


 medicine
Similar presentations:


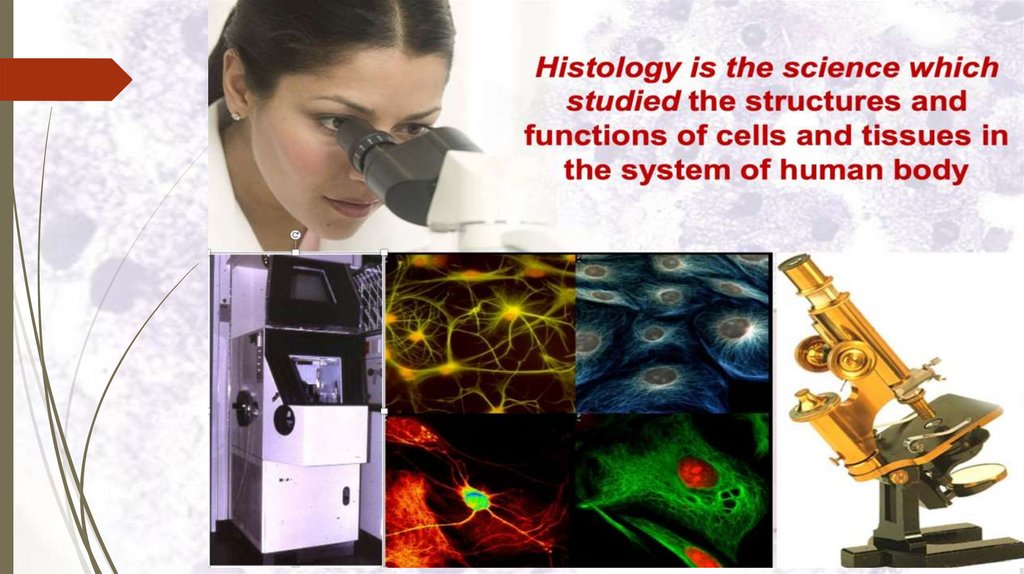
Intruduction to histology & methods
1.
INTRUDUCTION TOHISTOLOGY & METHODS
Lecturer: Associated Professor LUGIN IGOR ANATOLIEVICH
DEPARTMENT OF HISTOLOGY AND EMBRYOLOGY
2.
3.
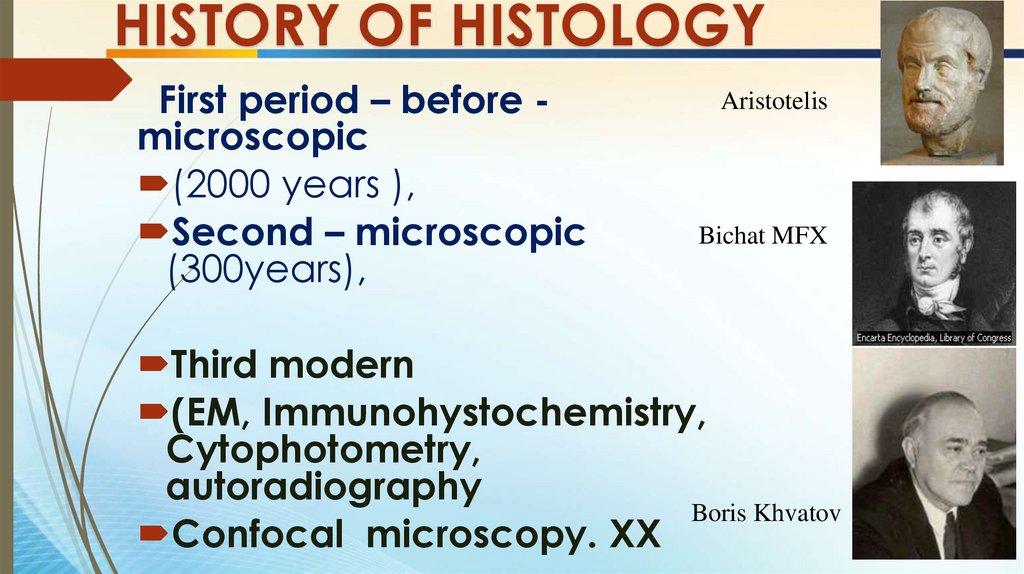
HISTORY OF HISTOLOGYFirst period – before microscopic
(2000 years ),
Second – microscopic
(300years),
Aristotelis
Bichat MFX
Third modern
(EM, Immunohystochemistry,
Cytophotometry,
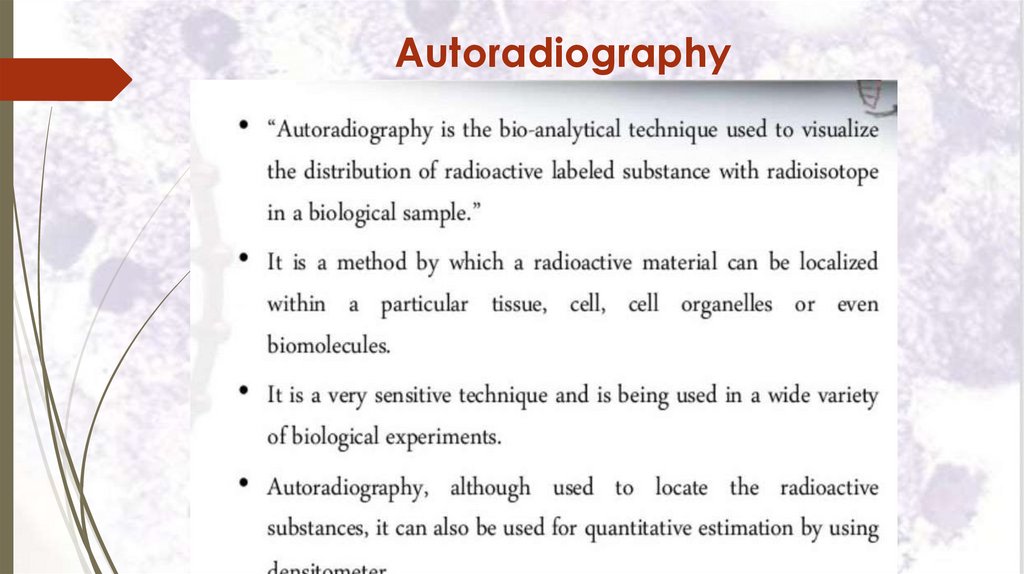
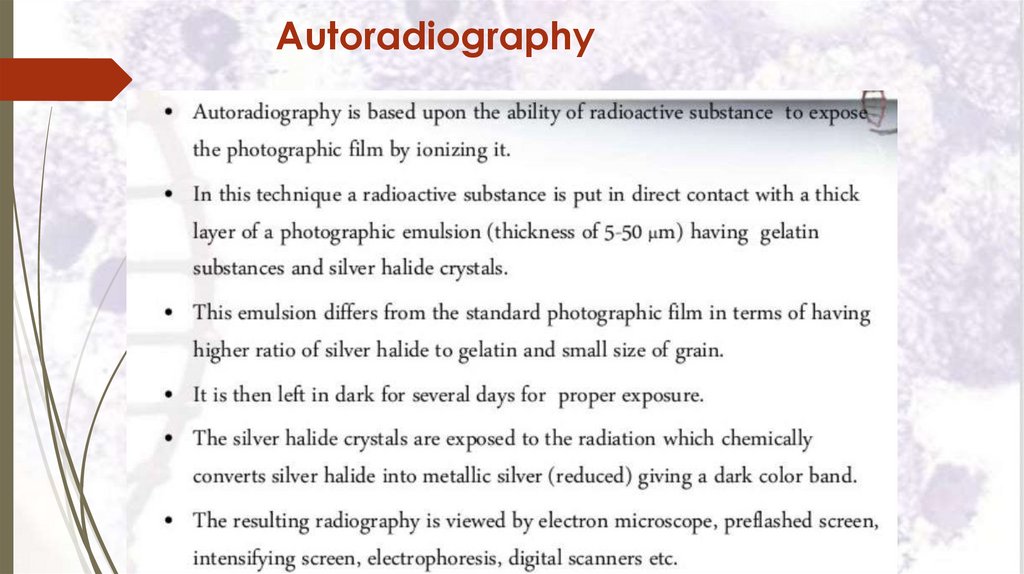
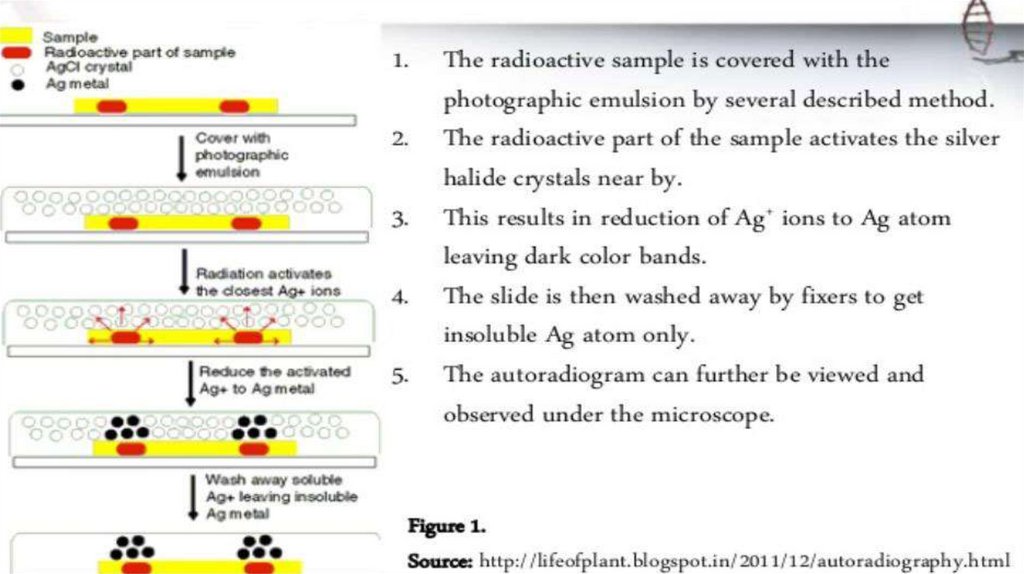
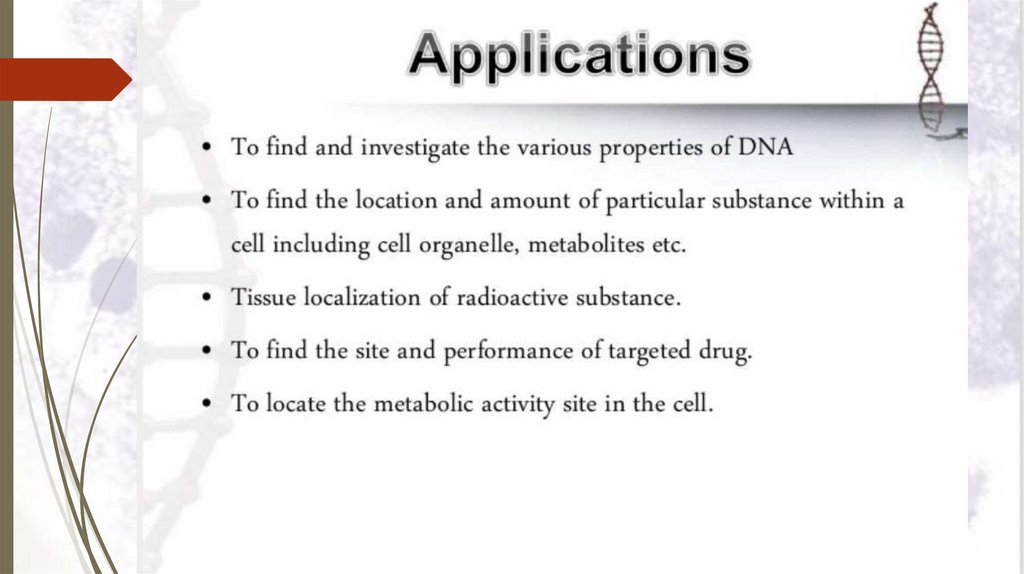
autoradiography
Boris Khvatov
Confocal microscopy. ХХ
4.
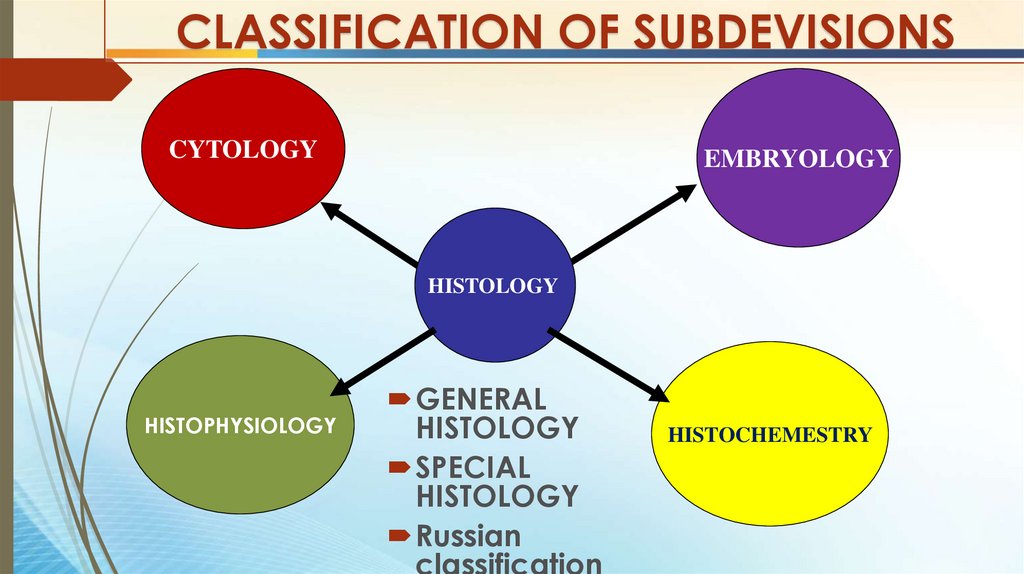
CLASSIFICATION OF SUBDEVISIONSCYTOLOGY
EMBRYOLOGY
HISTOLOGY
HISTOPHYSIOLOGY
GENERAL
HISTOLOGY
SPECIAL
HISTOLOGY
Russian
classification
HISTOCHEMESTRY
5.
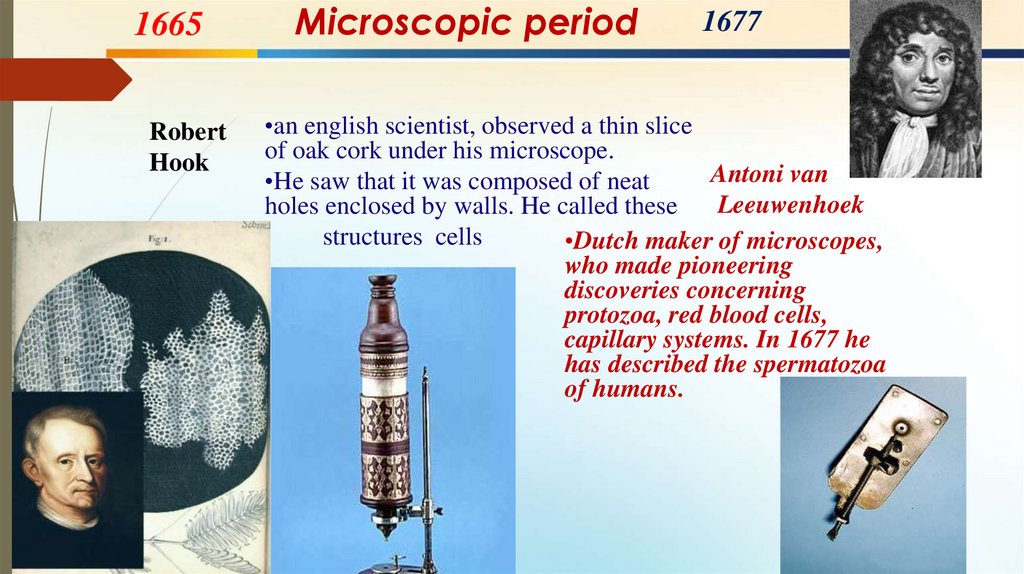
1665Robert
Hook
Microscopic period
1677
•an english scientist, observed a thin slice
of oak cork under his microscope.
Antoni van
•He saw that it was composed of neat
Leeuwenhoek
holes enclosed by walls. He called these
structures cells
•Dutch maker of microscopes,
who made pioneering
discoveries concerning
protozoa, red blood cells,
capillary systems. In 1677 he
has described the spermatozoa
of humans.
6.
Marcello Malpighi6
Italian
biologist and
physician,
Founder of
Microscopical
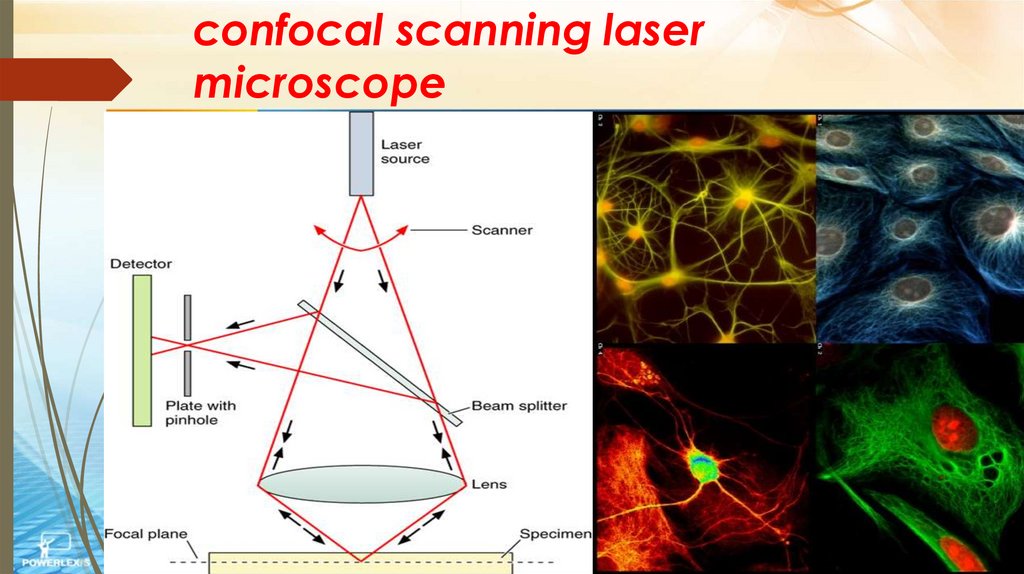
anatomy, embryology
demonstrating how the red
corpuscles circulated
through the capillaries of a
rabbit's ear Discribed:
Somites, nerve groove,
neural folds, optic vesicles
7.
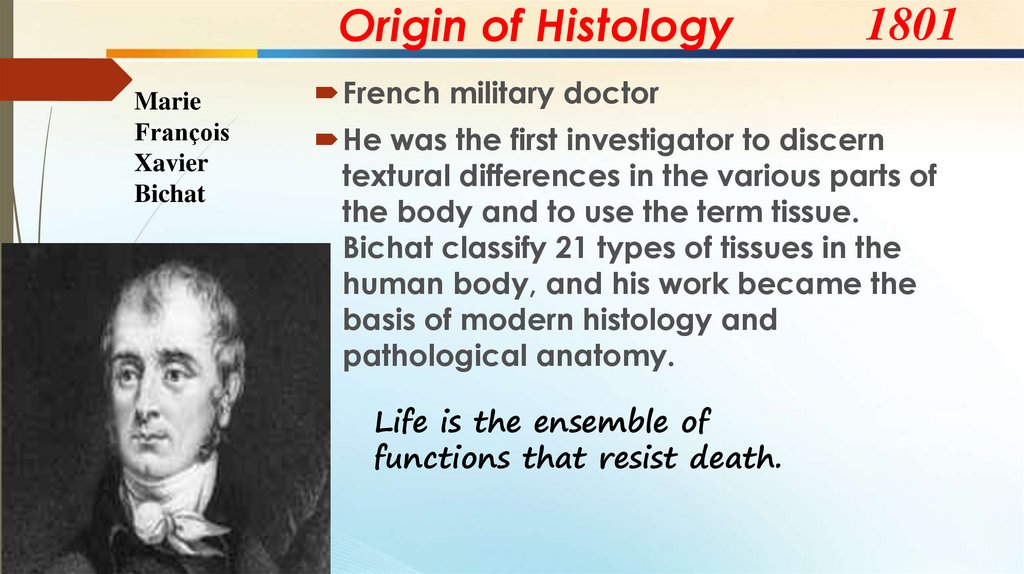
Origin of HistologyMarie
François
Xavier
Bichat
1801
French military doctor
He was the first investigator to discern
textural differences in the various parts of
the body and to use the term tissue.
Bichat classify 21 types of tissues in the
human body, and his work became the
basis of modern histology and
pathological anatomy.
Life is the ensemble of
functions that resist death.
8.
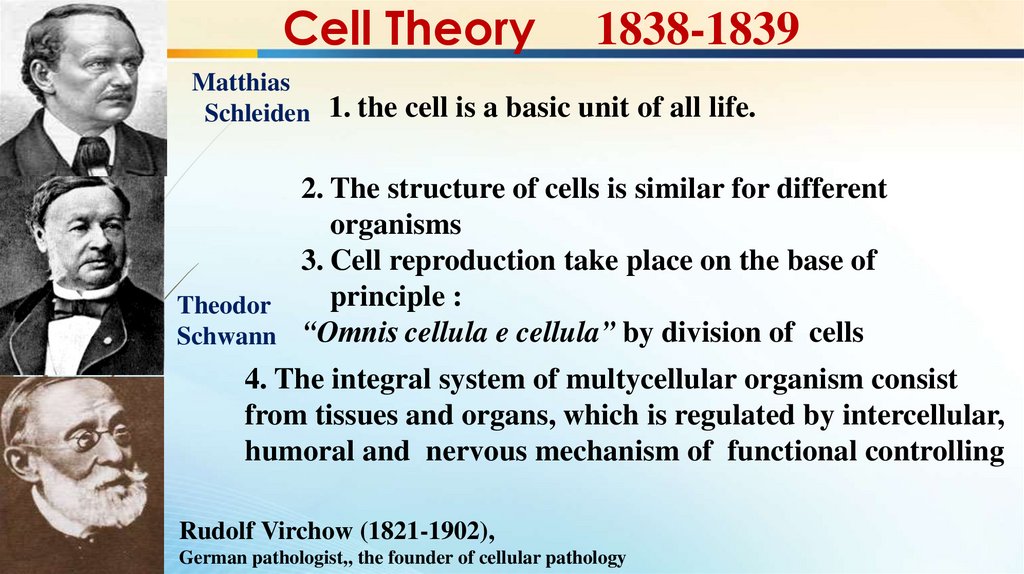
Cell Theory1838-1839
Matthias
Schleiden 1. the cell is a basic unit of all life.
2. The structure of cells is similar for different
organisms
3. Cell reproduction take place on the base of
principle :
Theodor
Schwann “Omnis cellula e cellula” by division of cells
4. The integral system of multycellular organism consist
from tissues and organs, which is regulated by intercellular,
humoral and nervous mechanism of functional controlling
Rudolf Virchow (1821-1902),
German pathologist,, the founder of cellular pathology
9.
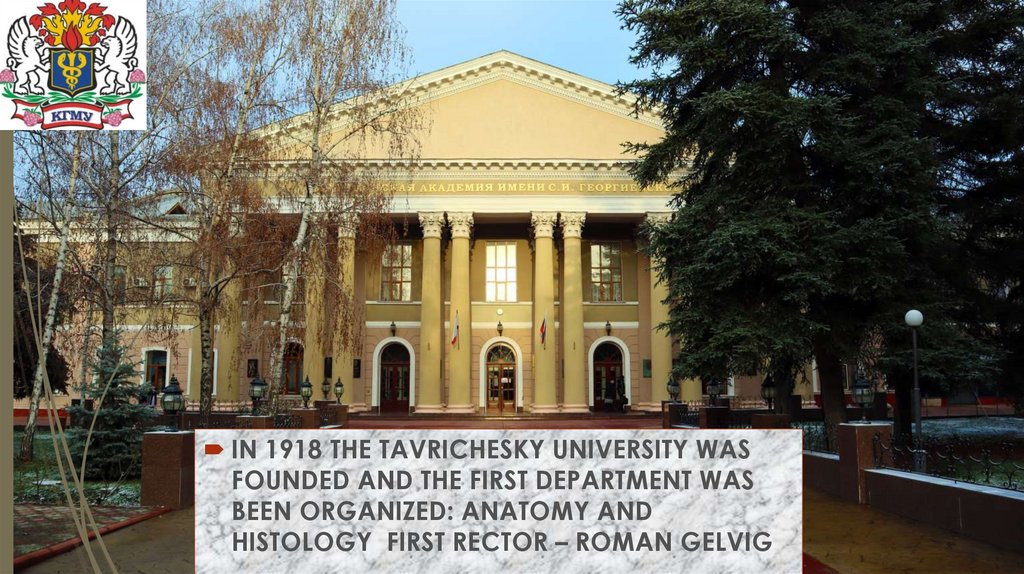
IN 1918 THE TAVRICHESKY UNIVERSITY WASFOUNDED AND THE FIRST DEPARTMENT WAS
BEEN ORGANIZED: ANATOMY AND
HISTOLOGY FIRST RECTOR – ROMAN GELVIG
10.
Аlexsander Gurvich (1874—1954)In 1923-1924 professor Gurvich
to discovered the mitotic
devision in sea star, fish and
amphibians, as results he was
postulated the
THEORY OF MITOGENIC REYS
which is basis for
THEORY OF BIOLOGICAL FIELD
(1944)
11.
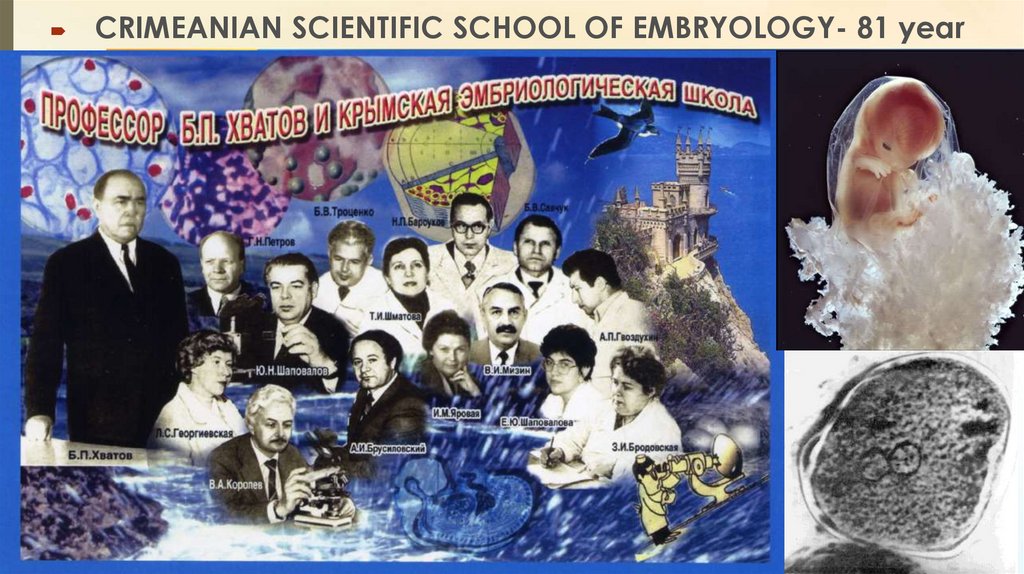
CRIMEANIAN SCIENTIFIC SCHOOL OF EMBRYOLOGY- 81 year12.
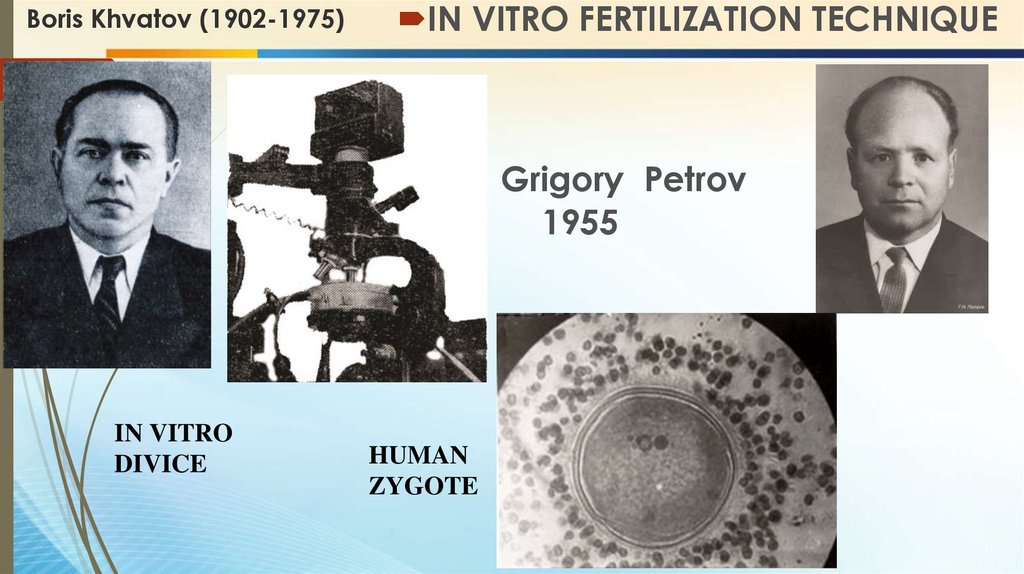
Boris Khvatov (1902-1975)IN VITRO FERTILIZATION TECHNIQUE
IN VITRO
DIVICE
HUMAN
ZYGOTE
Grigory Petrov
1955
13.
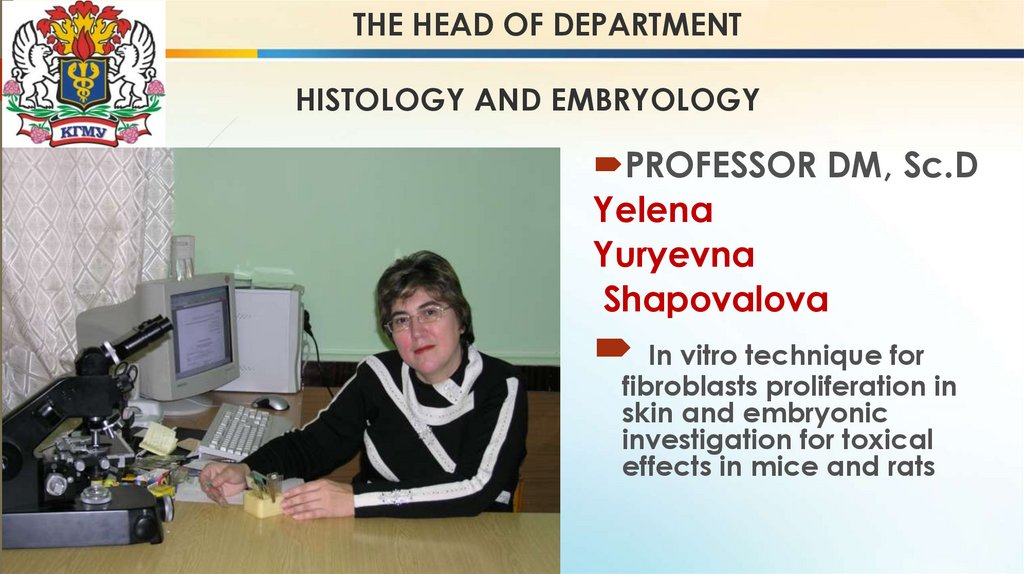
THE HEAD OF DEPARTMENTHISTOLOGY AND EMBRYOLOGY
PROFESSOR DM, Sc.D
Yelena
Yuryevna
Shapovalova
In vitro technique for
fibroblasts proliferation in
skin and embryonic
investigation for toxical
effects in mice and rats
14.
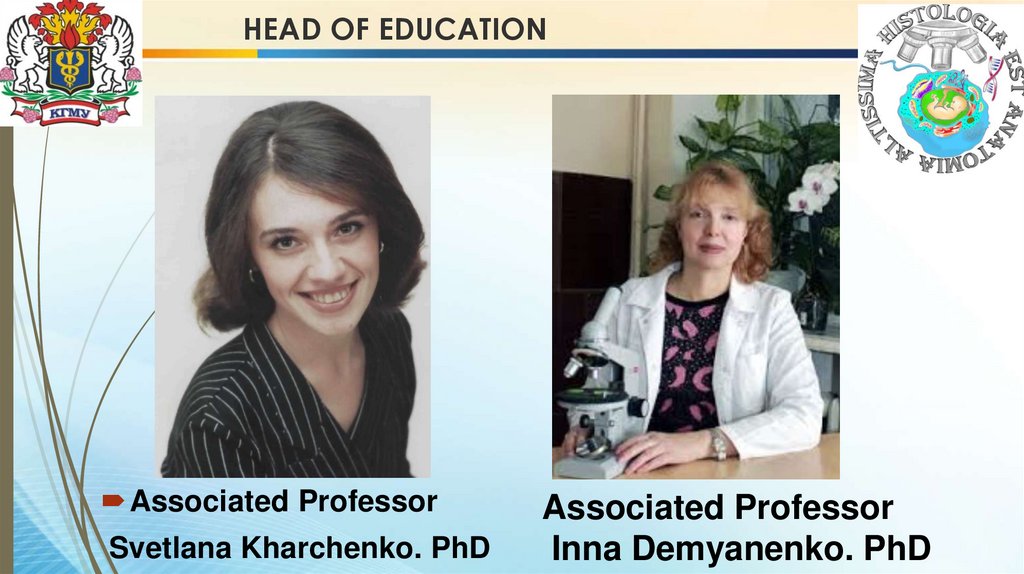
HEAD OF EDUCATIONAssociated Professor
Svetlana Kharchenko. PhD
Associated Professor
Inna Demyanenko. PhD
15.
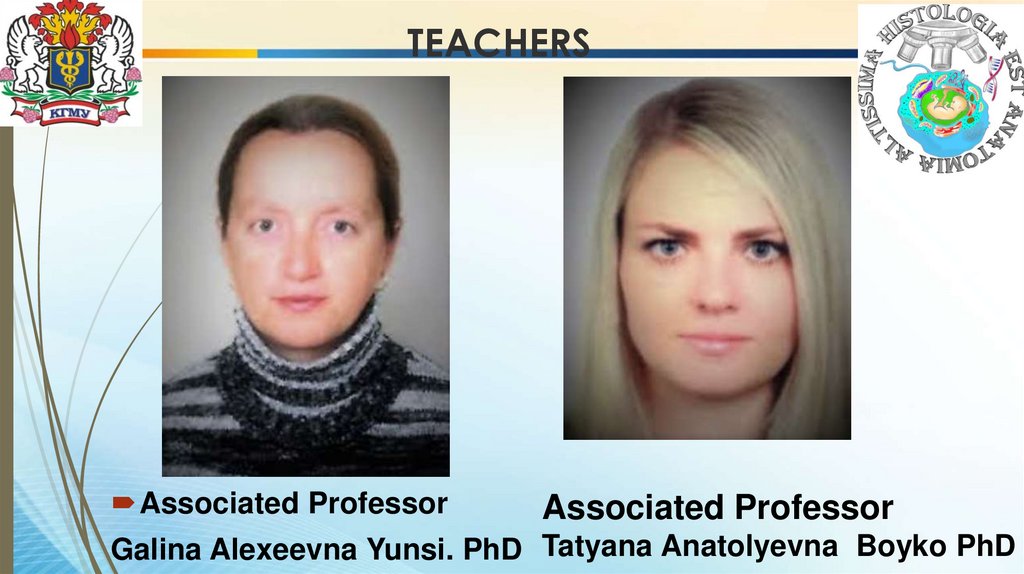
TEACHERSAssociated Professor
Associated Professor
Galina Alexeevna Yunsi. PhD Tatyana Anatolyevna Boyko PhD
16.
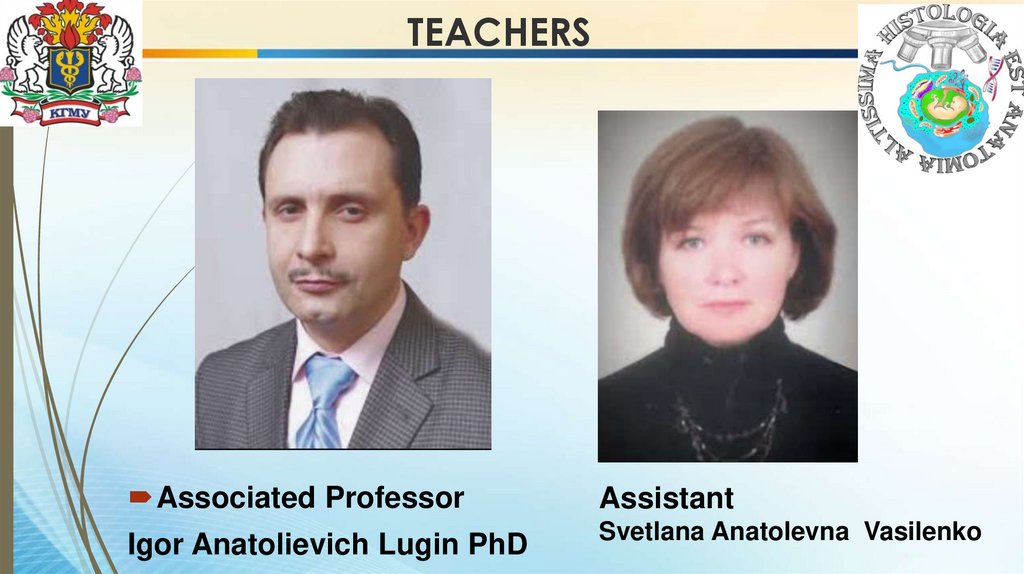
TEACHERSAssociated Professor
Assistant
Igor Anatolievich Lugin PhD
Svetlana Anatolevna Vasilenko
17.
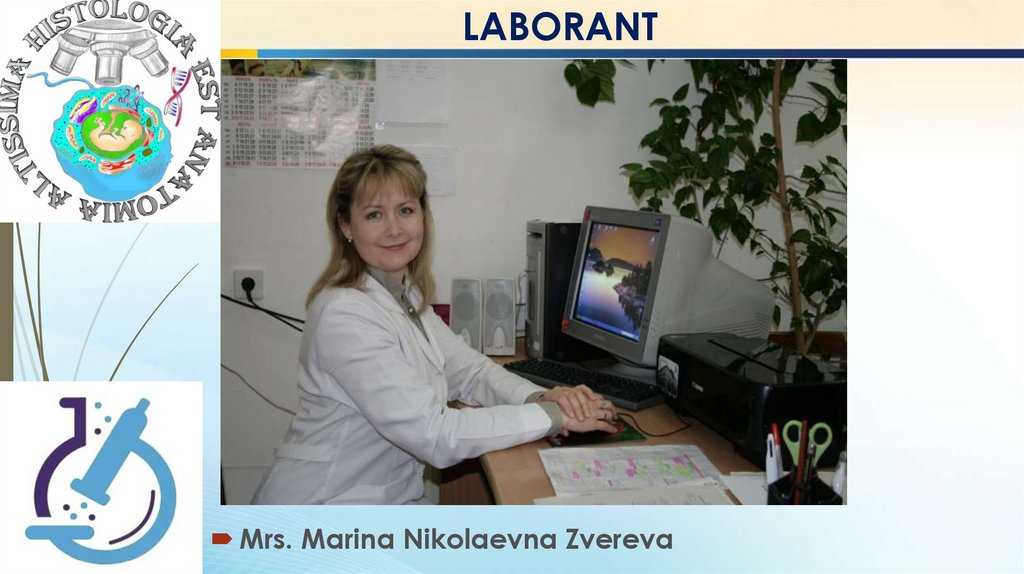
LABORANTMrs. Marina Nikolaevna Zvereva
18.
19.
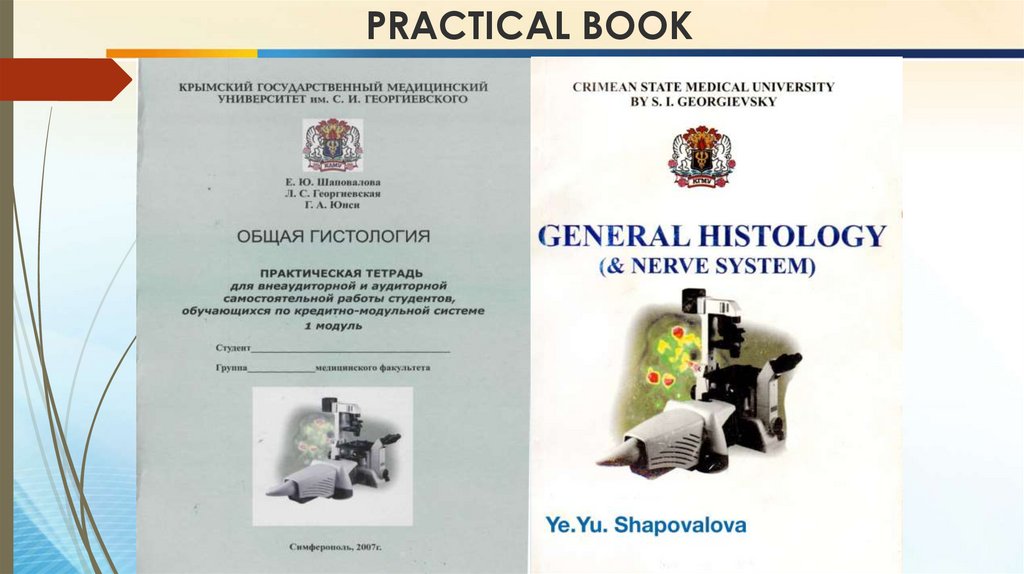
PRACTICAL BOOK20.
INTRUDUCTION TOHISTOLOGY &
METHODS
21.
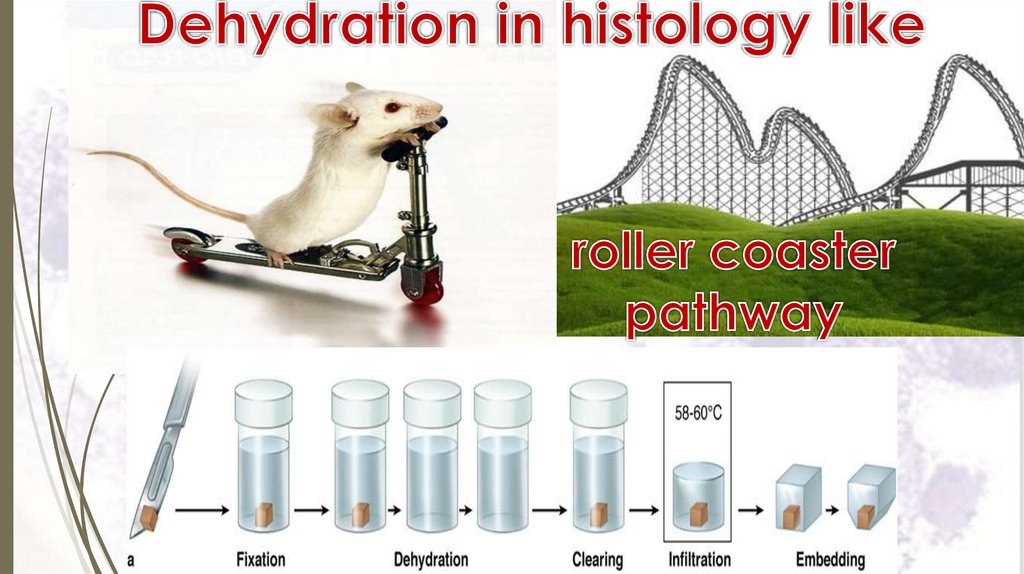
Micro-techniques21
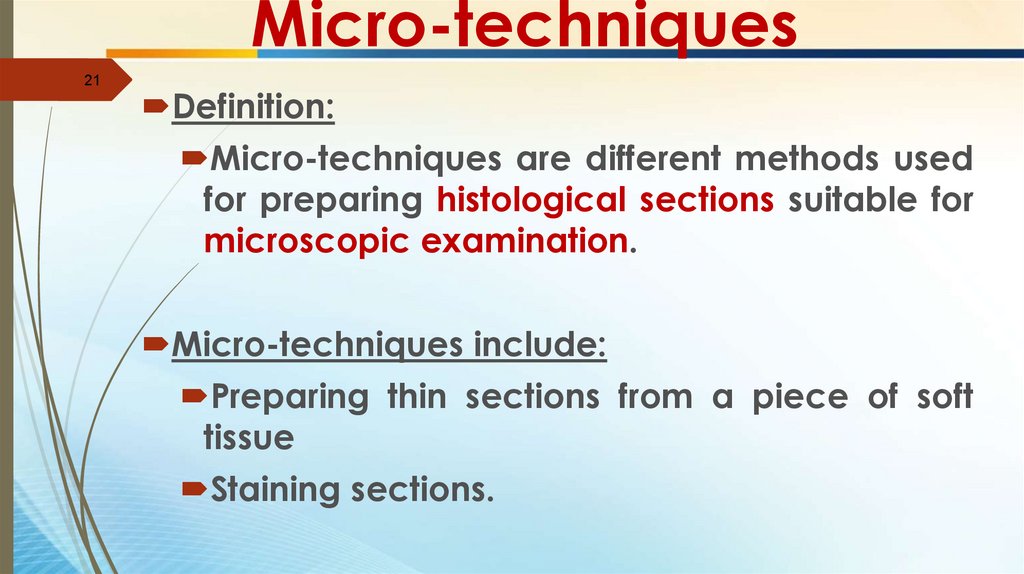
Definition:
Micro-techniques are different methods used
for preparing histological sections suitable for
microscopic examination.
Micro-techniques include:
Preparing thin sections from a piece of soft
tissue
Staining sections.
22.
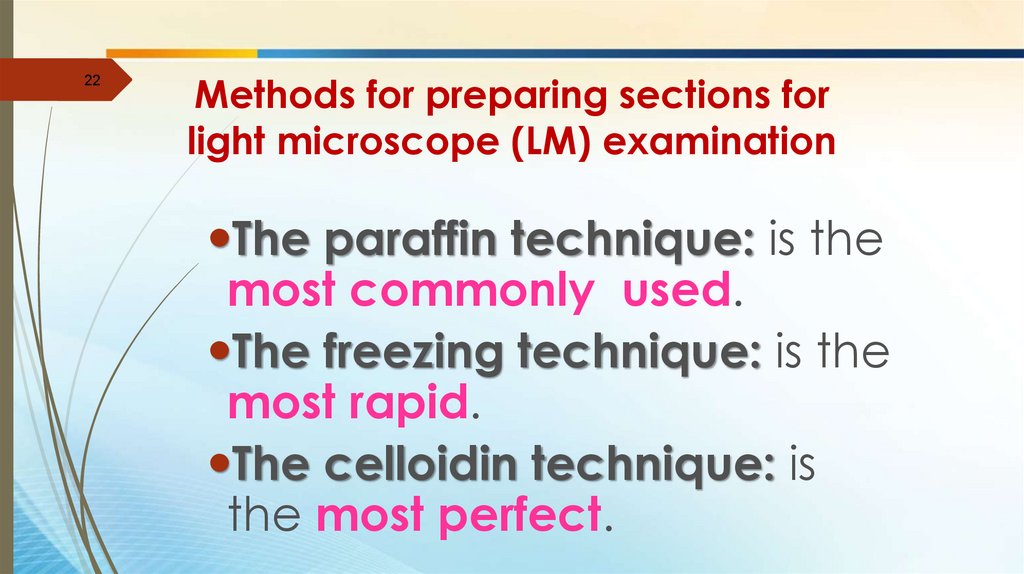
22Methods for preparing sections for
light microscope (LM) examination
The paraffin technique: is the
most commonly used.
The freezing technique: is the
most rapid.
The celloidin technique: is
the most perfect.
23.
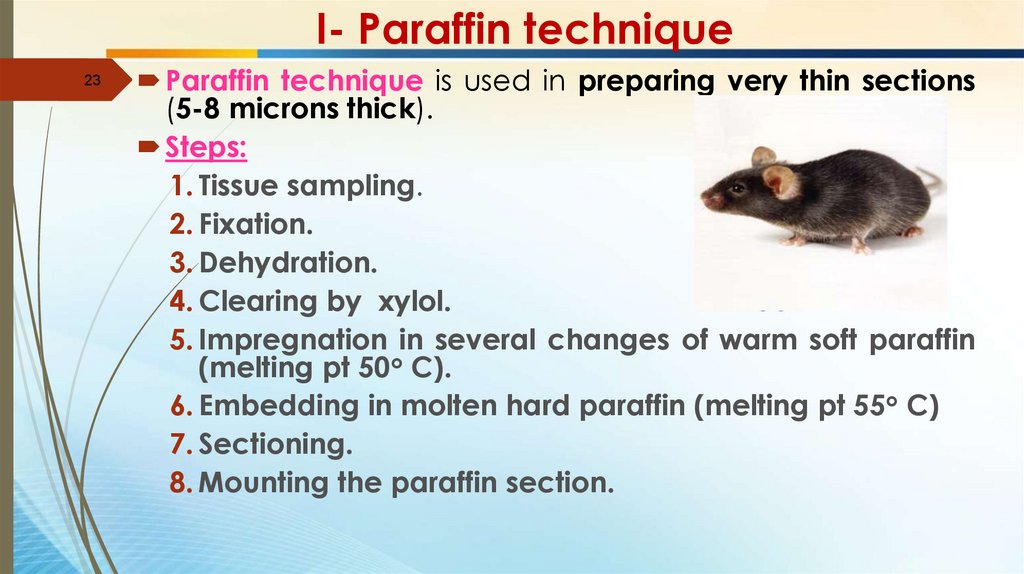
I- Paraffin technique23
Paraffin technique is used in preparing very thin sections
(5-8 microns thick).
Steps:
1. Tissue sampling.
2. Fixation.
3. Dehydration.
4. Clearing by xylol.
5. Impregnation in several changes of warm soft paraffin
(melting pt 50o C).
6. Embedding in molten hard paraffin (melting pt 55o C)
7. Sectioning.
8. Mounting the paraffin section.
24.
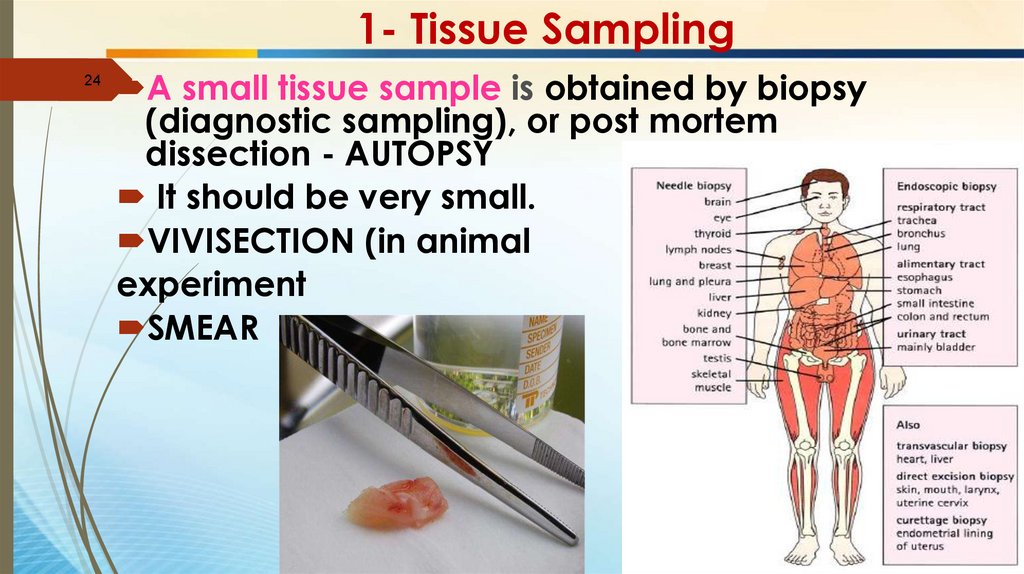
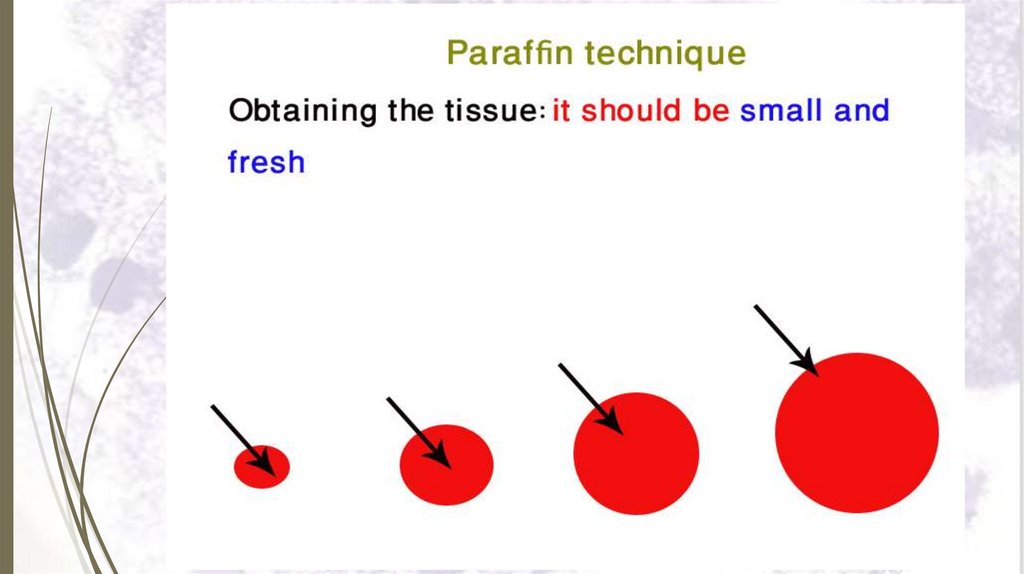
1- Tissue Sampling24
A small tissue sample is obtained by biopsy
(diagnostic sampling), or post mortem
dissection - AUTOPSY
It should be very small.
VIVISECTION (in animal
experiment
SMEAR
25.
26.
2- Fixation26
Fixation is done by putting the tissue
immediately in a “fixative” as 4% formaldehyde
in saline.
Aims of fixation:
Preventing postmortem degeneration
destruction of lysosomal enzymes.
by
Preventing putrefaction by killing bacteria.
Hardening the tissue by coagulating proteins,
so it becomes easier to cut into thin sections.
Enhancing staining of tissues.
27.
PerfussionImmersion
28.
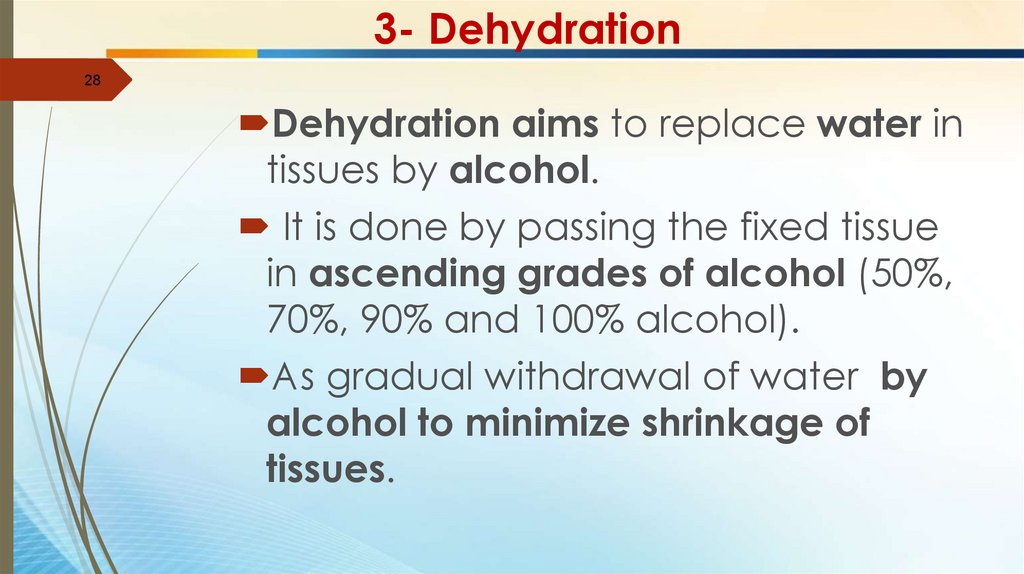
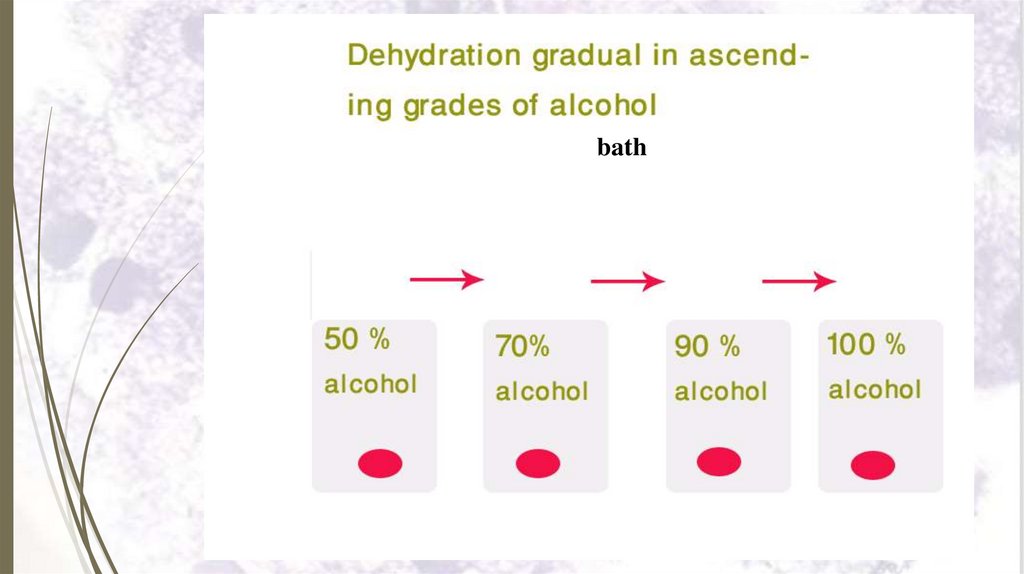
3- Dehydration28
Dehydration aims to replace water in
tissues by alcohol.
It is done by passing the fixed tissue
in ascending grades of alcohol (50%,
70%, 90% and 100% alcohol).
As gradual withdrawal of water by
alcohol to minimize shrinkage of
tissues.
29.
bath30.
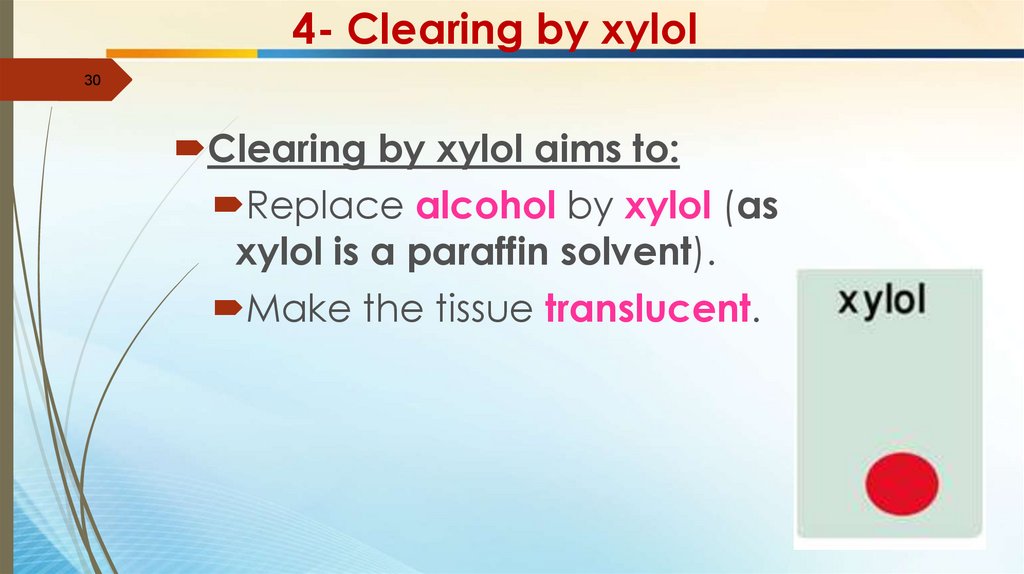
4- Clearing by xylol30
Clearing by xylol aims to:
Replace alcohol by xylol (as
xylol is a paraffin solvent).
Make the tissue translucent.
31.
315- Impregnation in several
changes of warm soft paraffin
Melting point of soft paraffin is 50o C.
Aims to replace xylol with paraffin
which penetrates the tissue
the rat is scared
32.
326- Embedding in molten hard
paraffin
Melting point of hard paraffin is 55o C.
Embedding is done by putting the tissue into a cast
containing hard paraffin.
Paraffin hardens as it cools forming a paraffin block
which can be cut into
thin sections.
33.
3334.
35.
36.
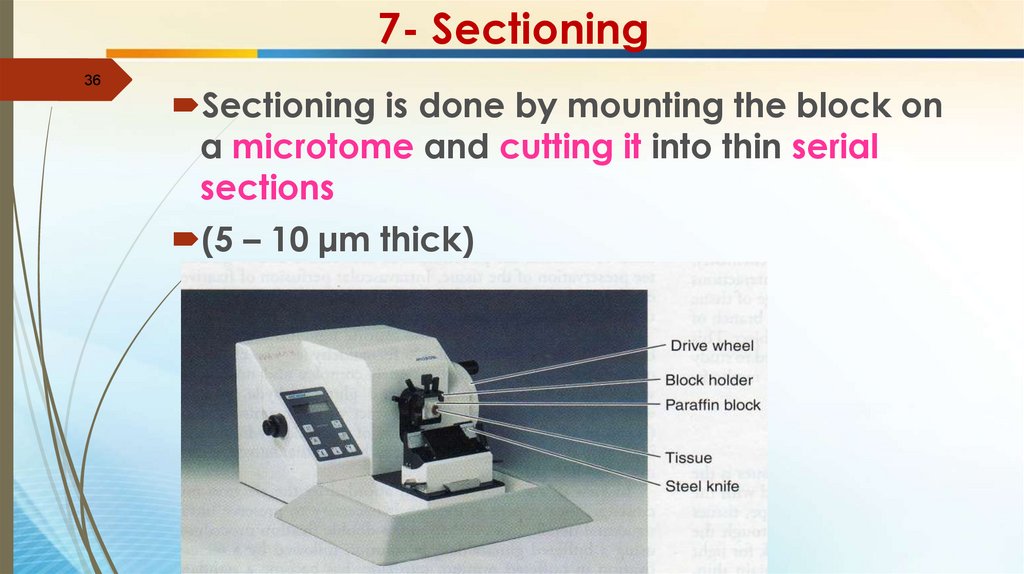
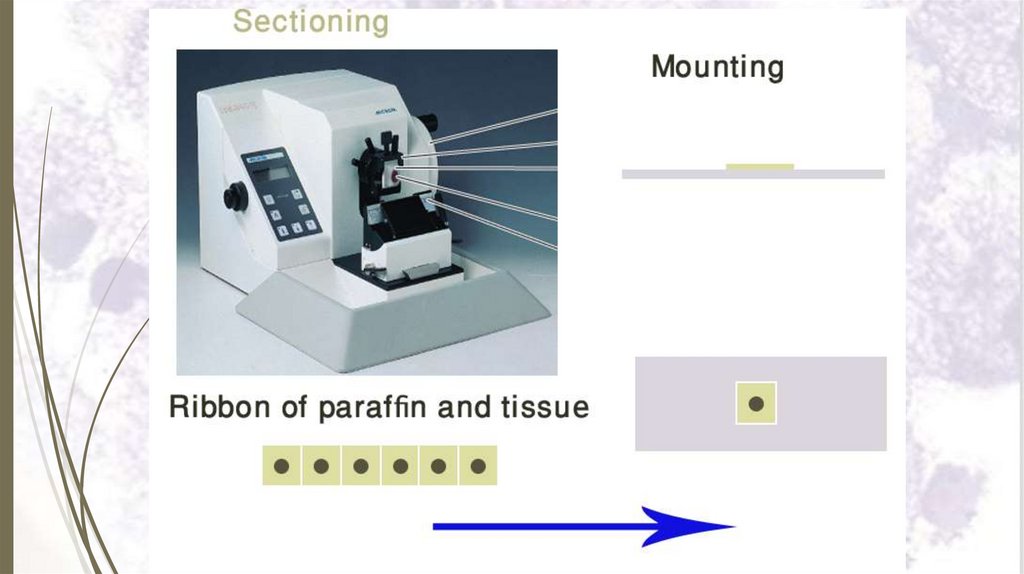
7- Sectioning36
Sectioning is done by mounting the block on
a microtome and cutting it into thin serial
sections
(5 – 10 μm thick)
37.
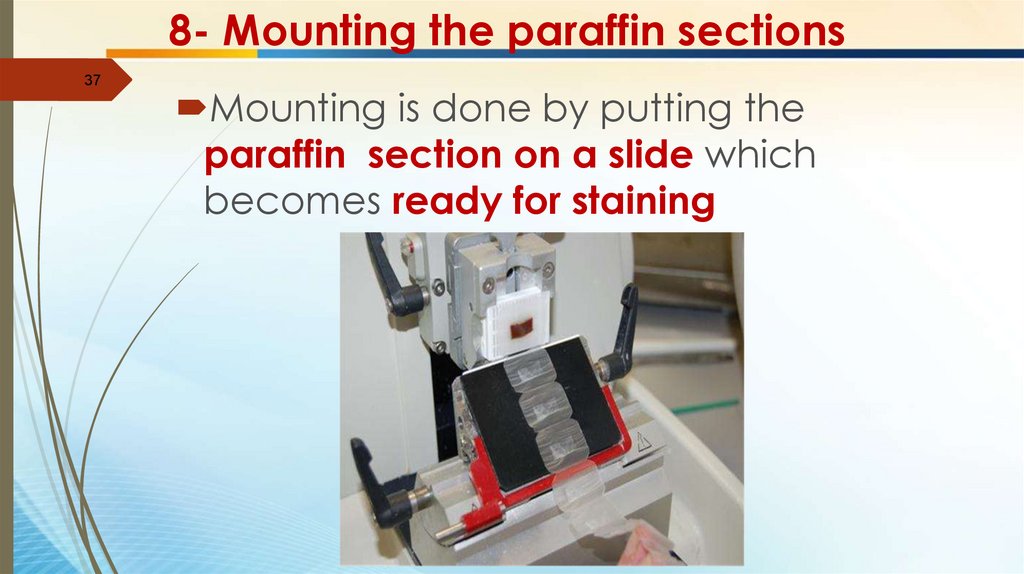
8- Mounting the paraffin sections37
Mounting is done by putting the
paraffin section on a slide which
becomes ready for staining
38.
39.
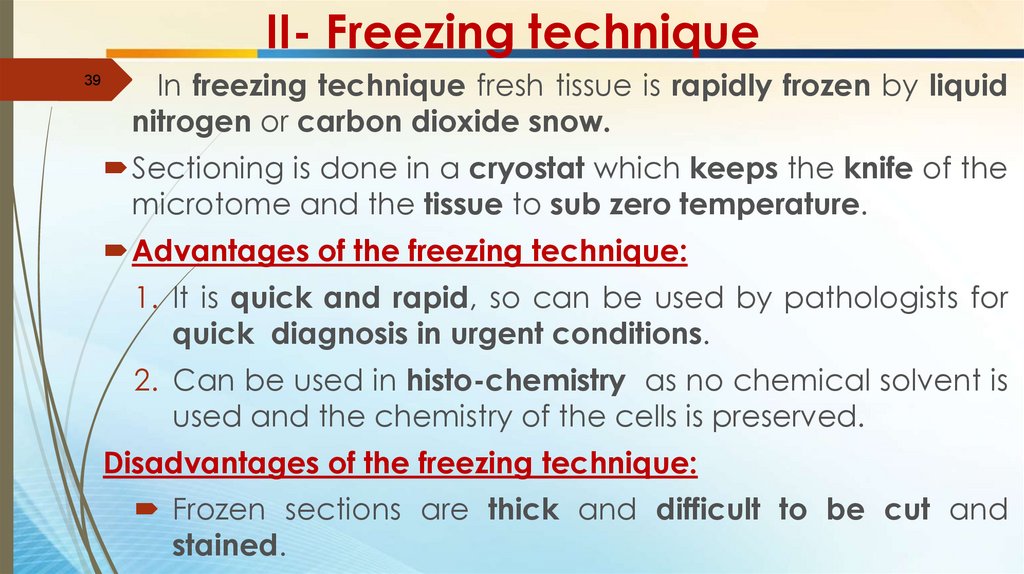
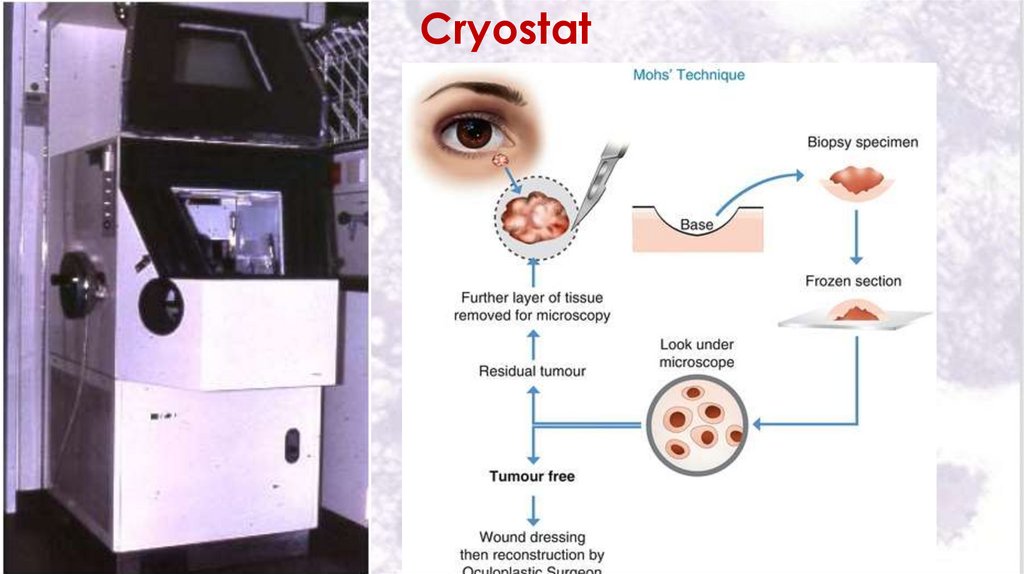
II- Freezing technique39
In freezing technique fresh tissue is rapidly frozen by liquid
nitrogen or carbon dioxide snow.
Sectioning is done in a cryostat which keeps the knife of the
microtome and the tissue to sub zero temperature.
Advantages of the freezing technique:
1. It is quick and rapid, so can be used by pathologists for
quick diagnosis in urgent conditions.
2. Can be used in histo-chemistry as no chemical solvent is
used and the chemistry of the cells is preserved.
Disadvantages of the freezing technique:
Frozen sections are thick and difficult to be cut and
stained.
40.
Cryostat40
41.
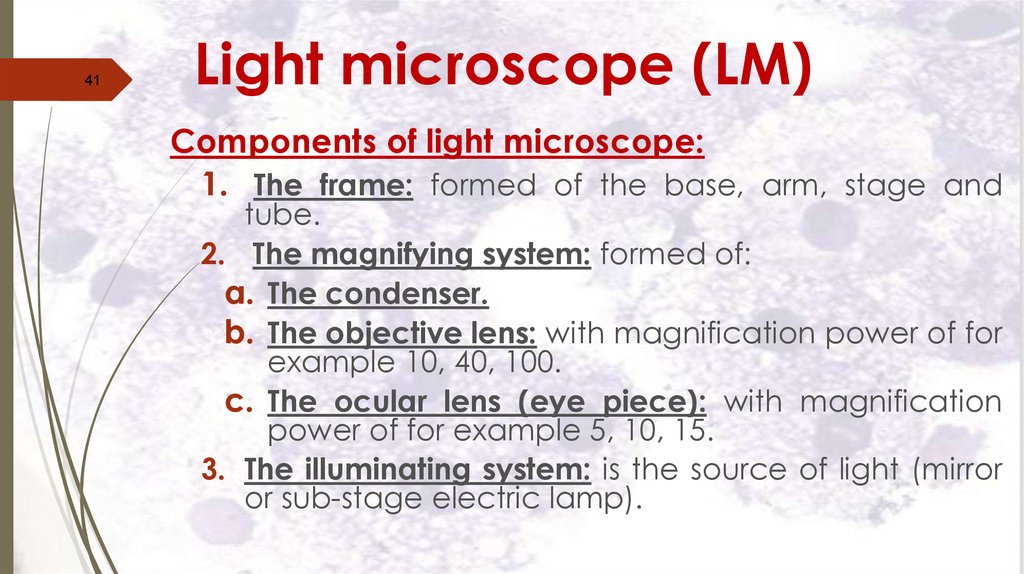
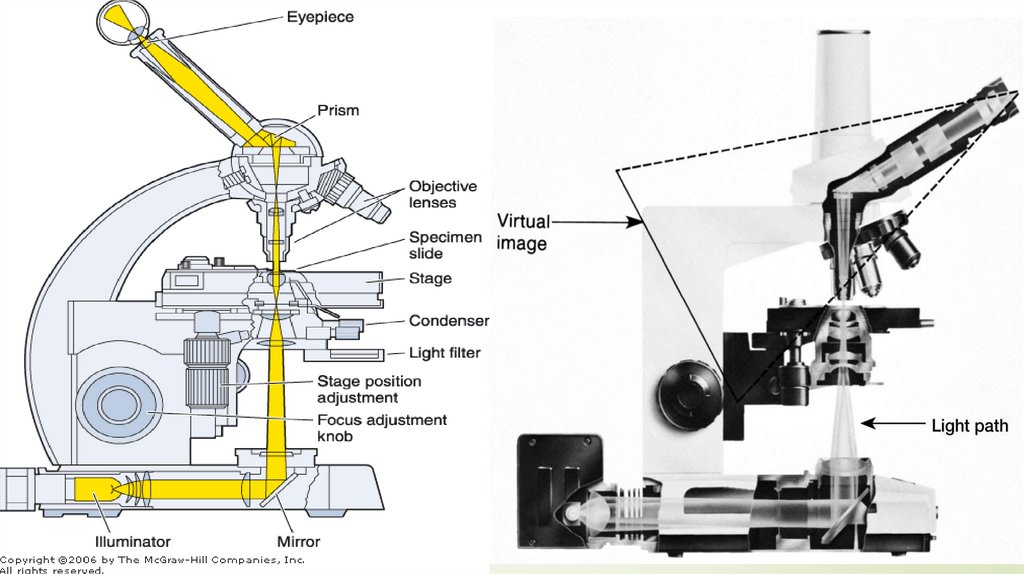
41Light microscope (LM)
Components of light microscope:
1. The frame: formed of the base, arm, stage and
tube.
2. The magnifying system: formed of:
a. The condenser.
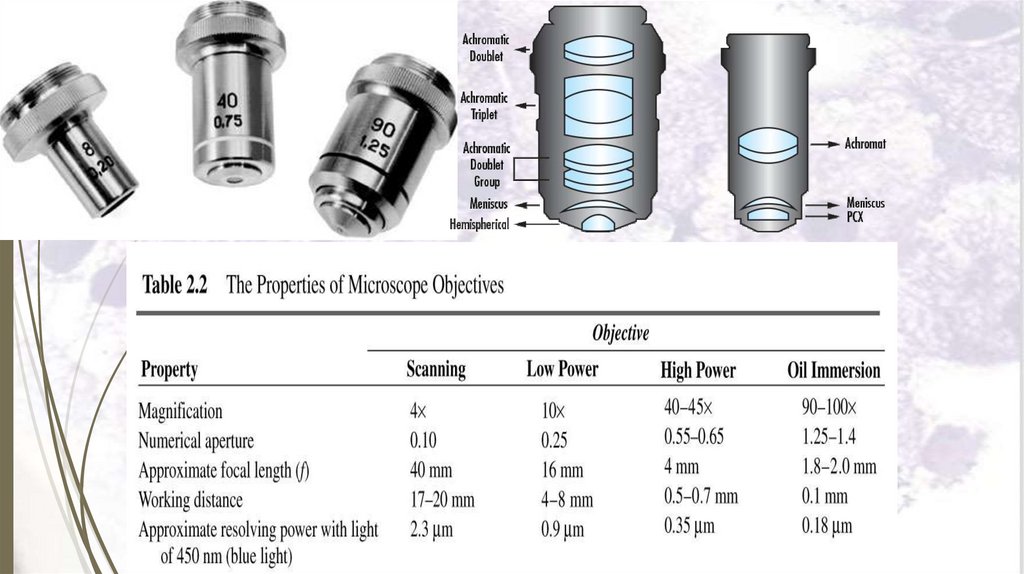
b. The objective lens: with magnification power of for
example 10, 40, 100.
c. The ocular lens (eye piece): with magnification
power of for example 5, 10, 15.
3. The illuminating system: is the source of light (mirror
or sub-stage electric lamp).
42.
Microscopes magnify images and allowvisualization of greater details
43.
44.
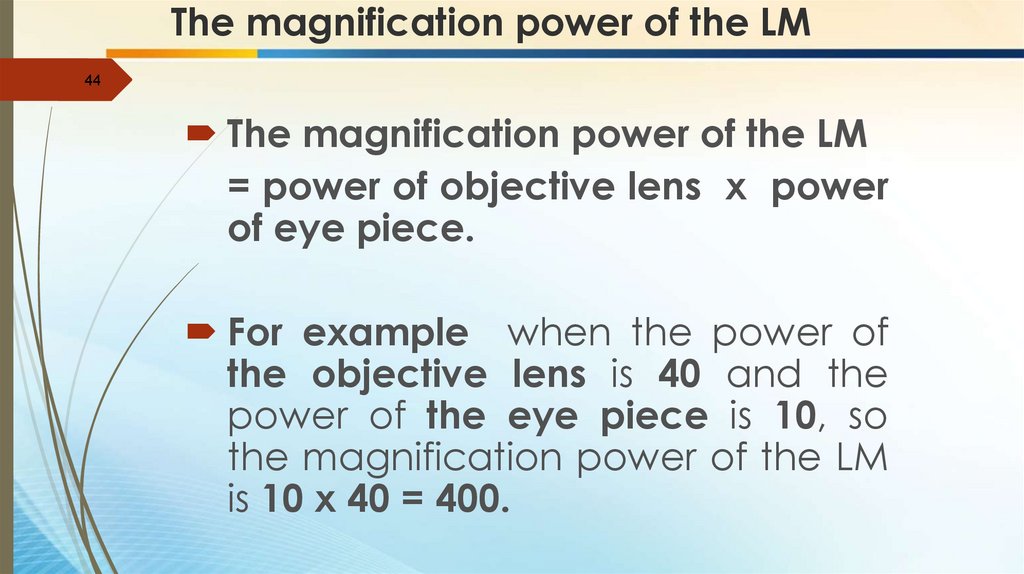
The magnification power of the LM44
The magnification power of the LM
= power of objective lens x power
of eye piece.
For example when the power of
the objective lens is 40 and the
power of the eye piece is 10, so
the magnification power of the LM
is 10 x 40 = 400.
45.
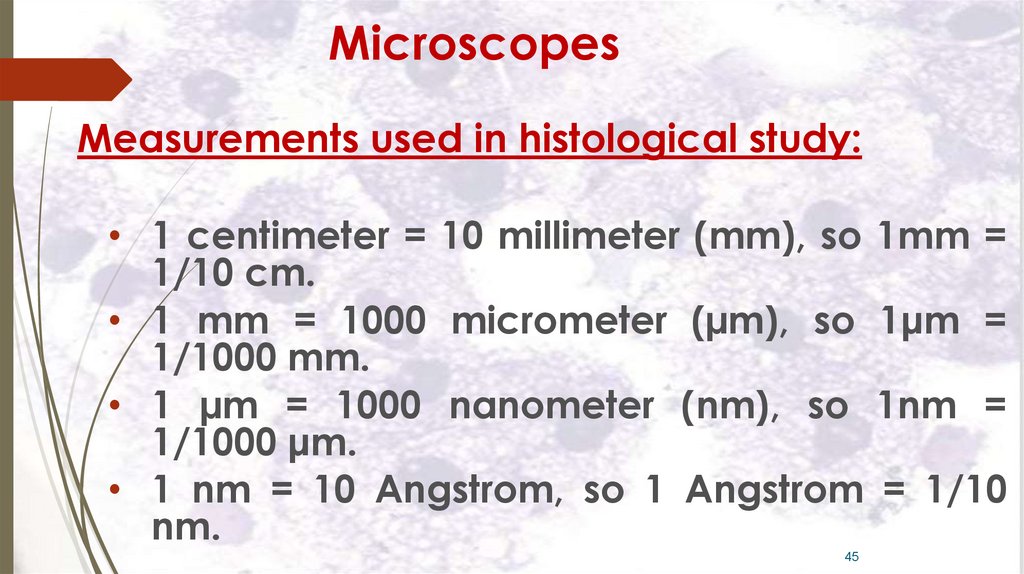
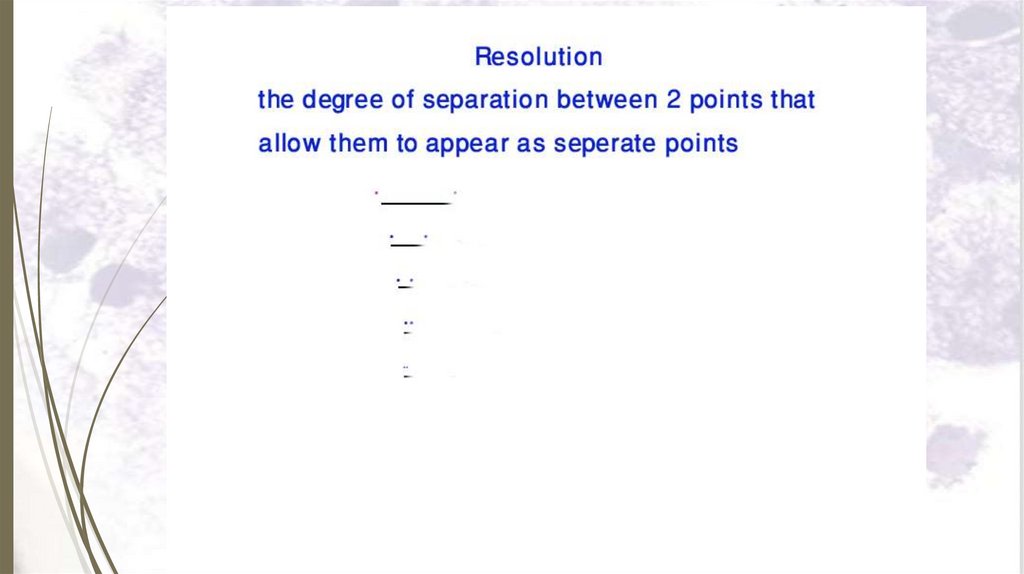
MicroscopesMeasurements used in histological study:
• 1 centimeter = 10 millimeter (mm), so
1/10 cm.
• 1 mm = 1000 micrometer (µm), so
1/1000 mm.
• 1 µm = 1000 nanometer (nm), so
1/1000 μm.
• 1 nm = 10 Angstrom, so 1 Angstrom
nm.
45
1mm =
1μm =
1nm =
= 1/10
46.
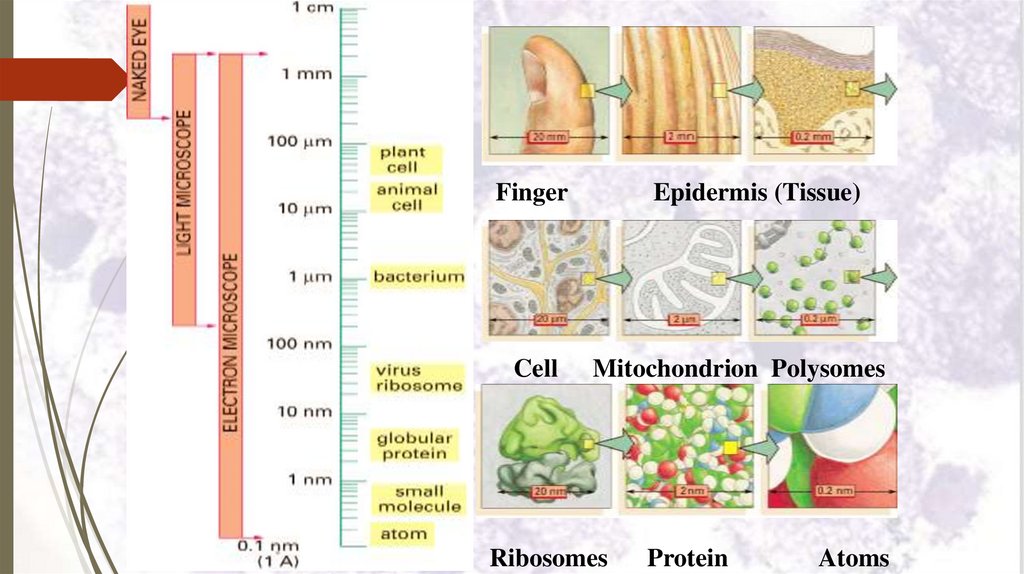
FingerCell
Epidermis (Tissue)
Mitochondrion Polysomes
Ribosomes
Protein
Atoms
47.
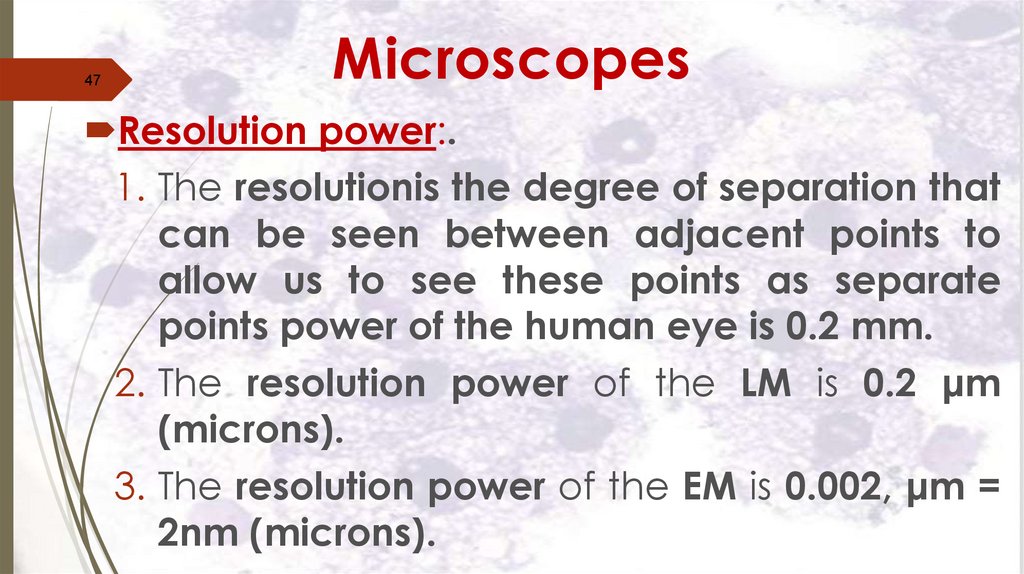
47Microscopes
Resolution power:.
1. The resolutionis the degree of separation that
can be seen between adjacent points to
allow us to see these points as separate
points power of the human eye is 0.2 mm.
2. The resolution power of the LM is 0.2 μm
(microns).
3. The resolution power of the EM is 0.002, μm =
2nm (microns).
48.
49.
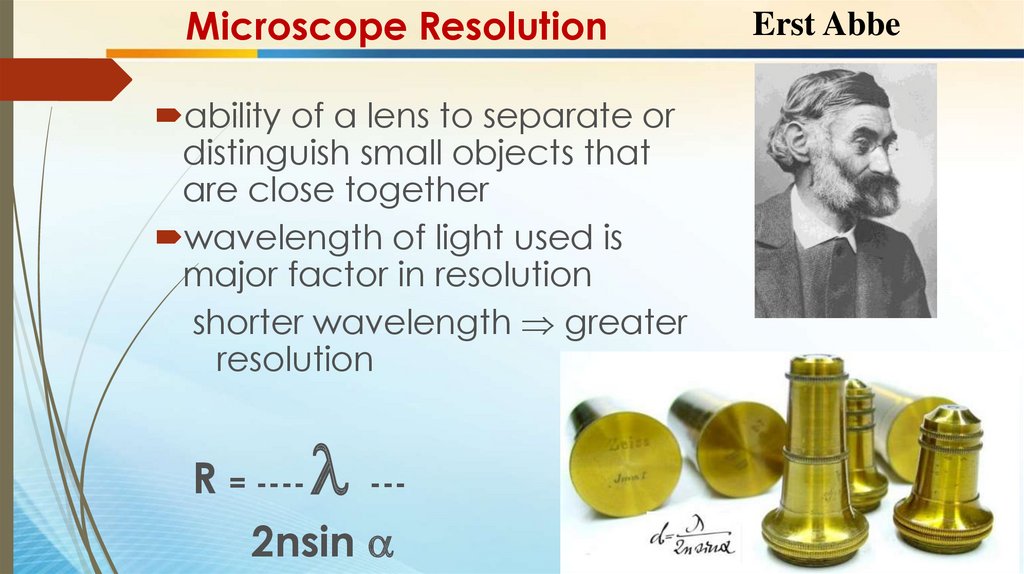
Microscope Resolutionability of a lens to separate or
distinguish small objects that
are close together
wavelength of light used is
major factor in resolution
shorter wavelength greater
resolution
R = ---- --2nsin
Erst Abbe
50.
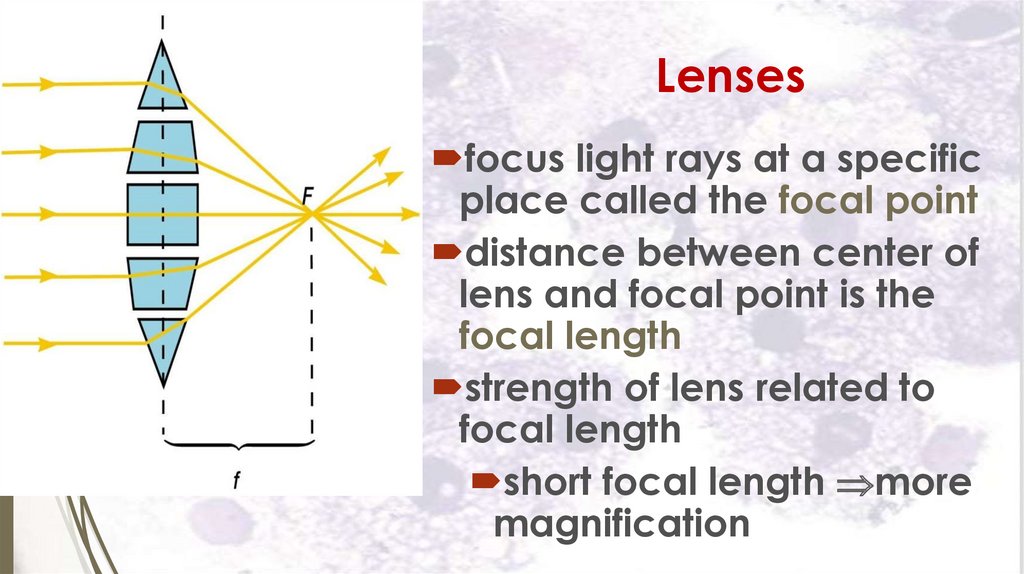
Lensesfocus light rays at a specific
place called the focal point
distance between center of
lens and focal point is the
focal length
strength of lens related to
focal length
short focal length more
magnification
51.
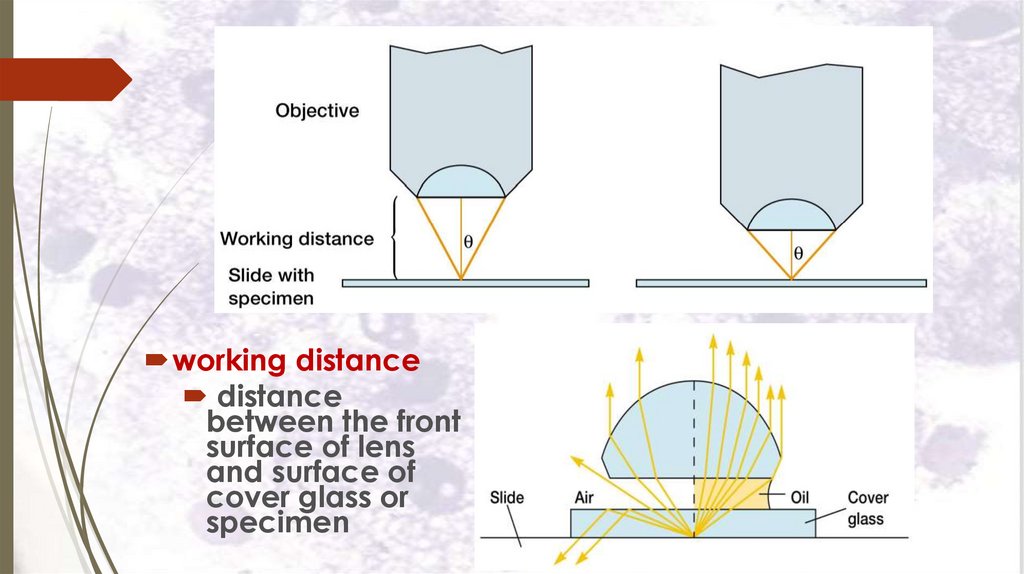
working distancedistance
between the front
surface of lens
and surface of
cover glass or
specimen
52.
53.
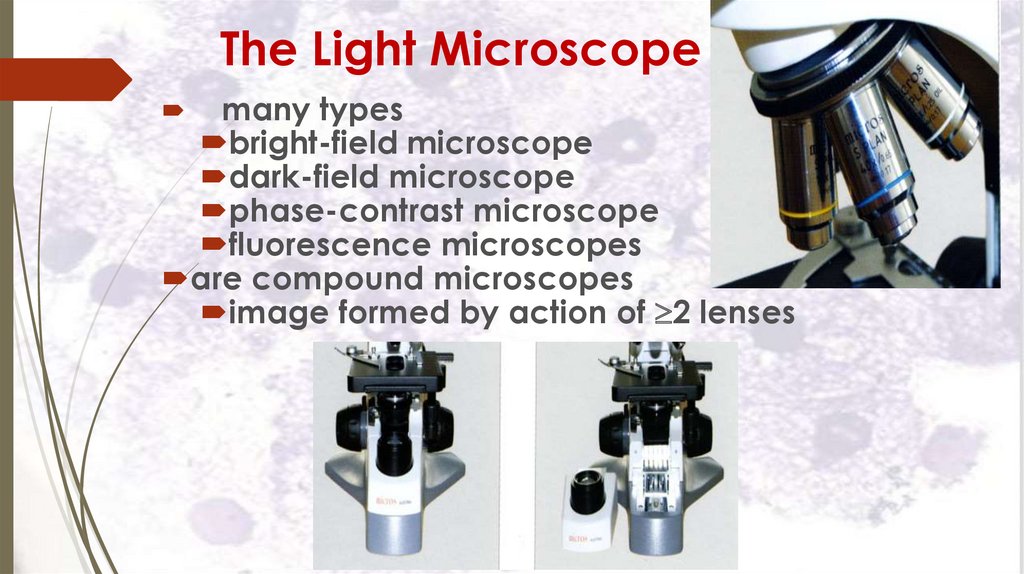
The Light Microscopemany types
bright-field microscope
dark-field microscope
phase-contrast microscope
fluorescence microscopes
are compound microscopes
image formed by action of 2 lenses
54.
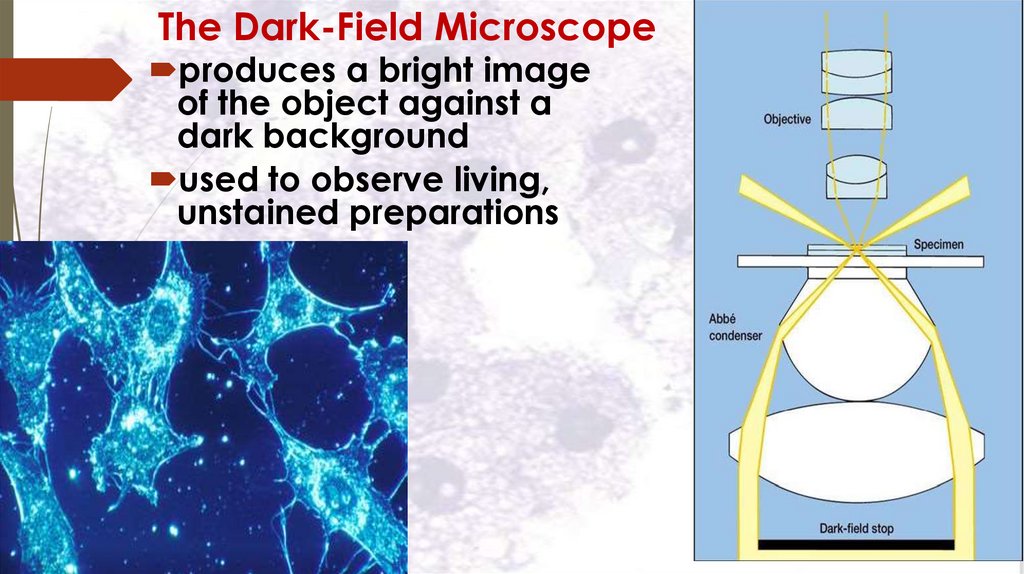
The Dark-Field Microscopeproduces a bright image
of the object against a
dark background
used to observe living,
unstained preparations
55.
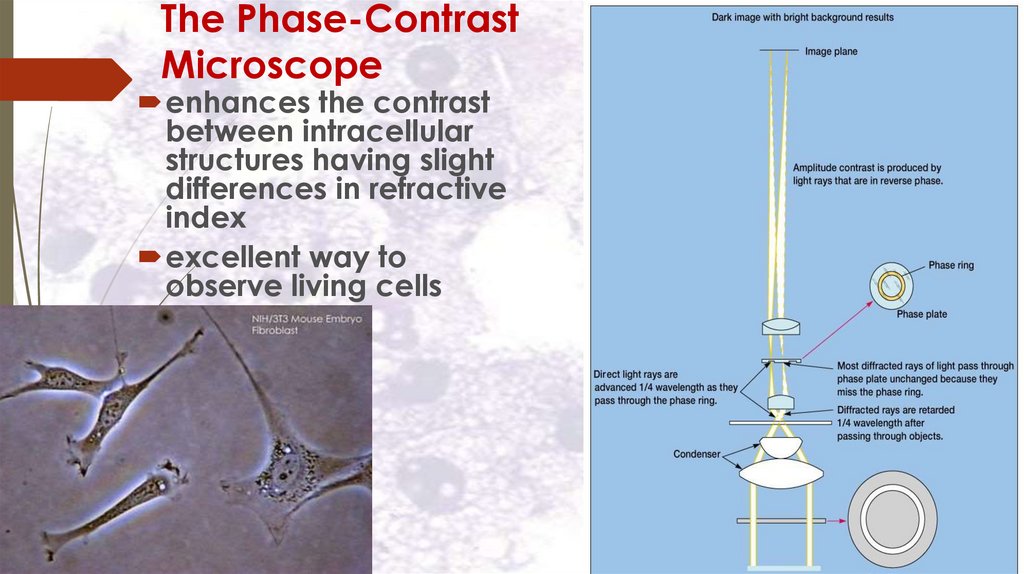
The Phase-ContrastMicroscope
enhances the contrast
between intracellular
structures having slight
differences in refractive
index
excellent way to
observe living cells
56.
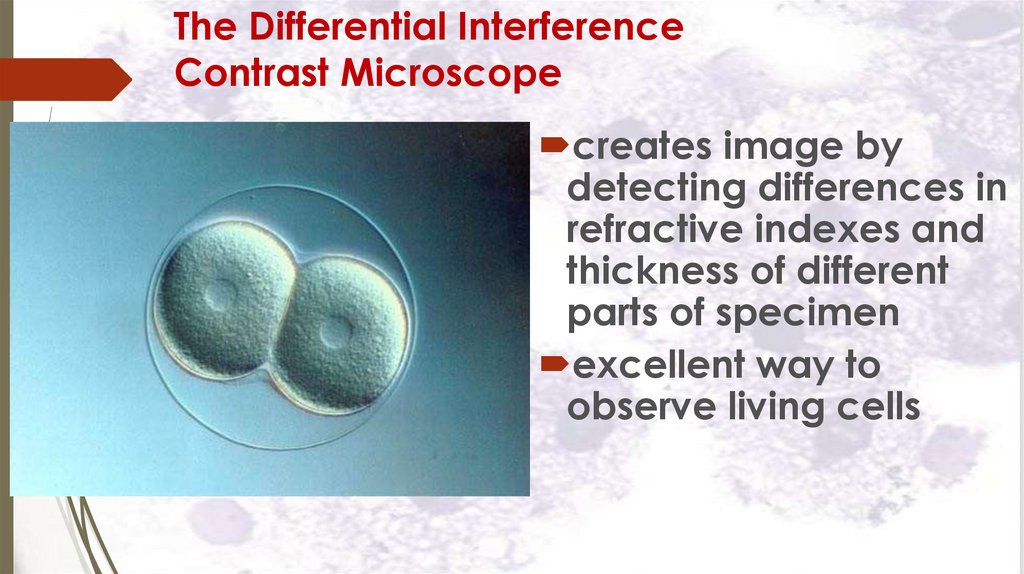
The Differential InterferenceContrast Microscope
creates image by
detecting differences in
refractive indexes and
thickness of different
parts of specimen
excellent way to
observe living cells
57.
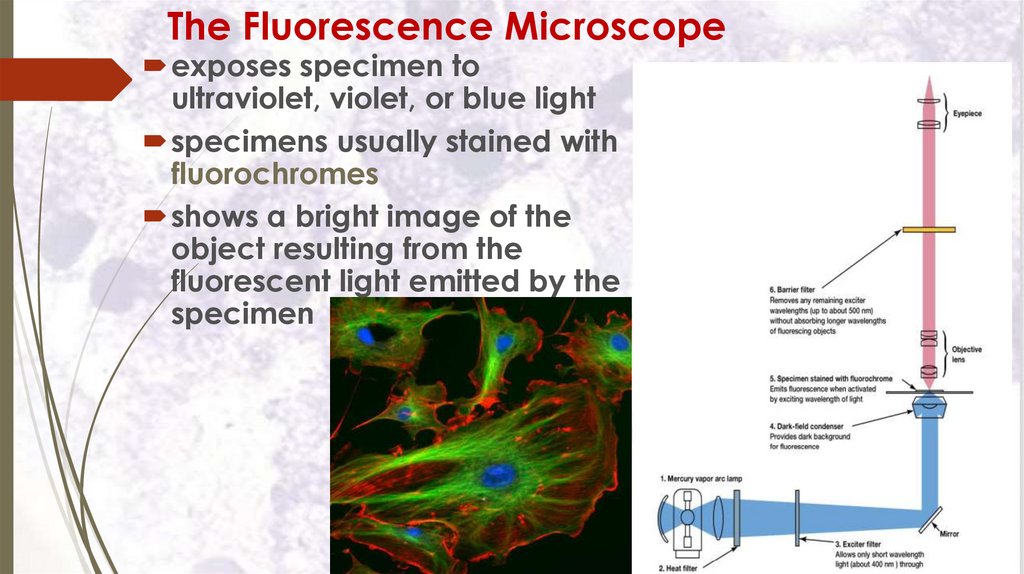
The Fluorescence Microscopeexposes specimen to
ultraviolet, violet, or blue light
specimens usually stained with
fluorochromes
shows a bright image of the
object resulting from the
fluorescent light emitted by the
specimen
58.
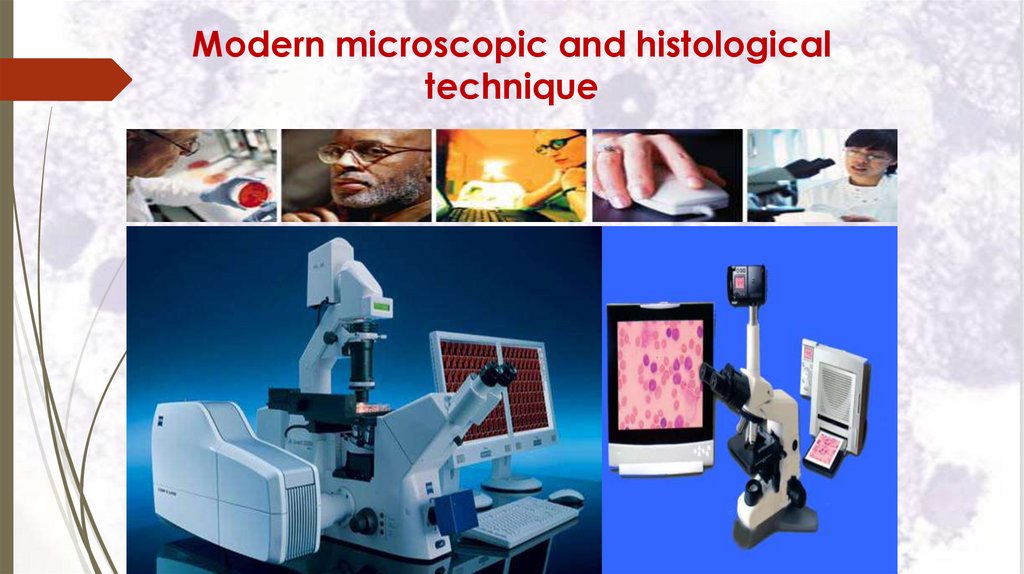
Modern microscopic and histologicaltechnique
59.
confocal scanning lasermicroscope
60.
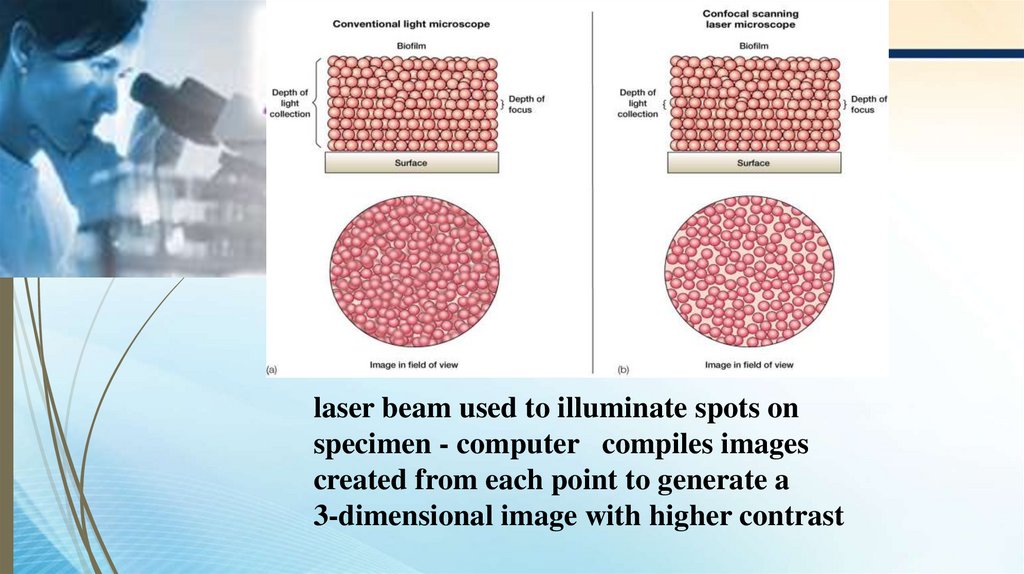
laser beam used to illuminate spots onspecimen - computer compiles images
created from each point to generate a
3-dimensional image with higher contrast
61.
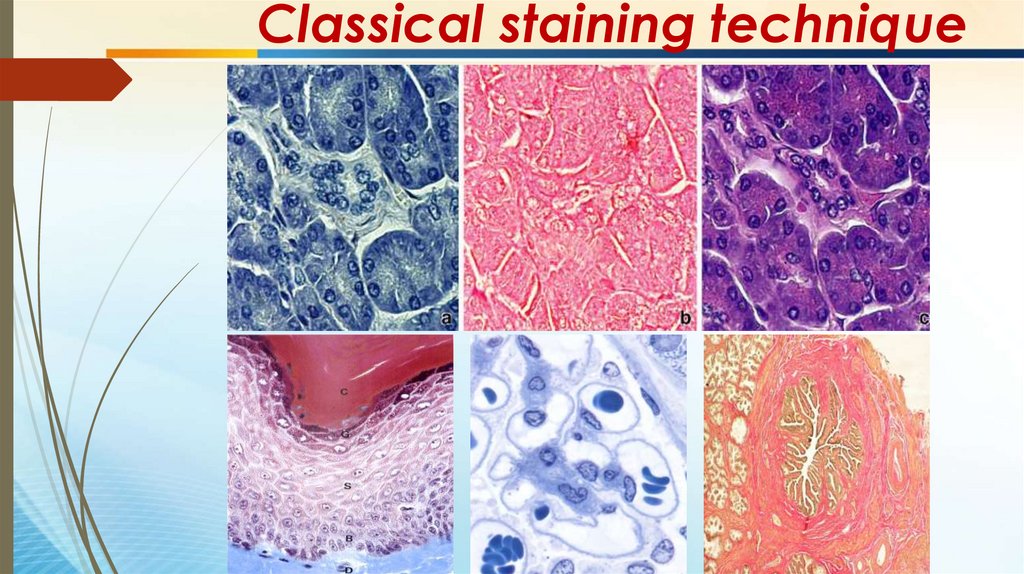
Classical staining technique62.
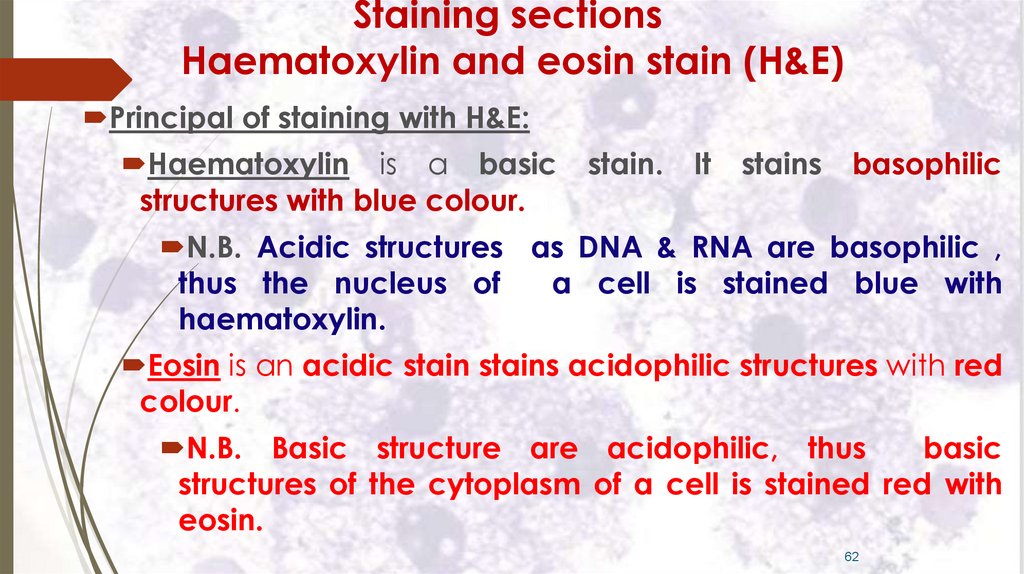
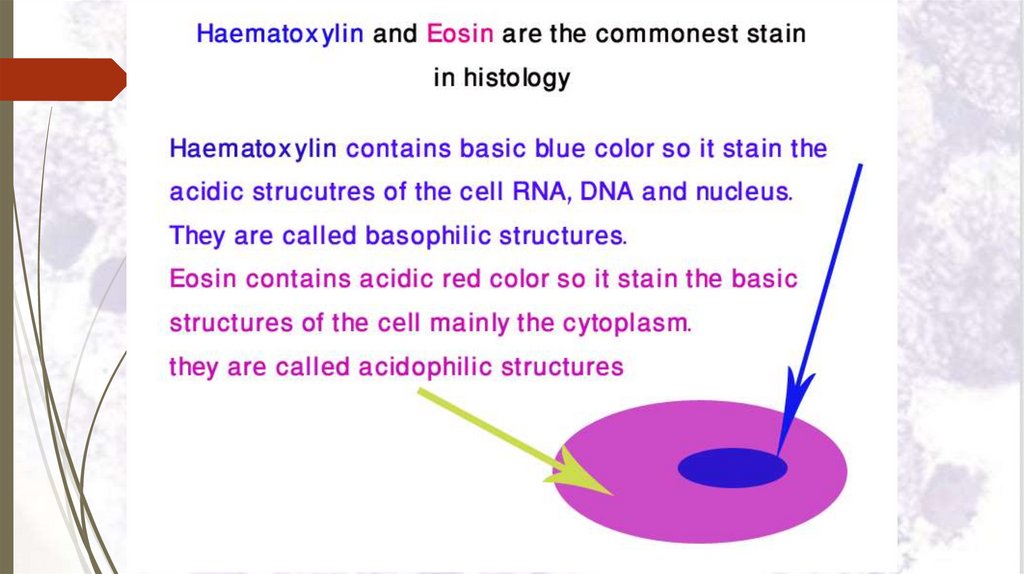
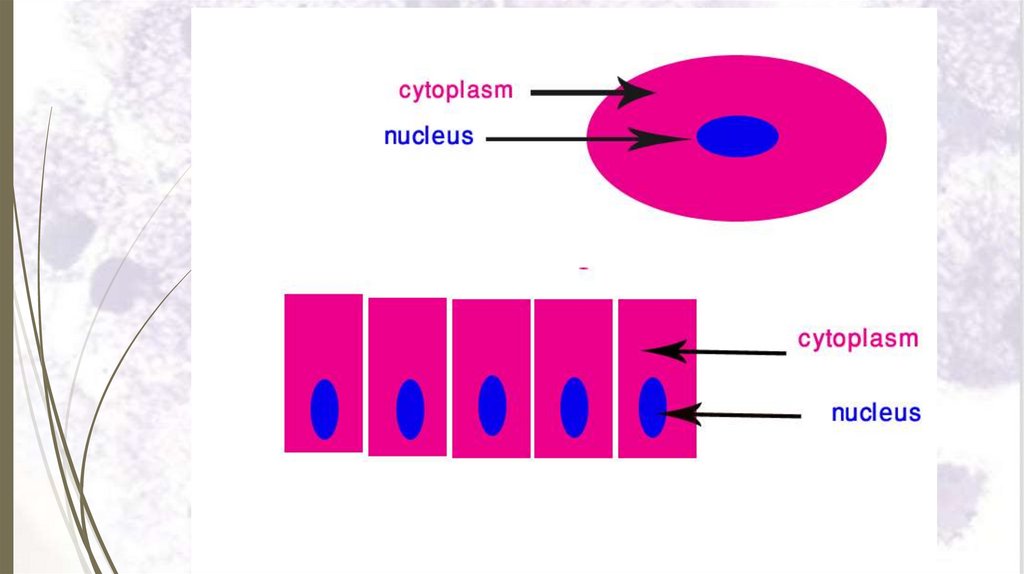
Staining sectionsHaematoxylin and eosin stain (H&E)
Principal of staining with H&E:
Haematoxylin is a basic
structures with blue colour.
stain.
It
stains
basophilic
N.B. Acidic structures as DNA & RNA are basophilic ,
thus the nucleus of
a cell is stained blue with
haematoxylin.
Eosin is an acidic stain stains acidophilic structures with red
colour.
N.B. Basic structure are acidophilic, thus
basic
structures of the cytoplasm of a cell is stained red with
eosin.
62
63.
64.
65.
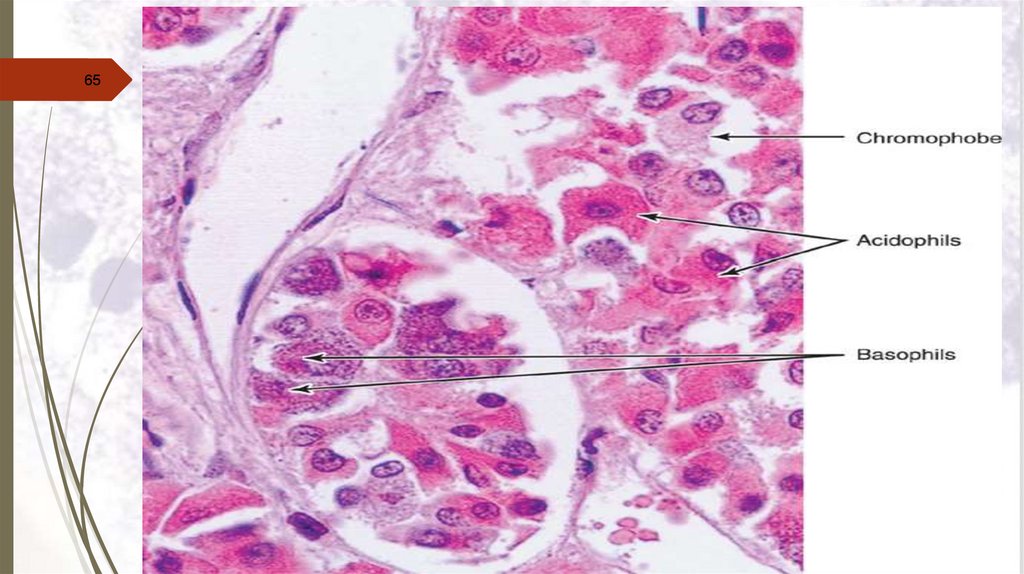
6566.
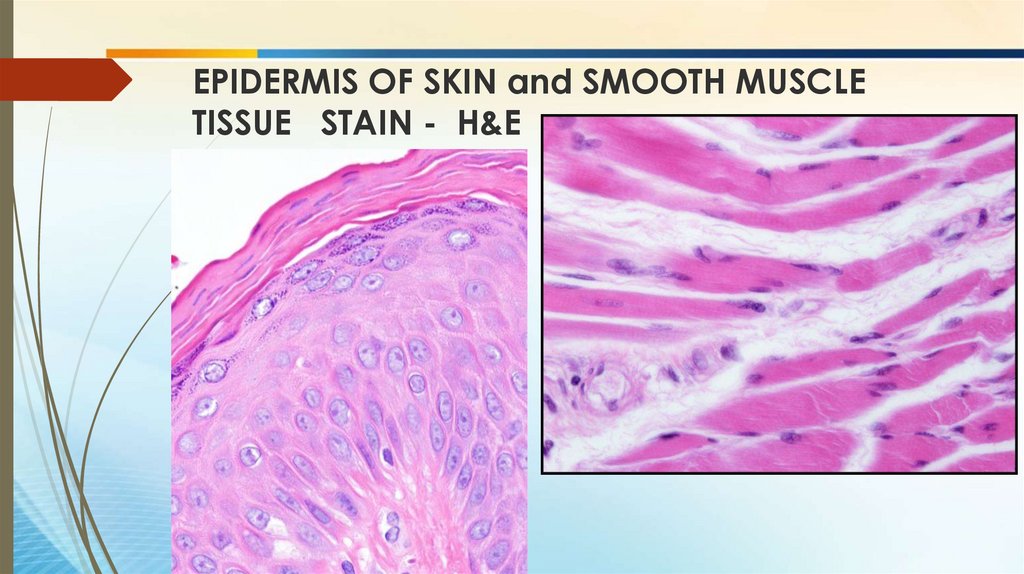
EPIDERMIS OF SKIN and SMOOTH MUSCLETISSUE STAIN - H&E
67.
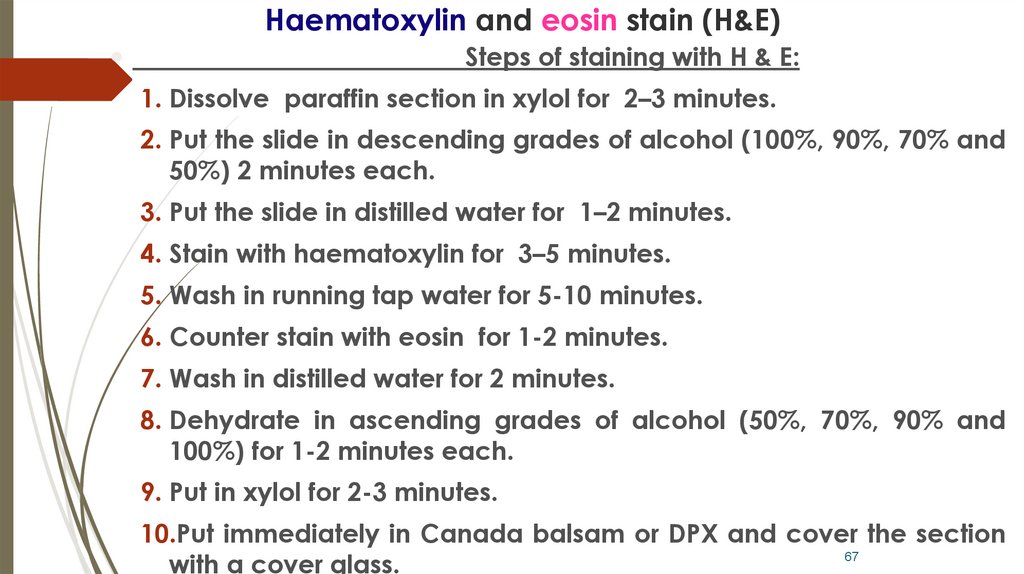
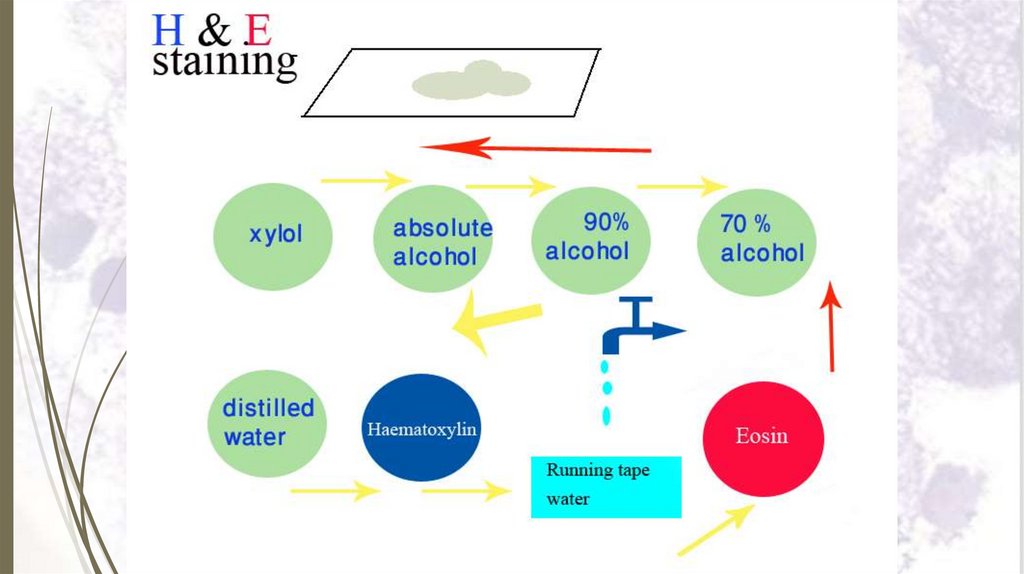
Haematoxylin and eosin stain (H&E)Steps of staining with H & E:
1. Dissolve paraffin section in xylol for 2–3 minutes.
2. Put the slide in descending grades of alcohol (100%, 90%, 70% and
50%) 2 minutes each.
3. Put the slide in distilled water for 1–2 minutes.
4. Stain with haematoxylin for 3–5 minutes.
5. Wash in running tap water for 5-10 minutes.
6. Counter stain with eosin for 1-2 minutes.
7. Wash in distilled water for 2 minutes.
8. Dehydrate in ascending grades of alcohol (50%, 70%, 90% and
100%) for 1-2 minutes each.
9. Put in xylol for 2-3 minutes.
10.Put immediately in Canada balsam or DPX and cover the section
67
with a cover glass.
68.
69.
70.
71.
72.
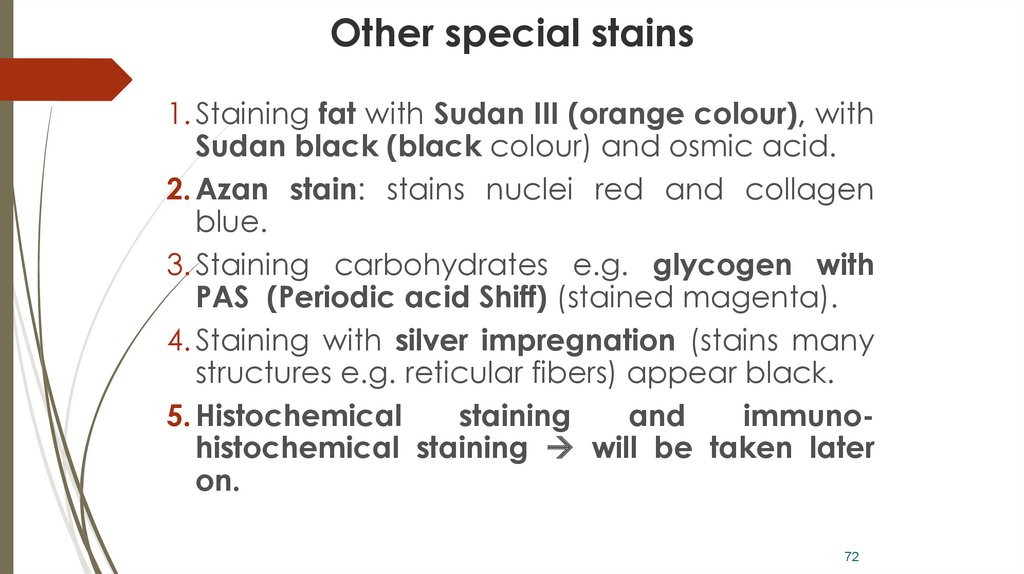
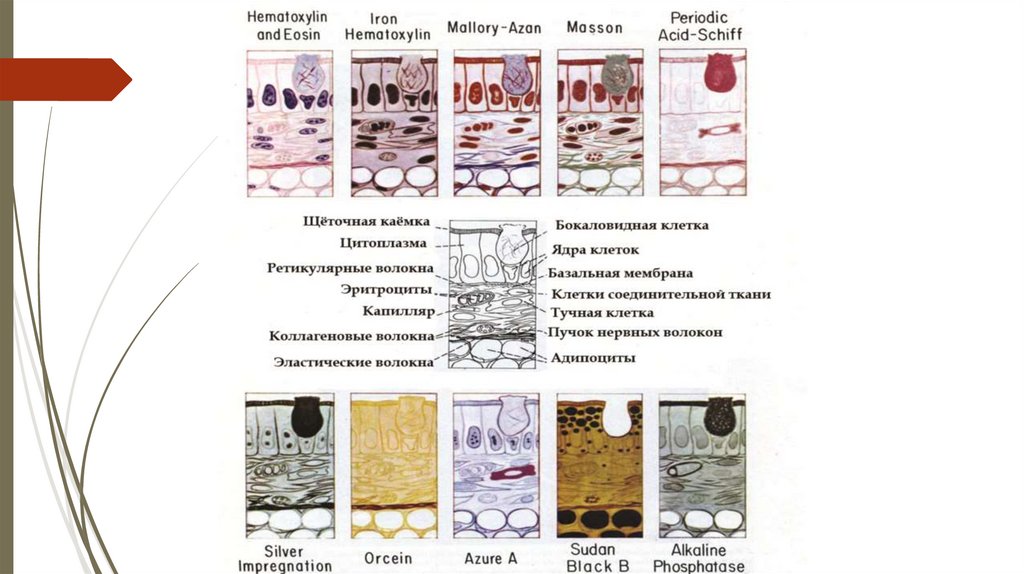
Other special stains1. Staining fat with Sudan III (orange colour), with
Sudan black (black colour) and osmic acid.
2. Azan stain: stains nuclei red and collagen
blue.
3. Staining carbohydrates e.g. glycogen with
PAS (Periodic acid Shiff) (stained magenta).
4. Staining with silver impregnation (stains many
structures e.g. reticular fibers) appear black.
5. Histochemical
staining
and
immunohistochemical staining will be taken later
on.
72
73.
74.
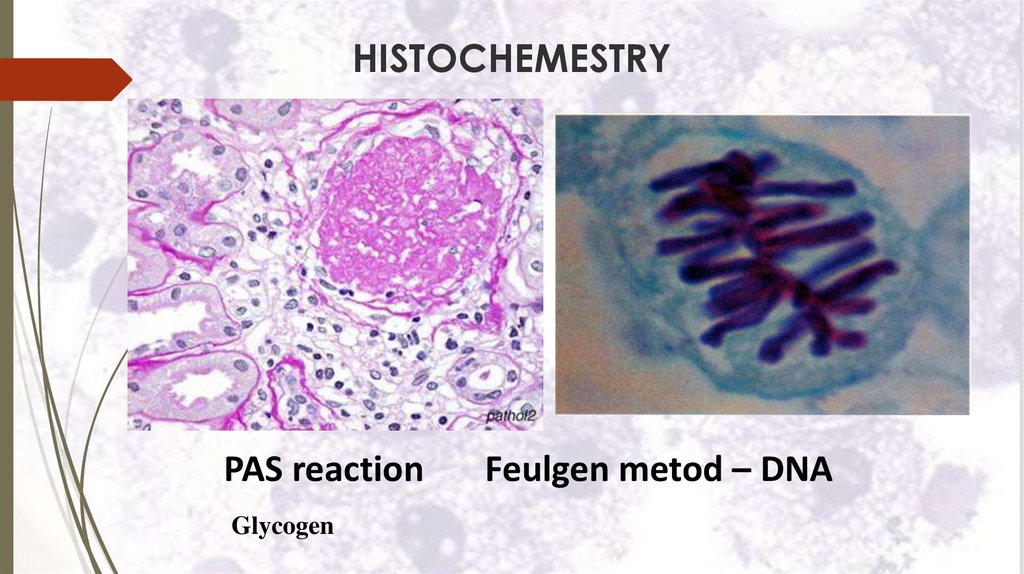
HISTOCHEMESTRYPAS reaction
Glycogen
Feulgen metod – DNA
75.
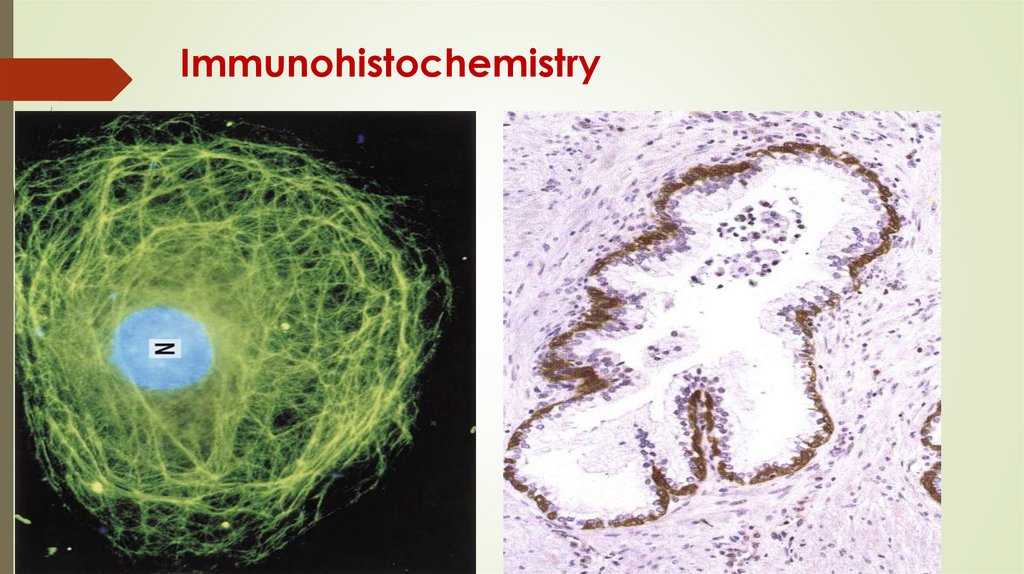
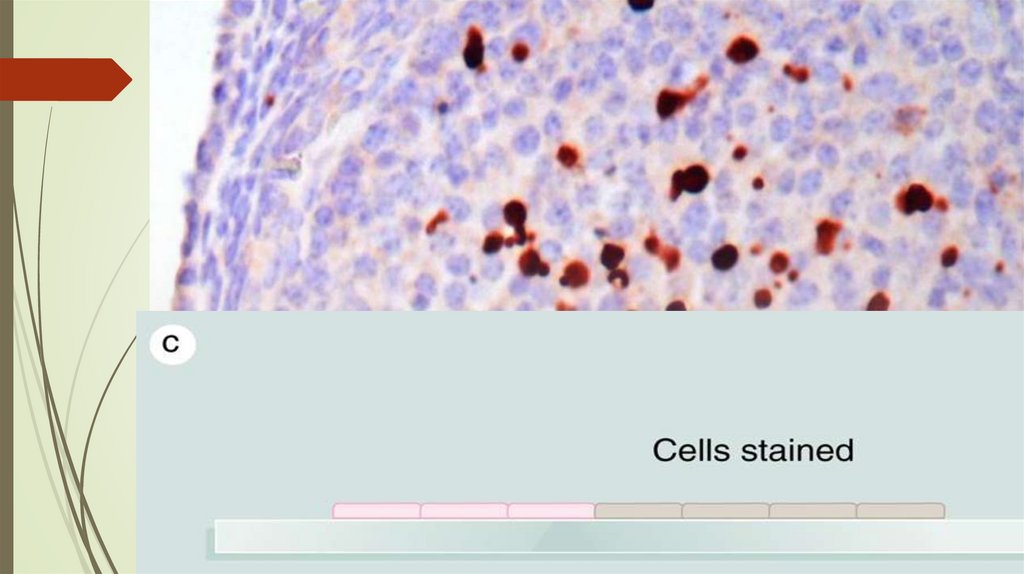
Immunohistochemistry76.
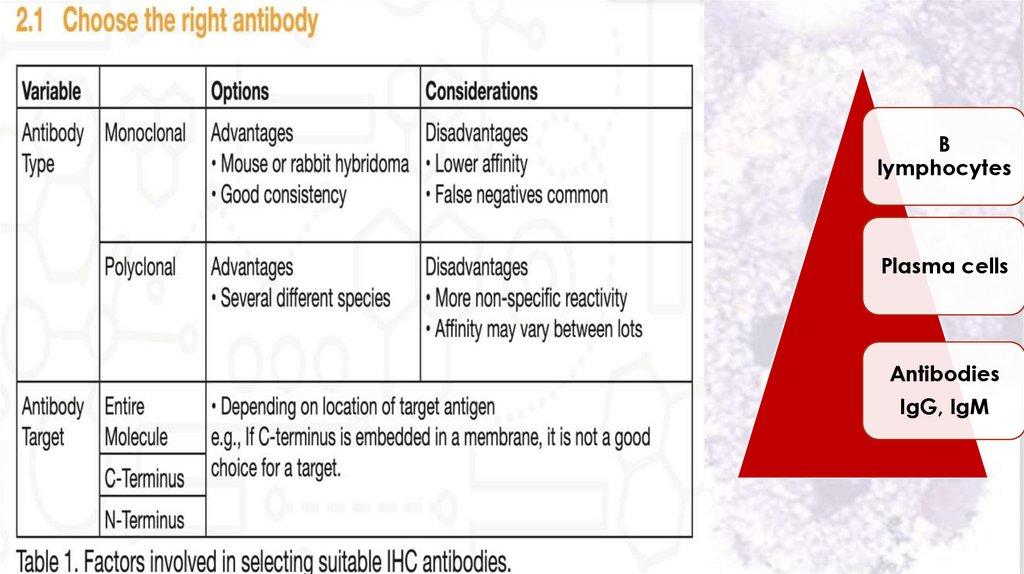
Blymphocytes
Plasma cells
Antibodies
IgG, IgM
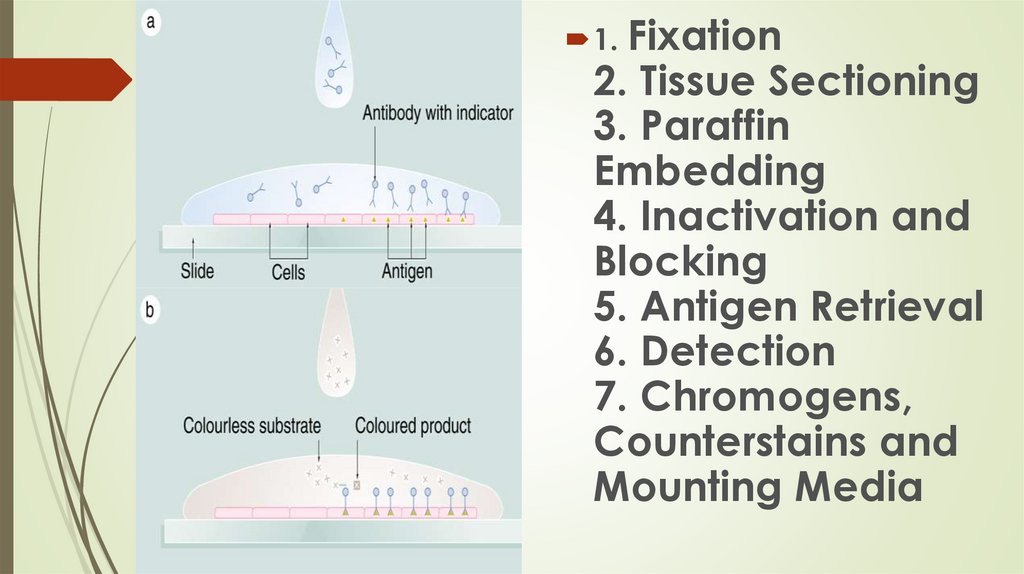
77.
1. Fixation2. Tissue Sectioning
3. Paraffin
Embedding
4. Inactivation and
Blocking
5. Antigen Retrieval
6. Detection
7. Chromogens,
Counterstains and
Mounting Media
78.
79.
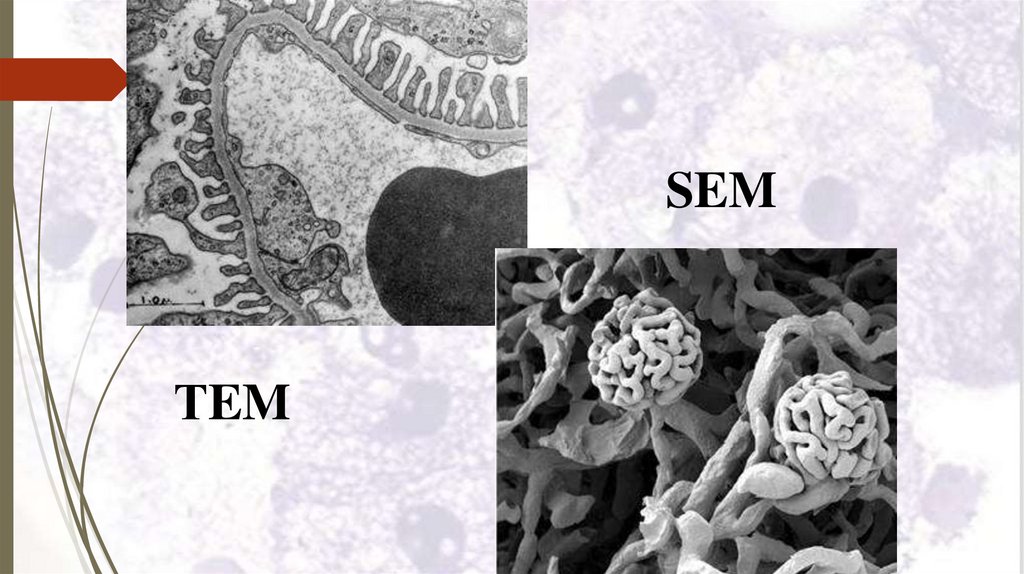
Electron Microscope (EM)Types of EM:
1. Transmission
electron
microscope
(TEM): visualizes the internal structure of
the cell.
2. Scanning electron microscope (SEM):
visualizes the surface of cells (three
dimensional image on the screen) as
microvilli and cilia.
79
80.
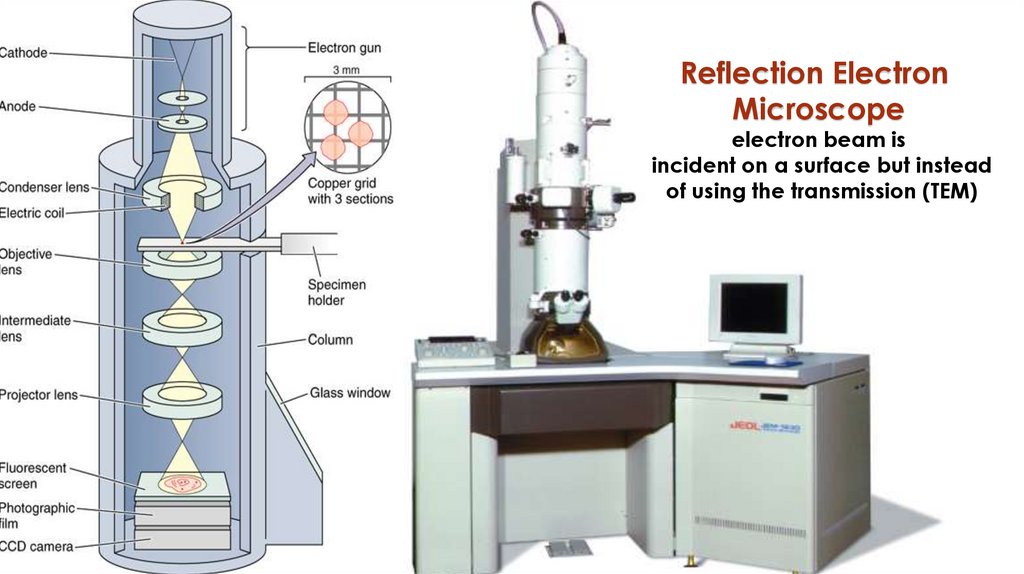
Reflection ElectronMicroscope
electron beam is
incident on a surface but instead
of using the transmission (TEM)
81.
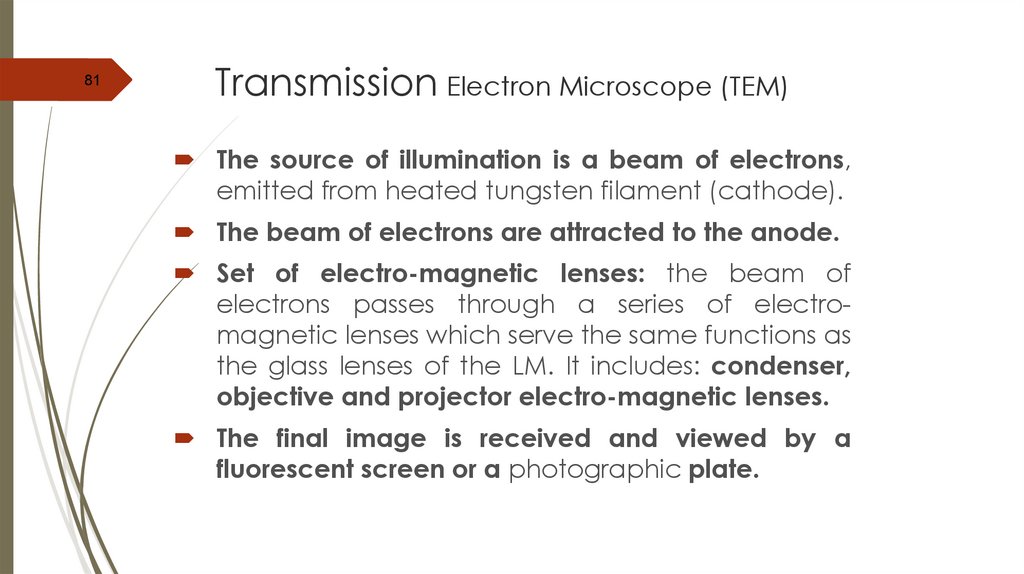
81Transmission Electron Microscope (TEM)
The source of illumination is a beam of electrons,
emitted from heated tungsten filament (cathode).
The beam of electrons are attracted to the anode.
Set of electro-magnetic lenses: the beam of
electrons passes through a series of electromagnetic lenses which serve the same functions as
the glass lenses of the LM. It includes: condenser,
objective and projector electro-magnetic lenses.
The final image is received and viewed by a
fluorescent screen or a photographic plate.
82.
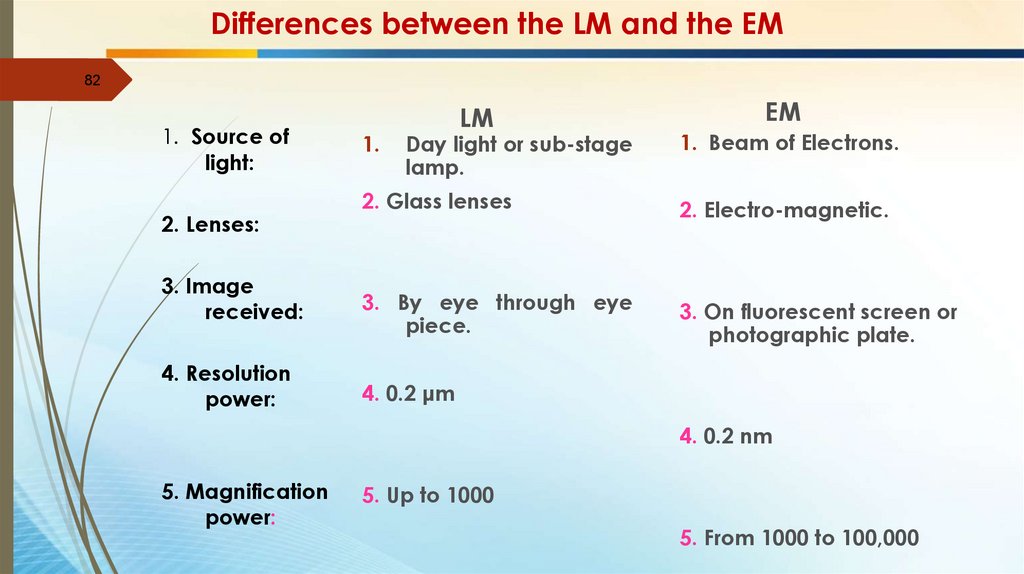
Differences between the LM and the EM82
1. Source of
light:
2. Lenses:
3. Image
received:
4. Resolution
power:
1.
LM
Day light or sub-stage
lamp.
EM
1. Beam of Electrons.
2. Glass lenses
2. Electro-magnetic.
3. By eye through eye
piece.
3. On fluorescent screen or
photographic plate.
4. 0.2 μm
4. 0.2 nm
5. Magnification
power:
5. Up to 1000
5. From 1000 to 100,000
83.
Scanning transmission electron microscopy SEMsecondary electrons (SEM), the reflected beam of
elastically scattered electrons is detected.
TEM
SEM
84.
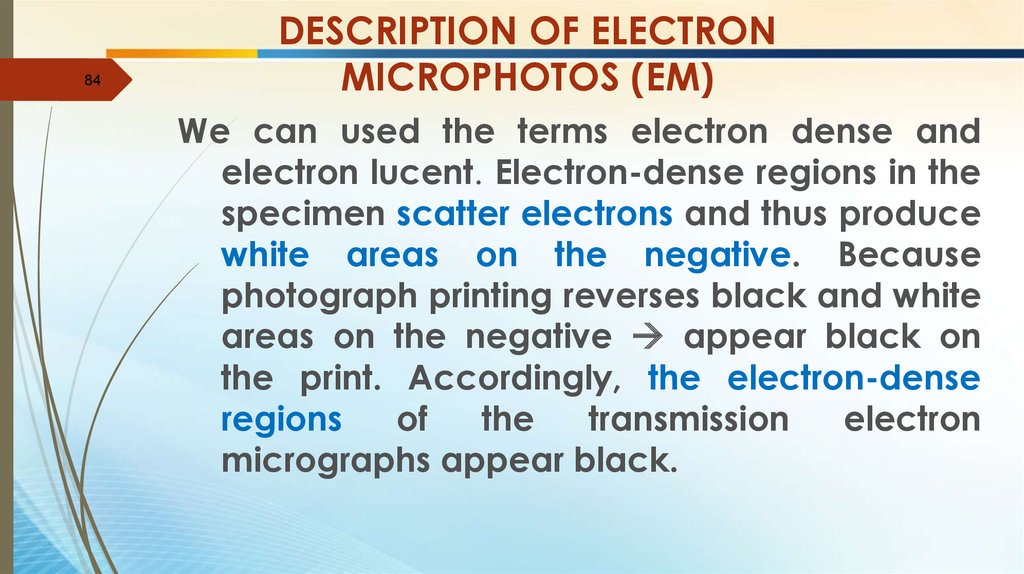
84DESCRIPTION OF ELECTRON
MICROPHOTOS (EM)
We can used the terms electron dense and
electron lucent. Electron-dense regions in the
specimen scatter electrons and thus produce
white areas on the negative. Because
photograph printing reverses black and white
areas on the negative appear black on
the print. Accordingly, the electron-dense
regions
of
the
transmission
electron
micrographs appear black.
85.
SEMТEM
86.
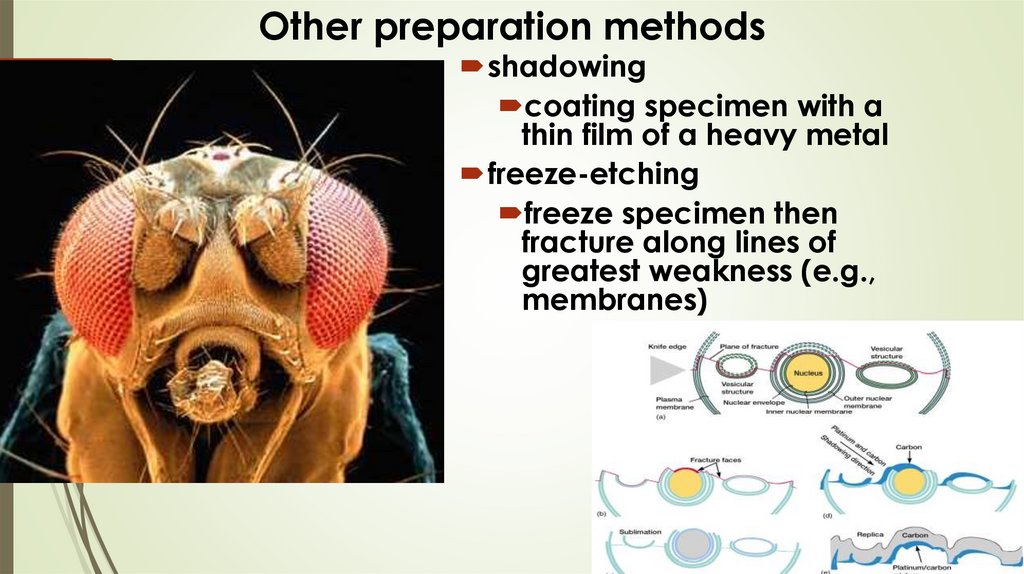
Other preparation methodsshadowing
coating specimen with a
thin film of a heavy metal
freeze-etching
freeze specimen then
fracture along lines of
greatest weakness (e.g.,
membranes)