Similar presentations:
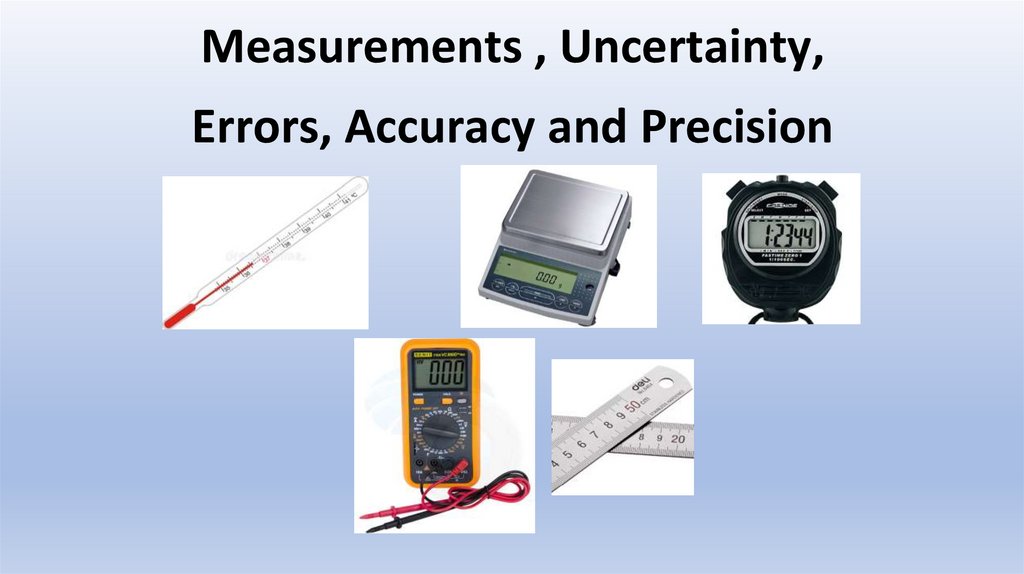
Measurements, Uncertainty, Errors, Accuracy and Precision
1.
Measurements , Uncertainty,Errors, Accuracy and Precision
2.
Review questions:1. Give the rules for determining the
number of significant figures.
2. How do we write scientific notation?
3.
The Measurement of Physical Quantities.Errors and Uncertainty
Accuracy and Precision of Measurement.
Learning objectives:
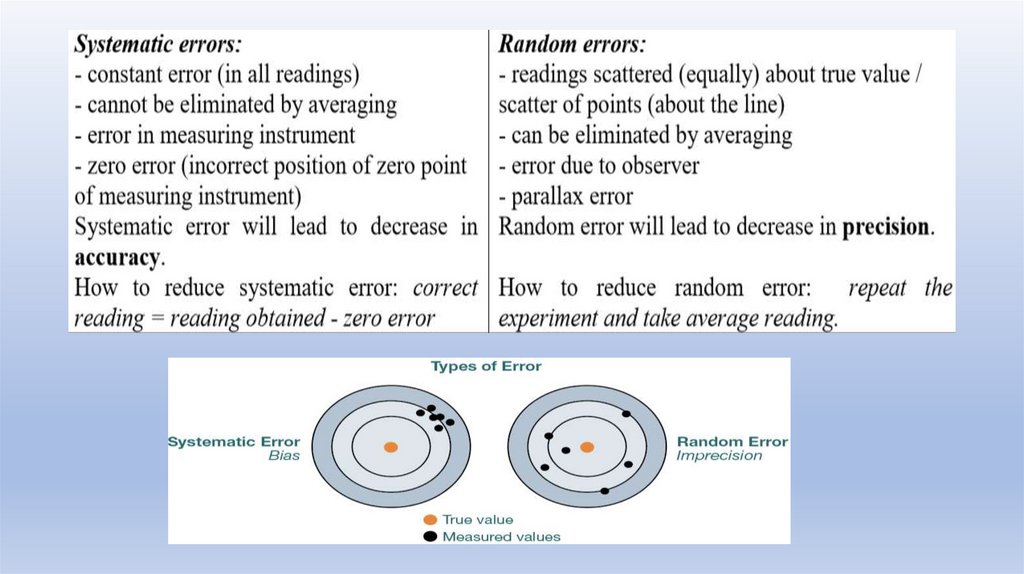
1. Show an understanding of the distinction between systematic errors
(including zero errors) and random errors;
2. Show an understanding of the distinction between precision and accuracy.
4.
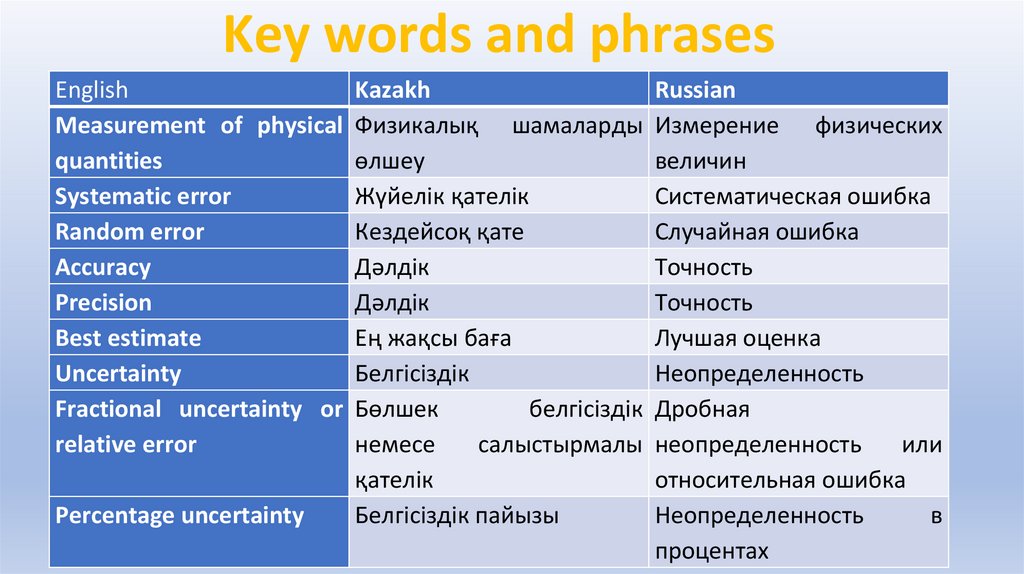
Key words and phrasesEnglish
Kazakh
Russian
Measurement of physical Физикалық шамаларды Измерение физических
quantities
өлшеу
величин
Systematic error
Жүйелік қателік
Систематическая ошибка
Random error
Кездейсоқ қате
Случайная ошибка
Accuracy
Дәлдік
Точность
Precision
Дәлдік
Точность
Best estimate
Ең жақсы баға
Лучшая оценка
Uncertainty
Белгісіздік
Неопределенность
Fractional uncertainty or Бөлшек
белгісіздік Дробная
relative error
немесе
салыстырмалы неопределенность
или
қателік
относительная ошибка
Percentage uncertainty
Белгісіздік пайызы
Неопределенность
в
процентах
5.
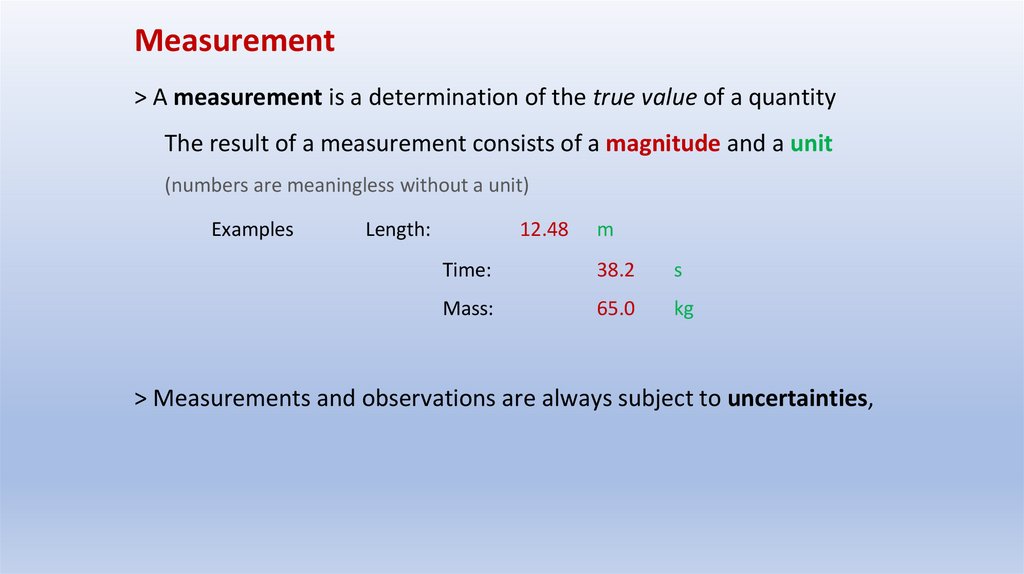
Measurement> A measurement is a determination of the true value of a quantity
The result of a measurement consists of a magnitude and a unit
(numbers are meaningless without a unit)
Examples
Length:
12.48
m
Time:
38.2
s
Mass:
65.0
kg
> Measurements and observations are always subject to uncertainties,
6.
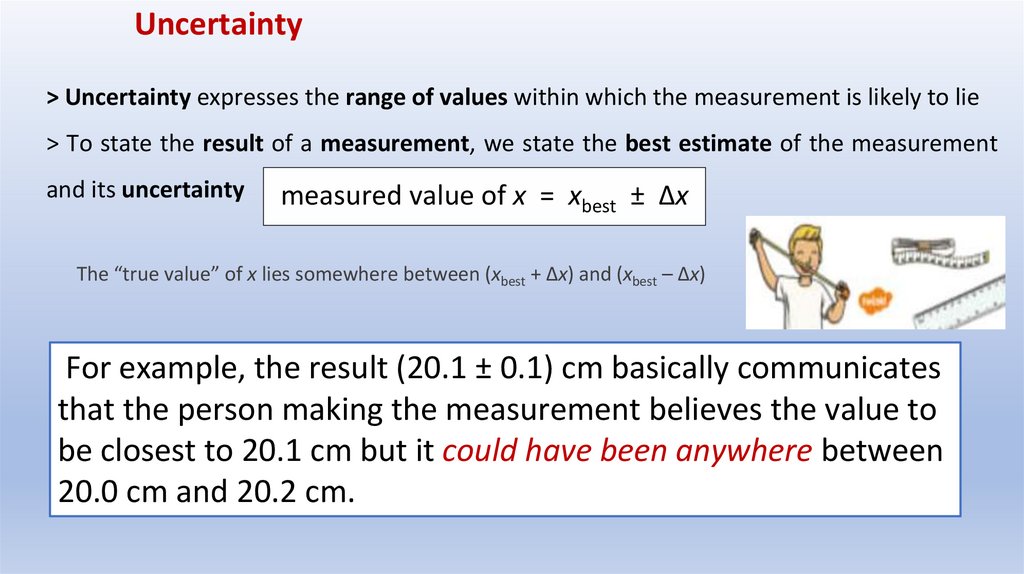
Uncertainty> Uncertainty expresses the range of values within which the measurement is likely to lie
> To state the result of a measurement, we state the best estimate of the measurement
and its uncertainty
measured value of x = xbest ± Δx
The “true value” of x lies somewhere between (xbest + Δx) and (xbest – Δx)
For example, the result (20.1 ± 0.1) cm basically communicates
that the person making the measurement believes the value to
be closest to 20.1 cm but it could have been anywhere between
20.0 cm and 20.2 cm.
7.
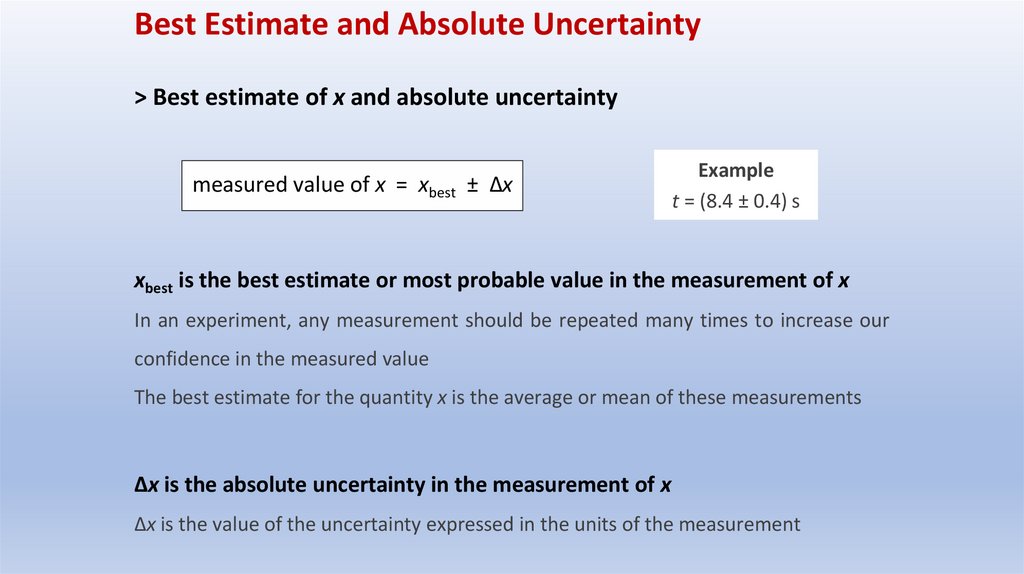
Best Estimate and Absolute Uncertainty> Best estimate of x and absolute uncertainty
measured value of x = xbest ± Δx
Example
t = (8.4 ± 0.4) s
xbest is the best estimate or most probable value in the measurement of x
In an experiment, any measurement should be repeated many times to increase our
confidence in the measured value
The best estimate for the quantity x is the average or mean of these measurements
Δx is the absolute uncertainty in the measurement of x
Δx is the value of the uncertainty expressed in the units of the measurement
8.
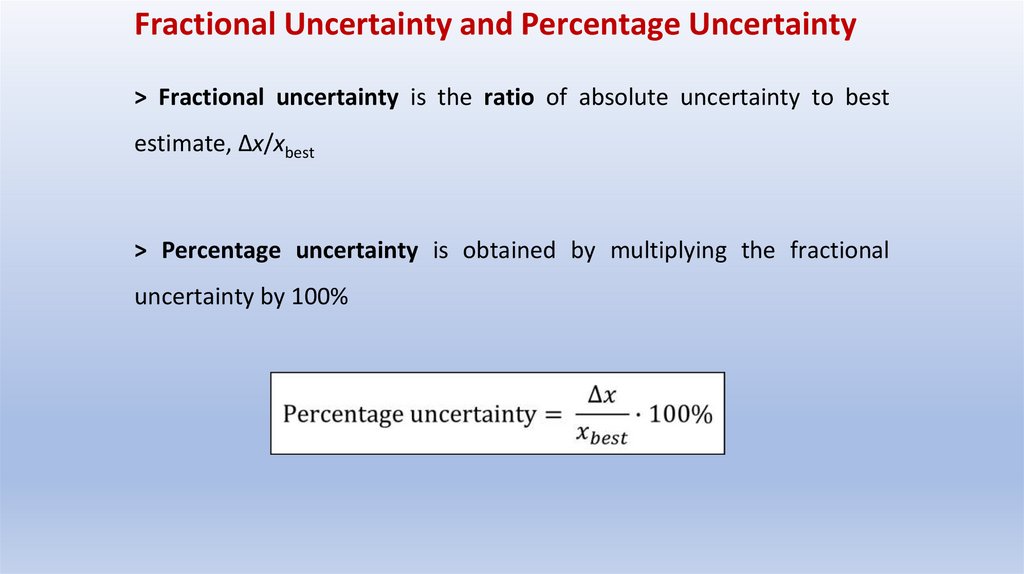
Fractional Uncertainty and Percentage Uncertainty> Fractional uncertainty is the ratio of absolute uncertainty to best
estimate, Δx/xbest
> Percentage uncertainty is obtained by multiplying the fractional
uncertainty by 100%
9.
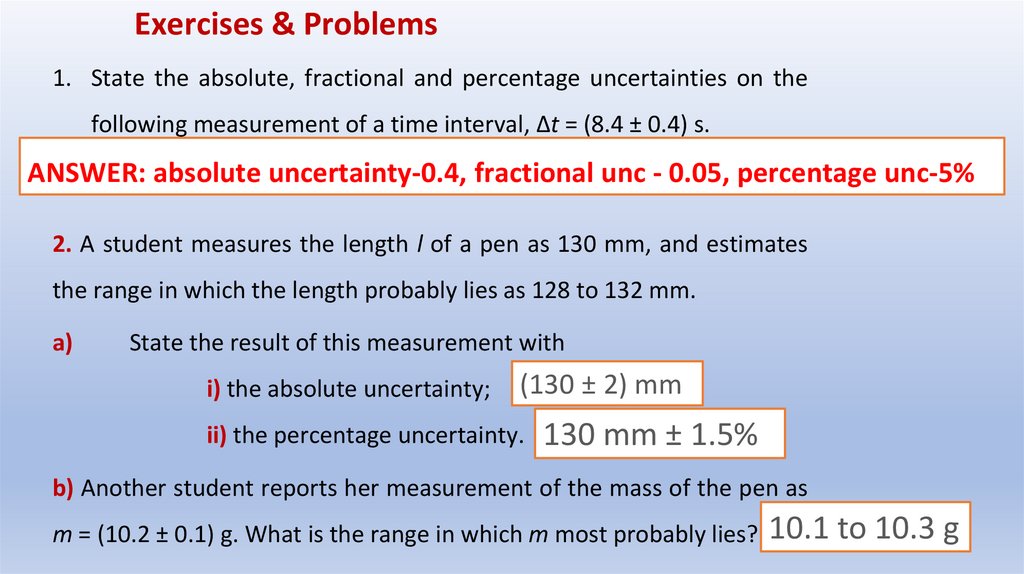
Exercises & Problems1. State the absolute, fractional and percentage uncertainties on the
following measurement of a time interval, Δt = (8.4 ± 0.4) s.
ANSWER: absolute uncertainty-0.4, fractional unc - 0.05, percentage unc-5%
2. A student measures the length l of a pen as 130 mm, and estimates
the range in which the length probably lies as 128 to 132 mm.
a)
State the result of this measurement with
i) the absolute uncertainty;
(130 ± 2) mm
ii) the percentage uncertainty.
130 mm ± 1.5%
b) Another student reports her measurement of the mass of the pen as
m = (10.2 ± 0.1) g. What is the range in which m most probably lies? 10.1 to 10.3 g
10.
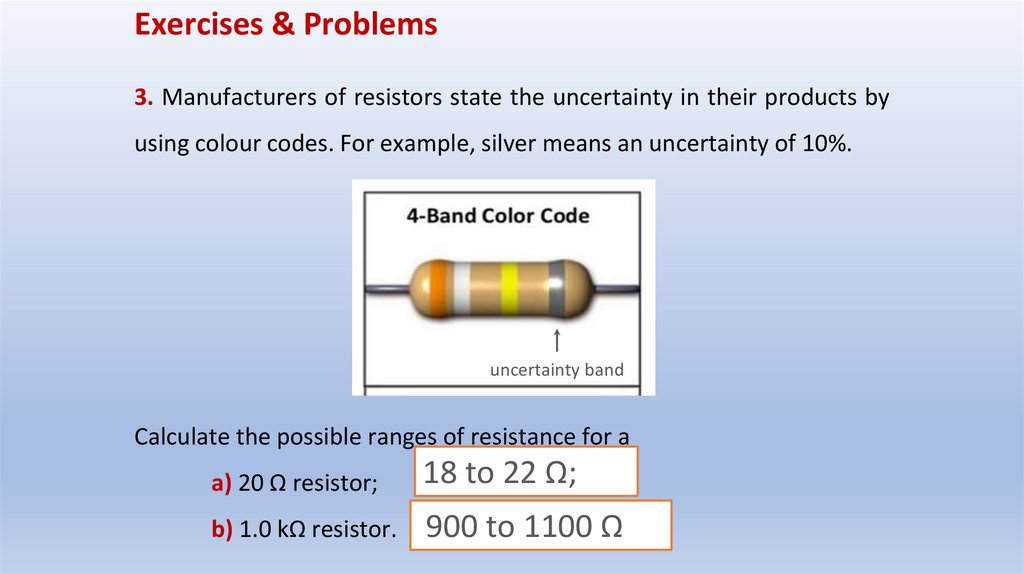
Exercises & Problems3. Manufacturers of resistors state the uncertainty in their products by
using colour codes. For example, silver means an uncertainty of 10%.
uncertainty band
Calculate the possible ranges of resistance for a
a) 20 Ω resistor;
18 to 22 Ω;
b) 1.0 kΩ resistor.
900 to 1100 Ω
11.
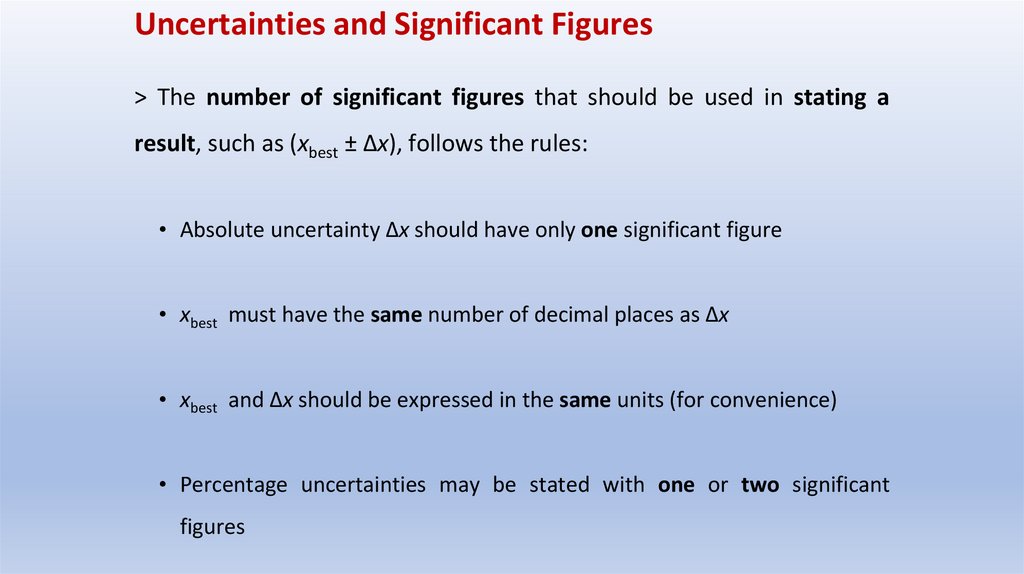
Uncertainties and Significant Figures> The number of significant figures that should be used in stating a
result, such as (xbest ± Δx), follows the rules:
• Absolute uncertainty Δx should have only one significant figure
• xbest must have the same number of decimal places as Δx
• xbest and Δx should be expressed in the same units (for convenience)
• Percentage uncertainties may be stated with one or two significant
figures
12.
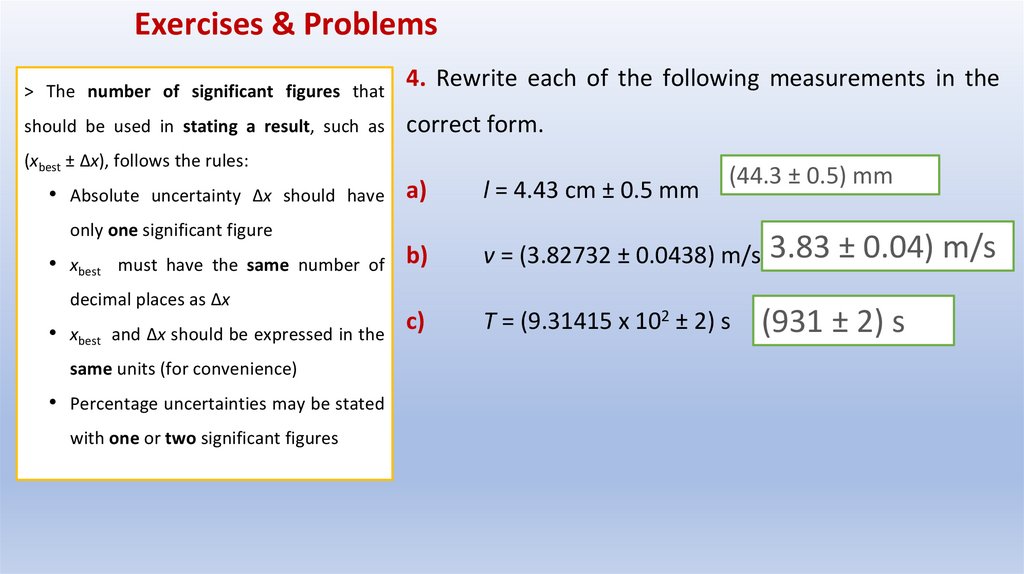
Exercises & Problems> The number of significant figures that
should be used in stating a result, such as
4. Rewrite each of the following measurements in the
correct form.
(xbest ± Δx), follows the rules:
• Absolute uncertainty Δx should have
a)
only one significant figure
• xbest must have the same number of b)
decimal places as Δx
• xbest and Δx should be expressed in the
same units (for convenience)
• Percentage uncertainties may be stated
with one or two significant figures
c)
l = 4.43 cm ± 0.5 mm
(44.3 ± 0.5) mm
v = (3.82732 ± 0.0438) m/s 3.83 ± 0.04) m/s
T = (9.31415 x 10² ± 2) s
(931 ± 2) s
13.
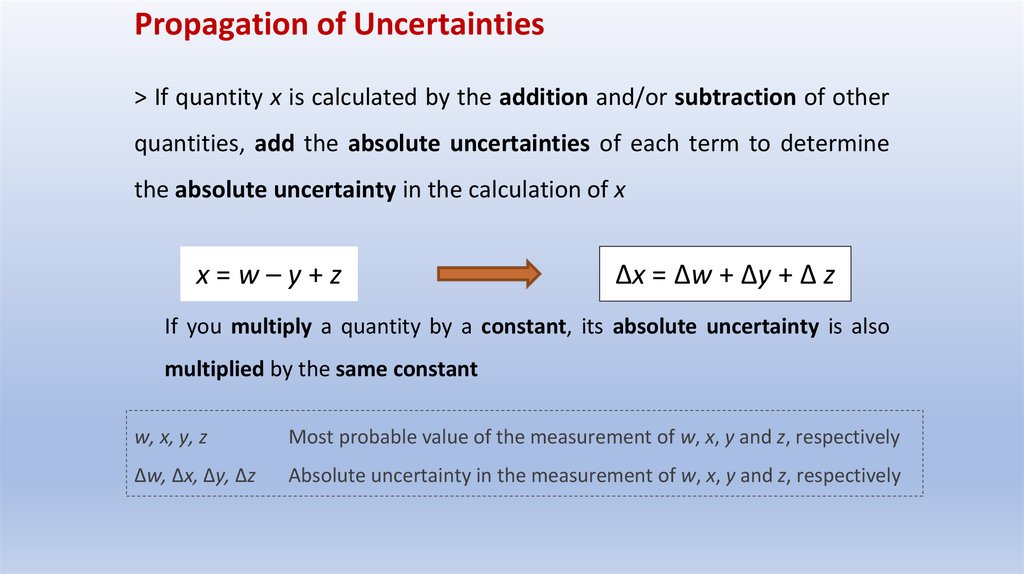
Propagation of Uncertainties> If quantity x is calculated by the addition and/or subtraction of other
quantities, add the absolute uncertainties of each term to determine
the absolute uncertainty in the calculation of x
x=w–y+z
Δx = Δw + Δy + Δ z
If you multiply a quantity by a constant, its absolute uncertainty is also
multiplied by the same constant
w, x, y, z
Most probable value of the measurement of w, x, y and z, respectively
Δw, Δx, Δy, Δz
Absolute uncertainty in the measurement of w, x, y and z, respectively
14.
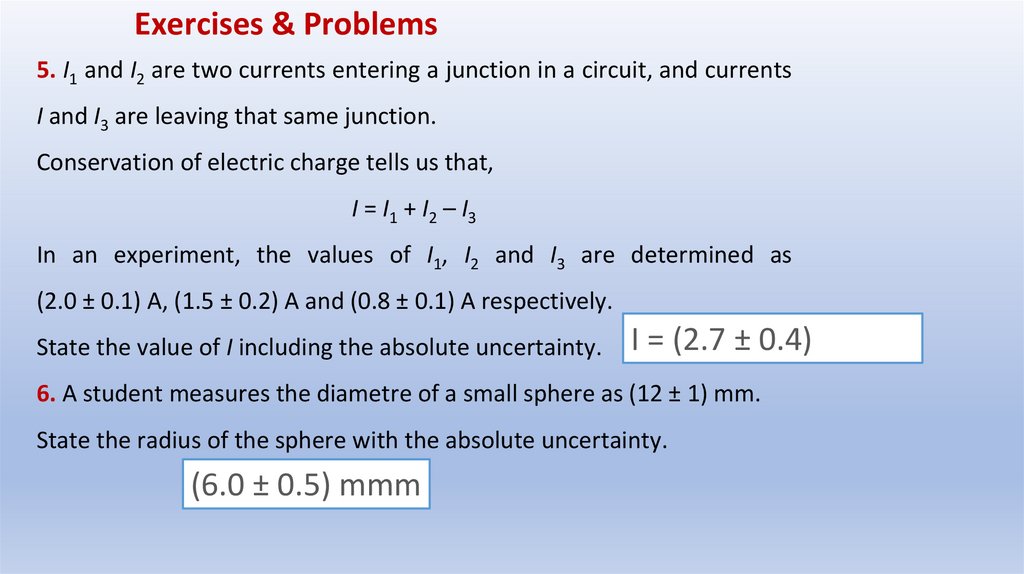
Exercises & Problems5. I1 and I2 are two currents entering a junction in a circuit, and currents
I and I3 are leaving that same junction.
Conservation of electric charge tells us that,
I = I1 + I2 – I3
In an experiment, the values of I1, I2 and I3 are determined as
(2.0 ± 0.1) A, (1.5 ± 0.2) A and (0.8 ± 0.1) A respectively.
State the value of I including the absolute uncertainty.
I = (2.7 ± 0.4)
6. A student measures the diametre of a small sphere as (12 ± 1) mm.
State the radius of the sphere with the absolute uncertainty.
(6.0 ± 0.5) mmm
15.
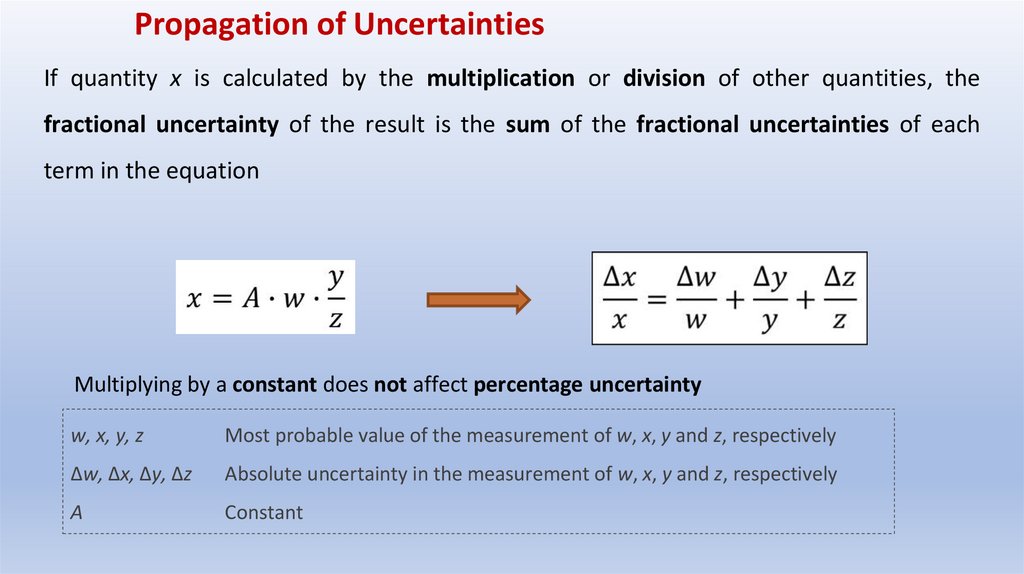
Propagation of UncertaintiesIf quantity x is calculated by the multiplication or division of other quantities, the
fractional uncertainty of the result is the sum of the fractional uncertainties of each
term in the equation
Multiplying by a constant does not affect percentage uncertainty
w, x, y, z
Most probable value of the measurement of w, x, y and z, respectively
Δw, Δx, Δy, Δz
Absolute uncertainty in the measurement of w, x, y and z, respectively
A
Constant
16.
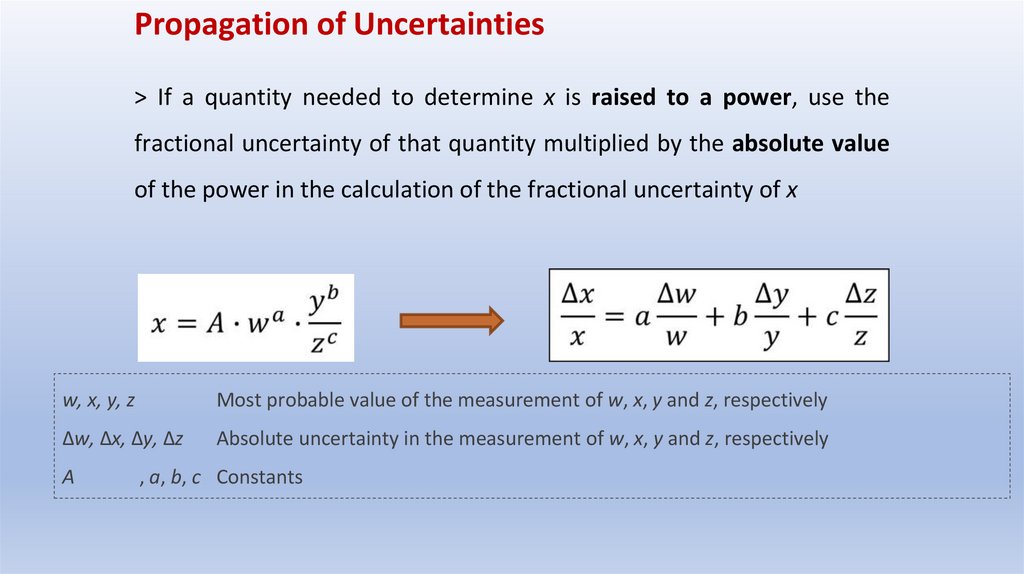
Propagation of Uncertainties> If a quantity needed to determine x is raised to a power, use the
fractional uncertainty of that quantity multiplied by the absolute value
of the power in the calculation of the fractional uncertainty of x
w, x, y, z
Most probable value of the measurement of w, x, y and z, respectively
Δw, Δx, Δy, Δz
Absolute uncertainty in the measurement of w, x, y and z, respectively
A
, a, b, c Constants
17.
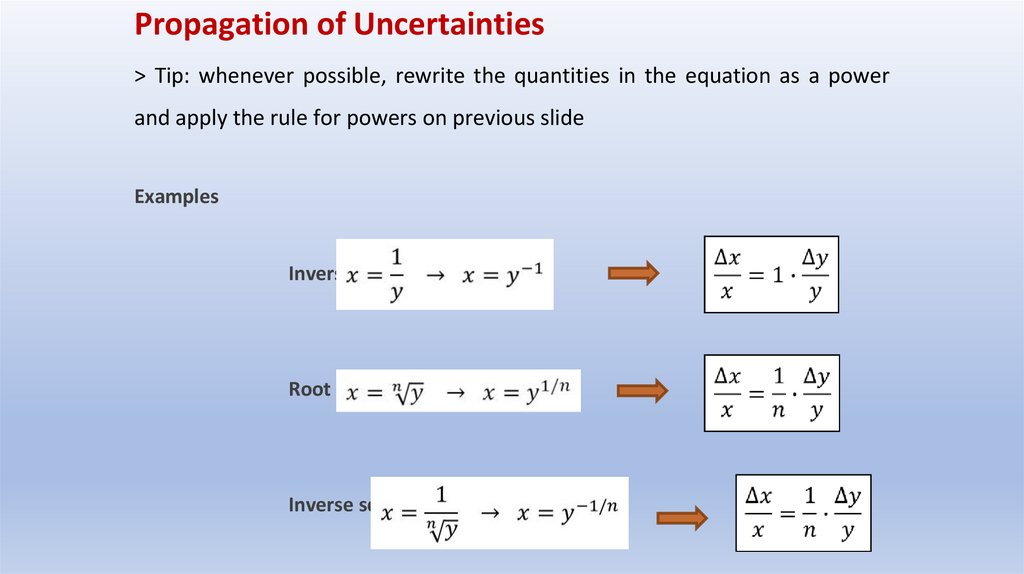
Propagation of Uncertainties> Tip: whenever possible, rewrite the quantities in the equation as a power
and apply the rule for powers on previous slide
Examples
Inverse value
Root
Inverse square root
18.
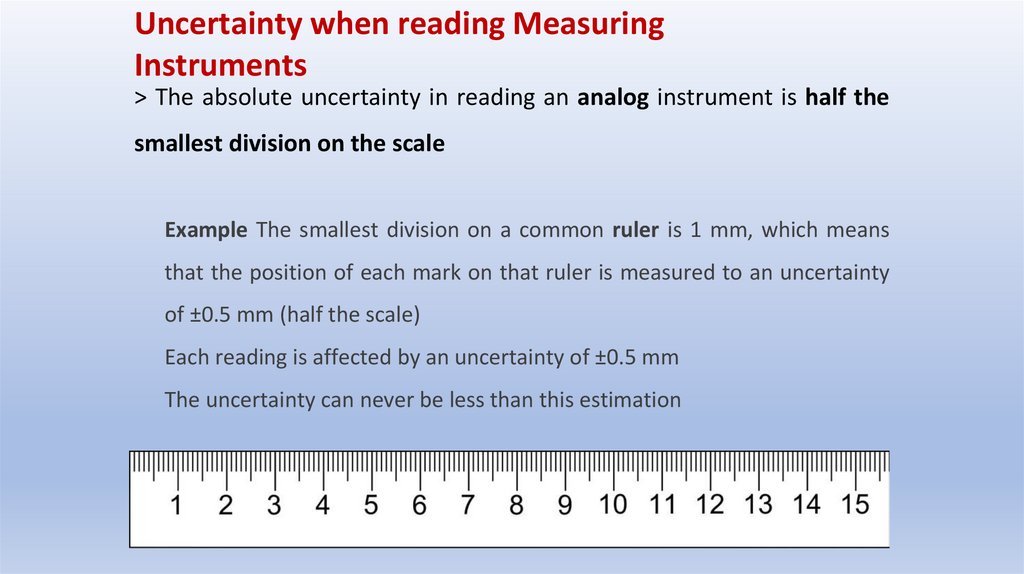
Uncertainty when reading MeasuringInstruments
> The absolute uncertainty in reading an analog instrument is half the
smallest division on the scale
Example The smallest division on a common ruler is 1 mm, which means
that the position of each mark on that ruler is measured to an uncertainty
of ±0.5 mm (half the scale)
Each reading is affected by an uncertainty of ±0.5 mm
The uncertainty can never be less than this estimation
19.
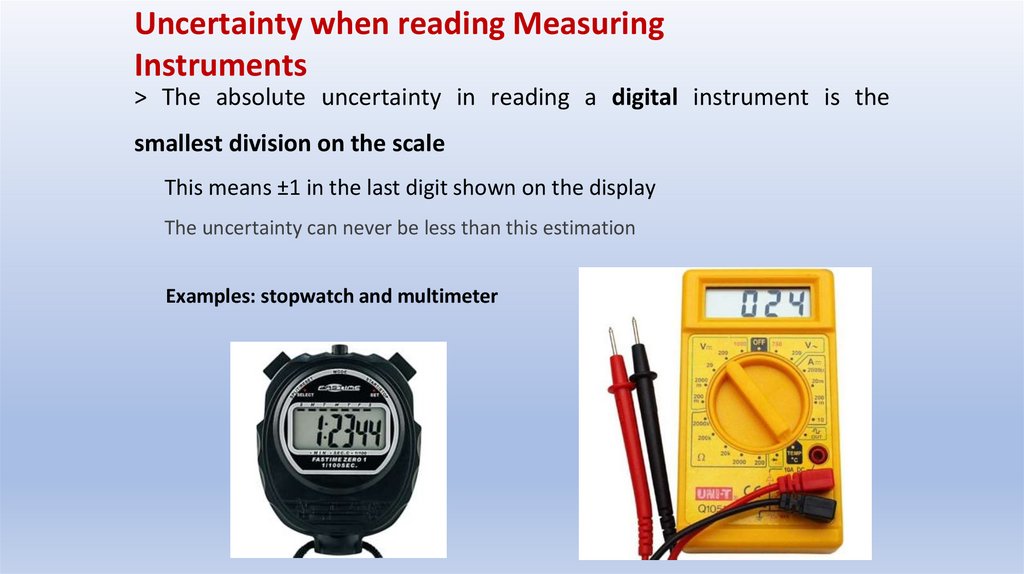
Uncertainty when reading MeasuringInstruments
> The absolute uncertainty in reading a digital instrument is the
smallest division on the scale
This means ±1 in the last digit shown on the display
The uncertainty can never be less than this estimation
Examples: stopwatch and multimeter
20.
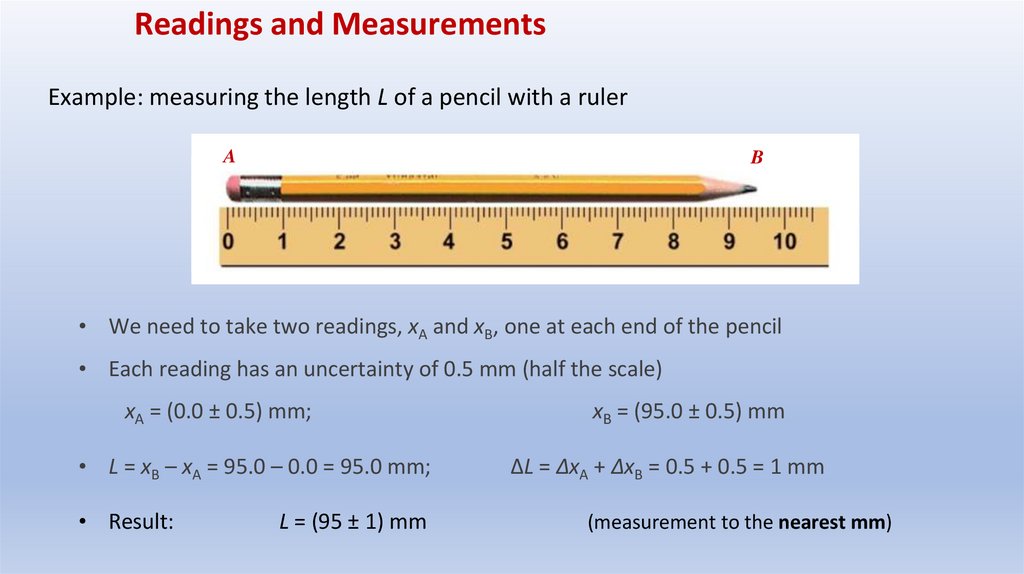
Readings and MeasurementsExample: measuring the length L of a pencil with a ruler
A
B
• We need to take two readings, xA and xB, one at each end of the pencil
• Each reading has an uncertainty of 0.5 mm (half the scale)
xA = (0.0 ± 0.5) mm;
• L = xB – xA = 95.0 – 0.0 = 95.0 mm;
• Result:
L = (95 ± 1) mm
xB = (95.0 ± 0.5) mm
ΔL = ΔxA + ΔxB = 0.5 + 0.5 = 1 mm
(measurement to the nearest mm)
21.
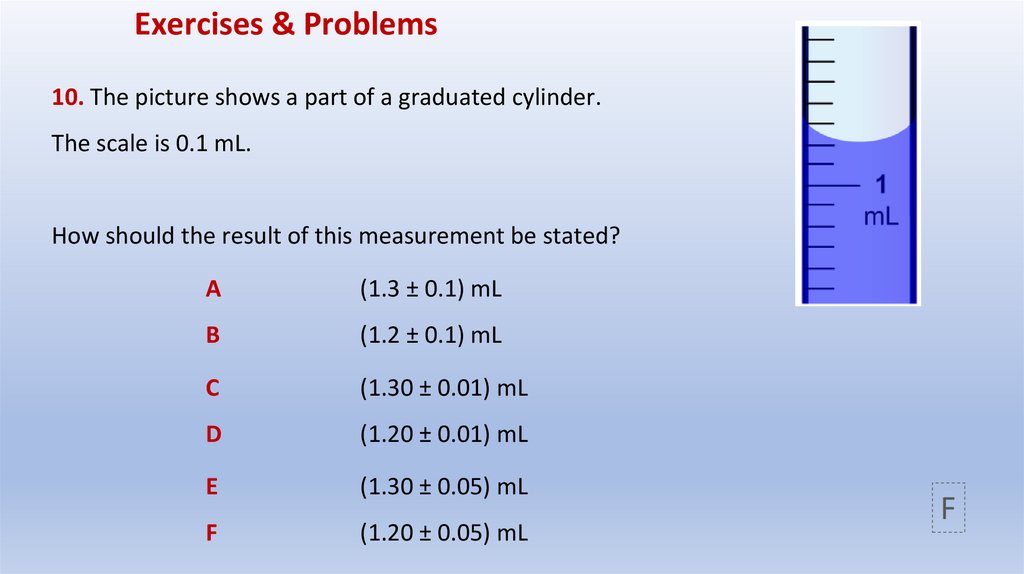
Exercises & Problems10. The picture shows a part of a graduated cylinder.
The scale is 0.1 mL.
How should the result of this measurement be stated?
A
(1.3 ± 0.1) mL
B
(1.2 ± 0.1) mL
C
(1.30 ± 0.01) mL
D
(1.20 ± 0.01) mL
E
(1.30 ± 0.05) mL
F
(1.20 ± 0.05) mL
F
22.
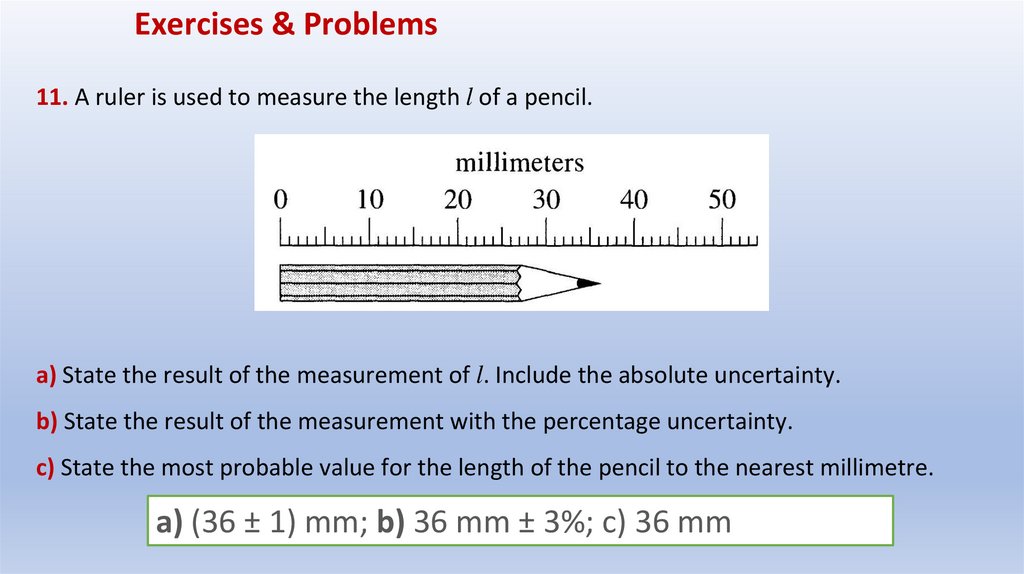
Exercises & Problems11. A ruler is used to measure the length l of a pencil.
a) State the result of the measurement of l. Include the absolute uncertainty.
b) State the result of the measurement with the percentage uncertainty.
c) State the most probable value for the length of the pencil to the nearest millimetre.
a) (36 ± 1) mm; b) 36 mm ± 3%; c) 36 mm
23.
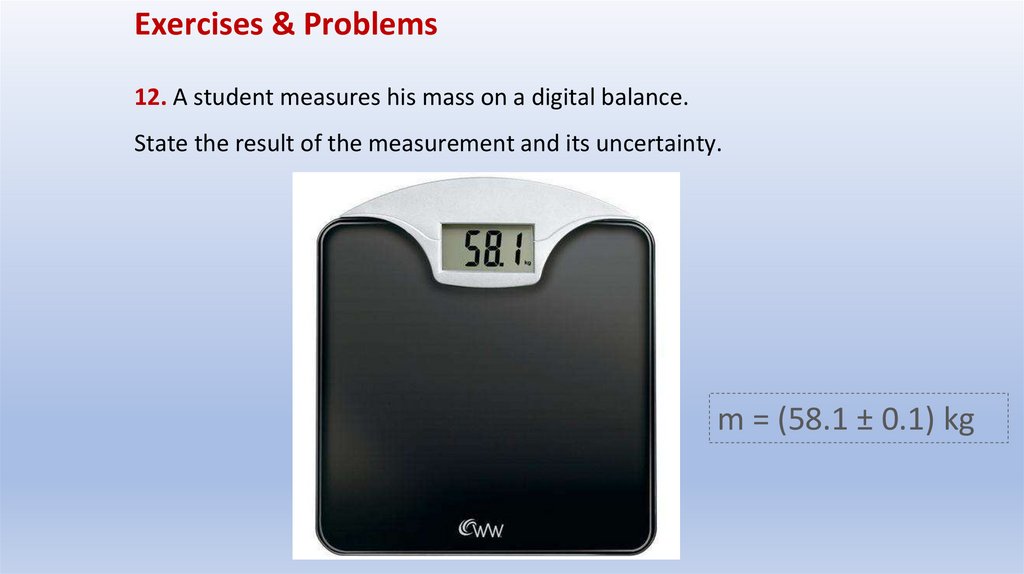
Exercises & Problems12. A student measures his mass on a digital balance.
State the result of the measurement and its uncertainty.
m = (58.1 ± 0.1) kg
24.
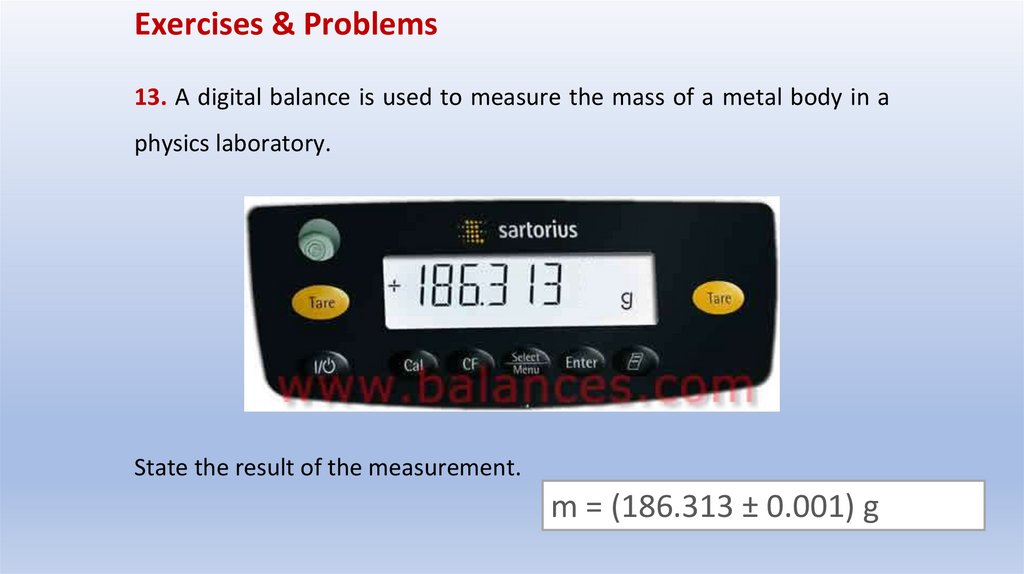
Exercises & Problems13. A digital balance is used to measure the mass of a metal body in a
physics laboratory.
State the result of the measurement.
m = (186.313 ± 0.001) g
25.
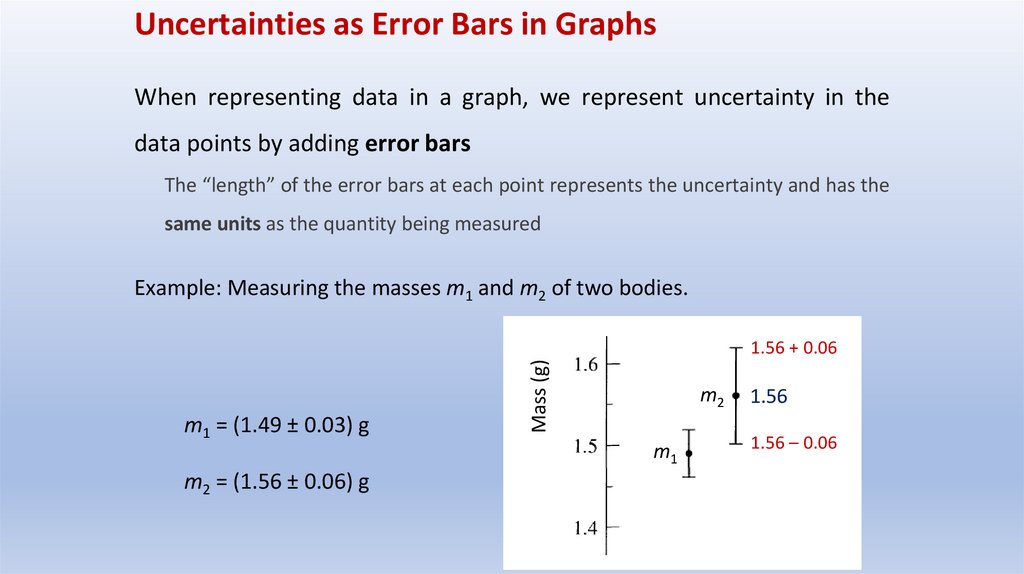
Uncertainties as Error Bars in GraphsWhen representing data in a graph, we represent uncertainty in the
data points by adding error bars
The “length” of the error bars at each point represents the uncertainty and has the
same units as the quantity being measured
Example: Measuring the masses m1 and m2 of two bodies.
m1 = (1.49 ± 0.03) g
Mass (g)
1.56 + 0.06
m2
m1
m2 = (1.56 ± 0.06) g
1.56
1.56 – 0.06
26.
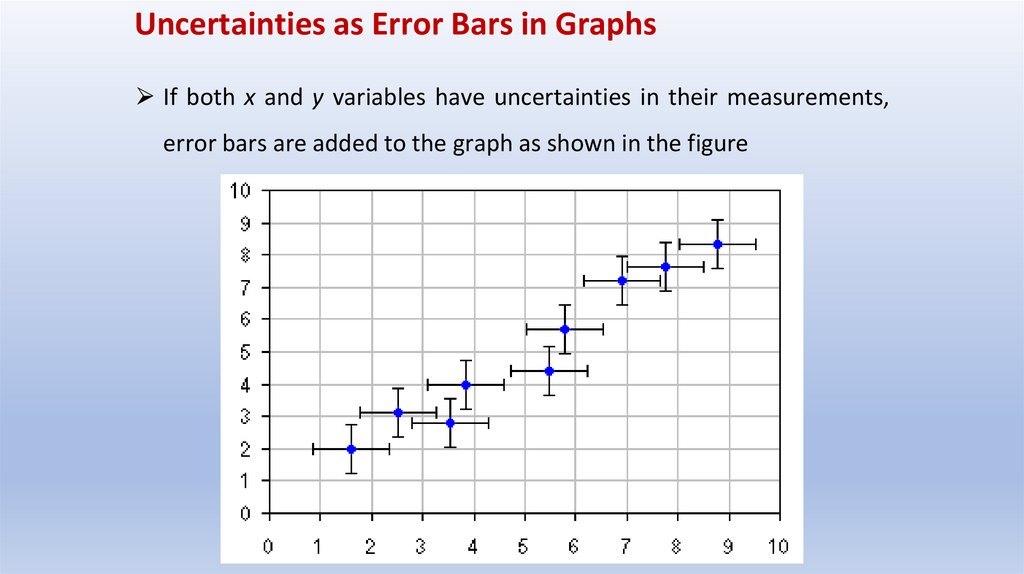
Uncertainties as Error Bars in Graphs⮚ If both x and y variables have uncertainties in their measurements,
error bars are added to the graph as shown in the figure
27.
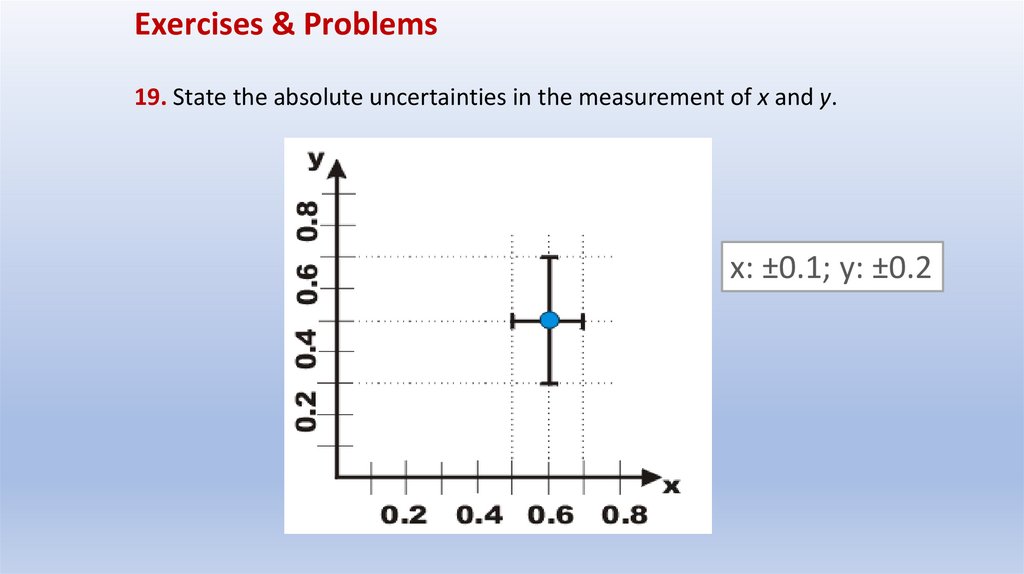
Exercises & Problems19. State the absolute uncertainties in the measurement of x and y.
x: ±0.1; y: ±0.2
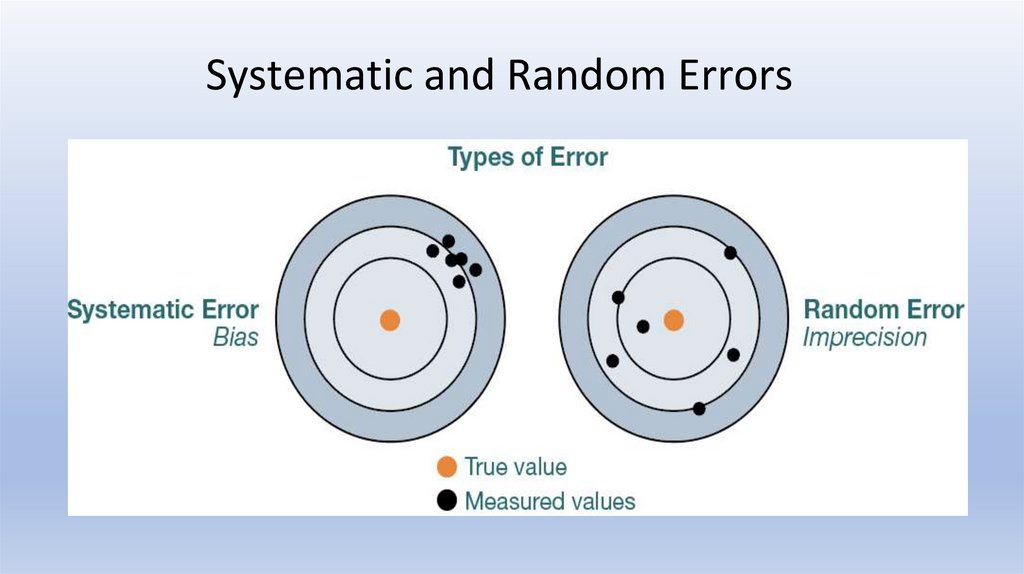
28.
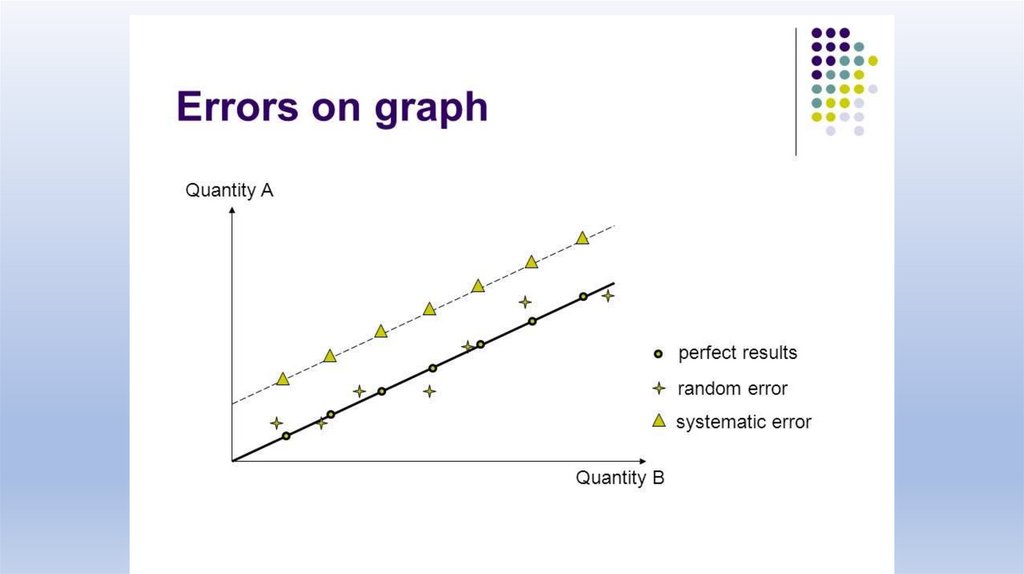
Systematic and Random Errors29.
30.
Accuracy and PrecisionAccurately!
Precisely!
31.
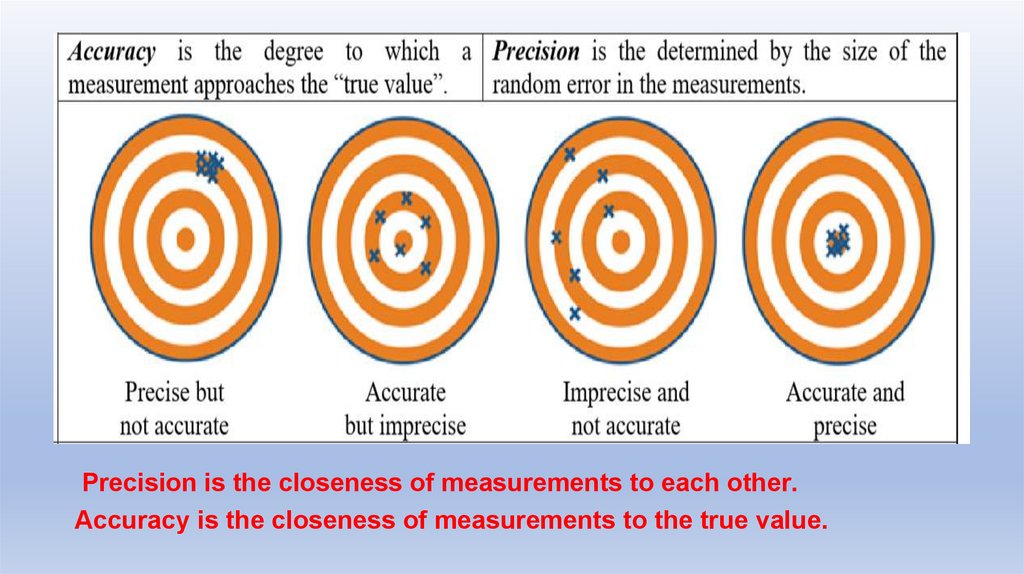
Precision is the closeness of measurements to each other.Accuracy is the closeness of measurements to the true value.
32.
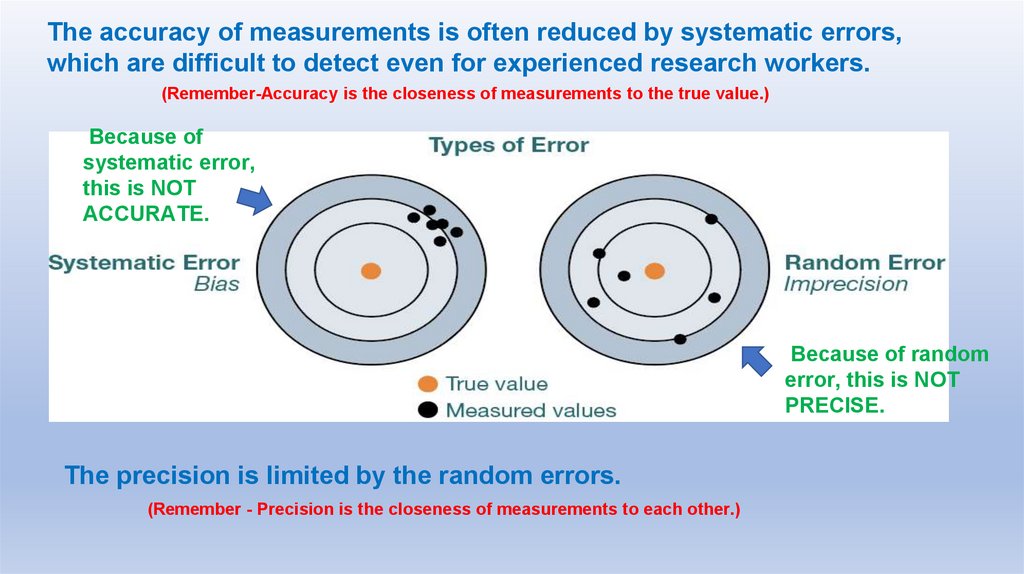
The accuracy of measurements is often reduced by systematic errors,which are difficult to detect even for experienced research workers.
(Remember-Accuracy is the closeness of measurements to the true value.)
Because of
systematic error,
this is NOT
ACCURATE.
Because of random
error, this is NOT
PRECISE.
The precision is limited by the random errors.
(Remember - Precision is the closeness of measurements to each other.)
33.
34.
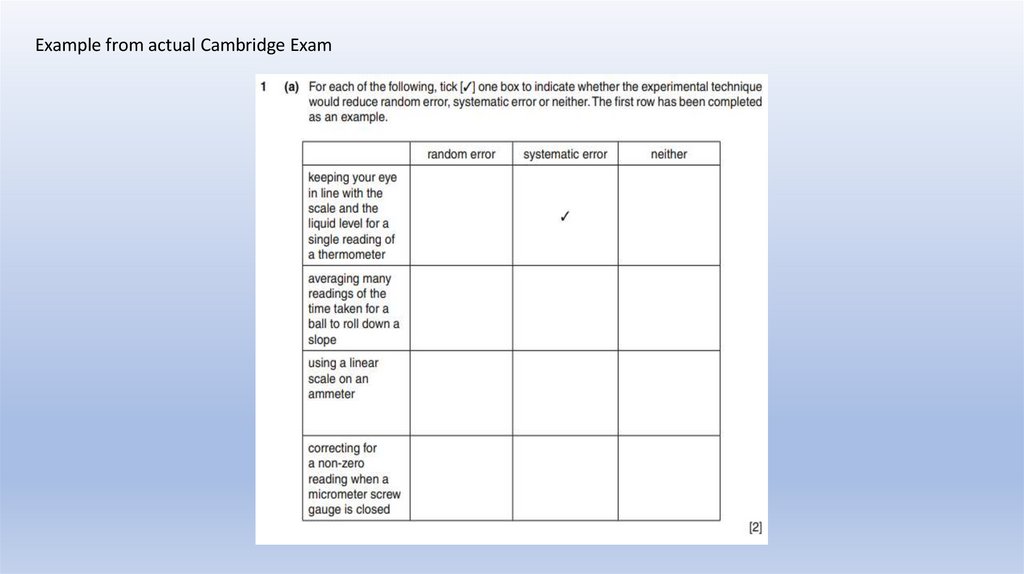
Example from actual Cambridge Exam35.
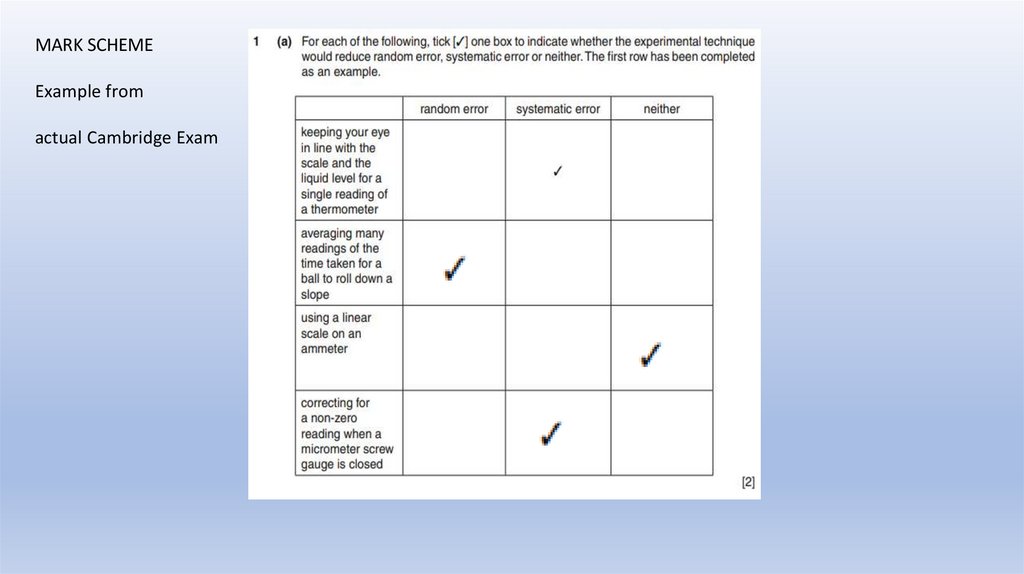
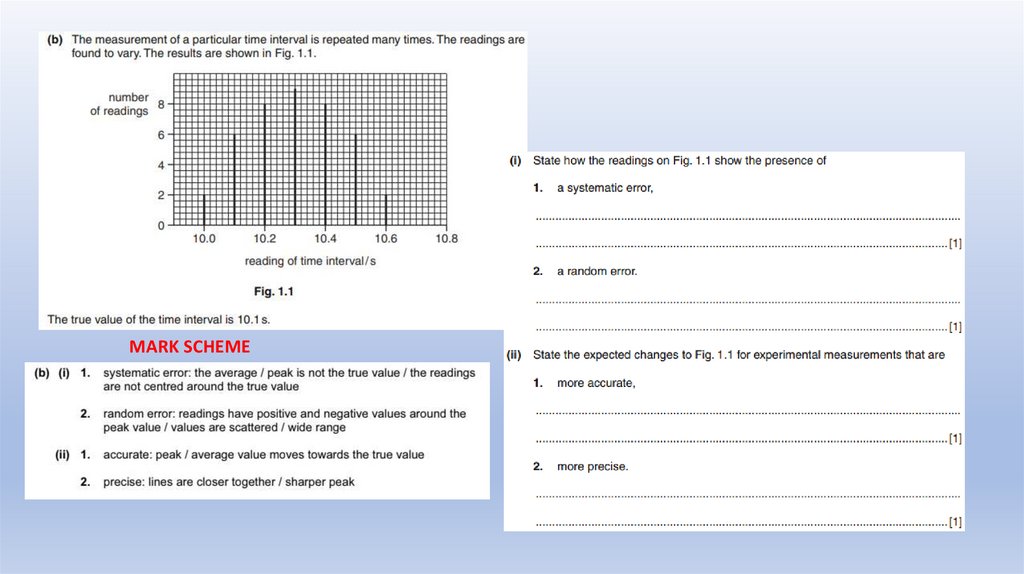
MARK SCHEMEExample from
actual Cambridge Exam
 mathematics


