


 software
Similar presentations:


")


")
Configuring a SINAMICS G130 or G150 offline
1.
Configuring a SINAMICS G130 or G150 offlineAfter you have created a project and set-up a drive unit (G130/150),
configure this using the Wizard. This involves configuring the drive unit,
selecting the option modules and a motor. After the Wizard has been
exited, the drive unit is configured and the motor can be tested.
2.
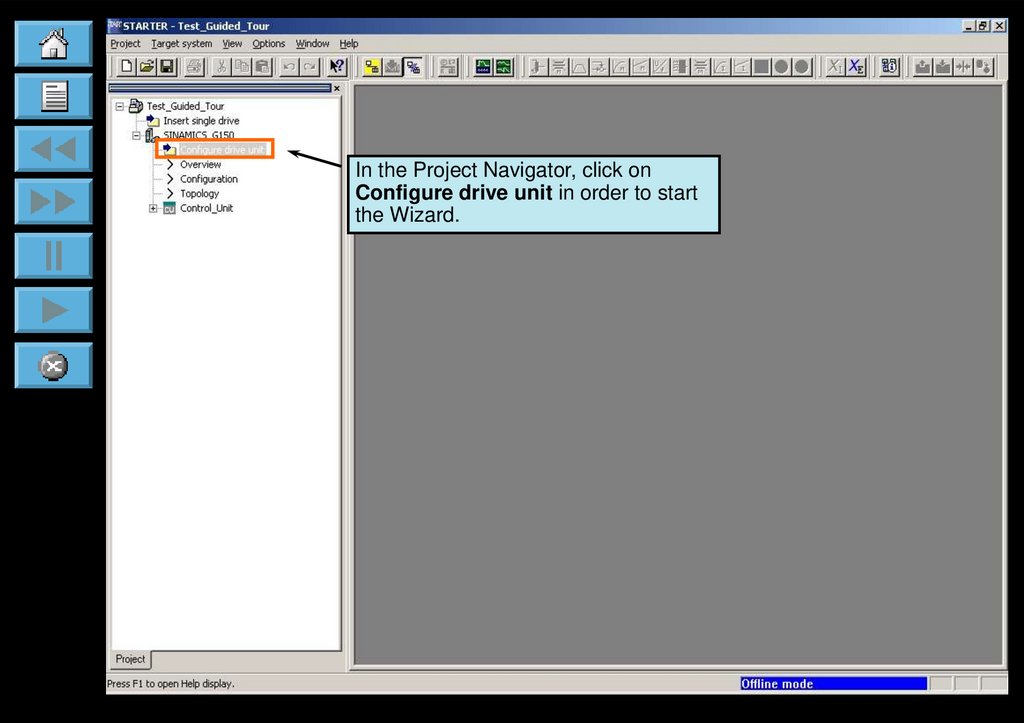
In the Project Navigator, click onConfigure drive unit in order to start
the Wizard.
3.
Selecting the drive unitHere, select the line supply
voltage of the drive inverter.
Here, select the unit
corresponding to the Order No. of
the drive unit.
Click on Continue to change
to the next window.
Here, where relevant, select the preassignment (default) of the drive
units:
- V2.x....terminals, pre-assignment
the same as Firmware V2.x
(standard)
- V1.3...terminals, pre-assignment
the same as Firmware V1.3
(for a firmware upgrade to V2.x
and older terminal assignment),
select the unit corresponding to the
Order No. on the unit.
4.
Selecting the options that you have orderedIn this dialog, you can select the options used so that the Wizard can make the
appropriate parameter assignments for you.
Select the options by
activating the checkbox.
Click on Continue to change
to the next window.
5.
Selecting the function modules and the control modeIn this dialog you have to choose the operating mode of your drive. The operating mode
decides on the possible control modes.
Function modules are additional
softwaremodules which allow to
realize easy technology functions
without a PLC. Before the function
modules are usable, they must be
activated in the configuration wizard.
Select the operating mode of your
drive. In the operating mode “V/f
control” no speed or torque control is
possible.
Depending on the operating mode
choose the control mode of your
drive.
Click on Continue to change
to the next window.
6.
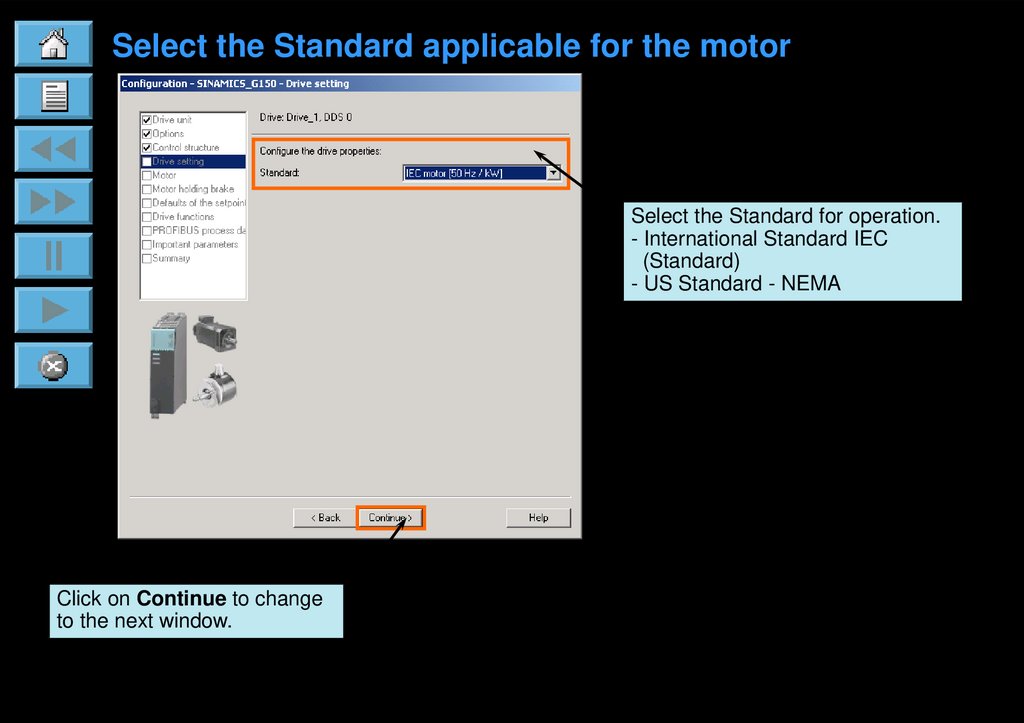
Select the Standard applicable for the motorSelect the Standard for operation.
- International Standard IEC
(Standard)
- US Standard - NEMA
Click on Continue to change
to the next window.
7.
Ways of selecting motorsYou can either select a SIEMENS motor from the list
- or you can directly enter the motor data.
Enter a name for the motor, e.g. the
equipment code.
Here you can either select a SIEMENS
motor from the list – or you can
manually enter the motor data (refer to
the next page).
If you have decided to enter a motor
from the list, then here, select the motor
type (e.g. 1PH7 or 1PH6). In the
checkbox below, you can specify
whether your motor should have an
internal brake.
Here, select your standard motor using
the Order No. (this is only active if
Select standard motor from list is
activated).
Click on Continue to change
to the next window.
8.
Entering motor data according to the rating plateThis dialog box is only displayed if
Enter motor data is activated in the previous dialog box.
Enter the motor data
according to the rating plate.
Activate the checkbox if you also
wish to enter equivalent circuit
diagram data (motor data sheet).
Generally this is not required for
standard applications.
Click on Continue to change
to the next window.
9.
Selecting the default settings for your command andsetpoint sources for the standard data set (CDS0)
In addition you can also change the default settings for a second data set (CDS1)
(CDS: ControlDataSet).
Here, select a source for your basic
drive controls – for example, the
power-on command.
Here, select your setpoint source,
e.g. analog input on a TM31.
Click on Continue to change
to the next window.
10.
Make the appropriate control settings and select aProfibus telegram
Here, select your particular drive
application. This selection influences the
pre-assignment (default setting) of the
closed-loop control parameters.
Here, you can define the type of motor
identification and controller optimization
routines. For the motor identification routine,
motor data are determined that are important
for the closed-loop control.
Click on Continue to change
to the next window.
11.
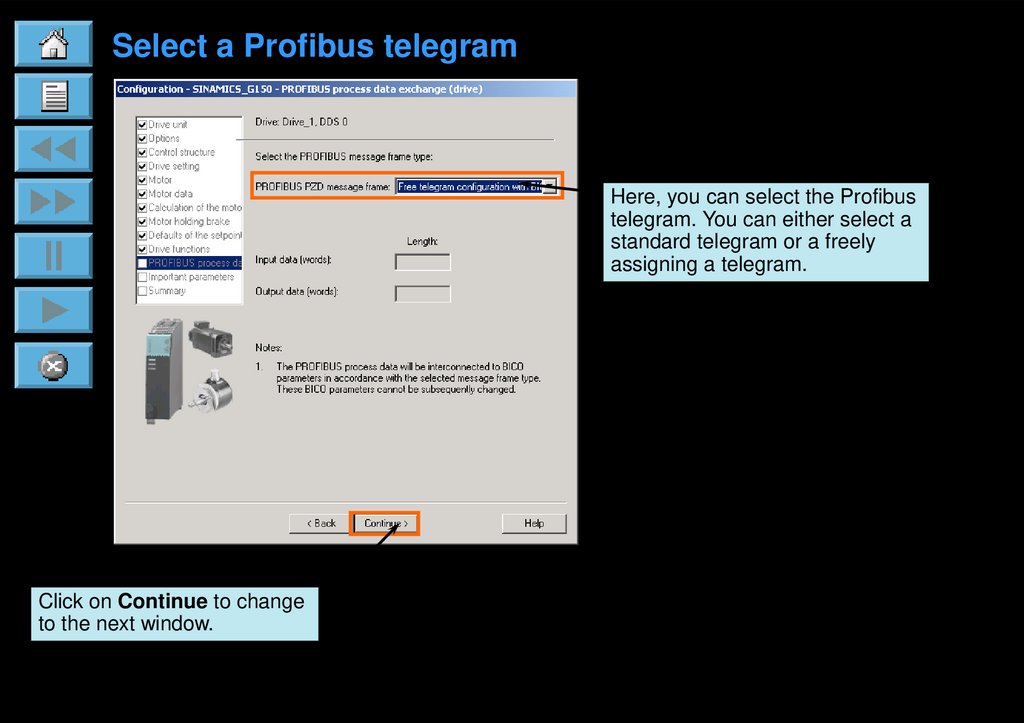
Select a Profibus telegramHere, you can select the Profibus
telegram. You can either select a
standard telegram or a freely
assigning a telegram.
Click on Continue to change
to the next window.
12.
Entering the most important drive parametersHere, enter the most
important drive parameters.
Click on Continue to change
to the next window.
13.
Summary of the settings madeIn this window you can
see a summary of the
settings you made.
You can copy this summary into a
buffer with Copy so that it can be
used in other applications, e.g. to
generate a report.
In order to exit the Wizard, click
on Finish. You can still change
the settings with Back.
14.
The drive unit has now been configuredYou can now:
Make additional settings
Download the project into the target system
Save the project and exit Starter
...
Configured project with a
SINAMICS G150 drive
unit and Drive_1.