


 software
 electronics
Similar presentations:

")


Handling the drive data sets
1.
Handling the drive data setsYou can connect to the drive units in two different ways:
Coupling to the individual drive unit via point-to-point
Coupling to drive units within a network topology
2.
Handling drive data setsThe following subjects are discussed:
Overview of the drive unit couplings
Copying data sets into drive units
Copying data sets into drive units in network architectures
Copying from drive units (with data) into a project
Copying from drive units (with data) between various projects
Copying drive data sets into a project
(XML export/import)
Copying from drive projects (XML export/import)
3.
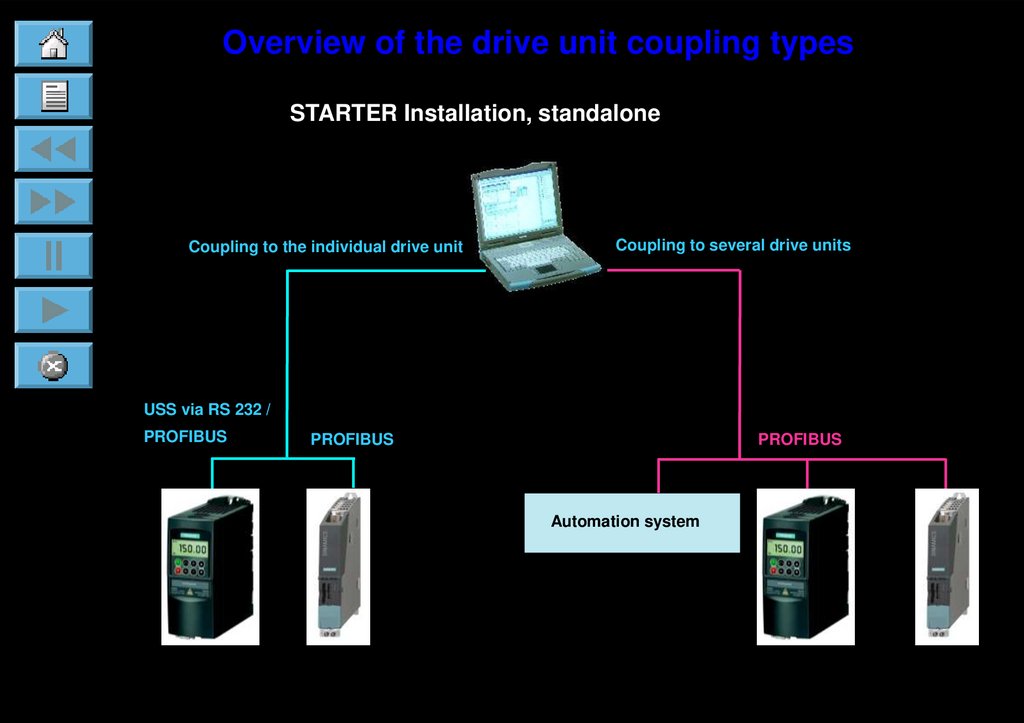
Overview of the drive unit coupling typesSTARTER Installation, standalone
Coupling to the individual drive unit
Coupling to several drive units
USS via RS 232 /
PROFIBUS
PROFIBUS
PROFIBUS
Automation system
4.
Overview of the drive unit coupling typesSTARTER Installation Drive ES Basic (TIA)
Access to drive units via various networks
(Drive ES)
Automation system
PROFIBUS
5.
Copying data sets into drive unitsCarry-out the following steps:
1.
2.
3.
4.
The data set required is in the STARTER project.
Copy the drive unit into STARTER.
Set the bus address.
Establish a connection and transfer into the drive unit
(download).
6.
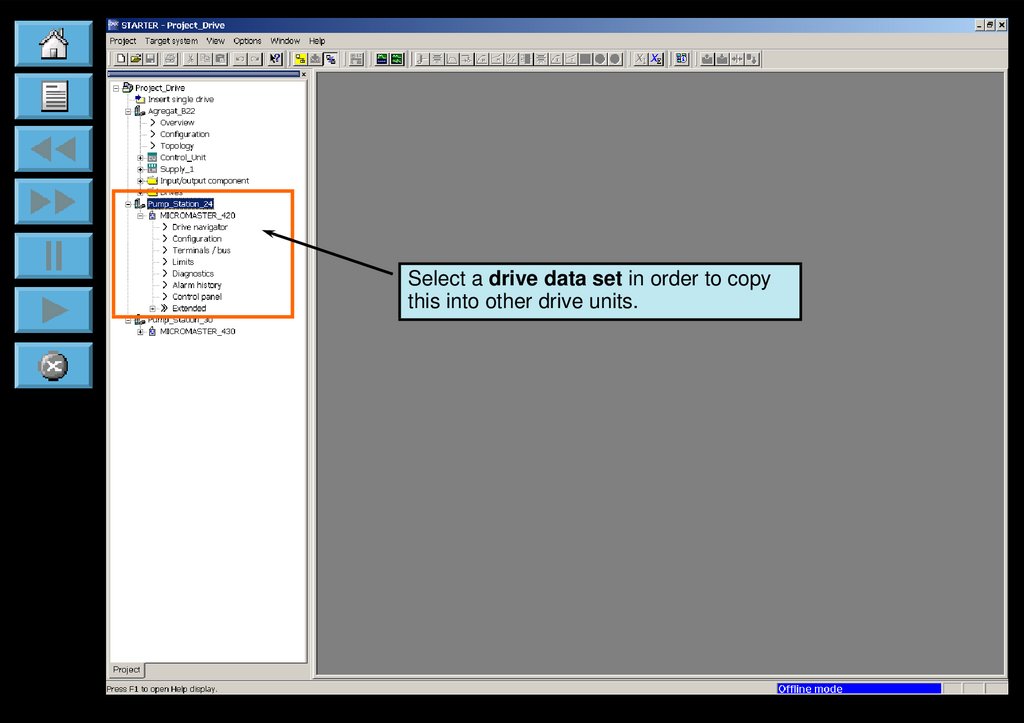
Select a drive data set in order to copythis into other drive units.
7.
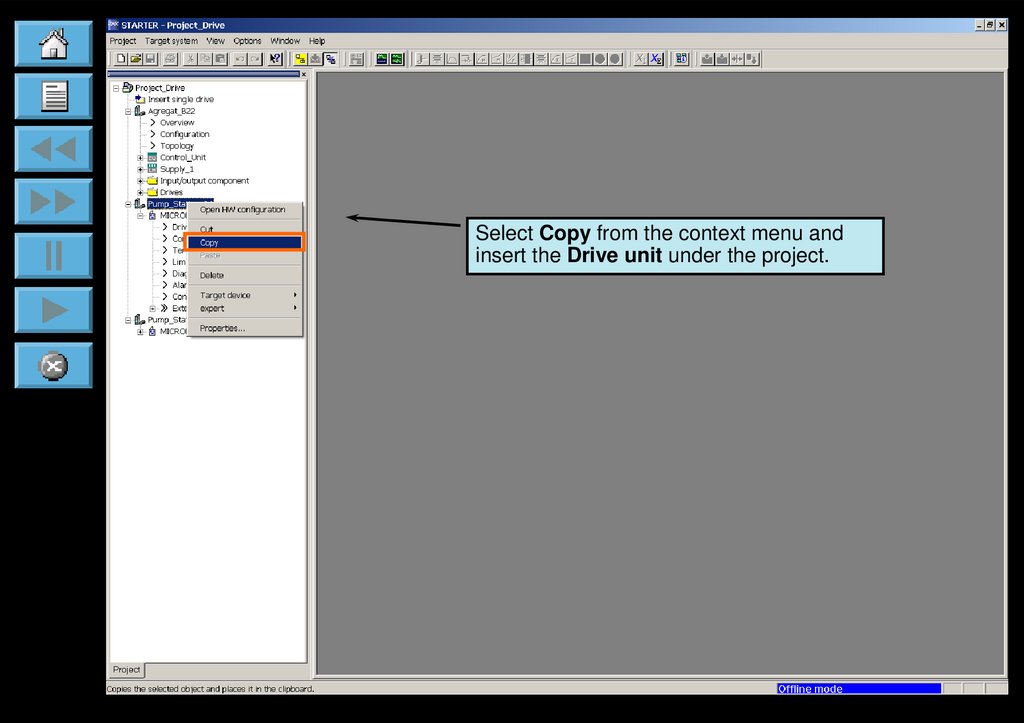
Select Copy from the context menu andinsert the Drive unit under the project.
8.
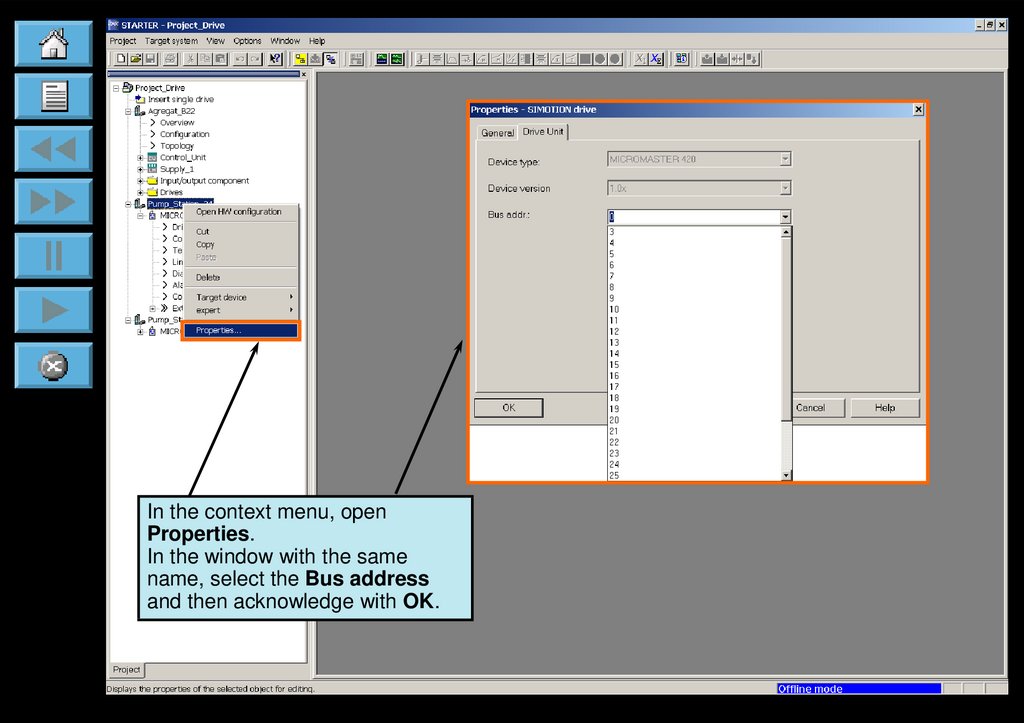
In the context menu, openProperties.
In the window with the same
name, select the Bus address
and then acknowledge with OK.
9.
In the online mode, change via Project> Connect to target system or using
this button.
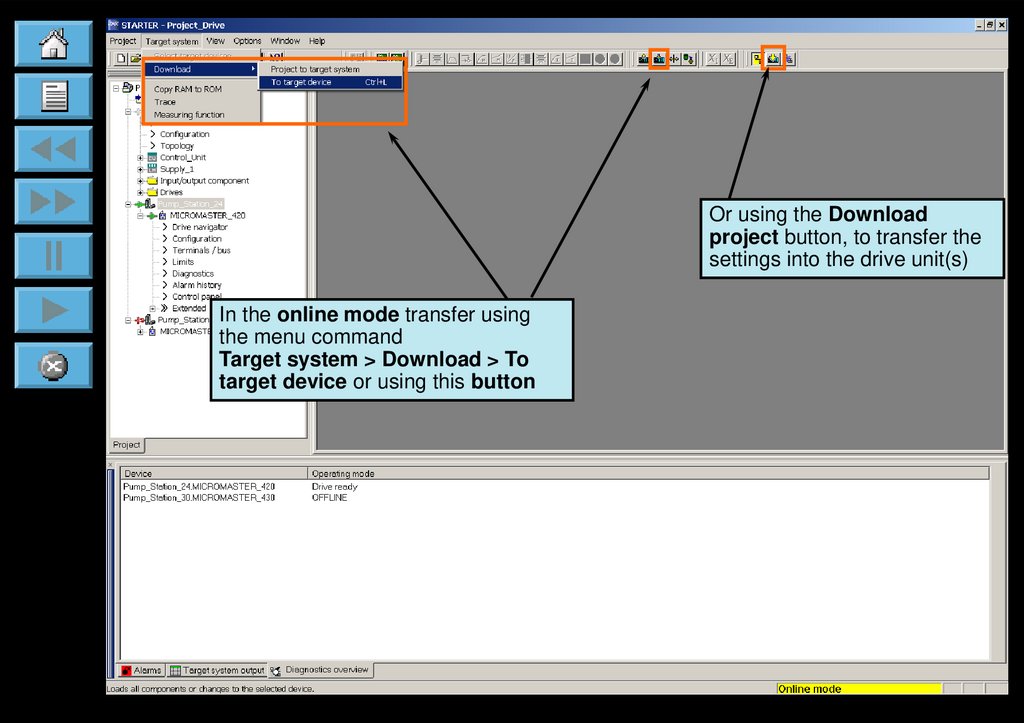
10.
Or using the Downloadproject button, to transfer the
settings into the drive unit(s)
In the online mode transfer using
the menu command
Target system > Download > To
target device or using this button
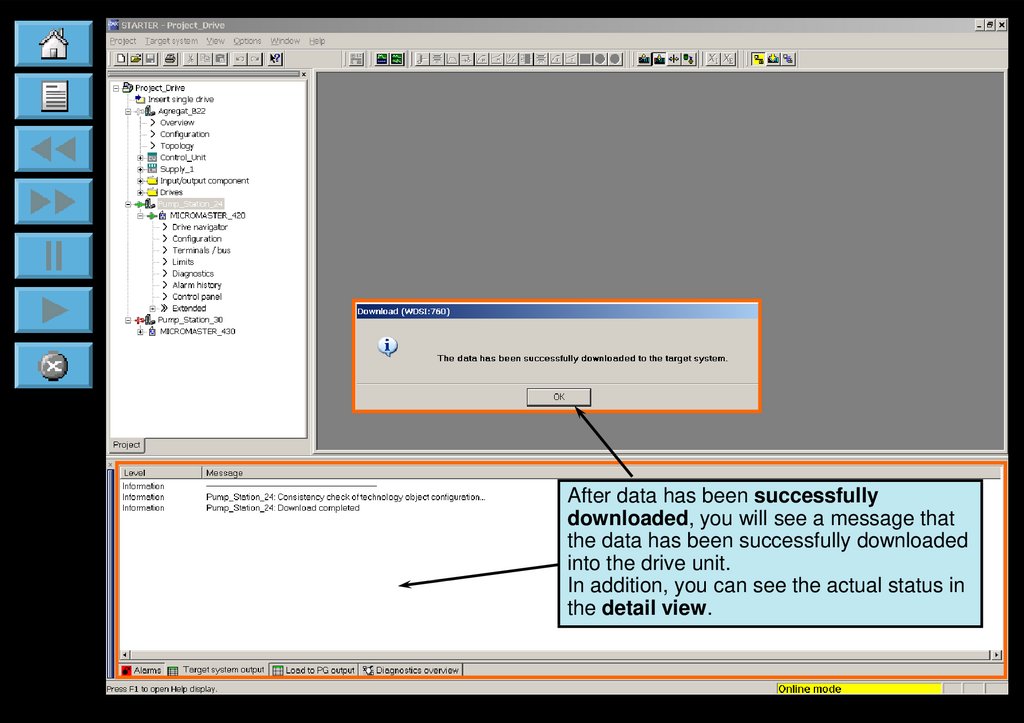
11.
After data has been successfullydownloaded, you will see a message that
the data has been successfully downloaded
into the drive unit.
In addition, you can see the actual status in
the detail view.
12.
Copying from drive units (with data) into the projectIn the Project Navigator, you can very simply copy drive settings.
To do this, select an existing drive unit in the Project Navigator, copy
this and insert the drive unit under the project.
13.
Highlight the selected drive unit.Select using the Copy context menu or
press Ctrl+C.
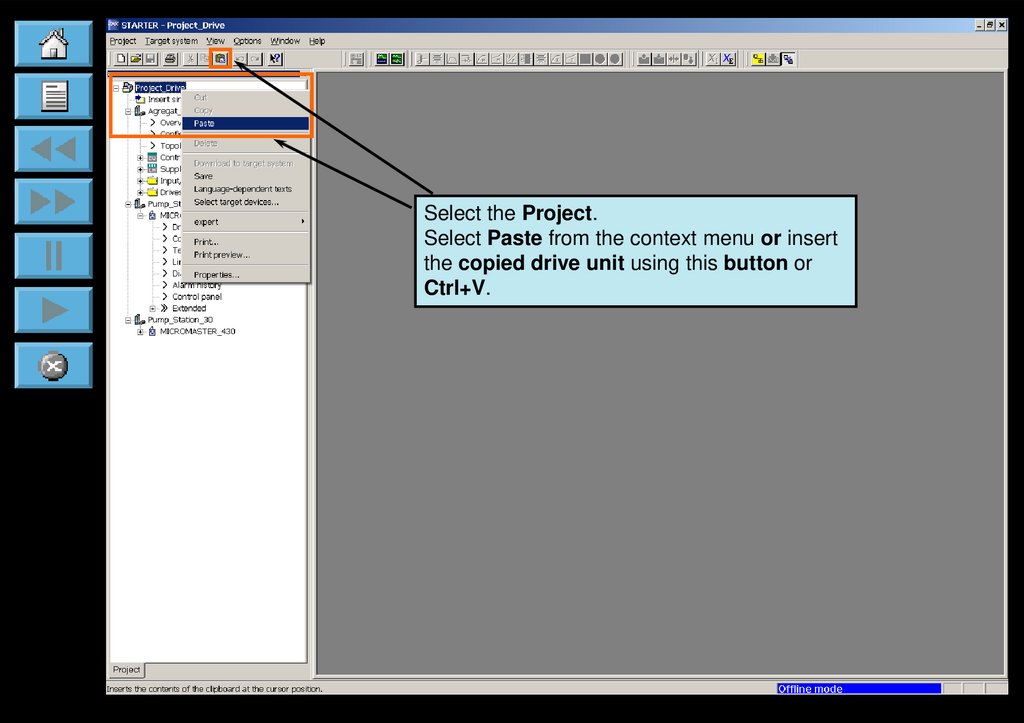
14.
Select the Project.Select Paste from the context menu or insert
the copied drive unit using this button or
Ctrl+V.
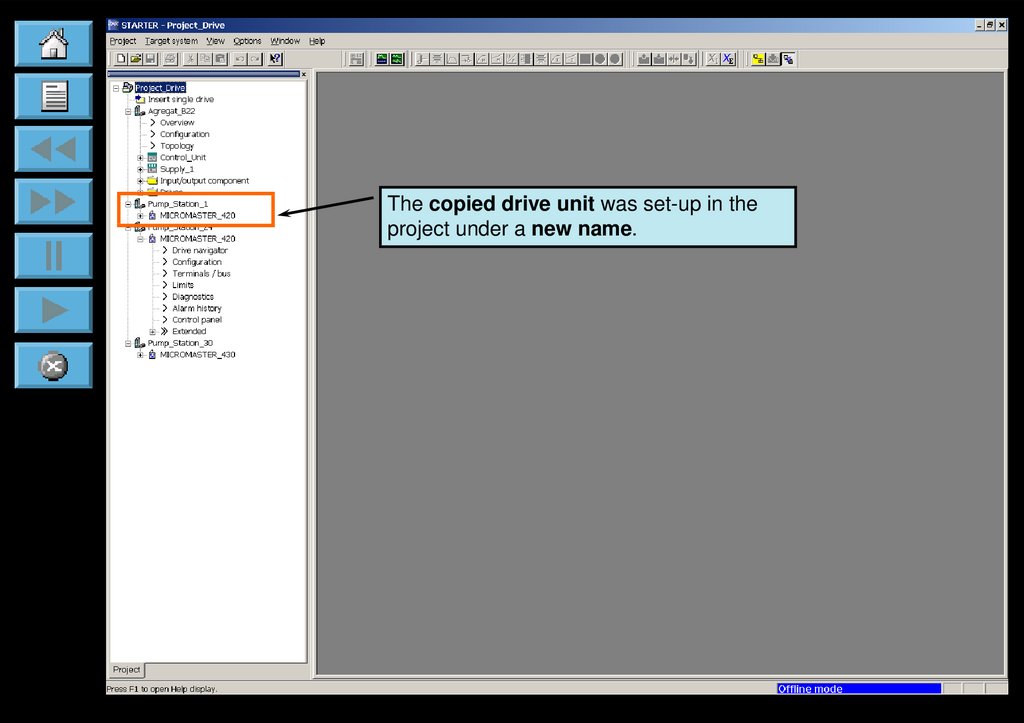
15.
The copied drive unit was set-up in theproject under a new name.
16.
NoteThe copied drive unit has the same address!
You can change the address under Properties.
17.
Copying from drive units (with data) between variousprojects
In order to copy between two projects, open STARTER a second
time.
The example shows you how you can copy a drive unit from
Project_Drive to Project_2.
18.
Start the STARTER program a second timein order to, e.g. copy a drive unit from
Project_Drive to Project_2.
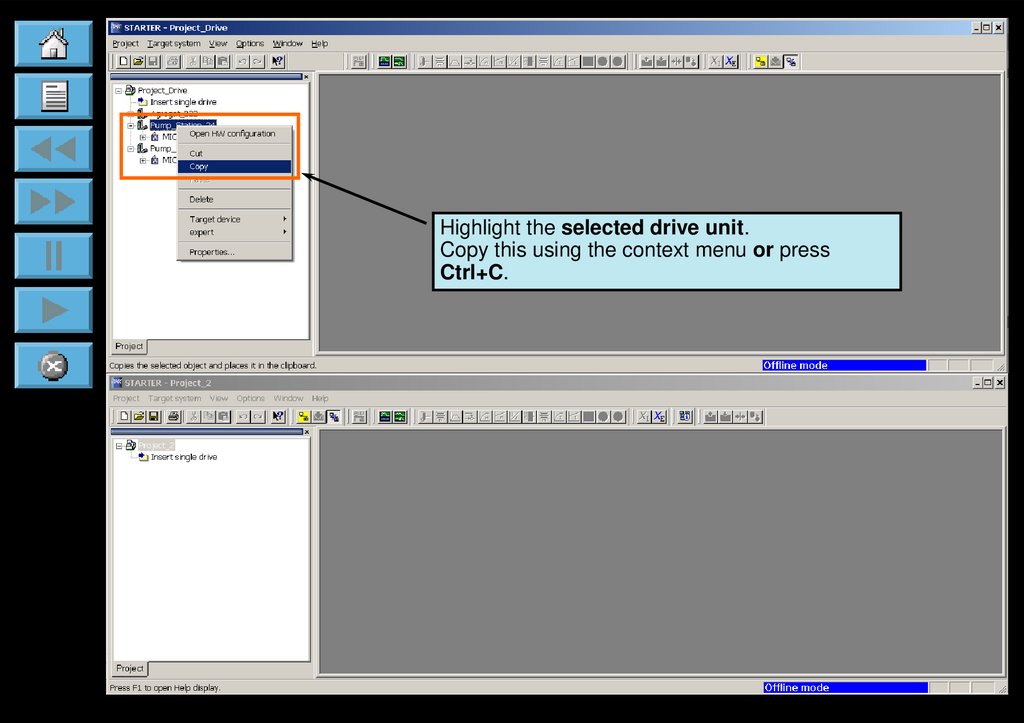
19.
Highlight the selected drive unit.Copy this using the context menu or press
Ctrl+C.
20.
Select Project_2.Insert the drive unit using the context
menu, this button or Ctrl+V.
21.
Pump_station_24 is nowlocated in both projects.
Note
The bus address is identical in
both drive units!
22.
Copying drive data sets into the project(XML export/import)
The settings of the Pump_Station_24 are exported
and saved in the XML format.
23.
In order to export the settings:Highlight the drive unit and select using the context
menu expert > Save project and export object.
24.
Define where you wish tosave the data.
Acknowledge with OK.
25.
The status of the export is indicatedin the Detail view window.
26.
To accept data of the drive unit:Select the drive object.
Select expert > Import object.
27.
The Import device window opens.With Search, you can define the
source path and the source name of
the drive unit to be imported.
In the window that opens, highlight
and select the appropriate XML file
with Open.
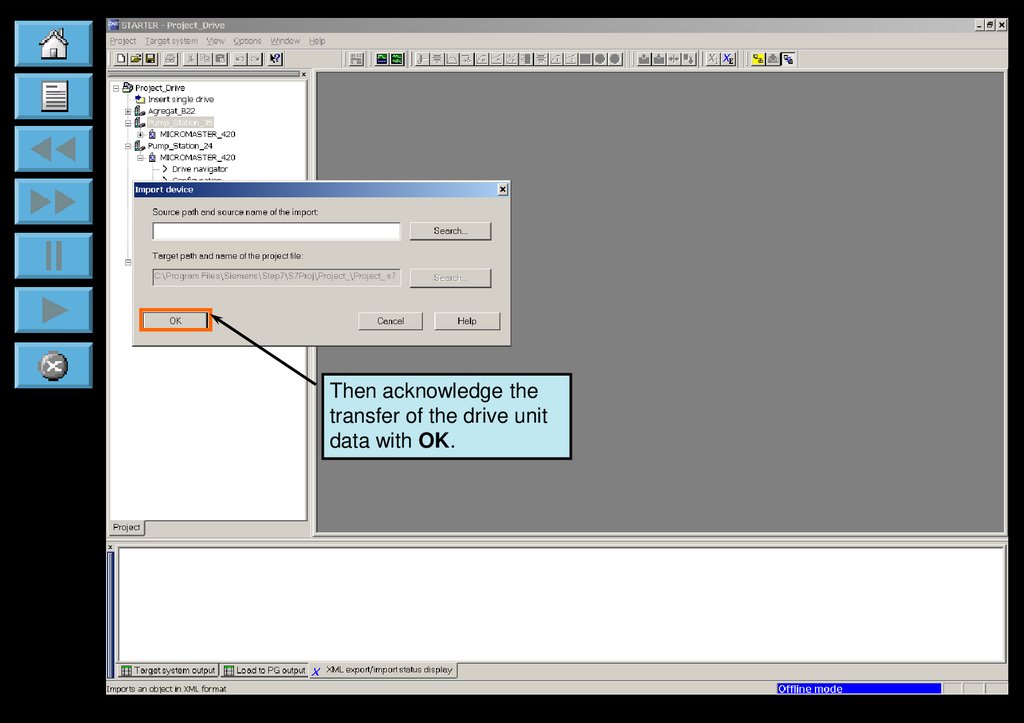
28.
Then acknowledge thetransfer of the drive unit
data with OK.
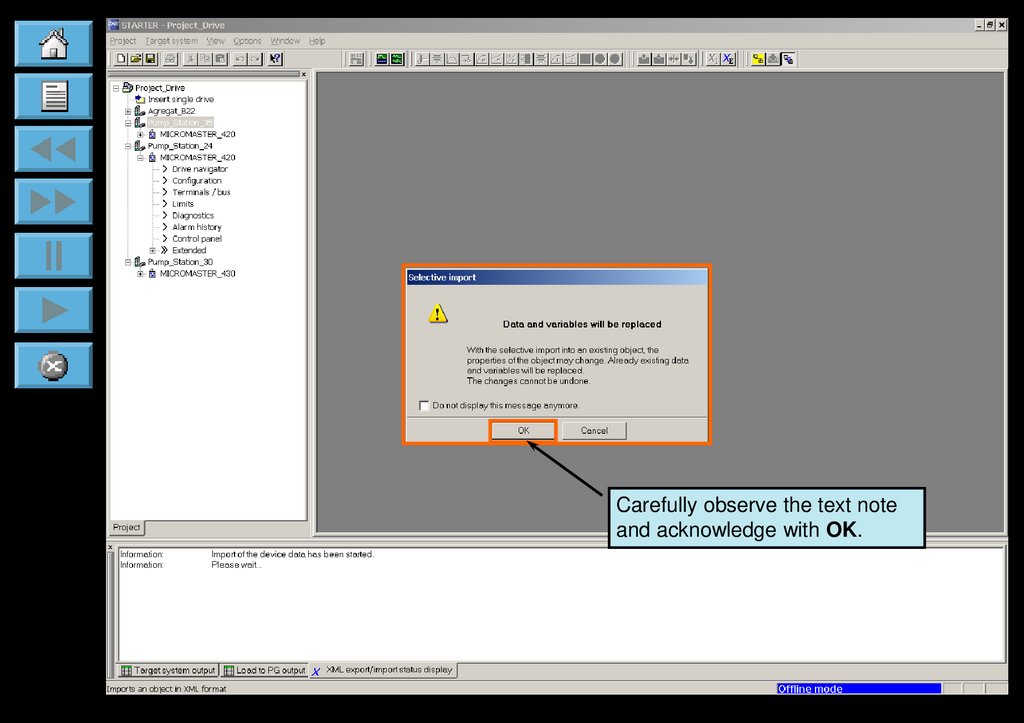
29.
Carefully observe the text noteand acknowledge with OK.
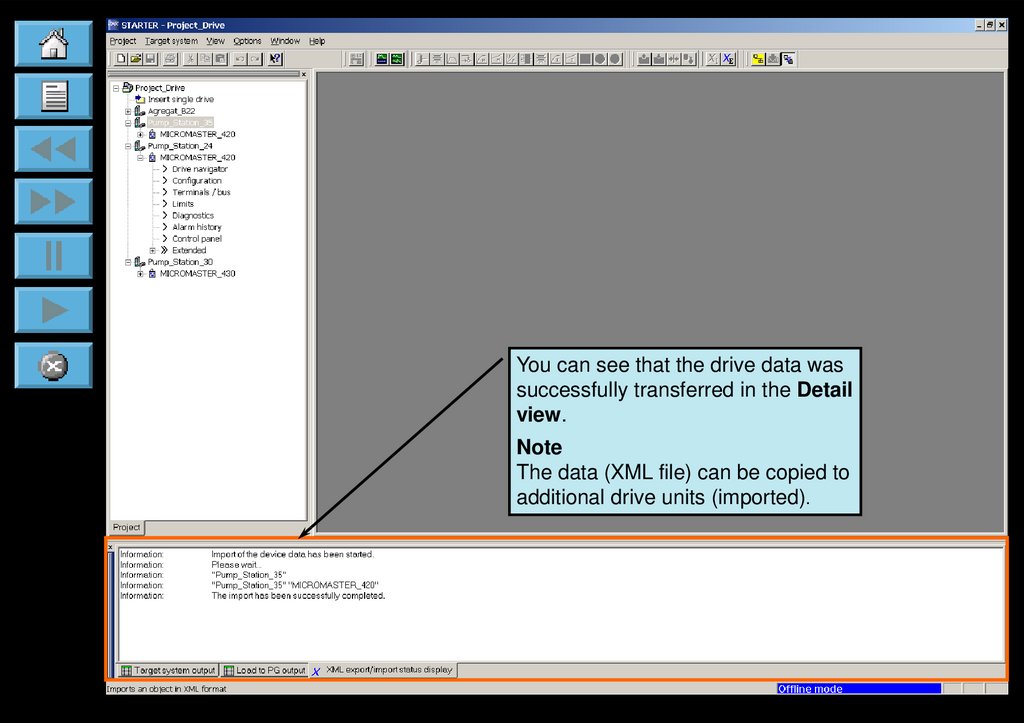
30.
You can see that the drive data wassuccessfully transferred in the Detail
view.
Note
The data (XML file) can be copied to
additional drive units (imported).
31.
Copying from drive projects (XML export/import)32.
Select the project export function usingProject > Save and export or directly
using this button.
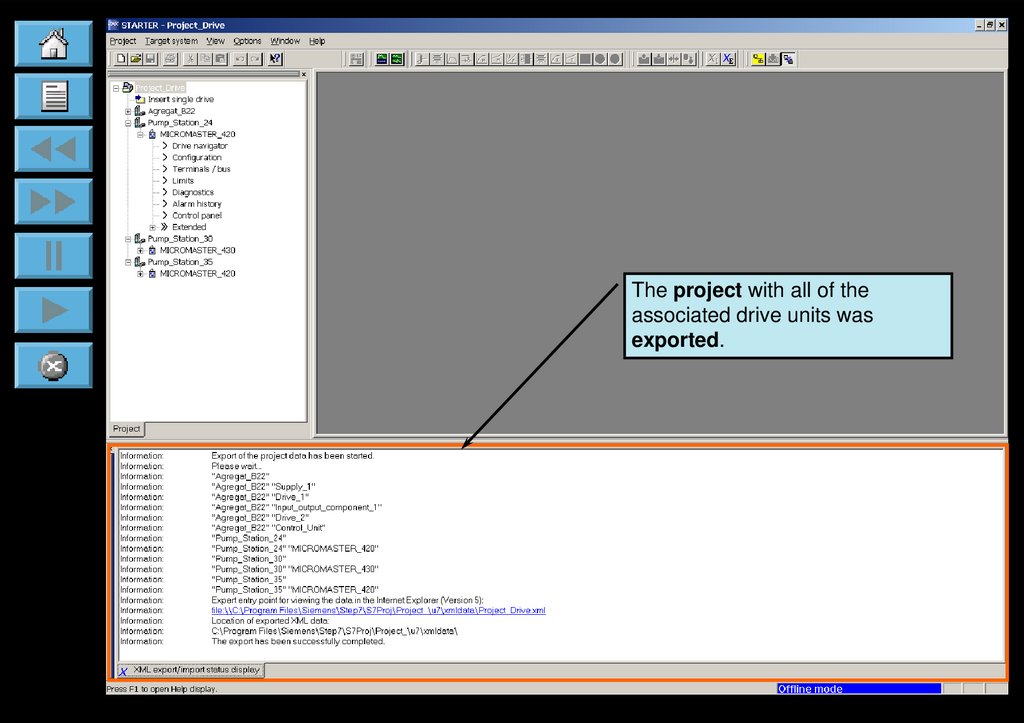
33.
The project with all of theassociated drive units was
exported.
34.
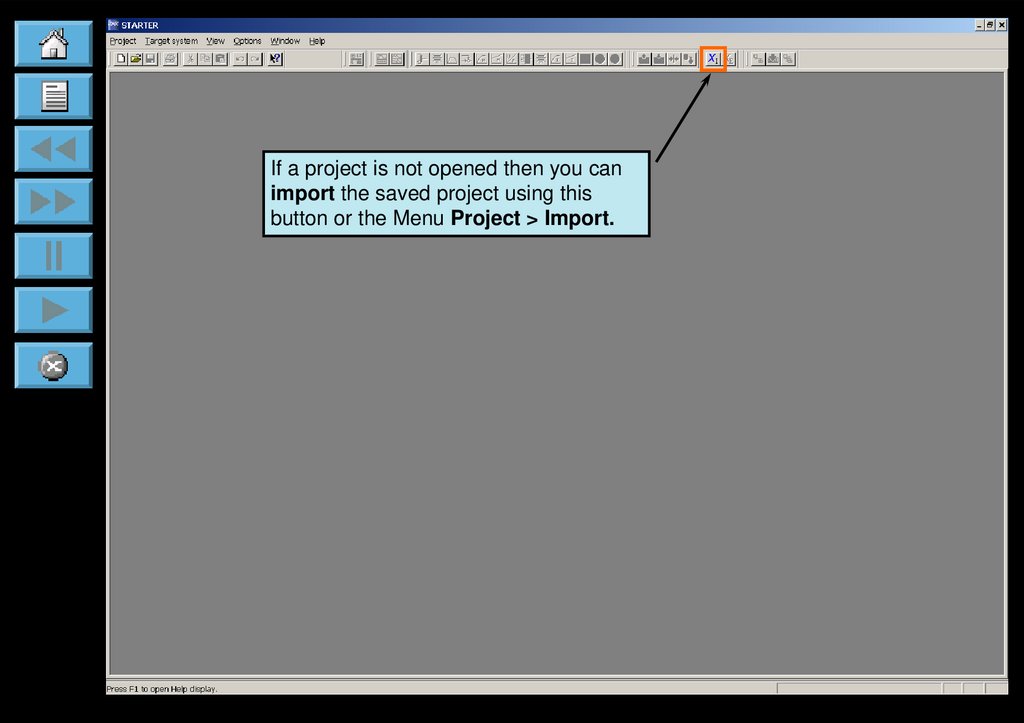
If a project is not opened then you canimport the saved project using this
button or the Menu Project > Import.
35.
Then select the exportedproject and acknowledge
with Open.
The Import project window
opens.
Click on Search in order to
get to the required project.
36.
Acknowledge the source path ofthe imported project using OK.
Now define the new name
and where the project is to
be saved.
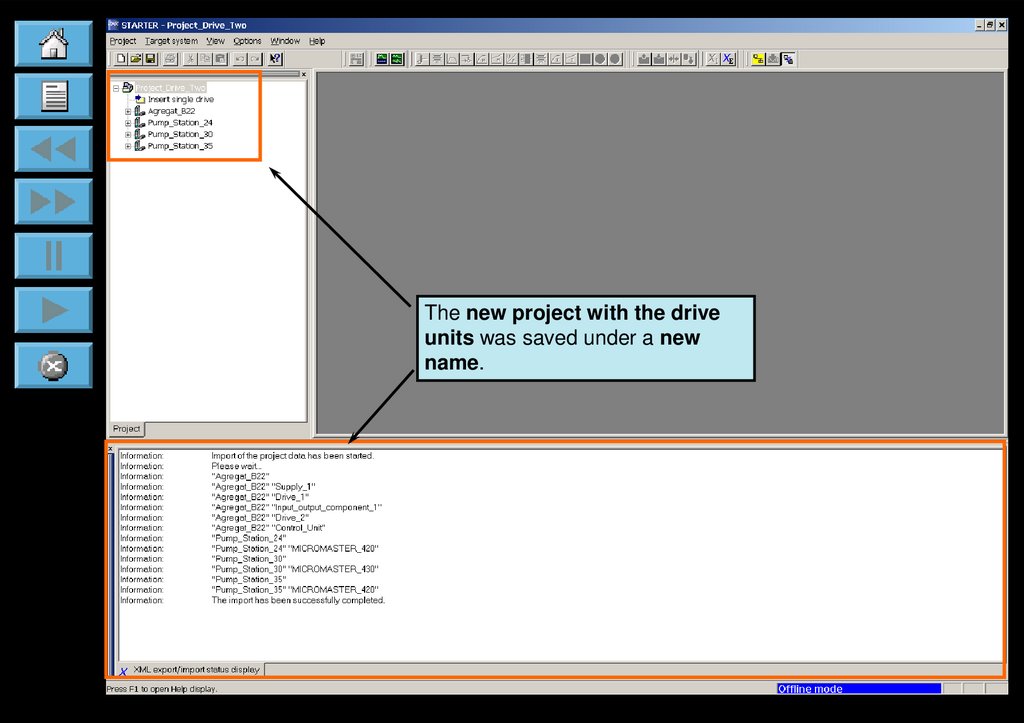
37.
The new project with the driveunits was saved under a new
name.