

 software
Similar presentations:


Publishing from revit
1.
Revit – Publishing from Revit to ACCDaniel Byron: Digital Construction Manager
:
Project: C4101 – UCD Science Centre Phase 3
2.
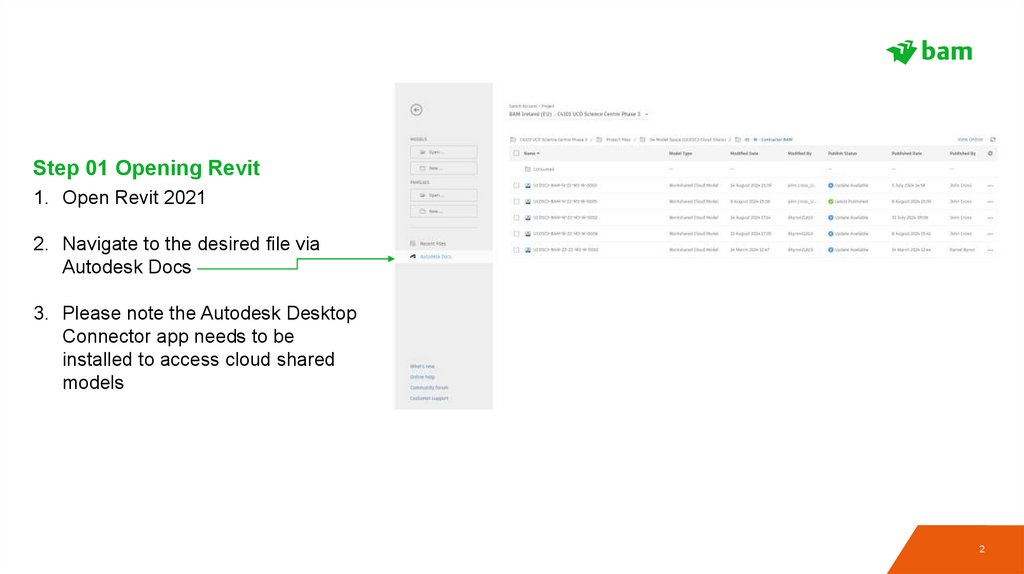
Step 01 Opening Revit1. Open Revit 2021
2. Navigate to the desired file via
Autodesk Docs
3. Please note the Autodesk Desktop
Connector app needs to be
installed to access cloud shared
models
2
3.
Step 02 Open Desired View1. Once the desired Revit file is open,
navigate to the desired 3D view.
2. Rename the view
3
4.
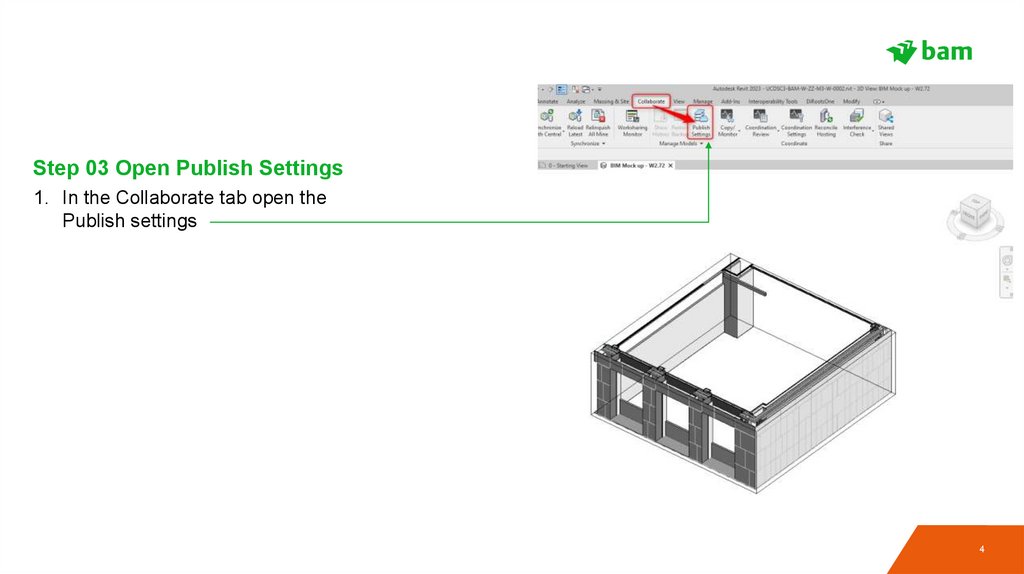
Step 03 Open Publish Settings1. In the Collaborate tab open the
Publish settings
4
5.
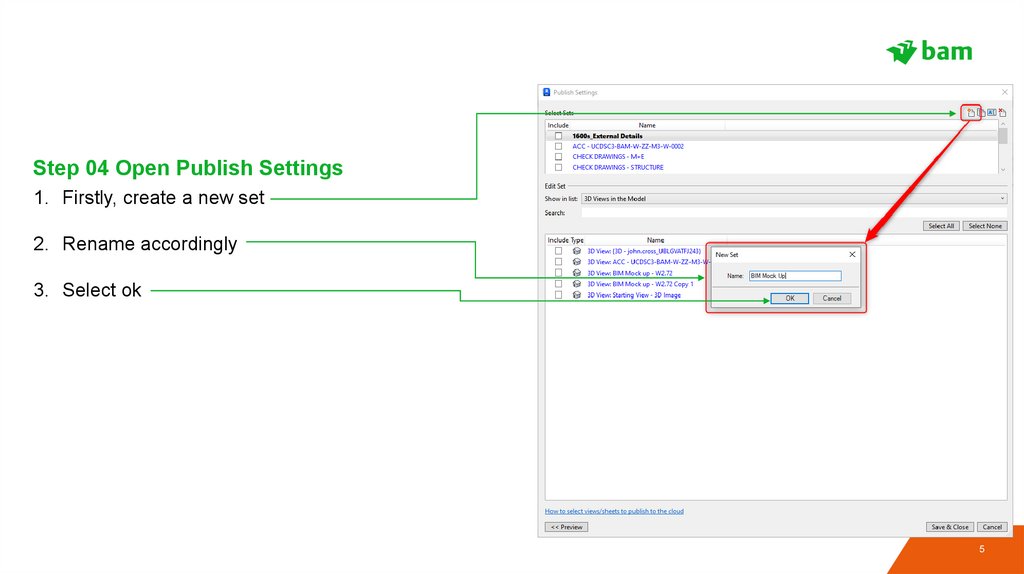
Step 04 Open Publish Settings1. Firstly, create a new set
2. Rename accordingly
3. Select ok
5
6.
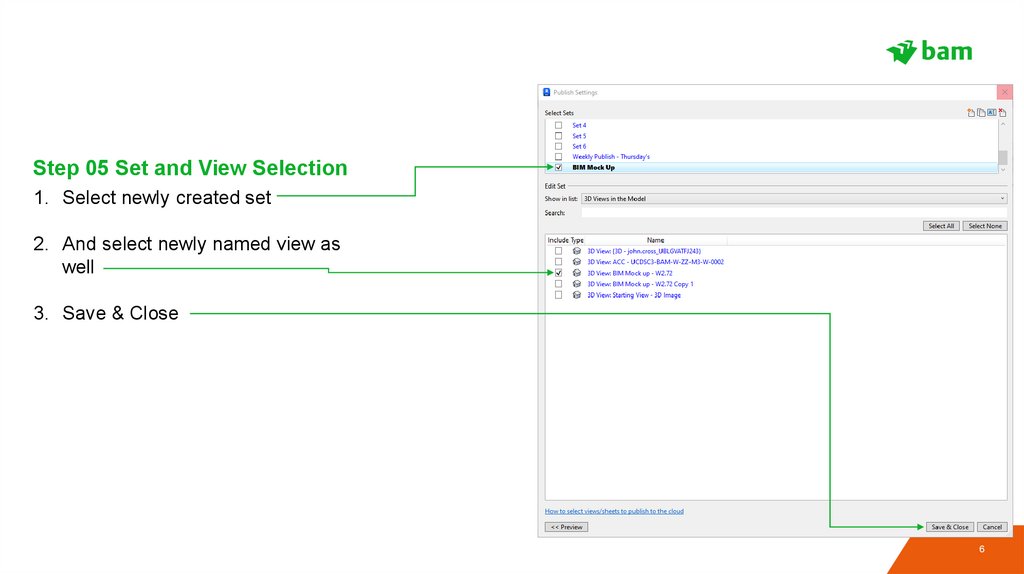
Step 05 Set and View Selection1. Select newly created set
2. And select newly named view as
well
3. Save & Close
6
7.
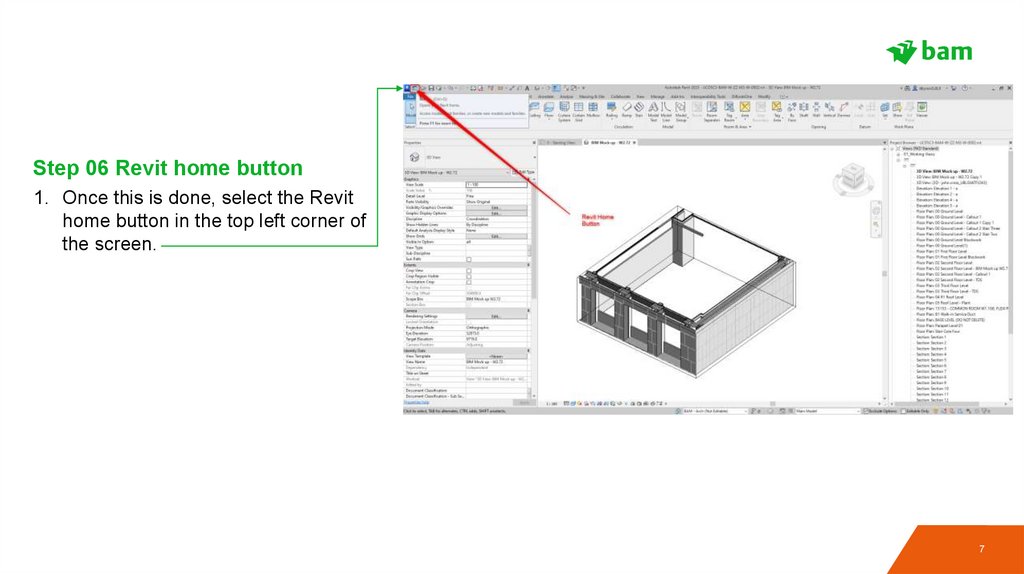
Step 06 Revit home button1. Once this is done, select the Revit
home button in the top left corner of
the screen.
7
8.
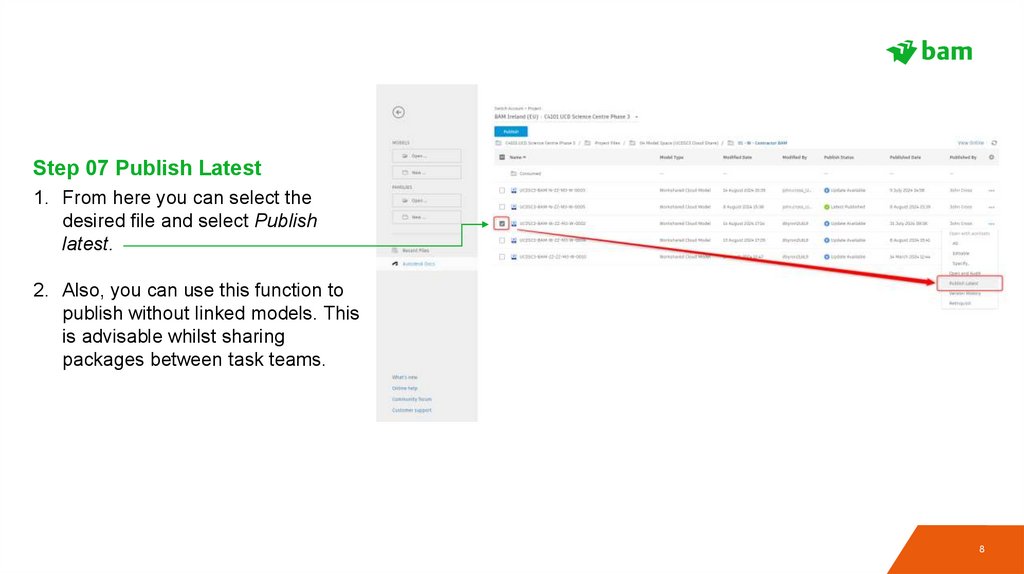
Step 07 Publish Latest1. From here you can select the
desired file and select Publish
latest.
2. Also, you can use this function to
publish without linked models. This
is advisable whilst sharing
packages between task teams.
8
9.
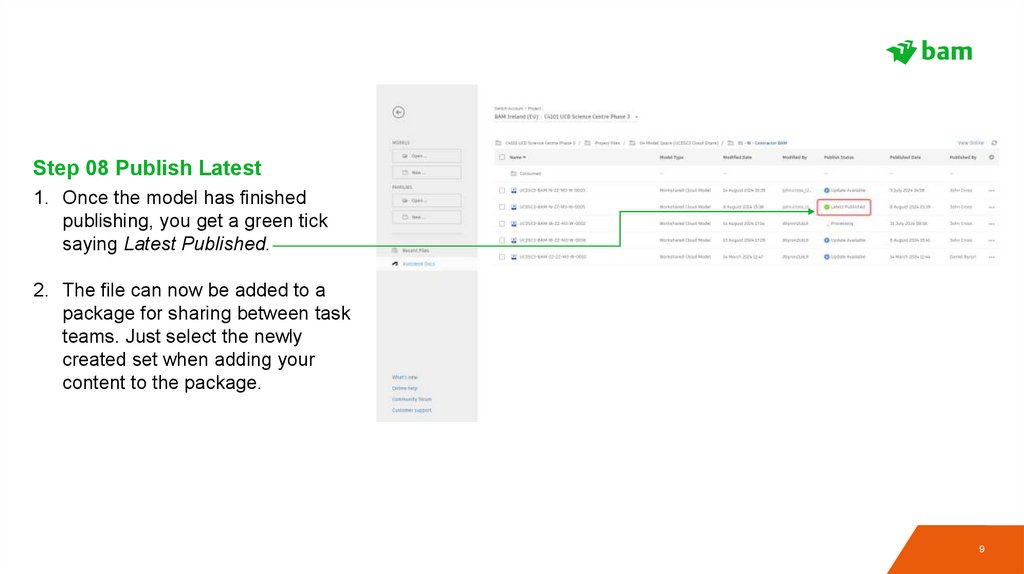
Step 08 Publish Latest1. Once the model has finished
publishing, you get a green tick
saying Latest Published.
2. The file can now be added to a
package for sharing between task
teams. Just select the newly
created set when adding your
content to the package.
9
10.
Revit – Publishing from Revit to ACCRevit Tutorials:
• Further tutorials can be found online via the link below:
• Publishing from Revit to ACC
10
11.
Thank You11