Similar presentations:
Back cover + front coverr - DFM
1.
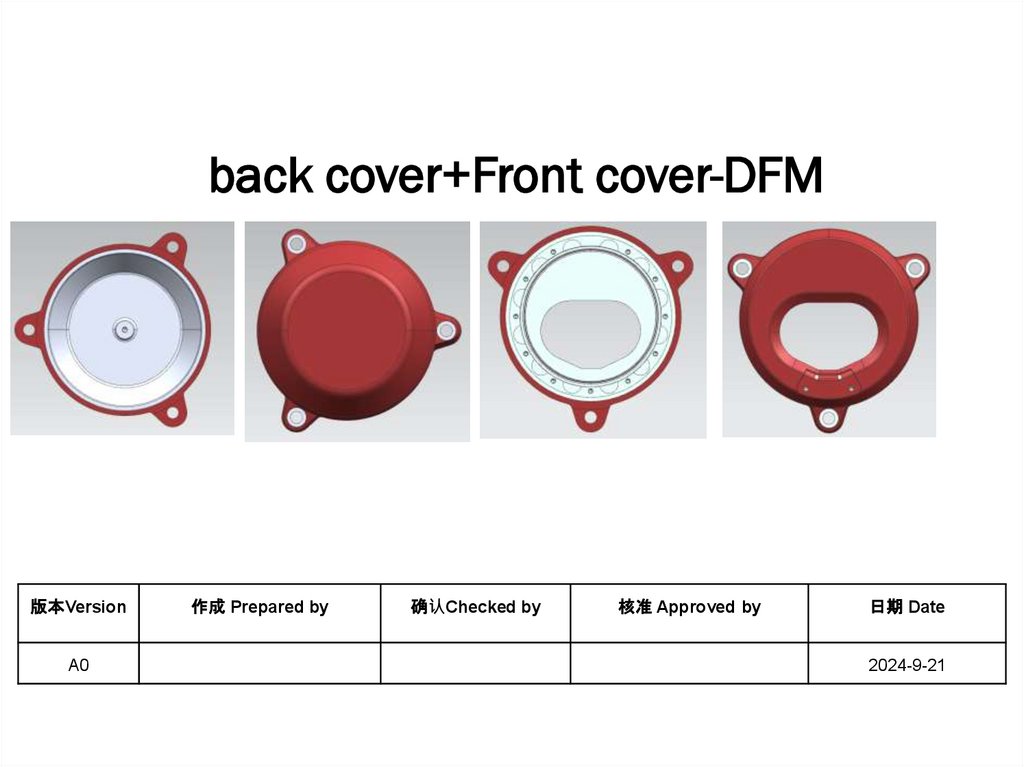
back cover+Front cover-DFM版本Version
A0
作成 Prepared by
确认Checked by
核准 Approved by
日期 Date
2024-9-21
2.
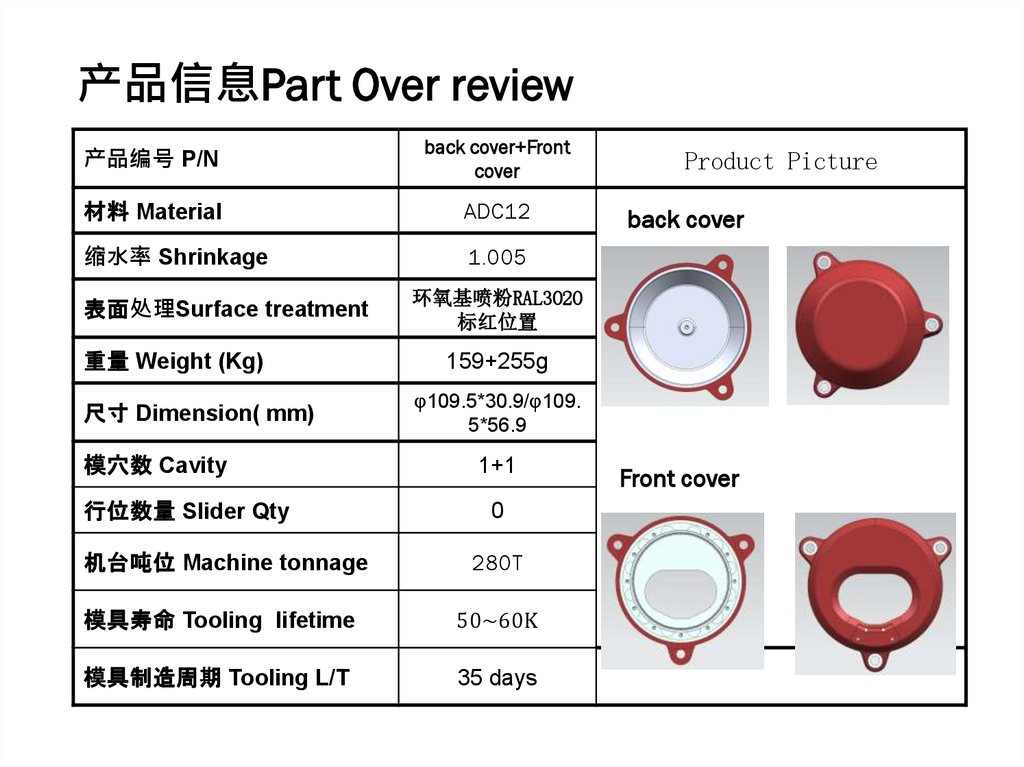
产品信息Part Over review产品编号 P/N
back cover+Front
cover
材料 Material
ADC12
缩水率 Shrinkage
1.005
表面处理Surface treatment
重量 Weight (Kg)
尺寸 Dimension( mm)
Product Picture
back cover
环氧基喷粉RAL3020
标红位置
159+255g
φ109.5*30.9/φ109.
5*56.9
模穴数 Cavity
1+1
行位数量 Slider Qty
0
机台吨位 Machine tonnage
280T
模具寿命 Tooling lifetime
50~60K
模具制造周期 Tooling L/T
35 days
Front cover
3.
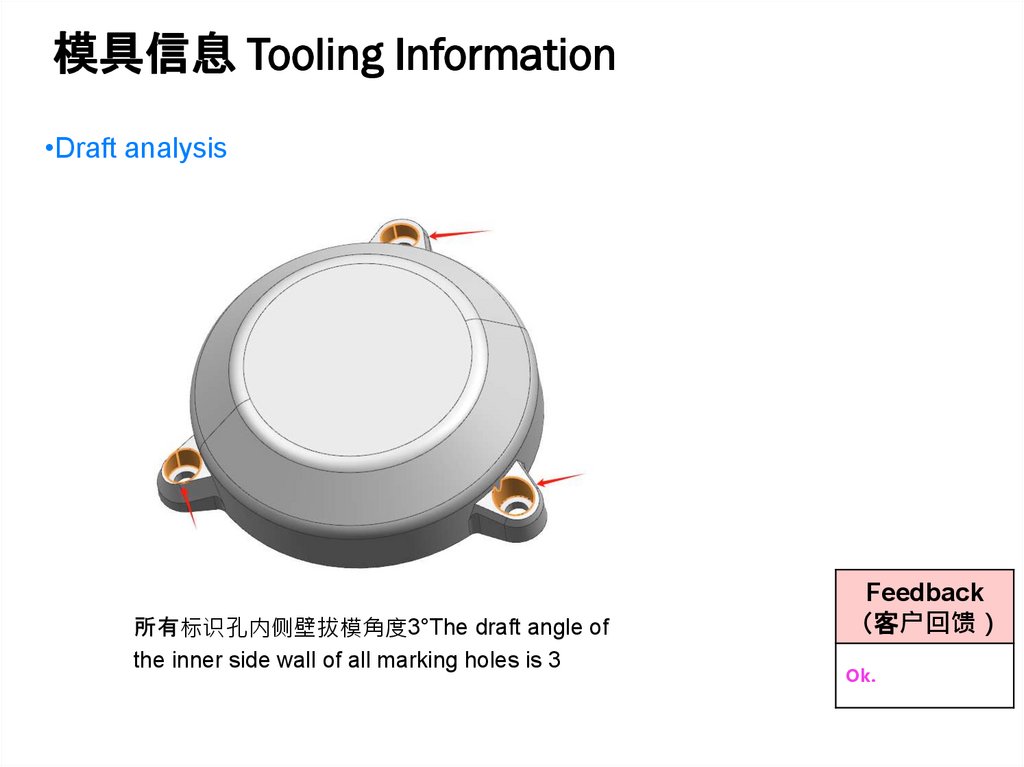
模具信息 Tooling Information•Draft analysis
所有标识孔内侧壁拔模角度3°The draft angle of
the inner side wall of all marking holes is 3
Feedback
客户回馈
Ok.
4.
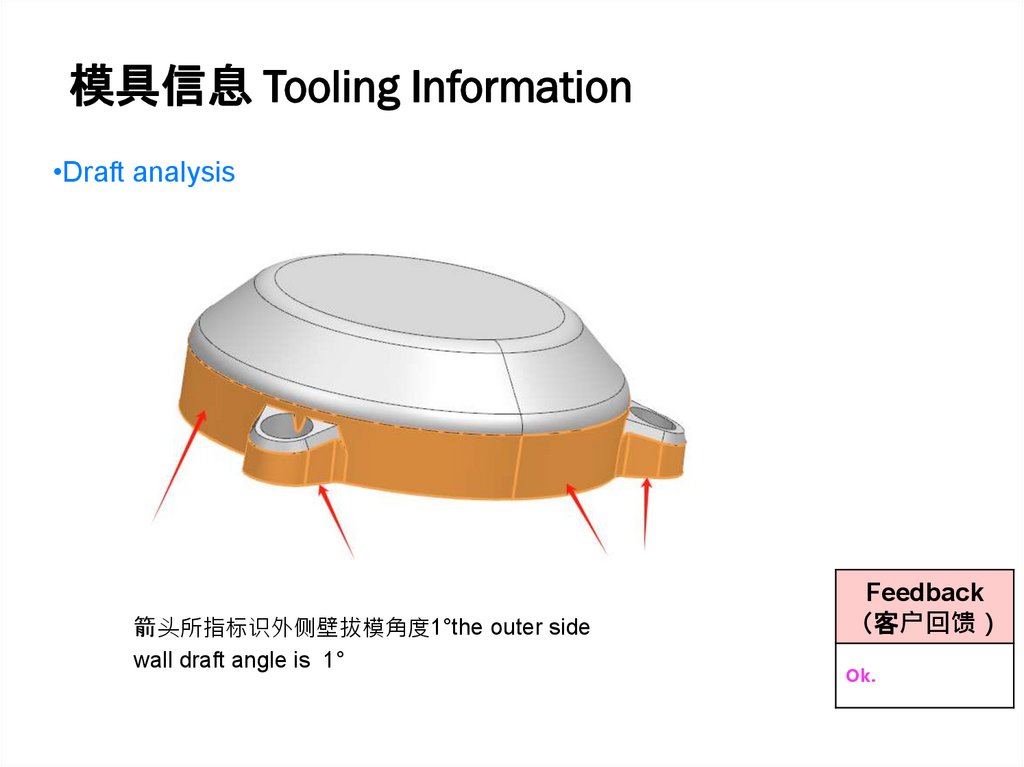
模具信息 Tooling Information•Draft analysis
箭头所指标识外侧壁拔模角度1°the outer side
wall draft angle is 1°
Feedback
客户回馈
Ok.
5.
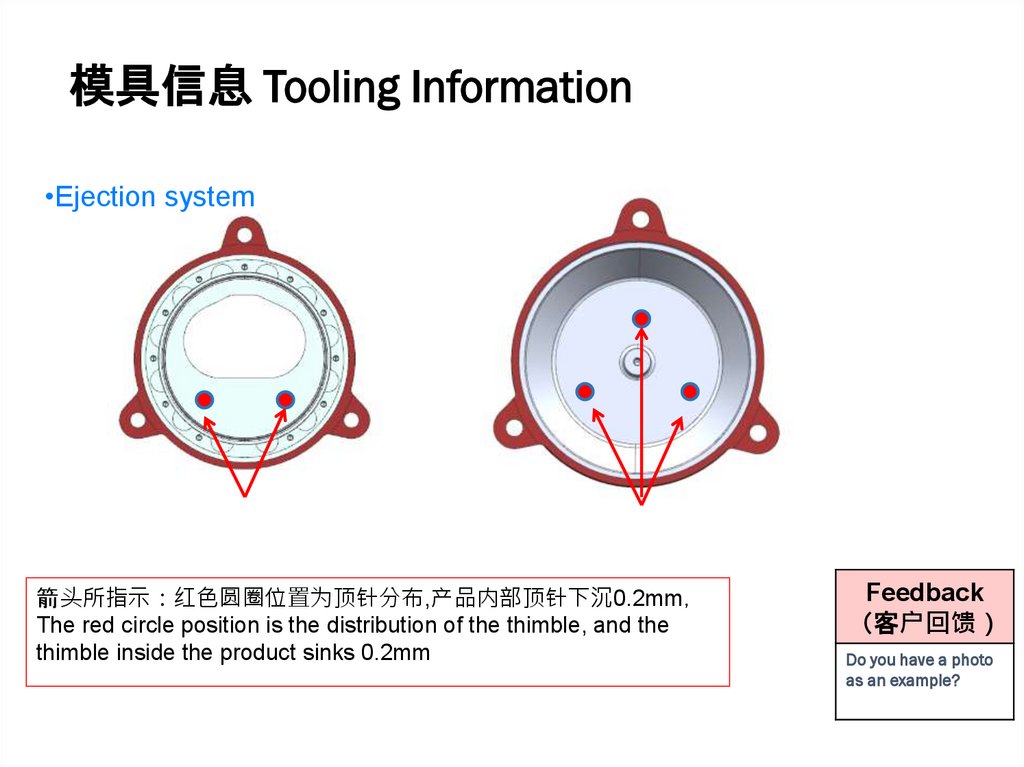
模具信息 Tooling Information•Ejection system
箭头所指示 红色圆圈位置为顶针分布,产品内部顶针下沉0.2mm
The red circle position is the distribution of the thimble, and the
thimble inside the product sinks 0.2mm
Feedback
客户回馈
Do you have a photo
as an example?
6.
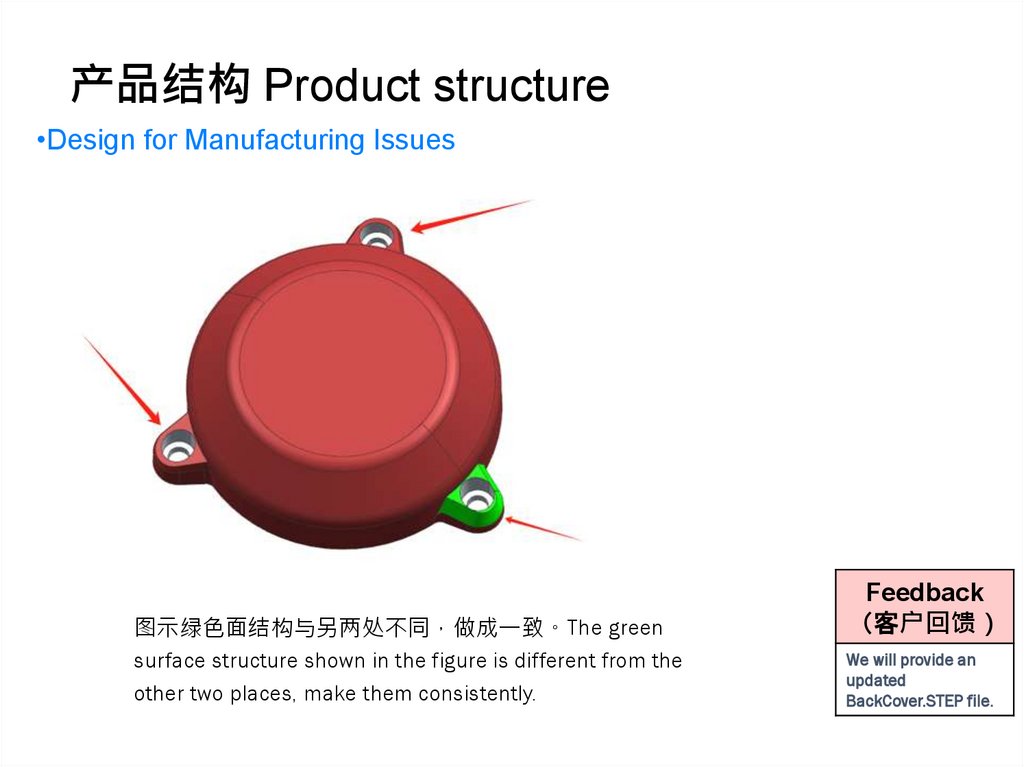
产品结构 Product structure•Design for Manufacturing Issues
图示绿色面结构与另两处不同 做成一致。The green
surface structure shown in the figure is different from the
other two places, make them consistently.
Feedback
客户回馈
We will provide an
updated
BackCover.STEP file.
7.
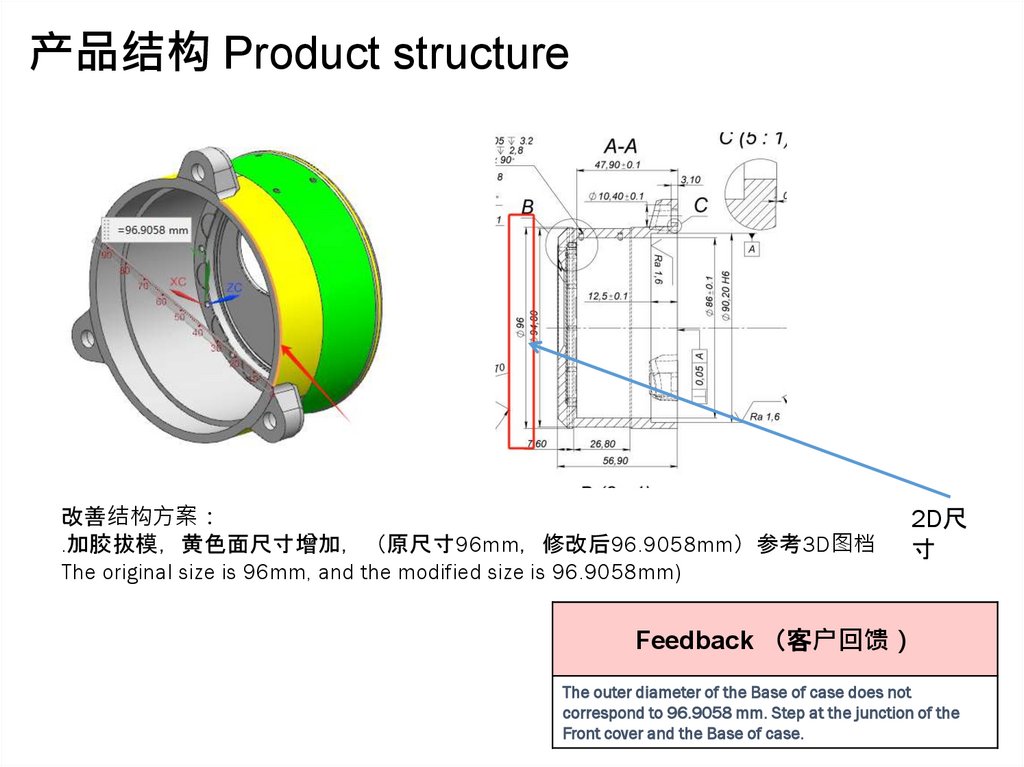
产品结构 Product structure改善结构方案
.加胶拔模 黄色面尺寸增加 原尺寸96mm 修改后96.9058mm 参考3D图档
The original size is 96mm, and the modified size is 96.9058mm)
2D尺
寸
Feedback 客户回馈
The outer diameter of the Base of case does not
correspond to 96.9058 mm. Step at the junction of the
Front cover and the Base of case.
8.
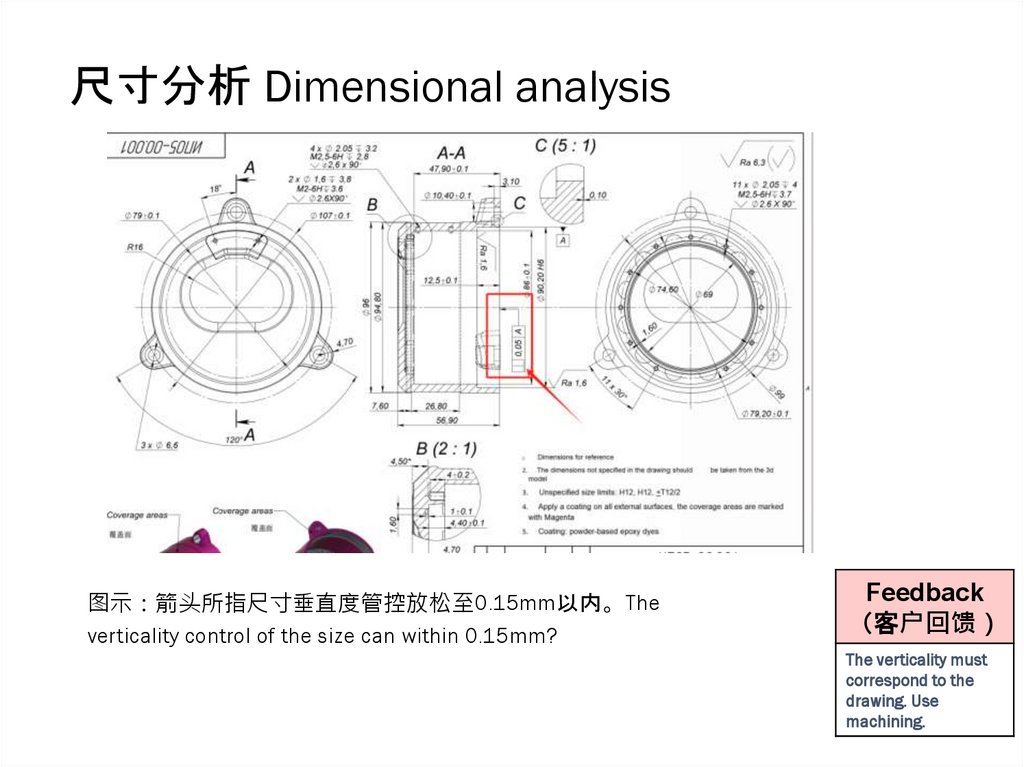
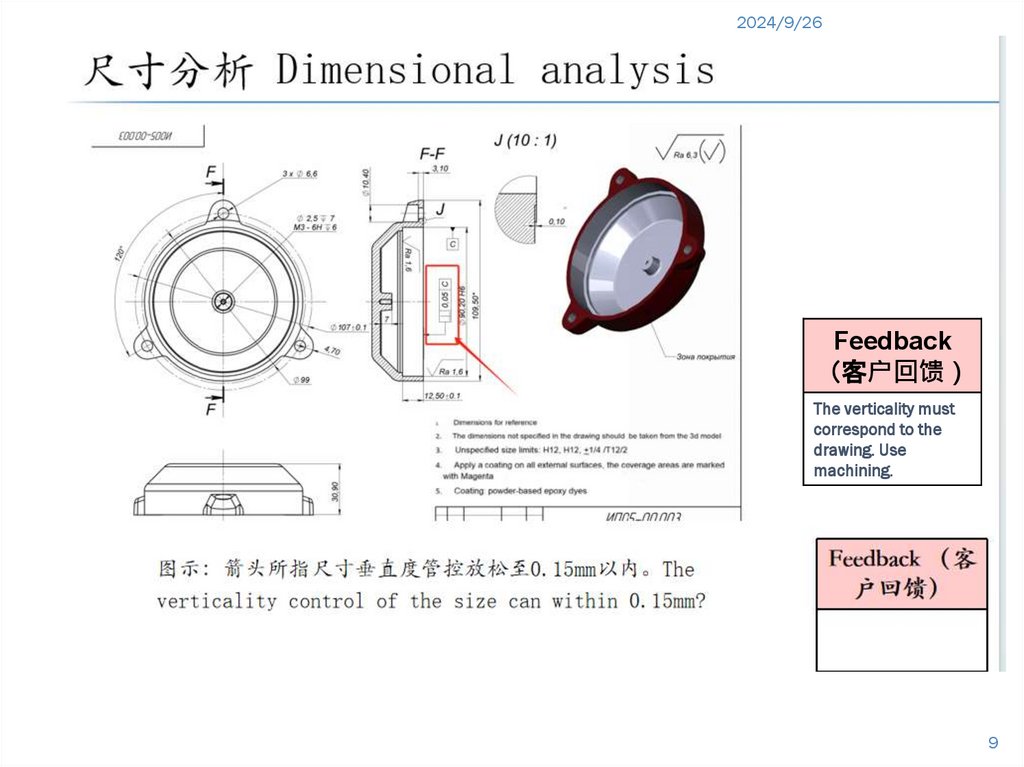
尺寸分析 Dimensional analysis图示 箭头所指尺寸垂直度管控放松至0.15mm以内。The
verticality control of the size can within 0.15mm?
Feedback
客户回馈
The verticality must
correspond to the
drawing. Use
machining.
9.
2024/9/26Feedback
客户回馈
The verticality must
correspond to the
drawing. Use
machining.
9
10.
2024/9/26Feedback
客户回馈
The tolerance must
correspond to the
drawing. Use
machining.
10
11.
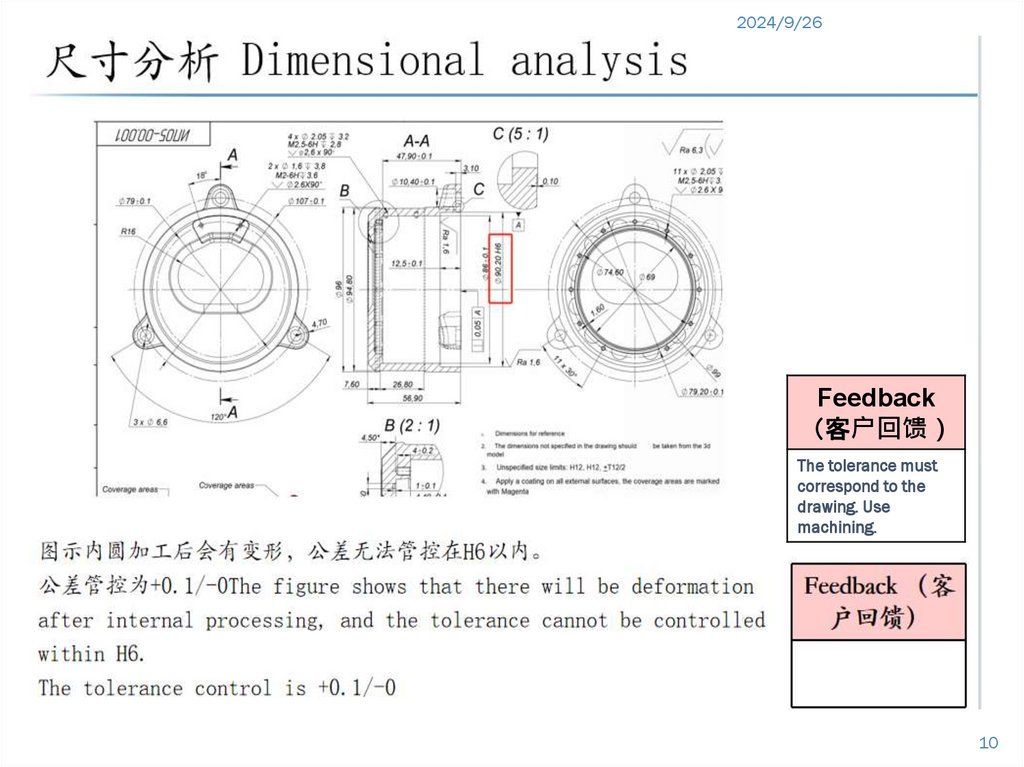
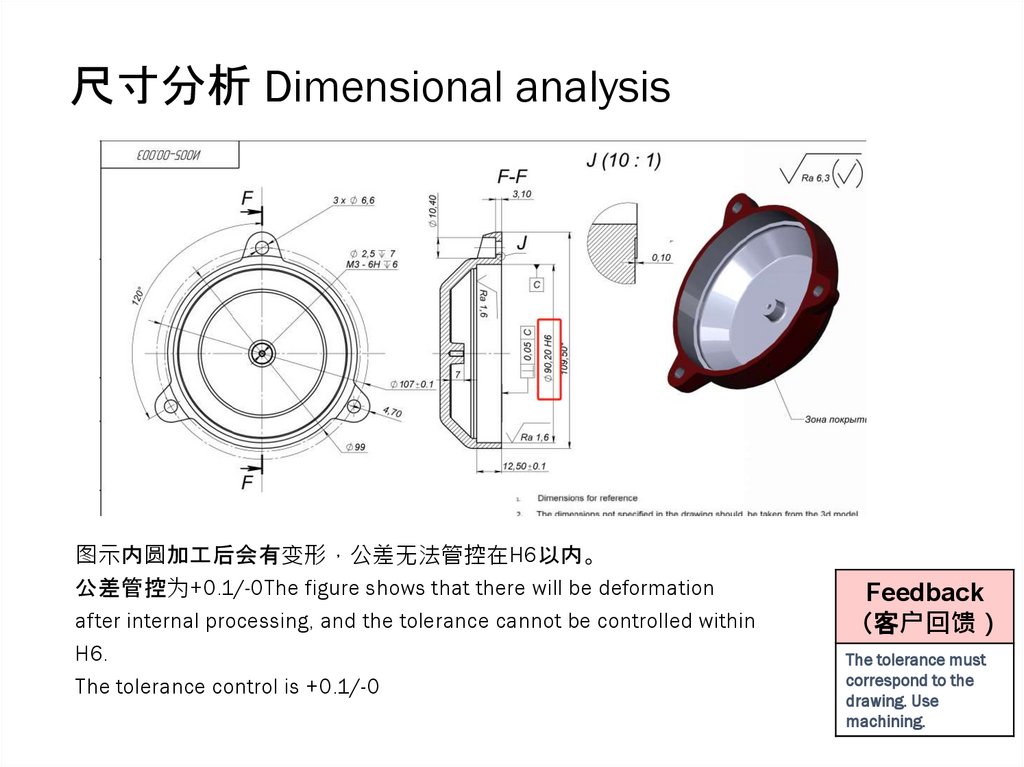
尺寸分析 Dimensional analysis图示内圆加工后会有变形 公差无法管控在H6以内。
公差管控为+0.1/-0The figure shows that there will be deformation
after internal processing, and the tolerance cannot be controlled within
H6.
The tolerance control is +0.1/-0
Feedback
客户回馈
The tolerance must
correspond to the
drawing. Use
machining.
12.
谢谢The end. Thank you!

 mechanics


