Similar presentations:
How to use tables of tolerances and fundamental deviations (Seminar 3)
1. Seminar 3: How to use tables of tolerances and fundamental deviations
Standardization and measurementassurance of engineering production
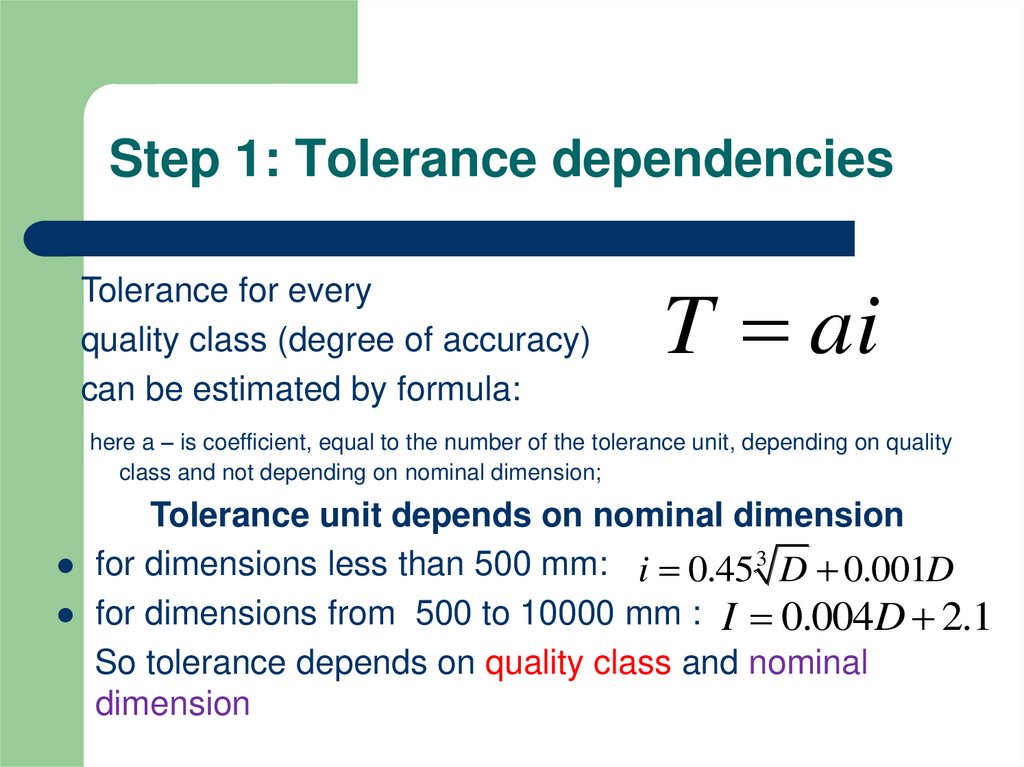
2. Step 1: Tolerance dependencies
Tolerance for everyquality class (degree of accuracy)
can be estimated by formula:
T ai
here a – is coefficient, equal to the number of the tolerance unit, depending on quality
class and not depending on nominal dimension;
Tolerance unit depends on nominal dimension
for dimensions less than 500 mm: i 0.45 3 D 0.001D
for dimensions from 500 to 10000 mm : I 0.004D 2.1
So tolerance depends on quality class and nominal
dimension
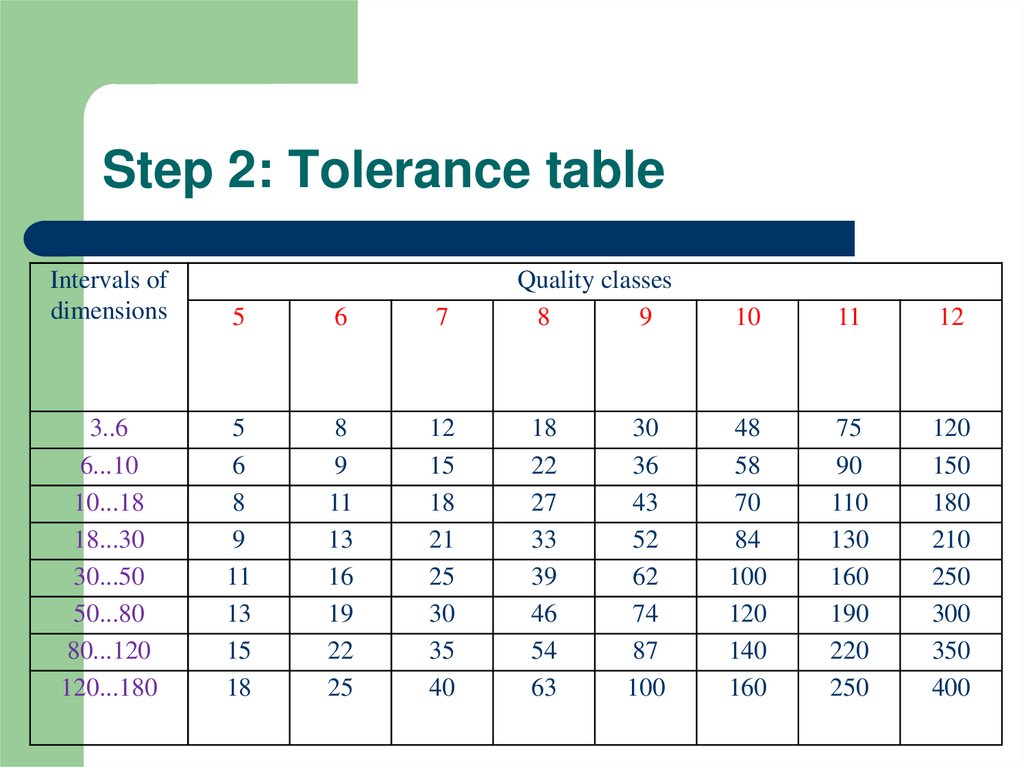
3. Step 2: Tolerance table
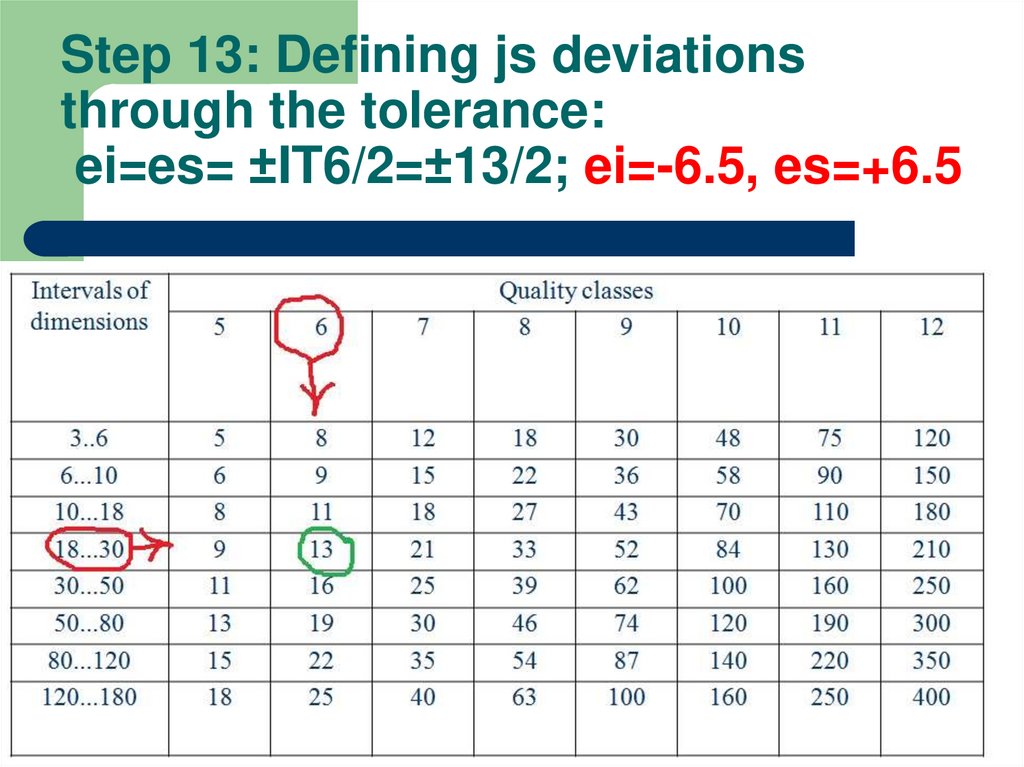
Intervals ofdimensions
5
6
7
3..6
6...10
10...18
18...30
30...50
50...80
80...120
120...180
5
6
8
9
11
13
15
18
8
9
11
13
16
19
22
25
12
15
18
21
25
30
35
40
Quality classes
8
9
18
22
27
33
39
46
54
63
30
36
43
52
62
74
87
100
10
11
12
48
58
70
84
100
120
140
160
75
90
110
130
160
190
220
250
120
150
180
210
250
300
350
400
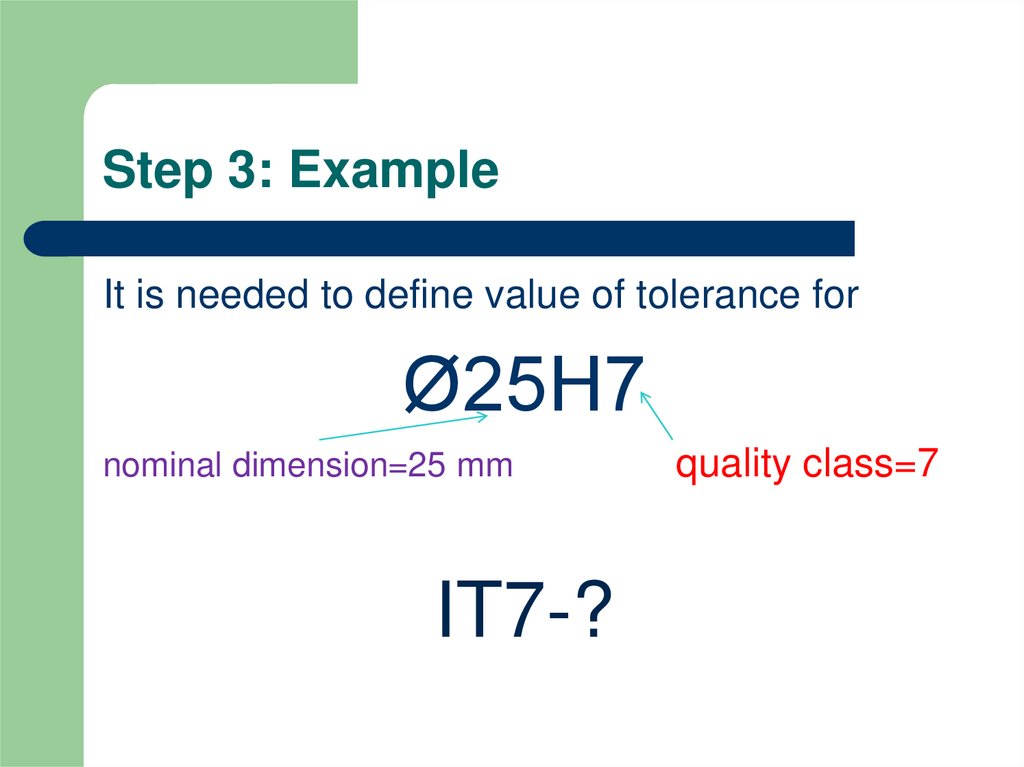
4. Step 3: Example
It is needed to define value of tolerance forØ25H7
nominal dimension=25 mm
IT7-?
quality class=7
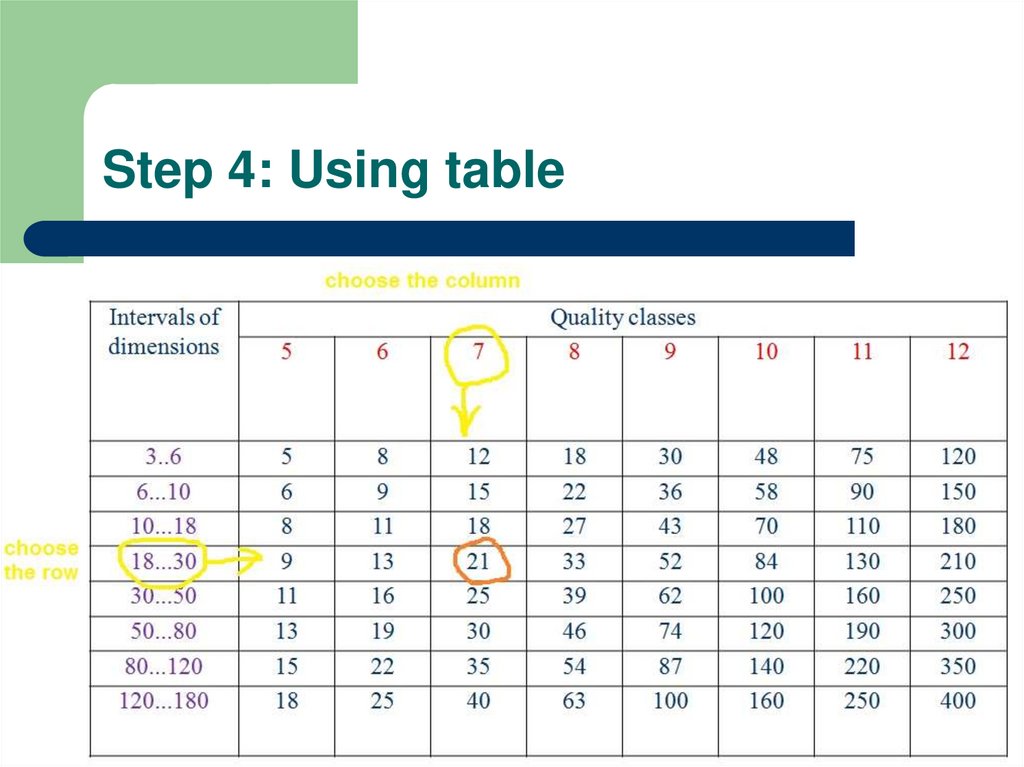
5. Step 4: Using table
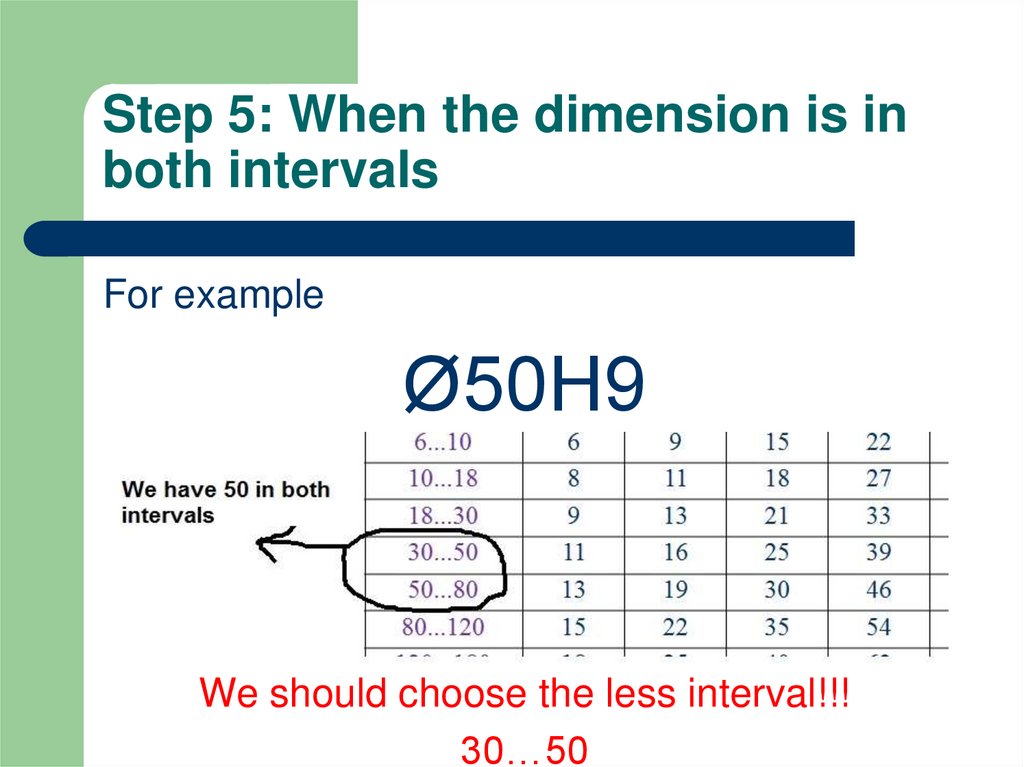
6. Step 5: When the dimension is in both intervals
For exampleØ50H9
We should choose the less interval!!!
30…50
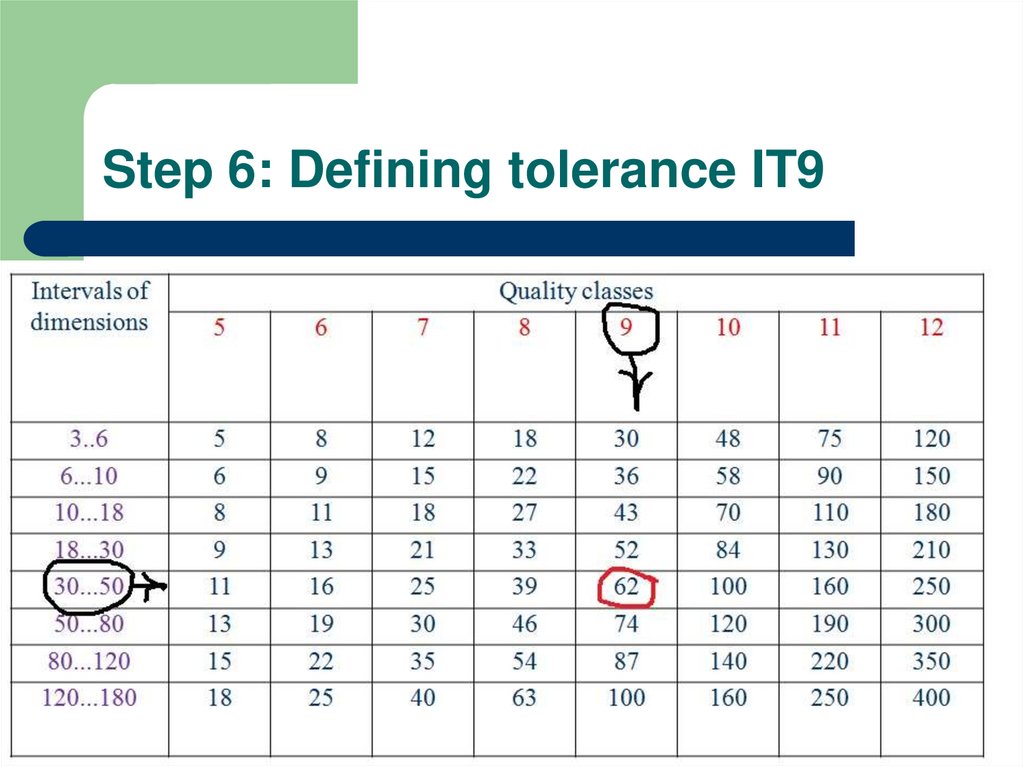
7. Step 6: Defining tolerance IT9
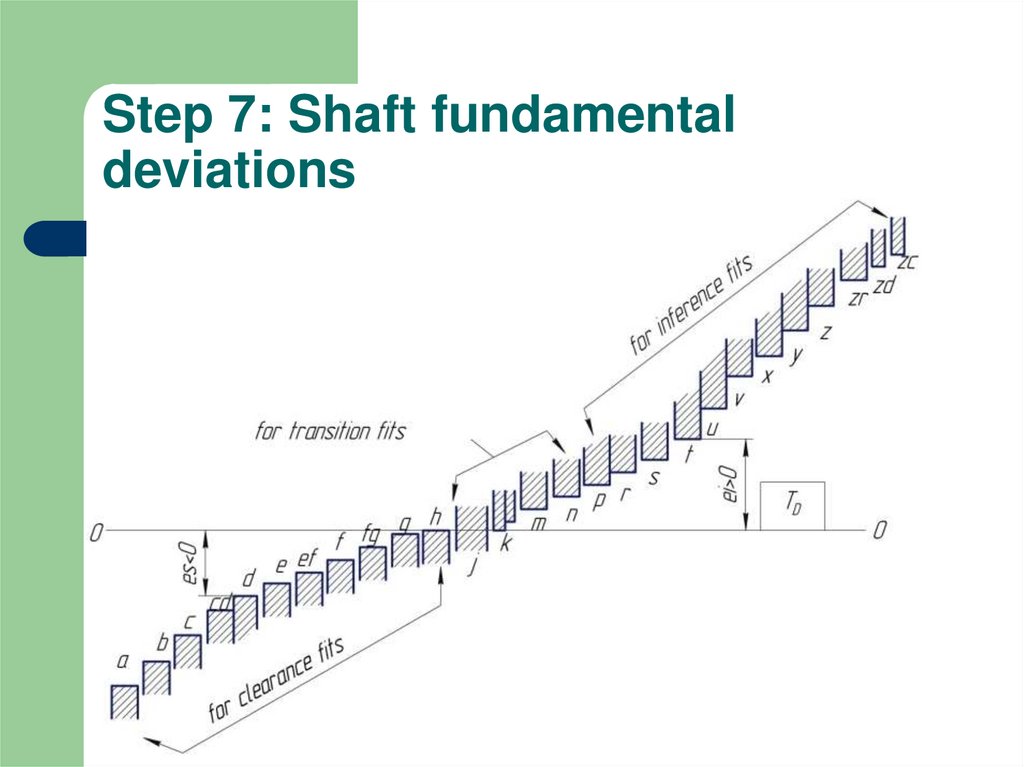
8. Step 7: Shaft fundamental deviations
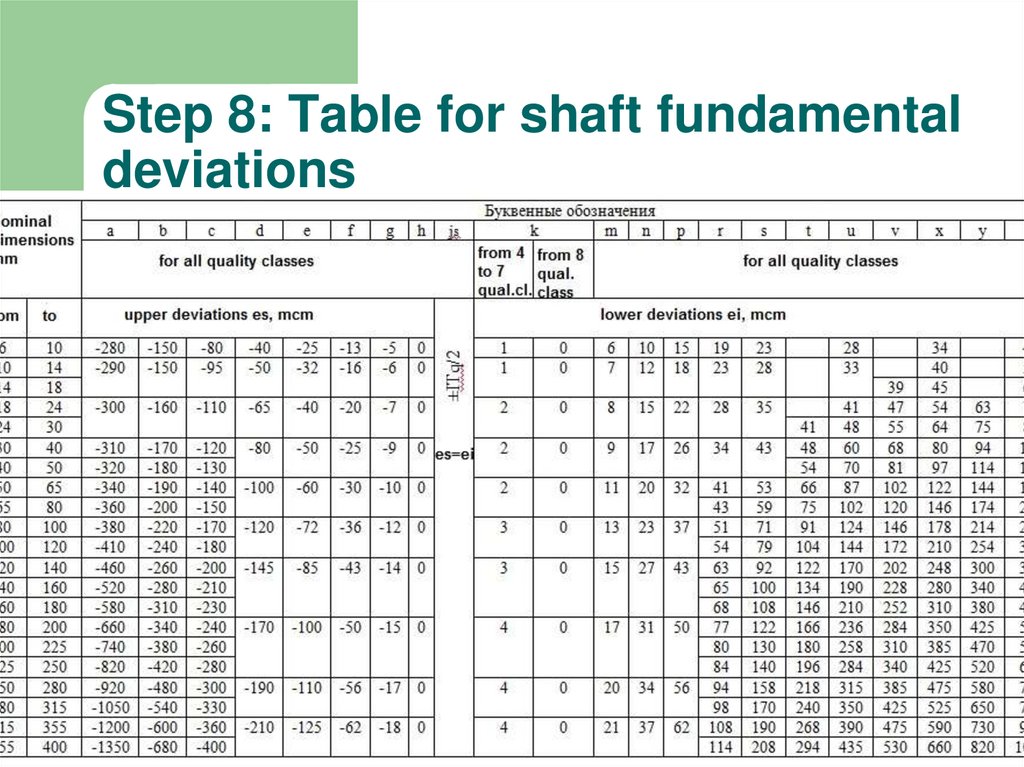
9. Step 8: Table for shaft fundamental deviations
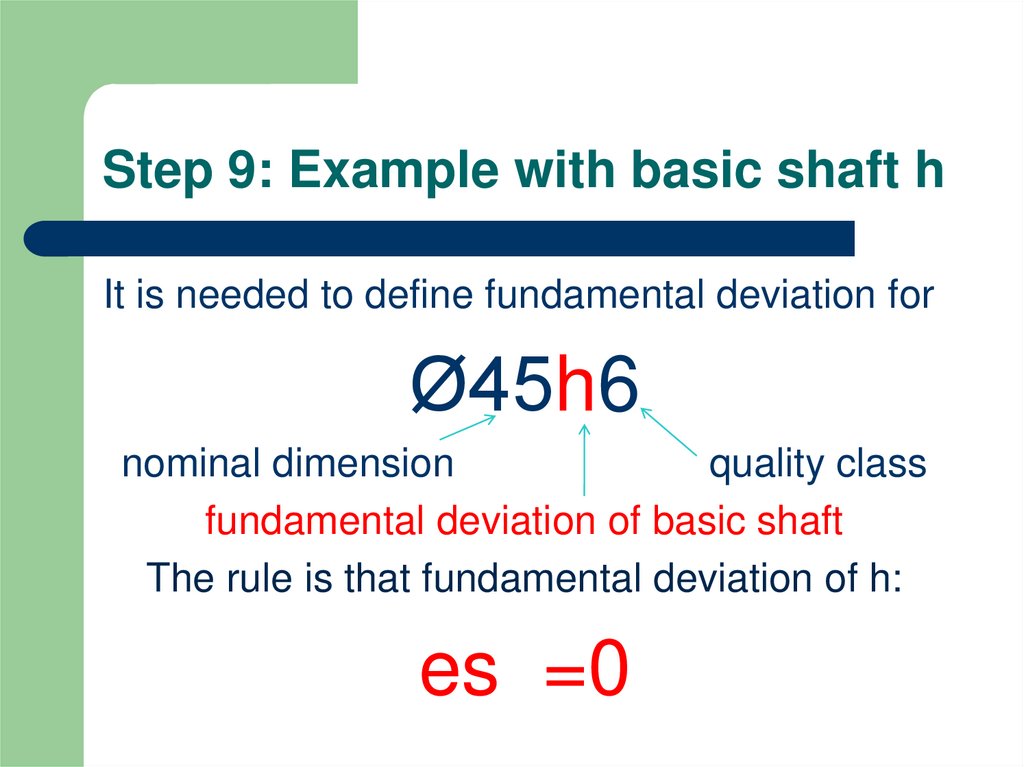
10. Step 9: Example with basic shaft h
It is needed to define fundamental deviation forØ45h6
nominal dimension
quality class
fundamental deviation of basic shaft
The rule is that fundamental deviation of h:
es =0
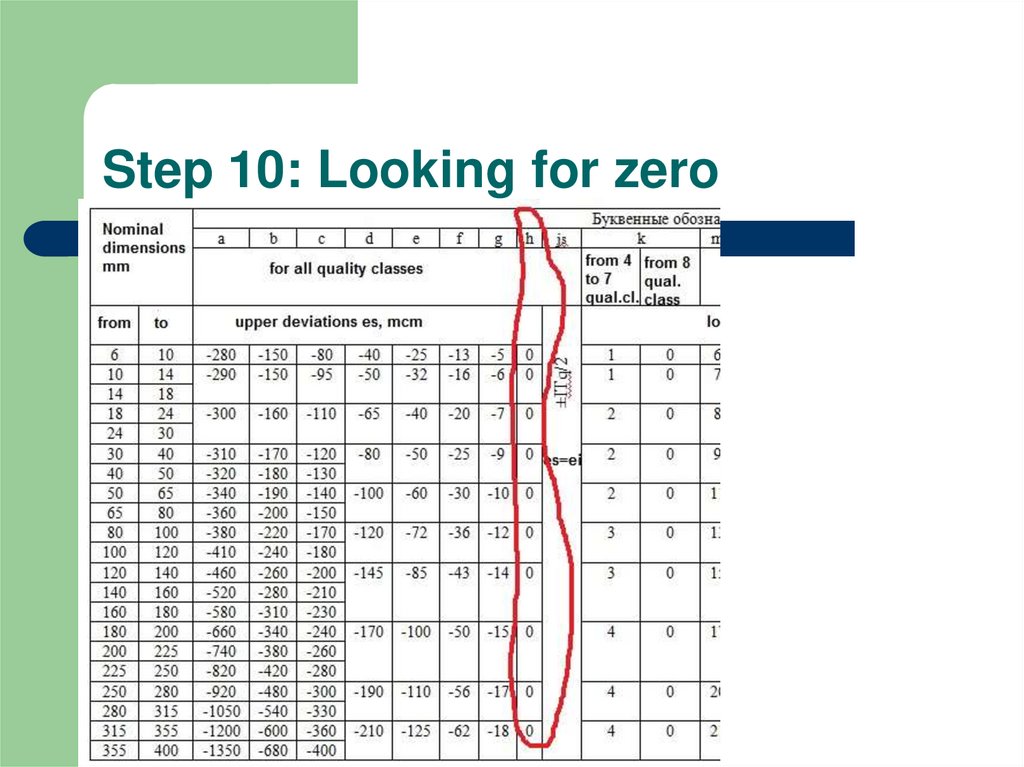
11. Step 10: Looking for zero
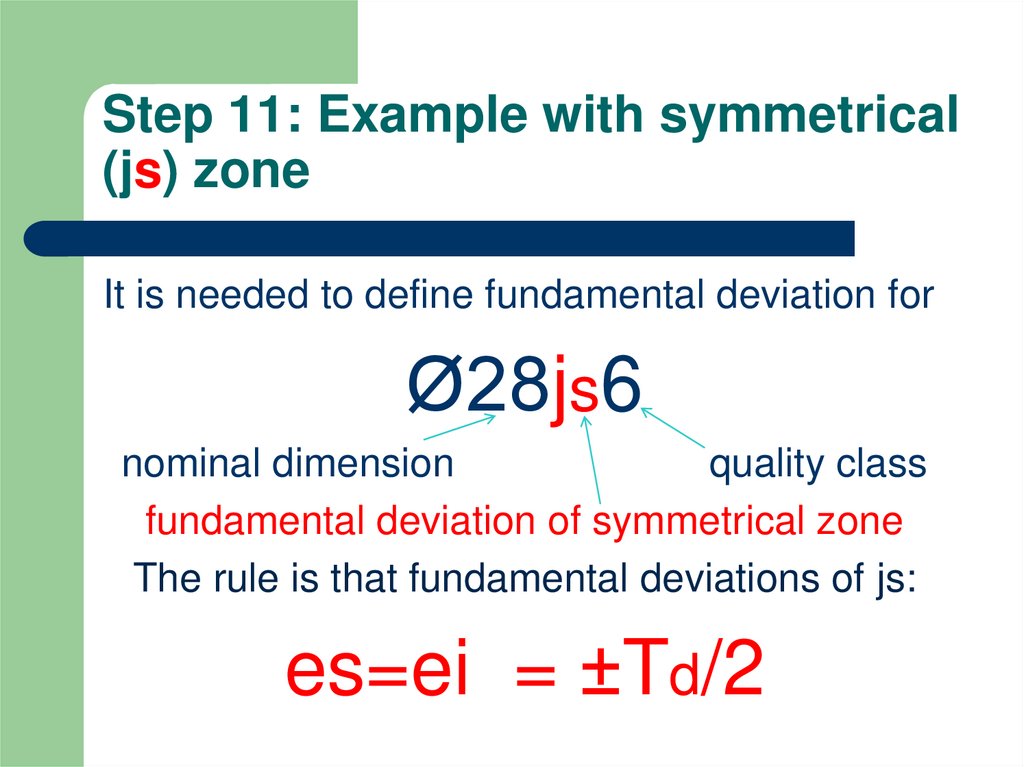
12. Step 11: Example with symmetrical (js) zone
It is needed to define fundamental deviation forØ28js6
nominal dimension
quality class
fundamental deviation of symmetrical zone
The rule is that fundamental deviations of js:
es=ei = ±Td/2
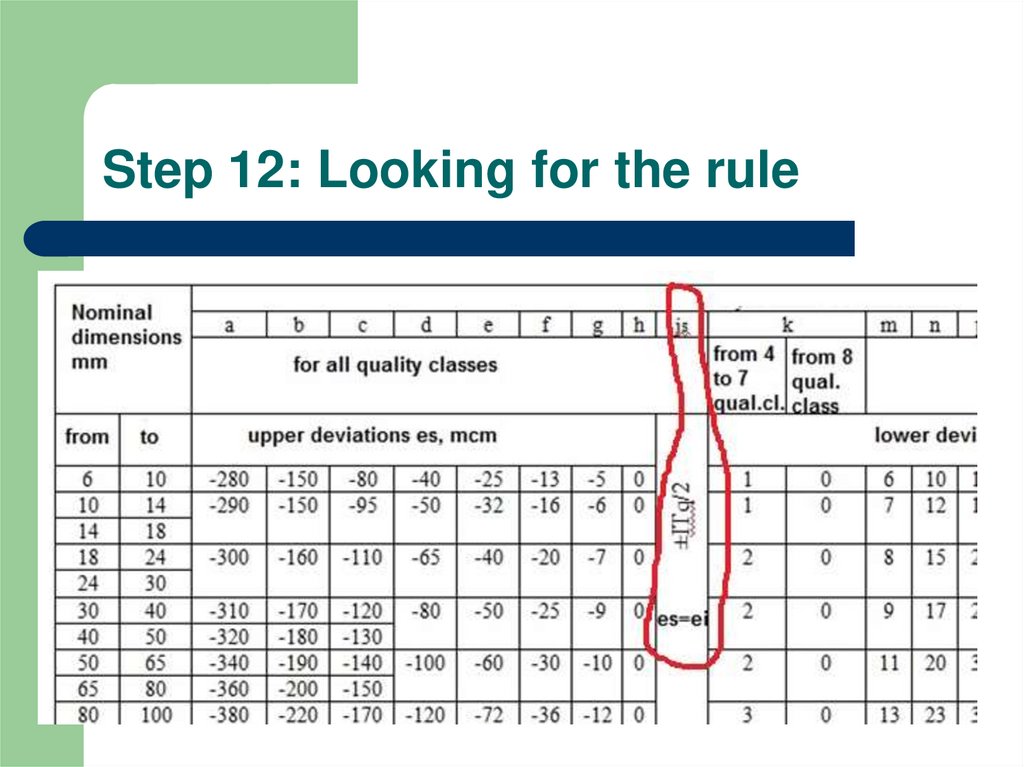
13. Step 12: Looking for the rule
14. Step 13: Defining js deviations through the tolerance: ei=es= ±IT6/2=±13/2; ei=-6.5, es=+6.5
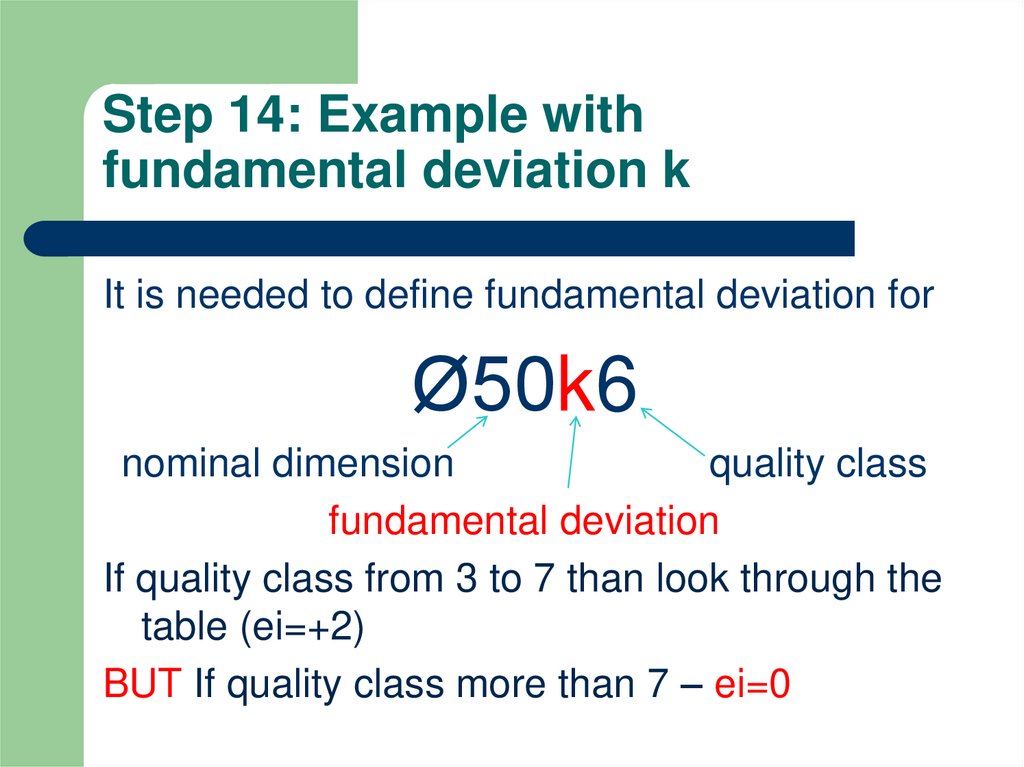
15. Step 14: Example with fundamental deviation k
It is needed to define fundamental deviation forØ50k6
nominal dimension
quality class
fundamental deviation
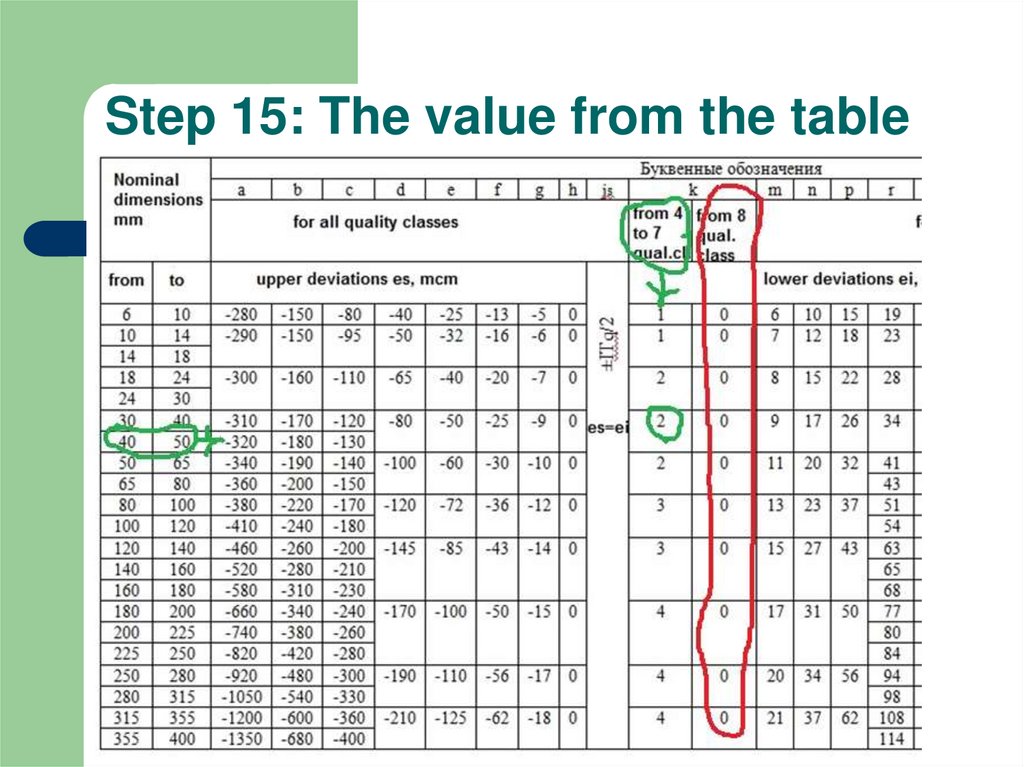
If quality class from 3 to 7 than look through the
table (ei=+2)
BUT If quality class more than 7 – ei=0
16. Step 15: The value from the table
17. Step 16: Find the values
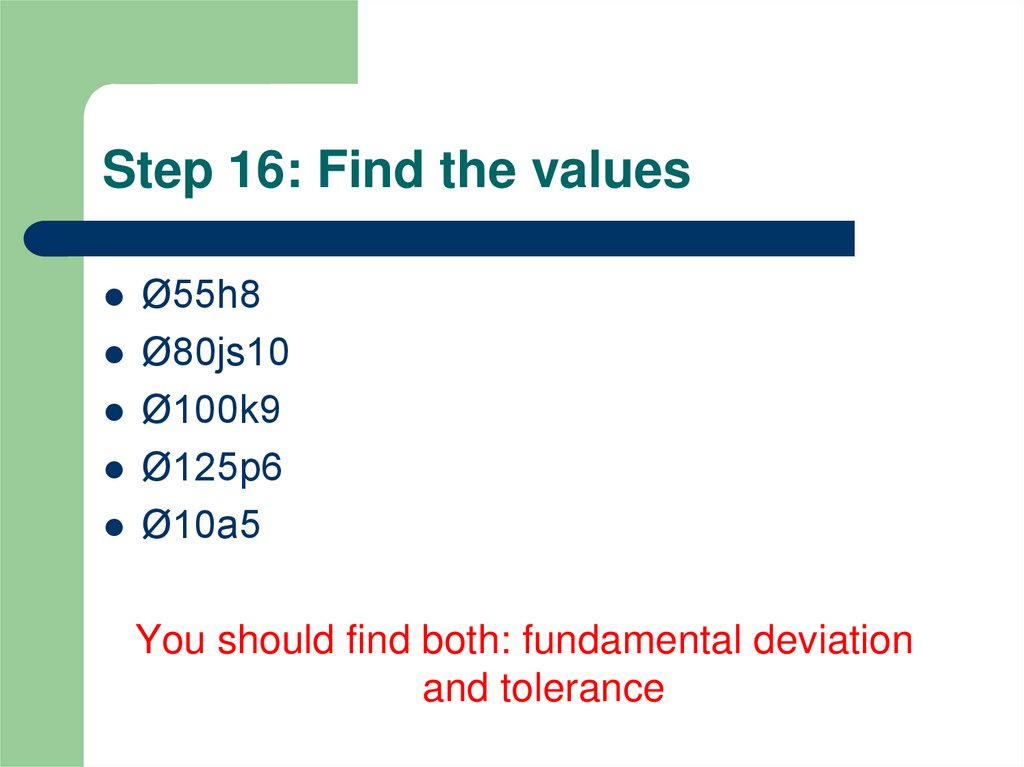
Ø55h8Ø80js10
Ø100k9
Ø125p6
Ø10a5
You should find both: fundamental deviation
and tolerance

