


 informatics
Similar presentations:


")
")


The Boot Process. Lection #3
1.
The Boot Process2.
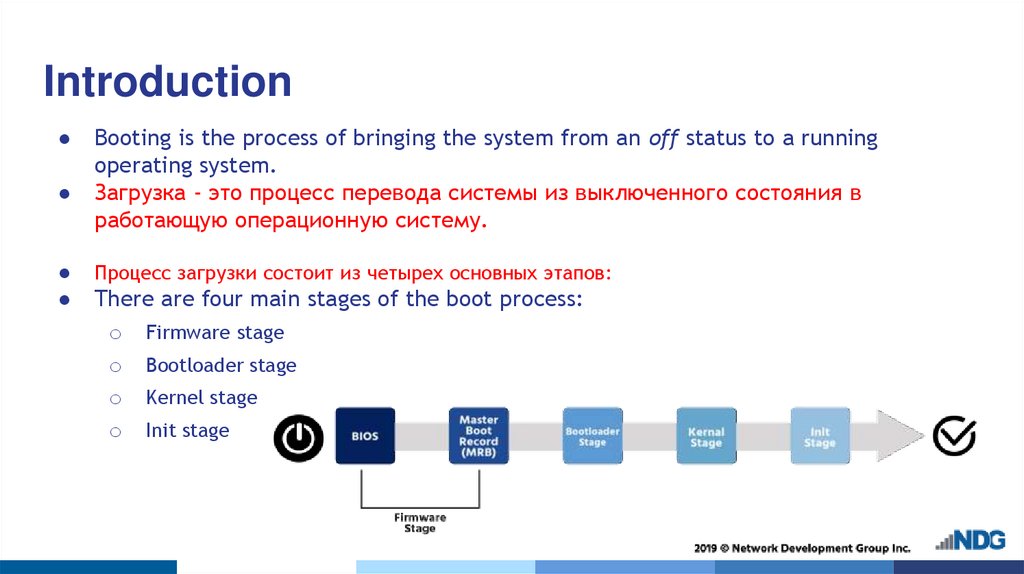
IntroductionBooting is the process of bringing the system from an off status to a running
operating system.
Загрузка - это процесс перевода системы из выключенного состояния в
работающую операционную систему.
Процесс загрузки состоит из четырех основных этапов:
There are four main stages of the boot process:
o Firmware stage
o Bootloader stage
o Kernel stage
o Init stage
3.
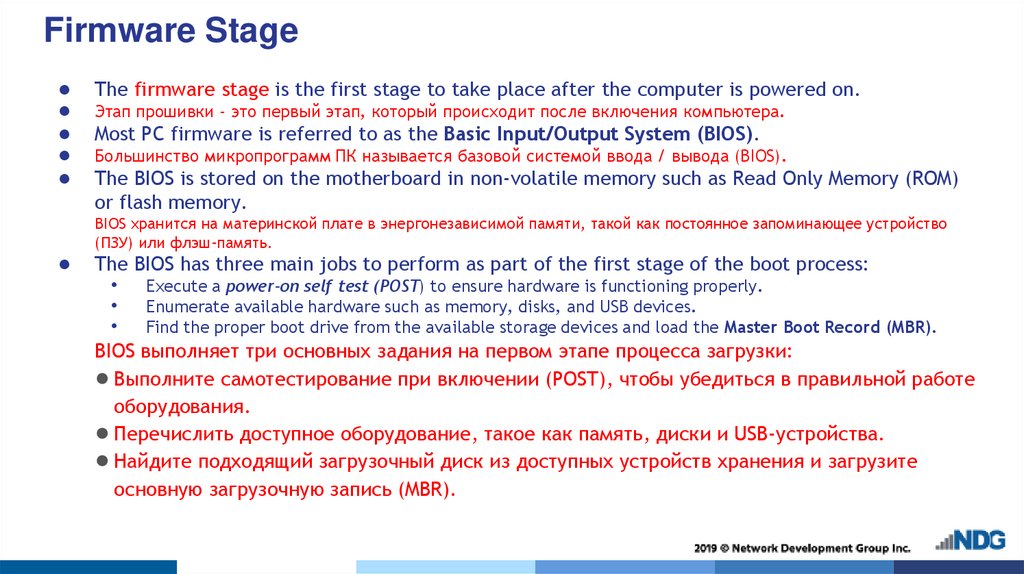
Firmware StageThe firmware stage is the first stage to take place after the computer is powered on.
Этап прошивки - это первый этап, который происходит после включения компьютера.
Most PC firmware is referred to as the Basic Input/Output System (BIOS).
Большинство микропрограмм ПК называется базовой системой ввода / вывода (BIOS).
The BIOS is stored on the motherboard in non-volatile memory such as Read Only Memory (ROM)
or flash memory.
BIOS хранится на материнской плате в энергонезависимой памяти, такой как постоянное запоминающее устройство
(ПЗУ) или флэш-память.
The BIOS has three main jobs to perform as part of the first stage of the boot process:
• Execute a power-on self test (POST) to ensure hardware is functioning properly.
• Enumerate available hardware such as memory, disks, and USB devices.
• Find the proper boot drive from the available storage devices and load the Master Boot Record (MBR).
BIOS выполняет три основных задания на первом этапе процесса загрузки:
● Выполните самотестирование при включении (POST), чтобы убедиться в правильной работе
оборудования.
● Перечислить доступное оборудование, такое как память, диски и USB-устройства.
● Найдите подходящий загрузочный диск из доступных устройств хранения и загрузите
основную загрузочную запись (MBR).
4.
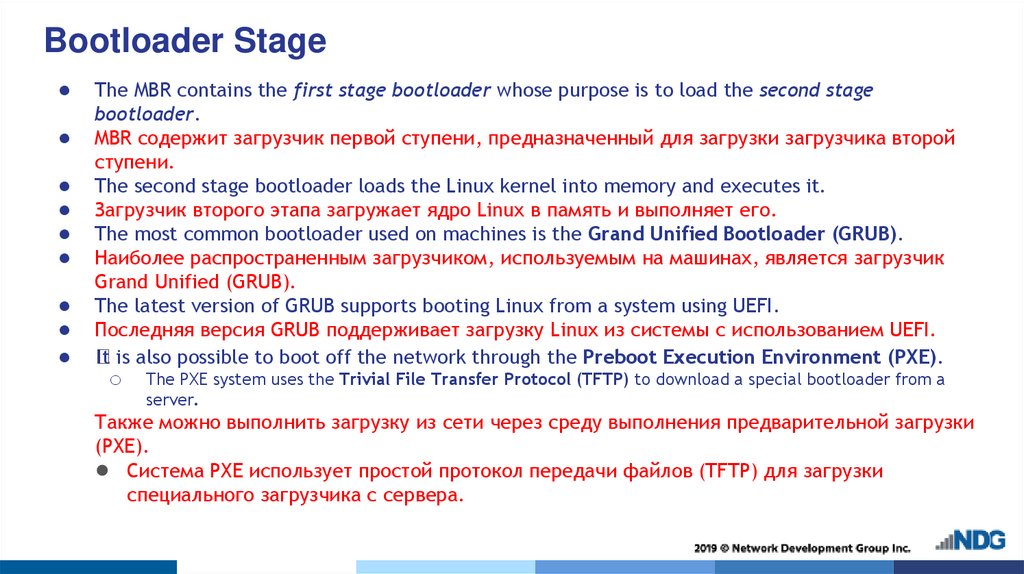
Bootloader StageThe MBR contains the first stage bootloader whose purpose is to load the second stage
bootloader.
MBR содержит загрузчик первой ступени, предназначенный для загрузки загрузчика второй
ступени.
The second stage bootloader loads the Linux kernel into memory and executes it.
Загрузчик второго этапа загружает ядро Linux в память и выполняет его.
The most common bootloader used on machines is the Grand Unified Bootloader (GRUB).
Наиболее распространенным загрузчиком, используемым на машинах, является загрузчик
Grand Unified (GRUB).
The latest version of GRUB supports booting Linux from a system using UEFI.
Последняя версия GRUB поддерживает загрузку Linux из системы с использованием UEFI.
It is also possible to boot off the network through the Preboot Execution Environment (PXE).
o
The PXE system uses the Trivial File Transfer Protocol (TFTP) to download a special bootloader from a
server.
Также можно выполнить загрузку из сети через среду выполнения предварительной загрузки
(PXE).
● Система PXE использует простой протокол передачи файлов (TFTP) для загрузки
специального загрузчика с сервера.
5.
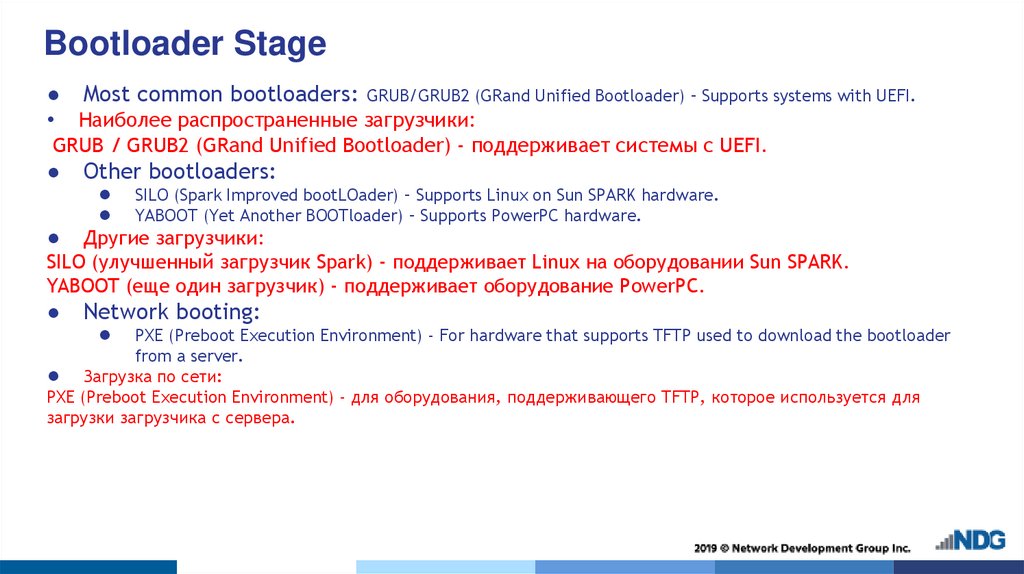
Bootloader Stage● Most common bootloaders: GRUB/GRUB2 (GRand Unified Bootloader) – Supports systems with UEFI.
• Наиболее распространенные загрузчики:
GRUB / GRUB2 (GRand Unified Bootloader) - поддерживает системы с UEFI.
Other bootloaders:
● SILO (Spark Improved bootLOader) – Supports Linux on Sun SPARK hardware.
● YABOOT (Yet Another BOOTloader) – Supports PowerPC hardware.
Другие загрузчики:
SILO (улучшенный загрузчик Spark) - поддерживает Linux на оборудовании Sun SPARK.
YABOOT (еще один загрузчик) - поддерживает оборудование PowerPC.
Network booting:
● PXE (Preboot Execution Environment) - For hardware that supports TFTP used to download the bootloader
from a server.
● Загрузка по сети:
PXE (Preboot Execution Environment) - для оборудования, поддерживающего TFTP, которое используется для
загрузки загрузчика с сервера.
6.
Kernel StageThe kernel initializes the hardware drivers and get the root / filesystem mounted for the next
stage.
The kernel typically lives in the /boot partition.
As the kernel is booting, it initializes recognized hardware and makes detected devices available
to the rest of the operating system.
The final job of the kernel is to start the first process (PID of 1) called init (final stage)
Ядро инициализирует драйверы оборудования и монтирует корневую / файловую систему
для следующего этапа.
Ядро обычно находится в разделе / boot.
Во время загрузки ядро инициализирует распознанное оборудование и делает обнаруженные
устройства доступными для остальной части операционной системы.
Последняя задача ядра - запустить первый процесс (PID = 1), называемый init
(заключительный этап).
7.
The init StageFinal booting stage
The first process of the operating system (also called init) is started.
The init process has three important responsibilities:
○
○
○
Continue the booting process to get services running, login screens displaying, and consoles listening.
Start all other system processes
Adopt any process that detach from its parent
.
● Финальный этап загрузки
● Запускается первый процесс операционной системы (также называемый
init).
● У процесса инициализации есть три важных обязанности:
Продолжайте процесс загрузки, чтобы запустить службы, отобразить экраны
входа в систему и прослушивать консоли.
Запустить все остальные системные процессы
Принять любой процесс, который отделяется от своего родителя.
8.
The init StageIf init has been replaced by Upstart:
If init has been replaced by Systemd:
Both Systemd and Upstart use the init executable (/sbin/init) to maintain compatibility with many legacy
processes
The scripts in /etc/init are used to complete system initialization.
The files in /etc/systemd directory are used for starting and running the system.
Если init был заменен Upstart:
Сценарии в / etc / init используются для завершения инициализации системы.
Если init был заменен на Systemd:
Файлы в каталоге / etc / systemd используются для запуска и работы системы.
И Systemd, и Upstart используют исполняемый файл init (/ sbin / init) для обеспечения совместимости
со многими устаревшими процессами.
9.
initramfsThe initramfs is the initial root filesystem that a Linux system typically has access to.
Think of it as a temporary "starter" filesystem:
The initramfs is a cpio archive:
o
o
o
It provides the files and drivers that are necessary to start the real root filesystem and continue the system startup.
Contents are unpacked by the kernel
Then loaded into a RAM disk by the kernel for access.
After being unpacked:
Initramfs - это начальная корневая файловая система, к которой обычно имеет доступ система Linux.
Думайте об этом как о временной «стартовой» файловой системе:
Он предоставляет файлы и драйверы, необходимые для запуска настоящей корневой файловой системы и
продолжения загрузки системы.
Initramfs - это архив cpio:
Содержимое распаковывается ядром
Затем загружается ядром в RAM-диск для доступа.
После распаковки:
Ядро запустит сценарий инициализации, включенный в корневую / файловую систему RAM-диска initramfs.
o
The kernel will launch the init script included in the root / filesystem of the initramfs RAM disk.
10.
initramfsThe main advantage of placing drivers in initramfs instead of compiling them into the kernel
is:
Once the kernel is fully booted and the real root filesystem is mounted, the memory allocated to the initial
RAM disk can be freed.
The initramfs is built initially with the mkinitramfs utility, or updated by the updateinitramfs utility.
Основное преимущество размещения драйверов в initramfs вместо их компиляции
в ядро:
● Как только ядро полностью загружено и настоящая корневая файловая
система смонтирована, память, выделенная начальному RAM-диску, может
быть освобождена.
Первоначально initramfs создается с помощью утилиты mkinitramfs или
обновляется утилитой update-initramfs.
11.
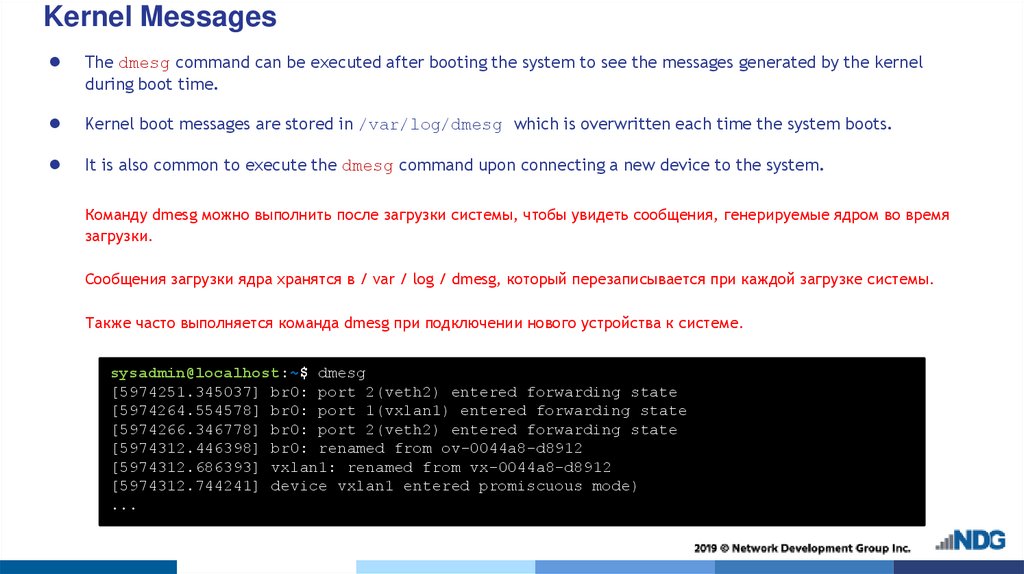
Kernel MessagesThe dmesg command can be executed after booting the system to see the messages generated by the kernel
during boot time.
Kernel boot messages are stored in /var/log/dmesg which is overwritten each time the system boots.
It is also common to execute the dmesg command upon connecting a new device to the system.
Команду dmesg можно выполнить после загрузки системы, чтобы увидеть сообщения, генерируемые ядром во время
загрузки.
Сообщения загрузки ядра хранятся в / var / log / dmesg, который перезаписывается при каждой загрузке системы.
Также часто выполняется команда dmesg при подключении нового устройства к системе.
sysadmin@localhost:~$ dmesg
[5974251.345037] br0: port 2(veth2) entered forwarding state
[5974264.554578] br0: port 1(vxlan1) entered forwarding state
[5974266.346778] br0: port 2(veth2) entered forwarding state
[5974312.446398] br0: renamed from ov-0044a8-d8912
[5974312.686393] vxlan1: renamed from vx-0044a8-d8912
[5974312.744241] device vxlan1 entered promiscuous mode)
...
12.
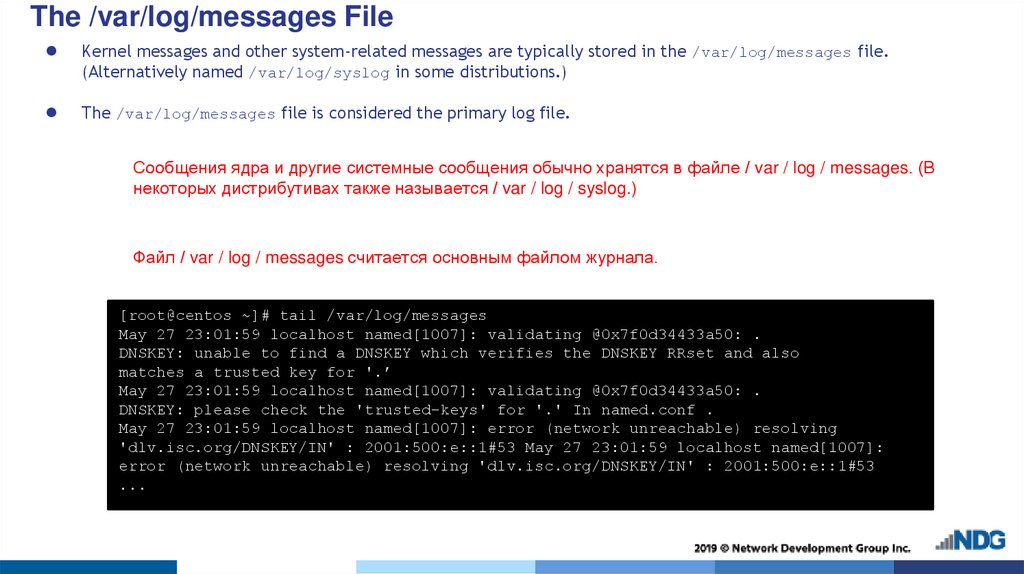
The /var/log/messages FileKernel messages and other system-related messages are typically stored in the /var/log/messages file.
(Alternatively named /var/log/syslog in some distributions.)
The /var/log/messages file is considered the primary log file.
Сообщения ядра и другие системные сообщения обычно хранятся в файле / var / log / messages. (В
некоторых дистрибутивах также называется / var / log / syslog.)
Файл / var / log / messages считается основным файлом журнала.
[root@centos ~]# tail /var/log/messages
May 27 23:01:59 localhost named[1007]: validating @0x7f0d34433a50: .
DNSKEY: unable to find a DNSKEY which verifies the DNSKEY RRset and also
matches a trusted key for '.’
May 27 23:01:59 localhost named[1007]: validating @0x7f0d34433a50: .
DNSKEY: please check the 'trusted-keys' for '.' In named.conf .
May 27 23:01:59 localhost named[1007]: error (network unreachable) resolving
'dlv.isc.org/DNSKEY/IN' : 2001:500:e::1#53 May 27 23:01:59 localhost named[1007]:
error (network unreachable) resolving 'dlv.isc.org/DNSKEY/IN' : 2001:500:e::1#53
...
13.
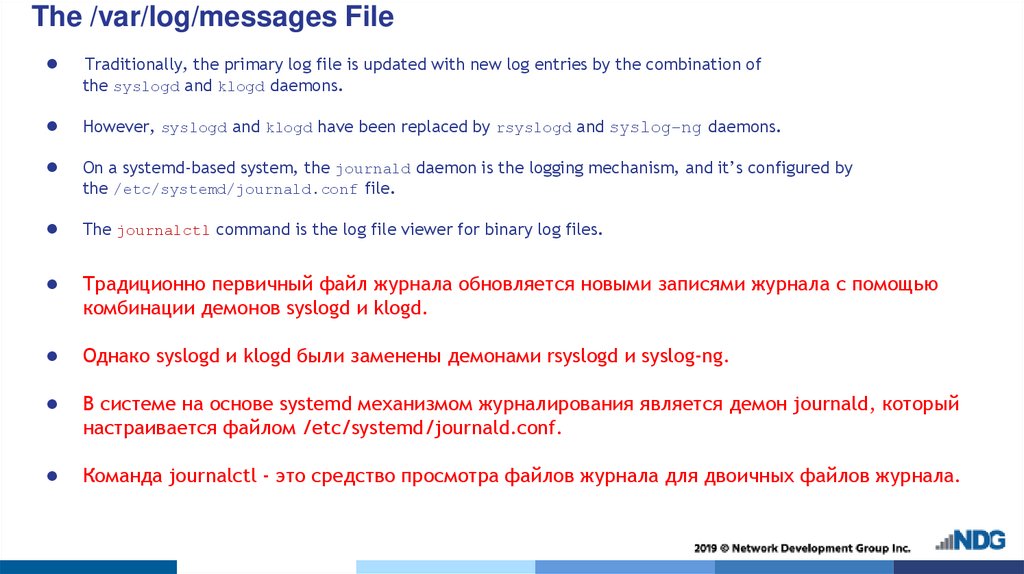
The /var/log/messages FileTraditionally, the primary log file is updated with new log entries by the combination of
the syslogd and klogd daemons.
However, syslogd and klogd have been replaced by rsyslogd and syslog-ng daemons.
On a systemd-based system, the journald daemon is the logging mechanism, and it’s configured by
the /etc/systemd/journald.conf file.
The journalctl command is the log file viewer for binary log files.
Традиционно первичный файл журнала обновляется новыми записями журнала с помощью
комбинации демонов syslogd и klogd.
Однако syslogd и klogd были заменены демонами rsyslogd и syslog-ng.
В системе на основе systemd механизмом журналирования является демон journald, который
настраивается файлом /etc/systemd/journald.conf.
Команда journalctl - это средство просмотра файлов журнала для двоичных файлов журнала.
14.
Bootloaders15.
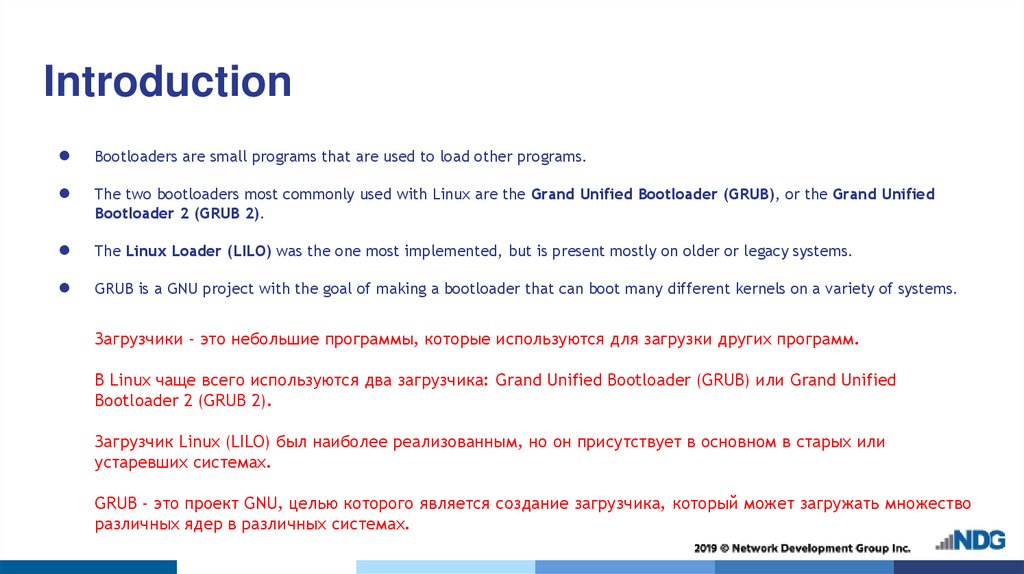
IntroductionBootloaders are small programs that are used to load other programs.
The two bootloaders most commonly used with Linux are the Grand Unified Bootloader (GRUB), or the Grand Unified
Bootloader 2 (GRUB 2).
The Linux Loader (LILO) was the one most implemented, but is present mostly on older or legacy systems.
GRUB is a GNU project with the goal of making a bootloader that can boot many different kernels on a variety of systems.
Загрузчики - это небольшие программы, которые используются для загрузки других программ.
В Linux чаще всего используются два загрузчика: Grand Unified Bootloader (GRUB) или Grand Unified
Bootloader 2 (GRUB 2).
Загрузчик Linux (LILO) был наиболее реализованным, но он присутствует в основном в старых или
устаревших системах.
GRUB - это проект GNU, целью которого является создание загрузчика, который может загружать множество
различных ядер в различных системах.
16.
IntroductionThe bootloader will perform several operations.
Primary task of the bootloader is to load the Linux kernel into memory and
execute it.
Once that has occurred, the kernel takes over booting the system.
Загрузчик выполнит несколько операций.
Основная задача загрузчика - загрузить ядро Linux в память и выполнить его.
Как только это произойдет, ядро берет на себя загрузку системы.
17.
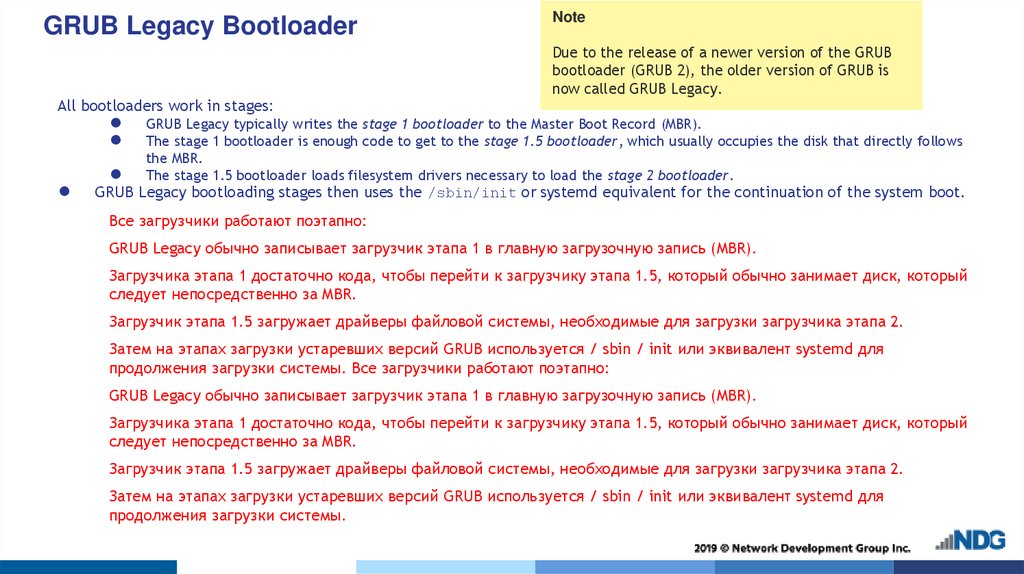
GRUB Legacy BootloaderAll bootloaders work in stages:
Note
Due to the release of a newer version of the GRUB
bootloader (GRUB 2), the older version of GRUB is
now called GRUB Legacy.
GRUB Legacy typically writes the stage 1 bootloader to the Master Boot Record (MBR).
The stage 1 bootloader is enough code to get to the stage 1.5 bootloader, which usually occupies the disk that directly follows
the MBR.
The stage 1.5 bootloader loads filesystem drivers necessary to load the stage 2 bootloader.
GRUB Legacy bootloading stages then uses the /sbin/init or systemd equivalent for the continuation of the system boot.
Все загрузчики работают поэтапно:
GRUB Legacy обычно записывает загрузчик этапа 1 в главную загрузочную запись (MBR).
Загрузчика этапа 1 достаточно кода, чтобы перейти к загрузчику этапа 1.5, который обычно занимает диск, который
следует непосредственно за MBR.
Загрузчик этапа 1.5 загружает драйверы файловой системы, необходимые для загрузки загрузчика этапа 2.
Затем на этапах загрузки устаревших версий GRUB используется / sbin / init или эквивалент systemd для
продолжения загрузки системы. Все загрузчики работают поэтапно:
GRUB Legacy обычно записывает загрузчик этапа 1 в главную загрузочную запись (MBR).
Загрузчика этапа 1 достаточно кода, чтобы перейти к загрузчику этапа 1.5, который обычно занимает диск, который
следует непосредственно за MBR.
Загрузчик этапа 1.5 загружает драйверы файловой системы, необходимые для загрузки загрузчика этапа 2.
Затем на этапах загрузки устаревших версий GRUB используется / sbin / init или эквивалент systemd для
продолжения загрузки системы.
18.
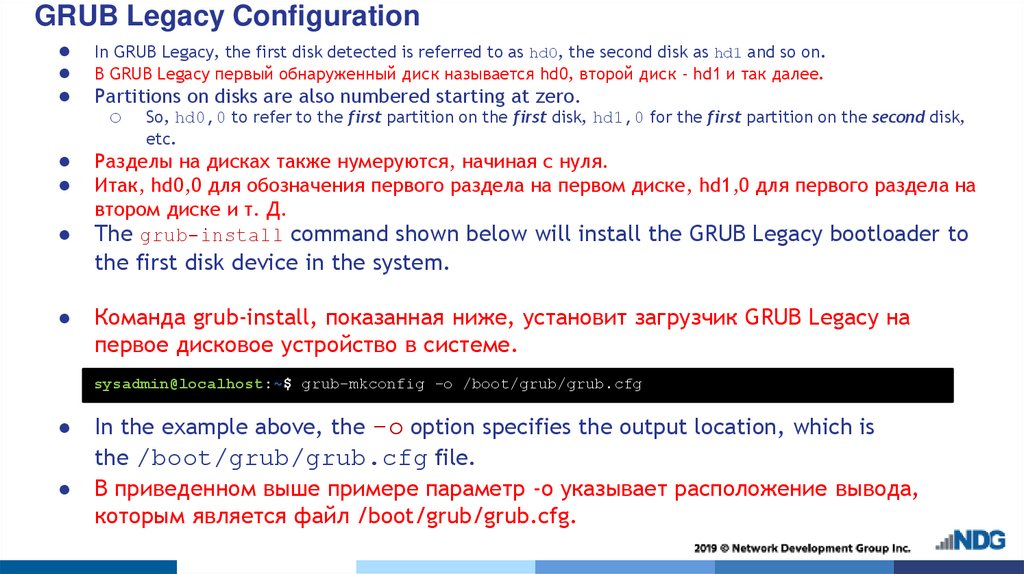
GRUB Legacy ConfigurationIn GRUB Legacy, the first disk detected is referred to as hd0, the second disk as hd1 and so on.
В GRUB Legacy первый обнаруженный диск называется hd0, второй диск - hd1 и так далее.
Разделы на дисках также нумеруются, начиная с нуля.
Итак, hd0,0 для обозначения первого раздела на первом диске, hd1,0 для первого раздела на
втором диске и т. Д.
The grub-install command shown below will install the GRUB Legacy bootloader to
Partitions on disks are also numbered starting at zero.
o
So, hd0,0 to refer to the first partition on the first disk, hd1,0 for the first partition on the second disk,
etc.
the first disk device in the system.
Команда grub-install, показанная ниже, установит загрузчик GRUB Legacy на
первое дисковое устройство в системе.
sysadmin@localhost:~$ grub-mkconfig -o /boot/grub/grub.cfg
In the example above, the -o option specifies the output location, which is
the /boot/grub/grub.cfg file.
В приведенном выше примере параметр -o указывает расположение вывода,
которым является файл /boot/grub/grub.cfg.
19.
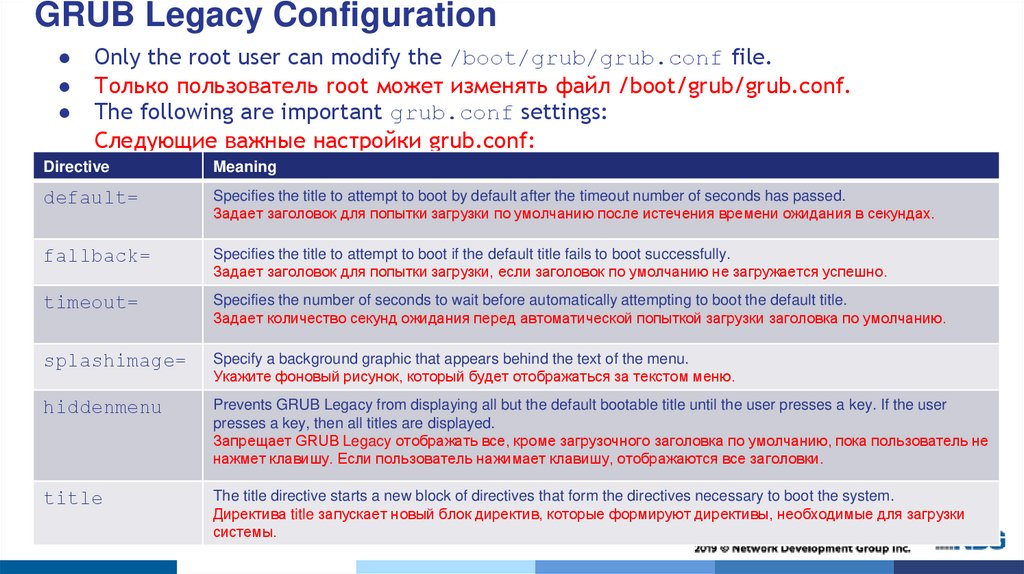
GRUB Legacy ConfigurationOnly the root user can modify the /boot/grub/grub.conf file.
Только пользователь root может изменять файл /boot/grub/grub.conf.
The following are important grub.conf settings:
Следующие важные настройки grub.conf:
Directive
Meaning
default=
Specifies the title to attempt to boot by default after the timeout number of seconds has passed.
Задает заголовок для попытки загрузки по умолчанию после истечения времени ожидания в секундах.
fallback=
Specifies the title to attempt to boot if the default title fails to boot successfully.
Задает заголовок для попытки загрузки, если заголовок по умолчанию не загружается успешно.
timeout=
Specifies the number of seconds to wait before automatically attempting to boot the default title.
Задает количество секунд ожидания перед автоматической попыткой загрузки заголовка по умолчанию.
splashimage=
Specify a background graphic that appears behind the text of the menu.
Укажите фоновый рисунок, который будет отображаться за текстом меню.
hiddenmenu
Prevents GRUB Legacy from displaying all but the default bootable title until the user presses a key. If the user
presses a key, then all titles are displayed.
Запрещает GRUB Legacy отображать все, кроме загрузочного заголовка по умолчанию, пока пользователь не
нажмет клавишу. Если пользователь нажимает клавишу, отображаются все заголовки.
title
The title directive starts a new block of directives that form the directives necessary to boot the system.
Директива title запускает новый блок директив, которые формируют директивы, необходимые для загрузки
системы.
20.
GRUB Legacy ConfigurationDirective
Meaning
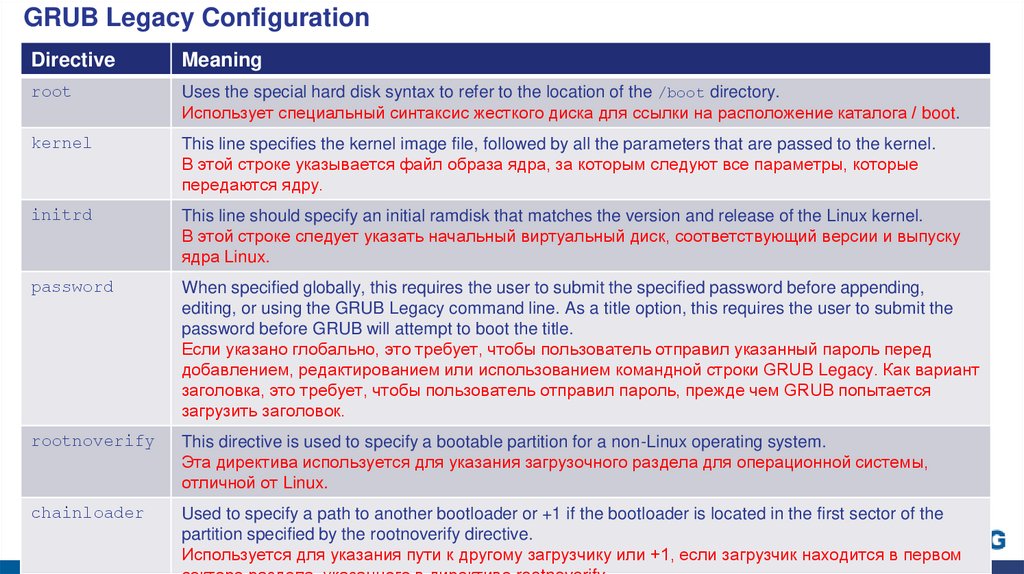
root
Uses the special hard disk syntax to refer to the location of the /boot directory.
Использует специальный синтаксис жесткого диска для ссылки на расположение каталога / boot.
kernel
This line specifies the kernel image file, followed by all the parameters that are passed to the kernel.
В этой строке указывается файл образа ядра, за которым следуют все параметры, которые
передаются ядру.
initrd
This line should specify an initial ramdisk that matches the version and release of the Linux kernel.
В этой строке следует указать начальный виртуальный диск, соответствующий версии и выпуску
ядра Linux.
password
When specified globally, this requires the user to submit the specified password before appending,
editing, or using the GRUB Legacy command line. As a title option, this requires the user to submit the
password before GRUB will attempt to boot the title.
Если указано глобально, это требует, чтобы пользователь отправил указанный пароль перед
добавлением, редактированием или использованием командной строки GRUB Legacy. Как вариант
заголовка, это требует, чтобы пользователь отправил пароль, прежде чем GRUB попытается
загрузить заголовок.
rootnoverify
This directive is used to specify a bootable partition for a non-Linux operating system.
Эта директива используется для указания загрузочного раздела для операционной системы,
отличной от Linux.
chainloader
Used to specify a path to another bootloader or +1 if the bootloader is located in the first sector of the
partition specified by the rootnoverify directive.
Используется для указания пути к другому загрузчику или +1, если загрузчик находится в первом
21.
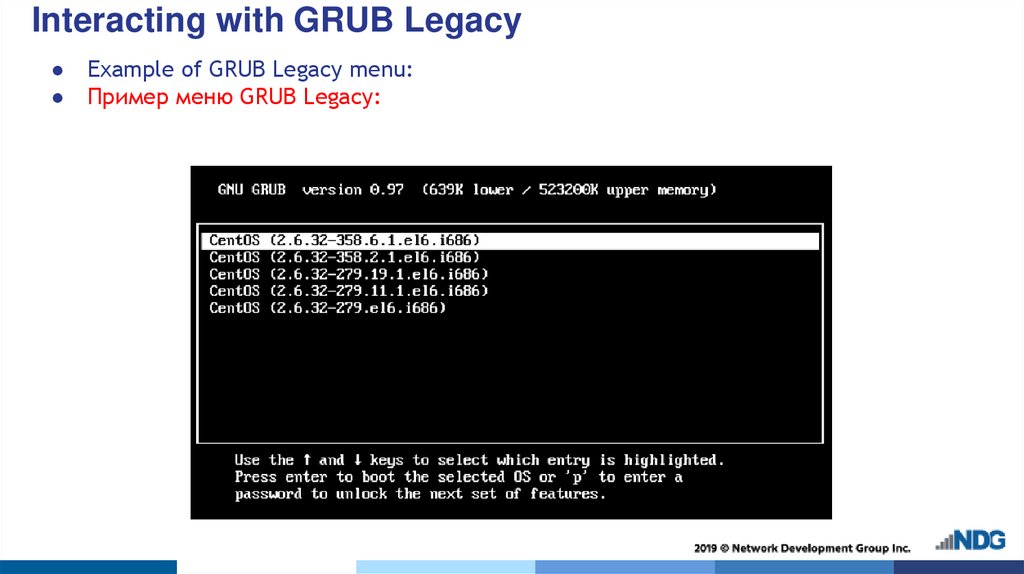
Interacting with GRUB LegacyWhen a system first starts up with GRUB Legacy installed as the bootloader:
o
o
o
If hiddenmenu directive is specified, it may hide menu options.
If hiddenmenu directive is not specified, GRUB Legacy will display all the titles.
Both will show countdown timer.
To interact with the menu:
o Press the P key if GRUB is password protected.
o Press the A key to append the kernel parameters.
o Press the E key to modify titles.
o Press the C key to get a GRUB command prompt.
Когда система впервые запускается с установленным в качестве загрузчика GRUB Legacy:
● Если указана директива hiddenmenu, она может скрывать параметры меню.
● Если директива hiddenmenu не указана, GRUB Legacy отобразит все заголовки.
● Оба покажут таймер обратного отсчета.
Для взаимодействия с меню:
● Нажмите кнопку P, если GRUB защищен паролем.
● Нажмите клавишу A, чтобы добавить параметры ядра.
● Нажмите клавишу E, чтобы изменить заголовки.
● Нажмите клавишу C, чтобы открыть командную строку GRUB.
22.
Interacting with GRUB LegacyExample of GRUB Legacy menu:
Пример меню GRUB Legacy:
23.
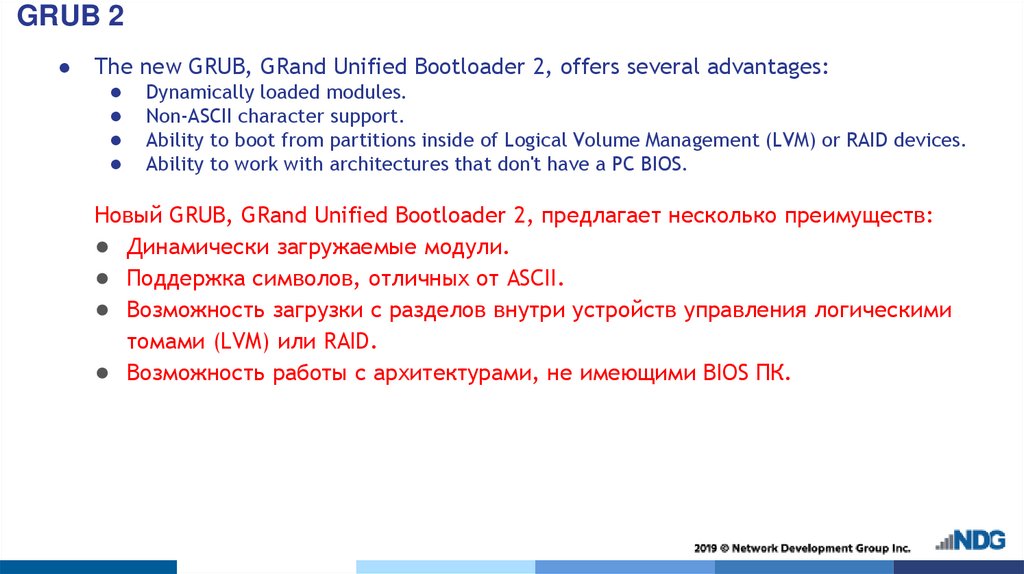
GRUB 2The
new GRUB, GRand Unified Bootloader 2, offers several advantages:
Dynamically loaded modules.
Non-ASCII character support.
Ability to boot from partitions inside of Logical Volume Management (LVM) or RAID devices.
Ability to work with architectures that don't have a PC BIOS.
Новый GRUB, GRand Unified Bootloader 2, предлагает несколько преимуществ:
● Динамически загружаемые модули.
● Поддержка символов, отличных от ASCII.
● Возможность загрузки с разделов внутри устройств управления логическими
томами (LVM) или RAID.
● Возможность работы с архитектурами, не имеющими BIOS ПК.
24.
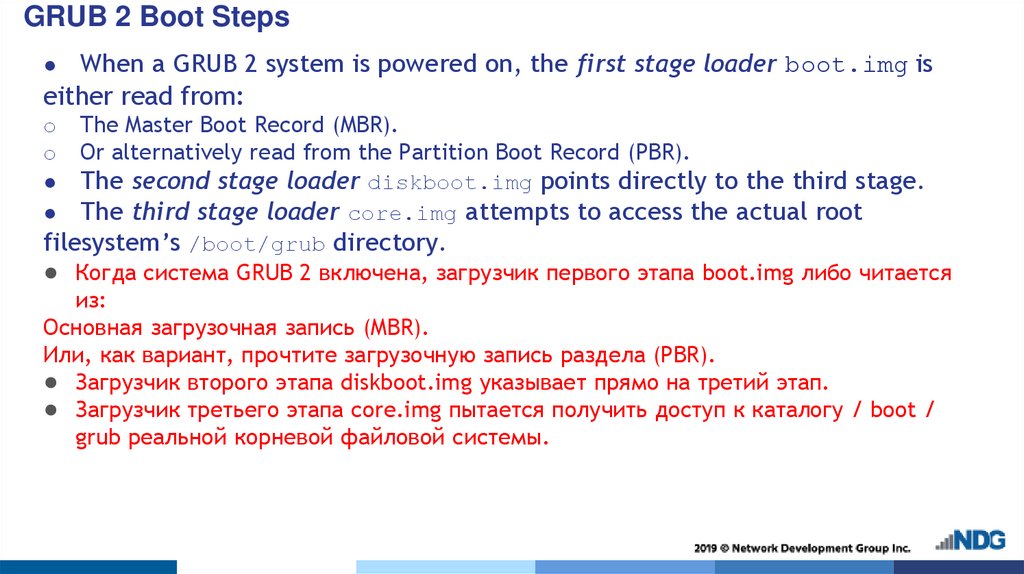
GRUB 2 Boot StepsWhen a GRUB 2 system is powered on, the first stage loader boot.img is
either read from:
The Master Boot Record (MBR).
Or alternatively read from the Partition Boot Record (PBR).
The second stage loader diskboot.img points directly to the third stage.
The third stage loader core.img attempts to access the actual root
filesystem’s /boot/grub directory.
● Когда система GRUB 2 включена, загрузчик первого этапа boot.img либо читается
из:
Основная загрузочная запись (MBR).
Или, как вариант, прочтите загрузочную запись раздела (PBR).
● Загрузчик второго этапа diskboot.img указывает прямо на третий этап.
● Загрузчик третьего этапа core.img пытается получить доступ к каталогу / boot /
grub реальной корневой файловой системы.
o
o
25.
GRUB 2 ConfigurationThe
o
o
o
o
o
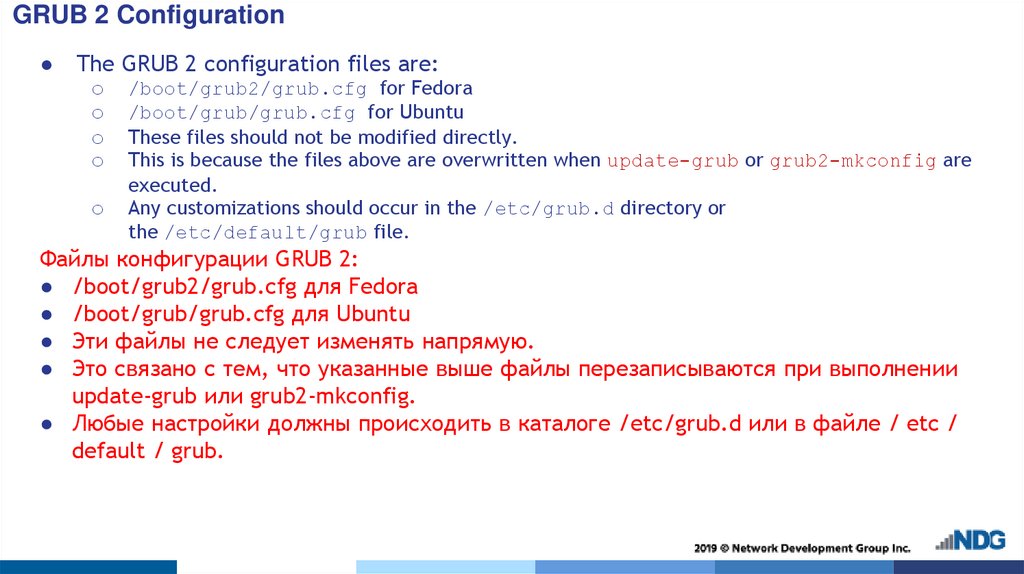
GRUB 2 configuration files are:
/boot/grub2/grub.cfg for Fedora
/boot/grub/grub.cfg for Ubuntu
These files should not be modified directly.
This is because the files above are overwritten when update-grub or grub2-mkconfig are
executed.
Any customizations should occur in the /etc/grub.d directory or
the /etc/default/grub file.
Файлы конфигурации GRUB 2:
● /boot/grub2/grub.cfg для Fedora
● /boot/grub/grub.cfg для Ubuntu
● Эти файлы не следует изменять напрямую.
● Это связано с тем, что указанные выше файлы перезаписываются при выполнении
update-grub или grub2-mkconfig.
● Любые настройки должны происходить в каталоге /etc/grub.d или в файле / etc /
default / grub.
26.
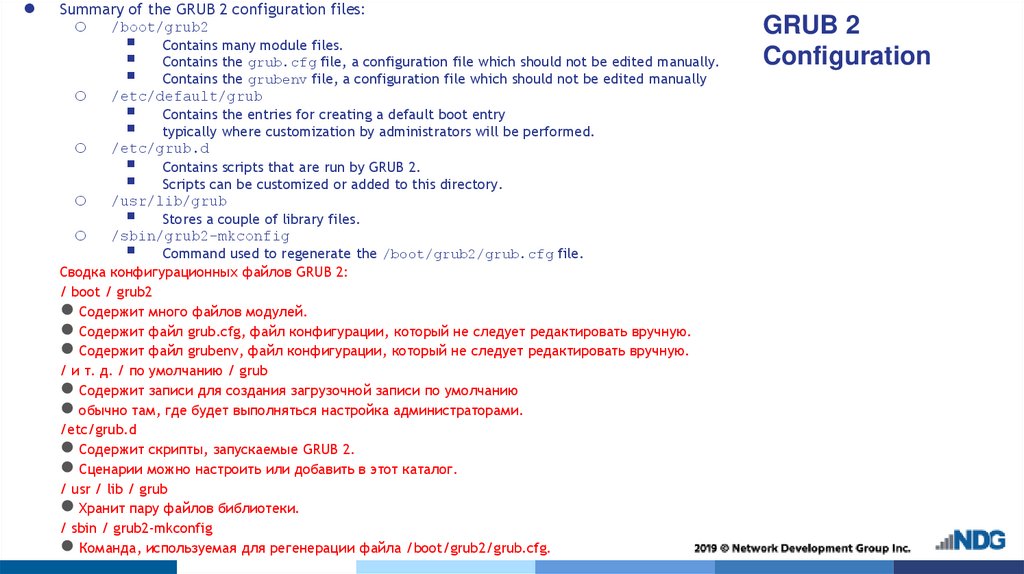
Summary of the GRUB 2 configuration files:
o /boot/grub2
o
o
Contains many module files.
Contains the grub.cfg file, a configuration file which should not be edited manually.
Contains the grubenv file, a configuration file which should not be edited manually
/etc/default/grub
Contains the entries for creating a default boot entry
typically where customization by administrators will be performed.
Contains scripts that are run by GRUB 2.
Scripts can be customized or added to this directory.
/etc/grub.d
o
/usr/lib/grub
o
/sbin/grub2-mkconfig
Stores a couple of library files.
Command used to regenerate the /boot/grub2/grub.cfg file.
Сводка конфигурационных файлов GRUB 2:
/ boot / grub2
Содержит много файлов модулей.
Содержит файл grub.cfg, файл конфигурации, который не следует редактировать вручную.
Содержит файл grubenv, файл конфигурации, который не следует редактировать вручную.
/ и т. д. / по умолчанию / grub
Содержит записи для создания загрузочной записи по умолчанию
обычно там, где будет выполняться настройка администраторами.
/etc/grub.d
Содержит скрипты, запускаемые GRUB 2.
Сценарии можно настроить или добавить в этот каталог.
/ usr / lib / grub
Хранит пару файлов библиотеки.
/ sbin / grub2-mkconfig
Команда, используемая для регенерации файла /boot/grub2/grub.cfg.
GRUB 2
Configuration
27.
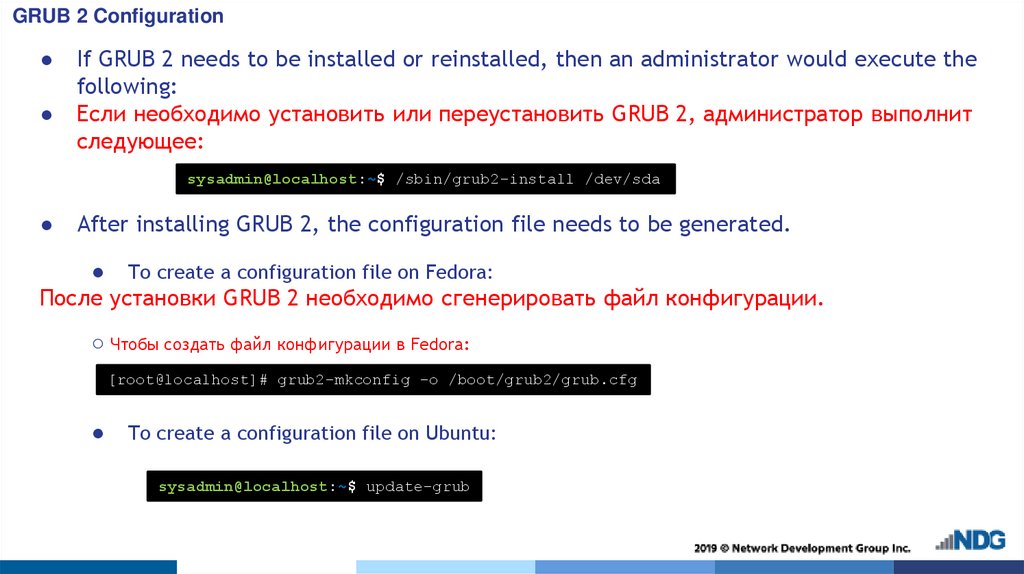
GRUB 2 ConfigurationIf GRUB 2 needs to be installed or reinstalled, then an administrator would execute the
following:
Если необходимо установить или переустановить GRUB 2, администратор выполнит
следующее:
sysadmin@localhost:~$ /sbin/grub2-install /dev/sda
After installing GRUB 2, the configuration file needs to be generated.
● To create a configuration file on Fedora:
После установки GRUB 2 необходимо сгенерировать файл конфигурации.
○ Чтобы создать файл конфигурации в Fedora:
[root@localhost]# grub2-mkconfig -o /boot/grub2/grub.cfg
To create a configuration file on Ubuntu:
sysadmin@localhost:~$ update-grub
28.
Runlevels29.
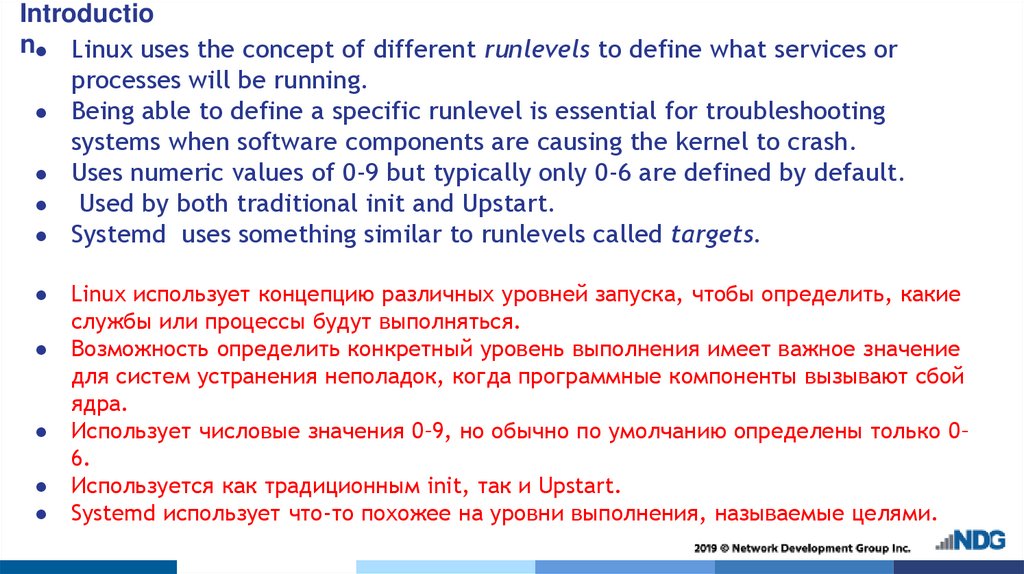
Introduction● Linux uses the concept of different runlevels to define what services or
processes will be running.
● Being able to define a specific runlevel is essential for troubleshooting
systems when software components are causing the kernel to crash.
● Uses numeric values of 0-9 but typically only 0-6 are defined by default.
● Used by both traditional init and Upstart.
● Systemd uses something similar to runlevels called targets.
Linux использует концепцию различных уровней запуска, чтобы определить, какие
службы или процессы будут выполняться.
Возможность определить конкретный уровень выполнения имеет важное значение
для систем устранения неполадок, когда программные компоненты вызывают сбой
ядра.
Использует числовые значения 0–9, но обычно по умолчанию определены только 0–
6.
Используется как традиционным init, так и Upstart.
Systemd использует что-то похожее на уровни выполнения, называемые целями.
30.
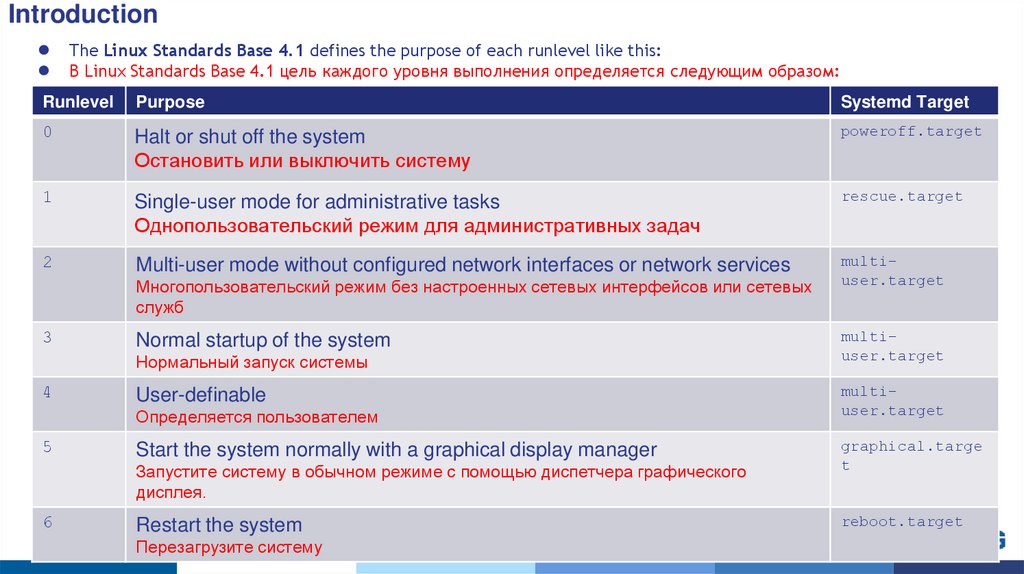
IntroductionThe Linux Standards Base 4.1 defines the purpose of each runlevel like this:
В Linux Standards Base 4.1 цель каждого уровня выполнения определяется следующим образом:
Runlevel
Purpose
Systemd Target
0
Halt or shut off the system
Остановить или выключить систему
poweroff.target
1
Single-user mode for administrative tasks
Однопользовательский режим для административных задач
rescue.target
2
Multi-user mode without configured network interfaces or network services
multiuser.target
Многопользовательский режим без настроенных сетевых интерфейсов или сетевых
служб
3
Normal startup of the system
Нормальный запуск системы
4
User-definable
Определяется пользователем
5
Start the system normally with a graphical display manager
Запустите систему в обычном режиме с помощью диспетчера графического
дисплея.
6
Restart the system
Перезагрузите систему
multiuser.target
multiuser.target
graphical.targe
t
reboot.target
31.
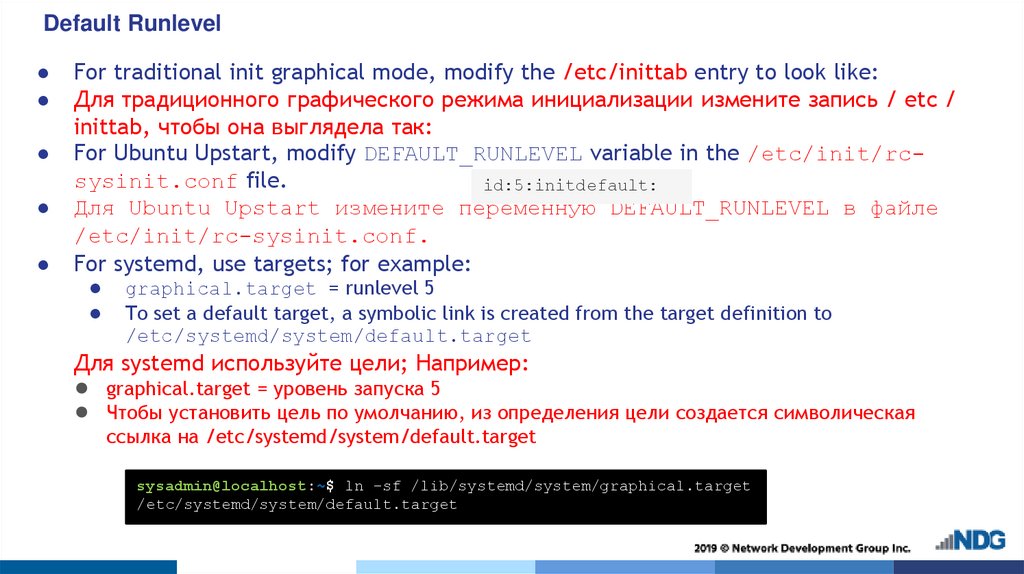
Default RunlevelFor traditional init graphical mode, modify the /etc/inittab entry to look like:
Для традиционного графического режима инициализации измените запись / etc /
inittab, чтобы она выглядела так:
For Ubuntu Upstart, modify DEFAULT_RUNLEVEL variable in the /etc/init/rcsysinit.conf file.
id:5:initdefault:
Для Ubuntu Upstart измените переменную DEFAULT_RUNLEVEL в файле
/etc/init/rc-sysinit.conf.
For systemd, use targets; for example:
● graphical.target = runlevel 5
● To set a default target, a symbolic link is created from the target definition to
/etc/systemd/system/default.target
Для systemd используйте цели; Например:
graphical.target = уровень запуска 5
Чтобы установить цель по умолчанию, из определения цели создается символическая
ссылка на /etc/systemd/system/default.target
sysadmin@localhost:~$ ln -sf /lib/systemd/system/graphical.target
/etc/systemd/system/default.target
32.
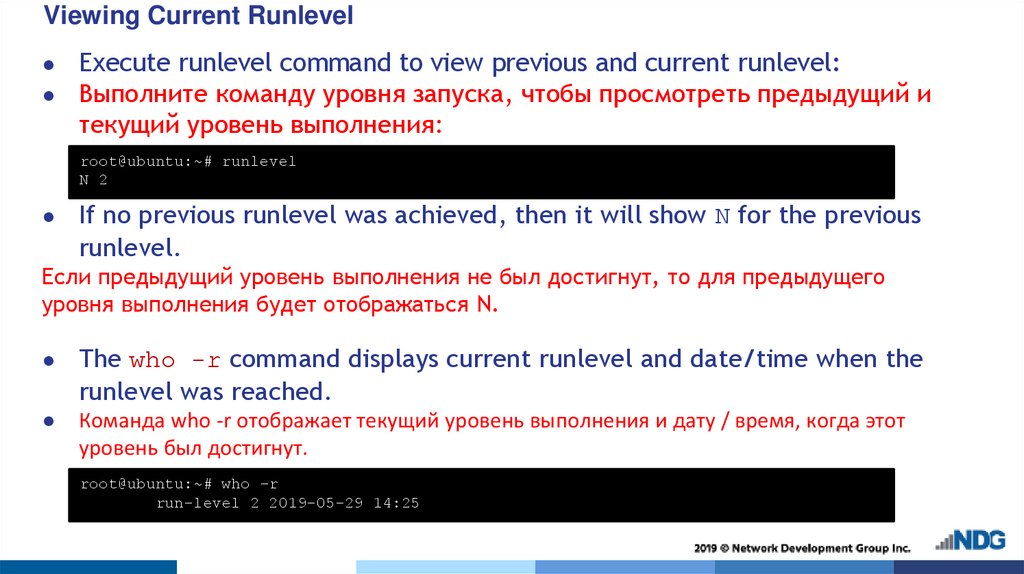
Viewing Current RunlevelExecute runlevel command to view previous and current runlevel:
Выполните команду уровня запуска, чтобы просмотреть предыдущий и
текущий уровень выполнения:
root@ubuntu:~# runlevel
N 2
If no previous runlevel was achieved, then it will show N for the previous
runlevel.
Если предыдущий уровень выполнения не был достигнут, то для предыдущего
уровня выполнения будет отображаться N.
The who -r command displays current runlevel and date/time when the
runlevel was reached.
Команда who -r отображает текущий уровень выполнения и дату / время, когда этот
уровень был достигнут.
root@ubuntu:~# who -r
run-level 2 2019-05-29 14:25
33.
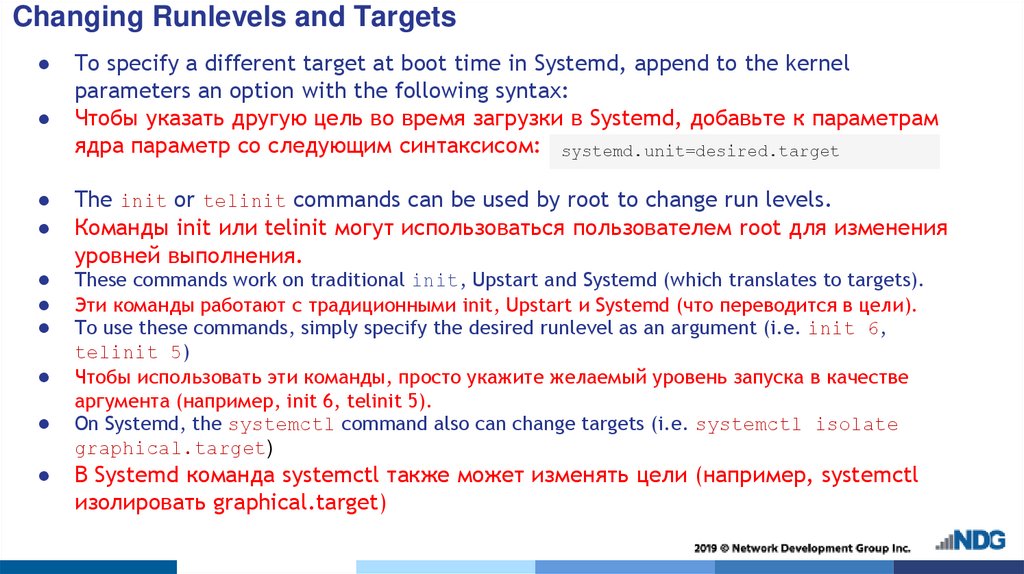
Changing Runlevels and TargetsTo specify a different target at boot time in Systemd, append to the kernel
parameters an option with the following syntax:
Чтобы указать другую цель во время загрузки в Systemd, добавьте к параметрам
ядра параметр со следующим синтаксисом: systemd.unit=desired.target
The init or telinit commands can be used by root to change run levels.
Команды init или telinit могут использоваться пользователем root для изменения
уровней выполнения.
These commands work on traditional init, Upstart and Systemd (which translates to targets).
Эти команды работают с традиционными init, Upstart и Systemd (что переводится в цели).
To use these commands, simply specify the desired runlevel as an argument (i.e. init 6,
telinit 5)
Чтобы использовать эти команды, просто укажите желаемый уровень запуска в качестве
аргумента (например, init 6, telinit 5).
On Systemd, the systemctl command also can change targets (i.e. systemctl isolate
graphical.target)
В Systemd команда systemctl также может изменять цели (например, systemctl
изолировать graphical.target)
34.
Changing Runlevels and TargetsTo bring the system down to runlevel zero, execute the halt, poweroff,
or shutdown command.
With the shutdown command, you must specify a shutdown time; for example:
Чтобы перевести систему на нулевой уровень запуска, выполните команду halt,
poweroff или shutdown.
С помощью команды выключения вы должны указать время выключения; Например:
sysadmin@localhost:~$ shutdown now
sysadmin@localhost:~$ shutdown +10
A message can be provided a to all users who are logged on before shutdown:
Сообщение может быть предоставлено всем пользователям, вошедшим в систему
перед выключением:
sysadmin@localhost:~$ shutdown now "System going down for repairs"
To reboot, use the shutdown –r command (similar to runlevel 6).
To halt, use the shutdown –h command (similar to runlevel 0).
Для перезагрузки используйте команду shutdown –r (аналогично уровню выполнения 6).
Чтобы остановиться, используйте команду shutdown –h (аналогично уровню выполнения 0).
35.
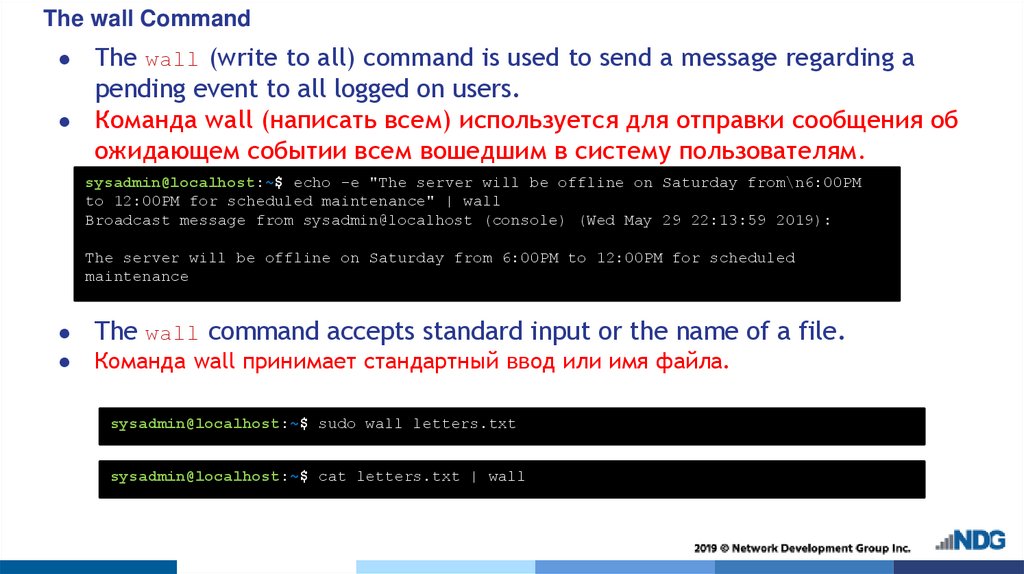
The wall CommandThe wall (write to all) command is used to send a message regarding a
pending event to all logged on users.
● Команда wall (написать всем) используется для отправки сообщения об
ожидающем событии всем вошедшим в систему пользователям.
sysadmin@localhost:~$ echo -e "The server will be offline on Saturday from\n6:00PM
to 12:00PM for scheduled maintenance" | wall
Broadcast message from sysadmin@localhost (console) (Wed May 29 22:13:59 2019):
The server will be offline on Saturday from 6:00PM to 12:00PM for scheduled
maintenance
The wall command accepts standard input or the name of a file.
Команда wall принимает стандартный ввод или имя файла.
sysadmin@localhost:~$ sudo wall letters.txt
sysadmin@localhost:~$ cat letters.txt | wall
36.
Managing System ServicesThe administrator can control which services will be provided by the various daemons.
A daemon is a processes that runs in the background of the system and provides a service.
Администратор может контролировать, какие службы будут предоставлять
различные демоны.
If a system is using the traditional init process to manage system services, then the
scripts in the /etc/rc.d/init.d directory are used.
For example, the script to manage the web server has a path name
of /etc/rc.d/init.d/httpd
Each script starts or stops a service or feature.
Демон - это процесс, который работает в фоновом режиме системы и
предоставляет услуги.
● Если система использует традиционный процесс инициализации для
управления системными службами, то используются сценарии в каталоге
/etc/rc.d/init.d.
● Например, сценарий для управления веб-сервером имеет путь
/etc/rc.d/init.d/httpd.
● Каждый сценарий запускает или останавливает службу или функцию.
37.
Managing System ServicesThe administrator can use these scripts to manually start or stop a service
For example, to manually start a web server, execute:
Администратор может использовать эти сценарии для запуска или остановки
службы вручную
Например, чтобы вручную запустить веб-сервер, выполните:
[root@localhost ~]# /etc/rc.d/init.d/httpd start
Starting httpd:
To manually stop a running web server, execute:
Чтобы вручную остановить запущенный веб-сервер, выполните
[root@localhost ~]# /etc/rc.d/init.d/httpd stop
Stopping httpd:
Instead of having to type the full path name to the script, many systems provide
a service script:
Вместо того, чтобы вводить полное имя пути к сценарию, многие системы
предоставляют сценарий службы:
[root@localhost ~]# service httpd start
[root@localhost ~]# service httpd stop
38.
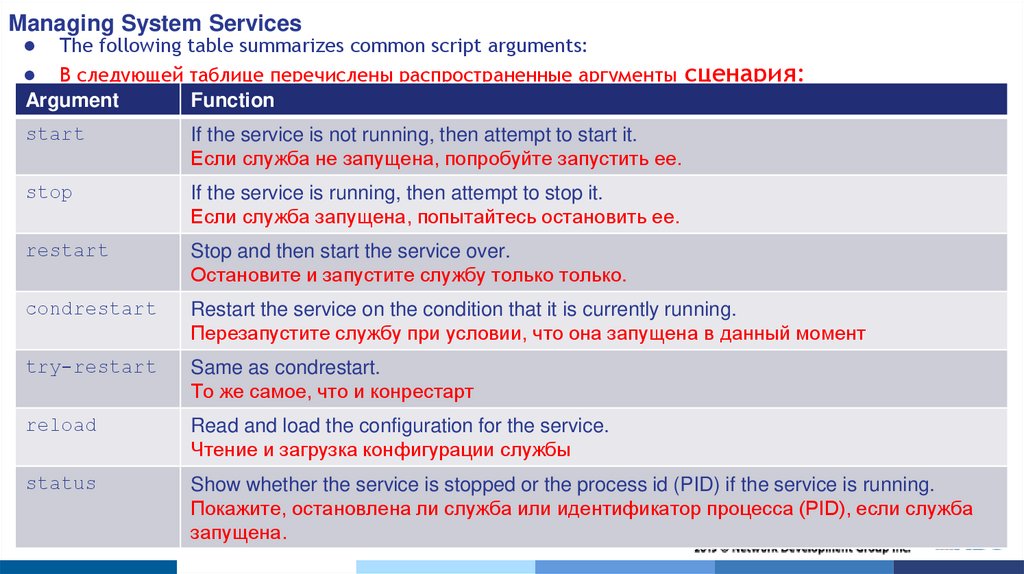
Managing System Services● The following table summarizes common script arguments:
● В следующей таблице перечислены распространенные аргументы сценария:
Argument
Function
start
If the service is not running, then attempt to start it.
Если служба не запущена, попробуйте запустить ее.
stop
If the service is running, then attempt to stop it.
Если служба запущена, попытайтесь остановить ее.
restart
Stop and then start the service over.
Остановите и запустите службу только только.
condrestart
Restart the service on the condition that it is currently running.
Перезапустите службу при условии, что она запущена в данный момент
try-restart
Same as condrestart.
То же самое, что и конрестарт
reload
Read and load the configuration for the service.
Чтение и загрузка конфигурации службы
status
Show whether the service is stopped or the process id (PID) if the service is running.
Покажите, остановлена ли служба или идентификатор процесса (PID), если служба
запущена.
39.
Managing System ServicesArgument
Function
fullstatus
For the Apache web server, displays the URL /server-status.
Для веб-сервера Apache отображается URL-адрес /server-status.
graceful
Gracefully restarts the service. If the service is not running, then it is started.
Unlike a normal restart, open connections are not aborted.
Корректно перезапускает службу. Если служба не запущена, то она
запускается. В отличие от обычной перезагрузки, открытые соединения
не прерываются.
help
Displays the usage of the script.
Отображает использование скрипта.
configtest
Checks the configuration files for correctness.
Проверяет конфигурационные файлы на корректность.
40.
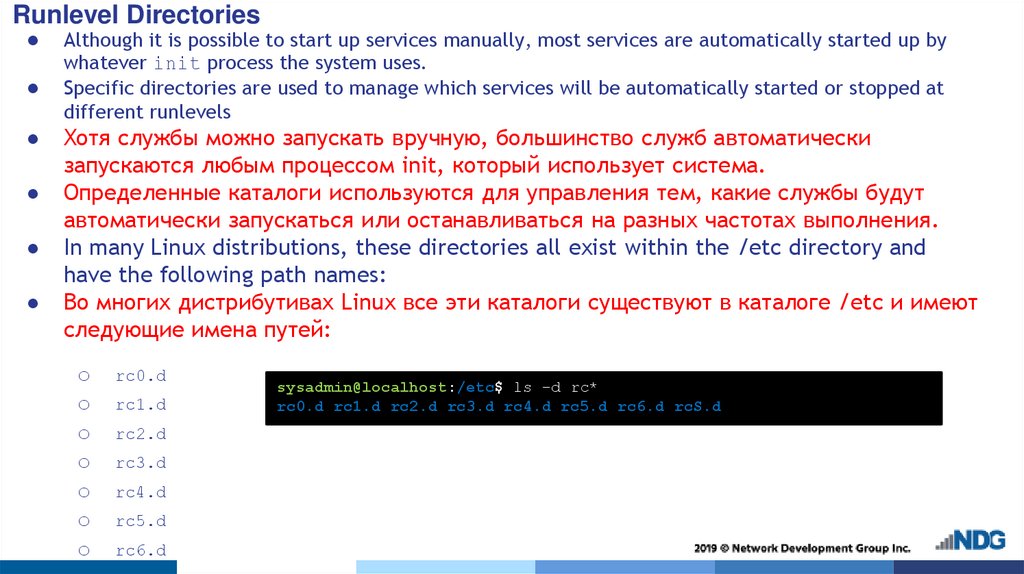
Runlevel DirectoriesAlthough it is possible to start up services manually, most services are automatically started up by
whatever init process the system uses.
Specific directories are used to manage which services will be automatically started or stopped at
different runlevels
Хотя службы можно запускать вручную, большинство служб автоматически
запускаются любым процессом init, который использует система.
Определенные каталоги используются для управления тем, какие службы будут
автоматически запускаться или останавливаться на разных частотах выполнения.
In many Linux distributions, these directories all exist within the /etc directory and
have the following path names:
Во многих дистрибутивах Linux все эти каталоги существуют в каталоге /etc и имеют
следующие имена путей:
o
o
o
o
o
o
o
rc0.d
rc1.d
rc2.d
rc3.d
rc4.d
rc5.d
rc6.d
sysadmin@localhost:/etc$ ls -d rc*
rc0.d rc1.d rc2.d rc3.d rc4.d rc5.d rc6.d rcS.d
41.
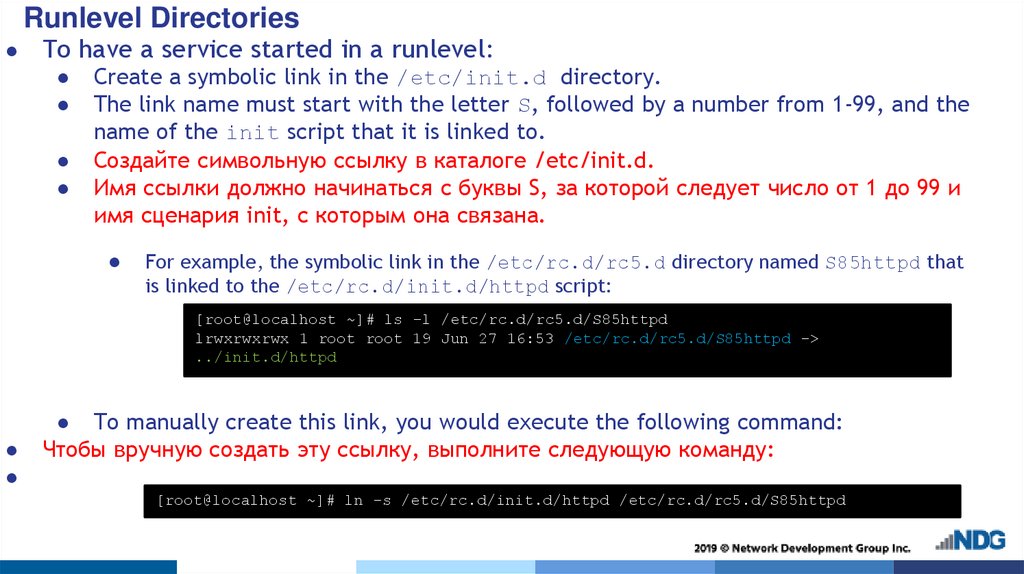
Runlevel DirectoriesTo have a service started in a runlevel:
Create a symbolic link in the /etc/init.d directory.
The link name must start with the letter S, followed by a number from 1-99, and the
name of the init script that it is linked to.
Создайте символьную ссылку в каталоге /etc/init.d.
Имя ссылки должно начинаться с буквы S, за которой следует число от 1 до 99 и
имя сценария init, с которым она связана.
For example, the symbolic link in the /etc/rc.d/rc5.d directory named S85httpd that
is linked to the /etc/rc.d/init.d/httpd script:
[root@localhost ~]# ls -l /etc/rc.d/rc5.d/S85httpd
lrwxrwxrwx 1 root root 19 Jun 27 16:53 /etc/rc.d/rc5.d/S85httpd ->
../init.d/httpd
● To manually create this link, you would execute the following command:
Чтобы вручную создать эту ссылку, выполните следующую команду:
[root@localhost ~]# ln -s /etc/rc.d/init.d/httpd /etc/rc.d/rc5.d/S85httpd
42.
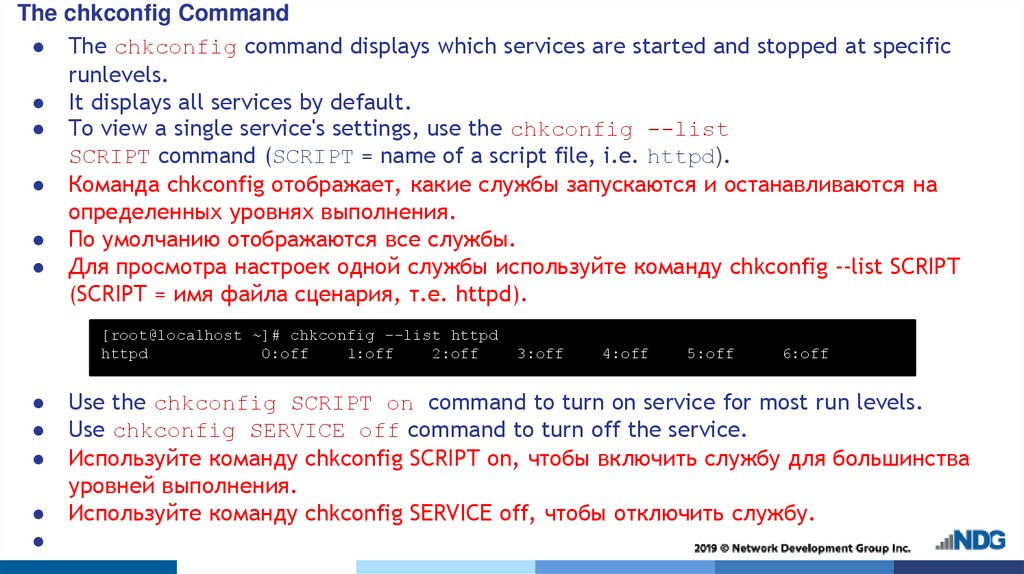
The chkconfig Command● The chkconfig command displays which services are started and stopped at specific
runlevels.
● It displays all services by default.
● To view a single service's settings, use the chkconfig --list
SCRIPT command (SCRIPT = name of a script file, i.e. httpd).
● Команда chkconfig отображает, какие службы запускаются и останавливаются на
определенных уровнях выполнения.
● По умолчанию отображаются все службы.
● Для просмотра настроек одной службы используйте команду chkconfig --list SCRIPT
(SCRIPT = имя файла сценария, т.е. httpd).
[root@localhost ~]# chkconfig --list httpd
httpd
0:off
1:off
2:off
3:off
4:off
5:off
6:off
Use the chkconfig SCRIPT on command to turn on service for most run levels.
Use chkconfig SERVICE off command to turn off the service.
Используйте команду chkconfig SCRIPT on, чтобы включить службу для большинства
уровней выполнения.
Используйте команду chkconfig SERVICE off, чтобы отключить службу.
43.
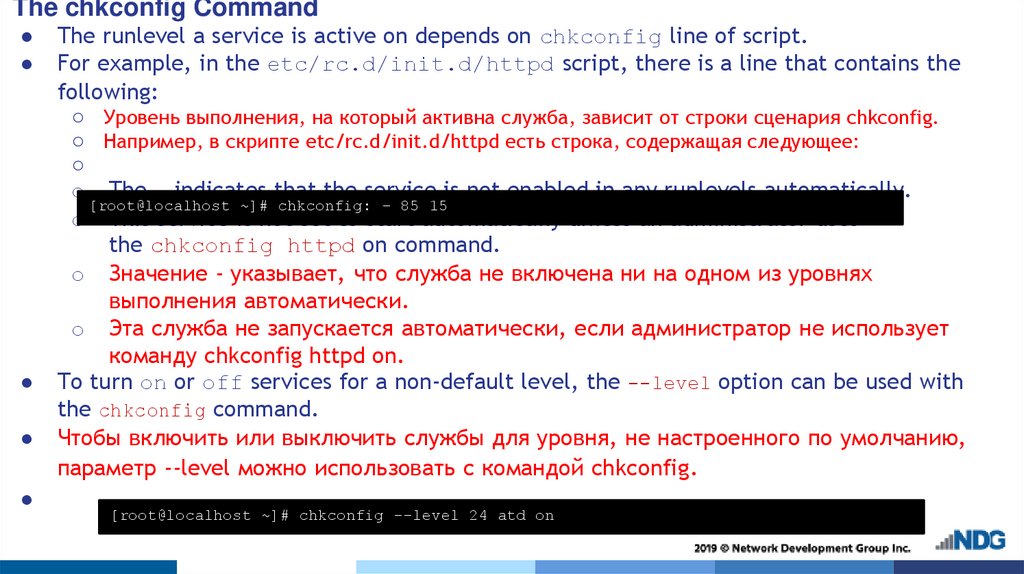
The chkconfig CommandThe runlevel a service is active on depends on chkconfig line of script.
For example, in the etc/rc.d/init.d/httpd script, there is a line that contains the
following:
○ Уровень выполнения, на который активна служба, зависит от строки сценария chkconfig.
○ Например, в скрипте etc/rc.d/init.d/httpd есть строка, содержащая следующее:
○
o The - indicates that the service is not enabled in any runlevels automatically.
[root@localhost ~]# chkconfig: - 85 15
o This service is not set to start automatically unless an administrator uses
the chkconfig httpd on command.
o Значение - указывает, что служба не включена ни на одном из уровнях
выполнения автоматически.
o Эта служба не запускается автоматически, если администратор не использует
команду chkconfig httpd on.
To turn on or off services for a non-default level, the --level option can be used with
the chkconfig command.
Чтобы включить или выключить службы для уровня, не настроенного по умолчанию,
параметр --level можно использовать с командой chkconfig.
[root@localhost ~]# chkconfig --level 24 atd on
44.
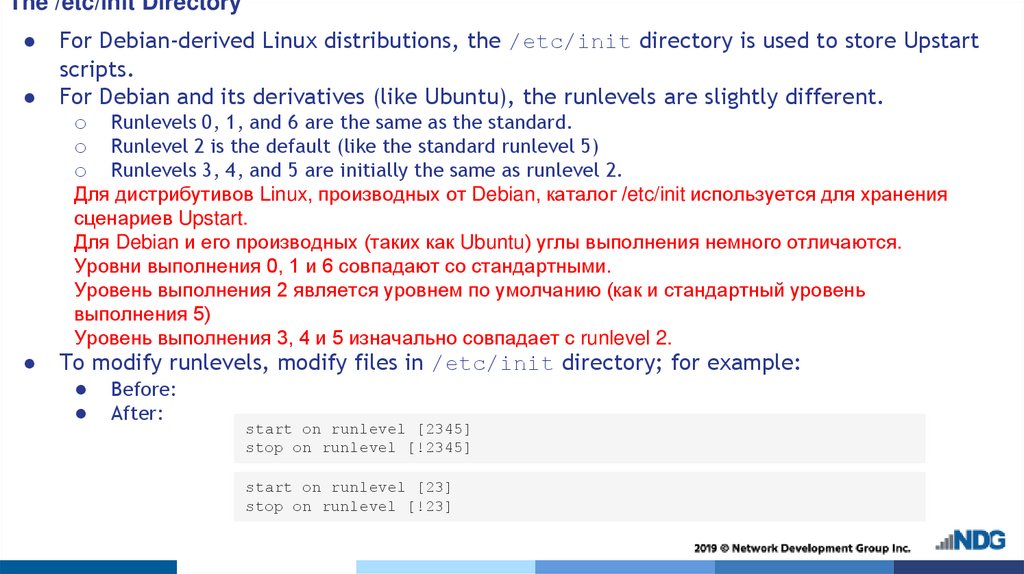
The /etc/init DirectoryFor Debian-derived Linux distributions, the /etc/init directory is used to store Upstart
scripts.
For Debian and its derivatives (like Ubuntu), the runlevels are slightly different.
o Runlevels 0, 1, and 6 are the same as the standard.
o Runlevel 2 is the default (like the standard runlevel 5)
o Runlevels 3, 4, and 5 are initially the same as runlevel 2.
Для дистрибутивов Linux, производных от Debian, каталог /etc/init используется для хранения
сценариев Upstart.
Для Debian и его производных (таких как Ubuntu) углы выполнения немного отличаются.
Уровни выполнения 0, 1 и 6 совпадают со стандартными.
Уровень выполнения 2 является уровнем по умолчанию (как и стандартный уровень
выполнения 5)
Уровень выполнения 3, 4 и 5 изначально совпадает с runlevel 2.
To modify runlevels, modify files in /etc/init directory; for example:
● Before:
● After:
start on runlevel [2345]
stop on runlevel [!2345]
start on runlevel [23]
stop on runlevel [!23]
45.
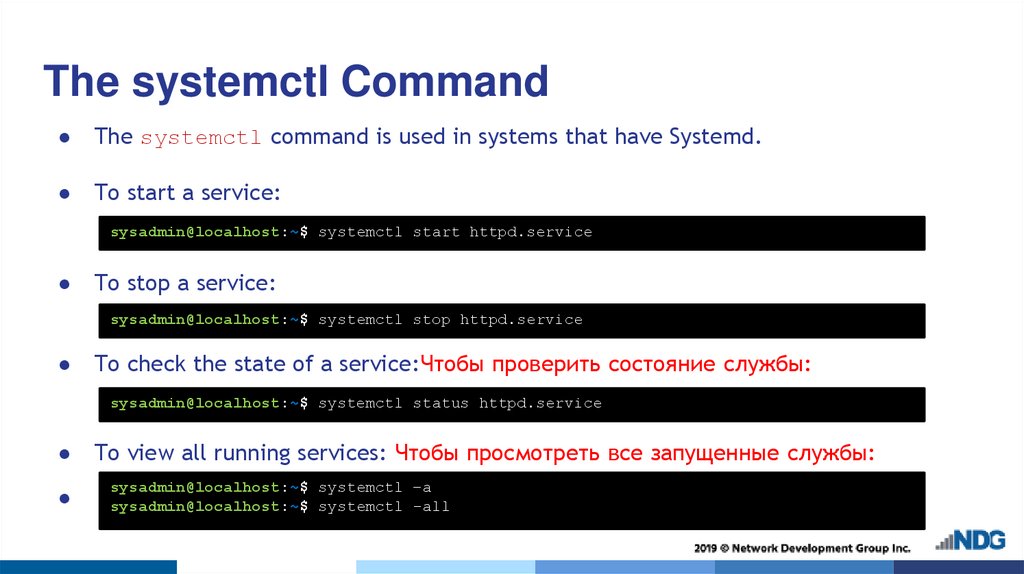
The systemctl CommandThe systemctl command is used in systems that have Systemd.
To start a service:
sysadmin@localhost:~$ systemctl start httpd.service
To stop a service:
sysadmin@localhost:~$ systemctl stop httpd.service
To check the state of a service:Чтобы проверить состояние службы:
sysadmin@localhost:~$ systemctl status httpd.service
To view all running services: Чтобы просмотреть все запущенные службы:
sysadmin@localhost:~$ systemctl –a
sysadmin@localhost:~$ systemctl -all
46.
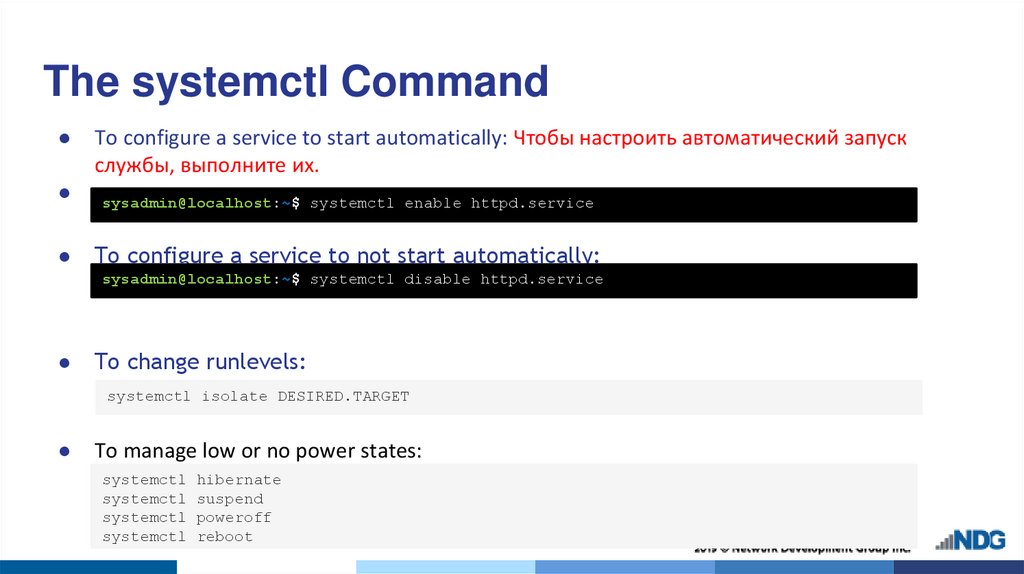
The systemctl CommandTo configure a service to start automatically: Чтобы настроить автоматический запуск
службы, выполните их.
sysadmin@localhost:~$ systemctl enable httpd.service
To configure a service to not start automatically:
sysadmin@localhost:~$ systemctl disable httpd.service
To change runlevels:
systemctl isolate DESIRED.TARGET
To manage low or no power states:
systemctl
systemctl
systemctl
systemctl
hibernate
suspend
poweroff
reboot
47.
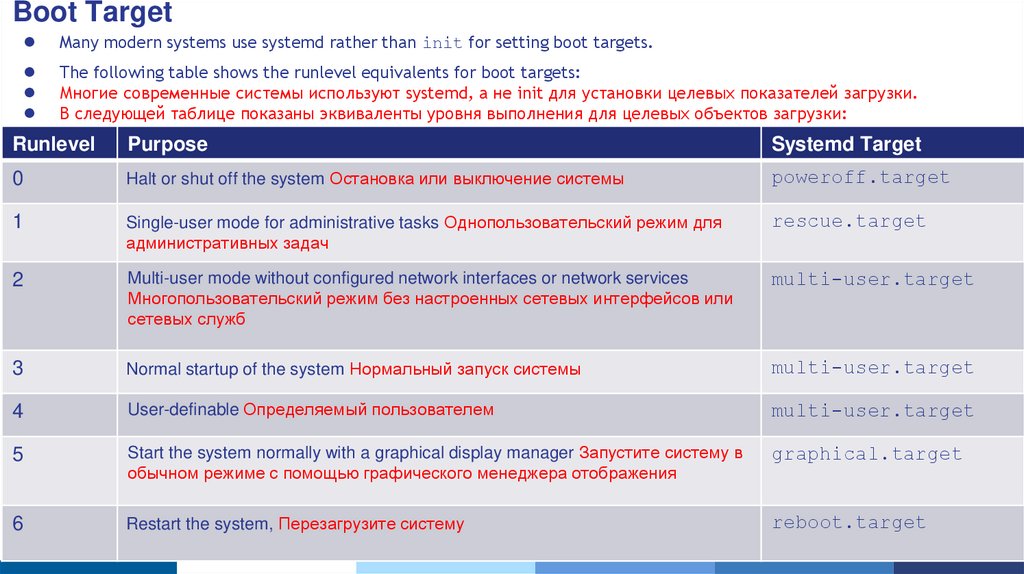
Boot TargetMany modern systems use systemd rather than init for setting boot targets.
The following table shows the runlevel equivalents for boot targets:
Многие современные системы используют systemd, а не init для установки целевых показателей загрузки.
В следующей таблице показаны эквиваленты уровня выполнения для целевых объектов загрузки:
Runlevel
Purpose
Systemd Target
0
Halt or shut off the system Остановка или выключение системы
poweroff.target
1
Single-user mode for administrative tasks Однопользовательский режим для
административных задач
rescue.target
2
Multi-user mode without configured network interfaces or network services
Многопользовательский режим без настроенных сетевых интерфейсов или
сетевых служб
multi-user.target
3
Normal startup of the system Нормальный запуск системы
multi-user.target
4
User-definable Определяемый пользователем
multi-user.target
5
Start the system normally with a graphical display manager Запустите систему в
обычном режиме с помощью графического менеджера отображения
graphical.target
6
Restart the system, Перезагрузите систему
reboot.target
48.
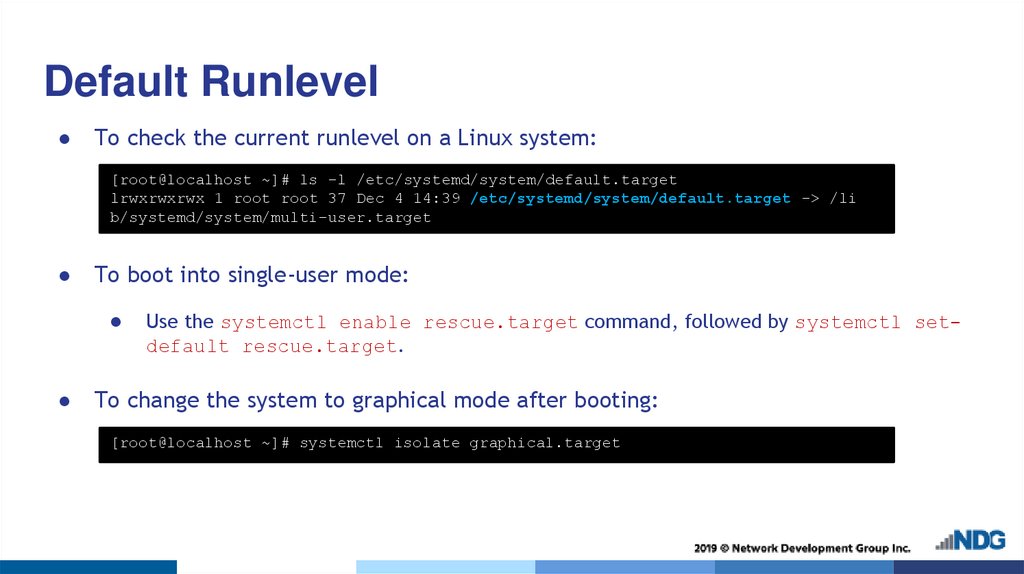
Default RunlevelTo check the current runlevel on a Linux system:
[root@localhost ~]# ls -l /etc/systemd/system/default.target
lrwxrwxrwx 1 root root 37 Dec 4 14:39 /etc/systemd/system/default.target -> /li
b/systemd/system/multi-user.target
To boot into single-user mode:
Use the systemctl enable rescue.target command, followed by systemctl setdefault rescue.target.
To change the system to graphical mode after booting:
[root@localhost ~]# systemctl isolate graphical.target
49.
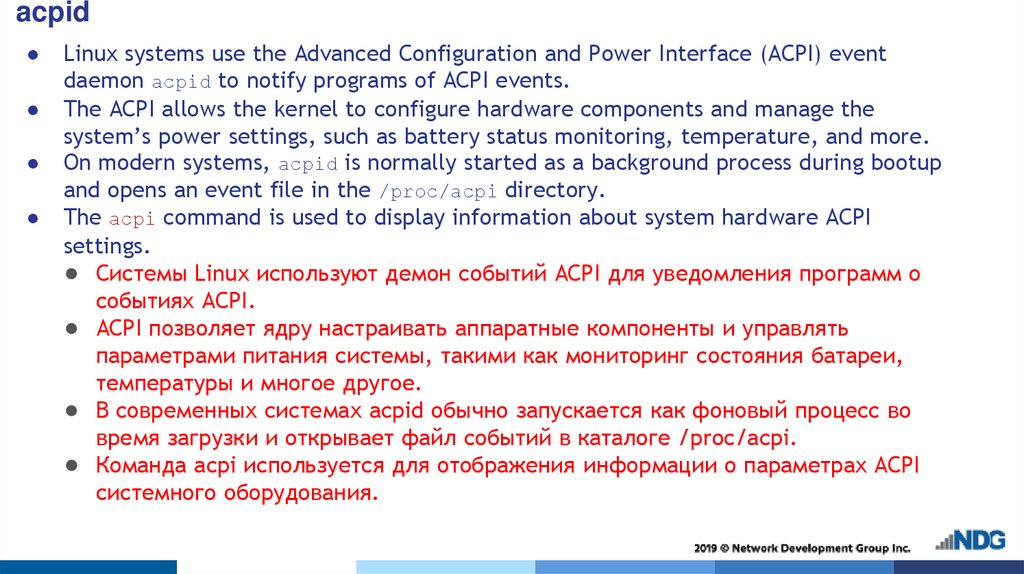
acpidLinux systems use the Advanced Configuration and Power Interface (ACPI) event
daemon acpid to notify programs of ACPI events.
The ACPI allows the kernel to configure hardware components and manage the
system’s power settings, such as battery status monitoring, temperature, and more.
On modern systems, acpid is normally started as a background process during bootup
and opens an event file in the /proc/acpi directory.
The acpi command is used to display information about system hardware ACPI
settings.
● Системы Linux используют демон событий ACPI для уведомления программ о
событиях ACPI.
● ACPI позволяет ядру настраивать аппаратные компоненты и управлять
параметрами питания системы, такими как мониторинг состояния батареи,
температуры и многое другое.
● В современных системах acpid обычно запускается как фоновый процесс во
время загрузки и открывает файл событий в каталоге /proc/acpi.
● Команда acpi используется для отображения информации о параметрах ACPI
системного оборудования.
50.
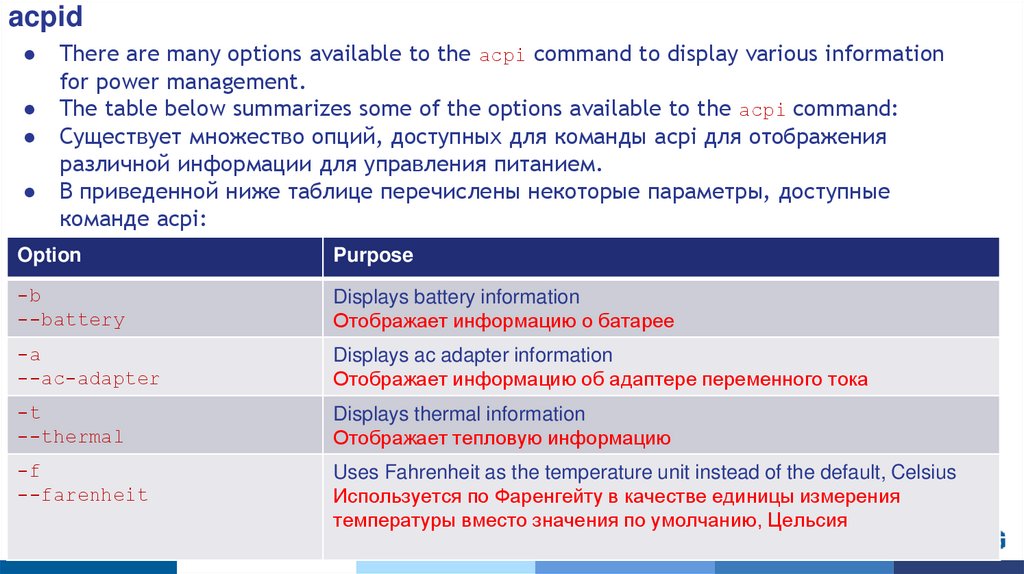
acpidThere are many options available to the acpi command to display various information
for power management.
The table below summarizes some of the options available to the acpi command:
Существует множество опций, доступных для команды acpi для отображения
различной информации для управления питанием.
В приведенной ниже таблице перечислены некоторые параметры, доступные
команде acpi:
Option
Purpose
-b
--battery
Displays battery information
Отображает информацию о батарее
-a
--ac-adapter
Displays ac adapter information
Отображает информацию об адаптере переменного тока
-t
--thermal
Displays thermal information
Отображает тепловую информацию
-f
--farenheit
Uses Fahrenheit as the temperature unit instead of the default, Celsius
Используется по Фаренгейту в качестве единицы измерения
температуры вместо значения по умолчанию, Цельсия