


 software
Similar presentations:


System Services. Lection #4
1.
Lection #4System Services
2.
System Time3.
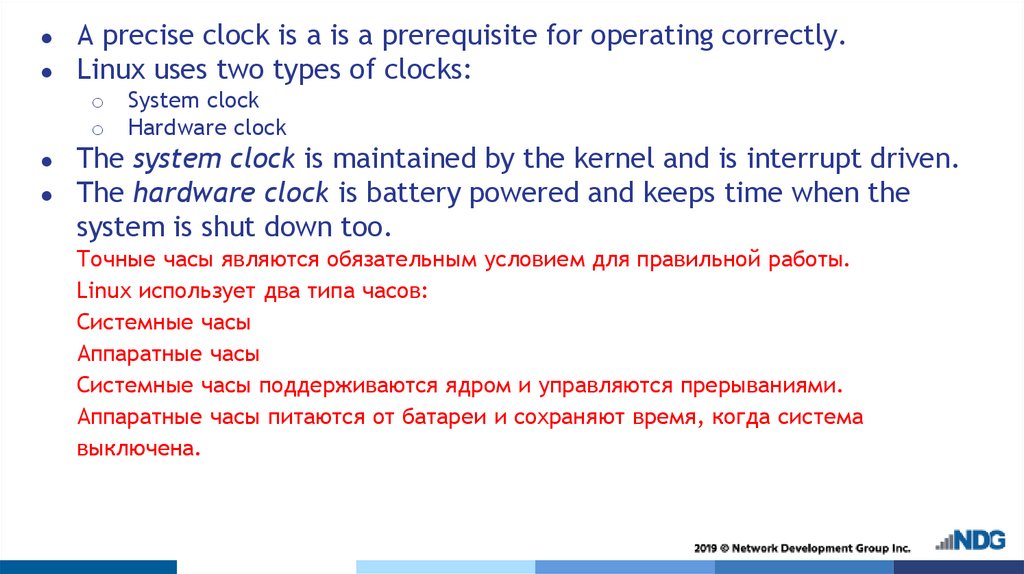
A precise clock is a is a prerequisite for operating correctly.
Linux uses two types of clocks:
o
o
System clock
Hardware clock
The system clock is maintained by the kernel and is interrupt driven.
The hardware clock is battery powered and keeps time when the
system is shut down too.
Точные часы являются обязательным условием для правильной работы.
Linux использует два типа часов:
Системные часы
Аппаратные часы
Системные часы поддерживаются ядром и управляются прерываниями.
Аппаратные часы питаются от батареи и сохраняют время, когда система
выключена.
4.
Hardware Clock5.
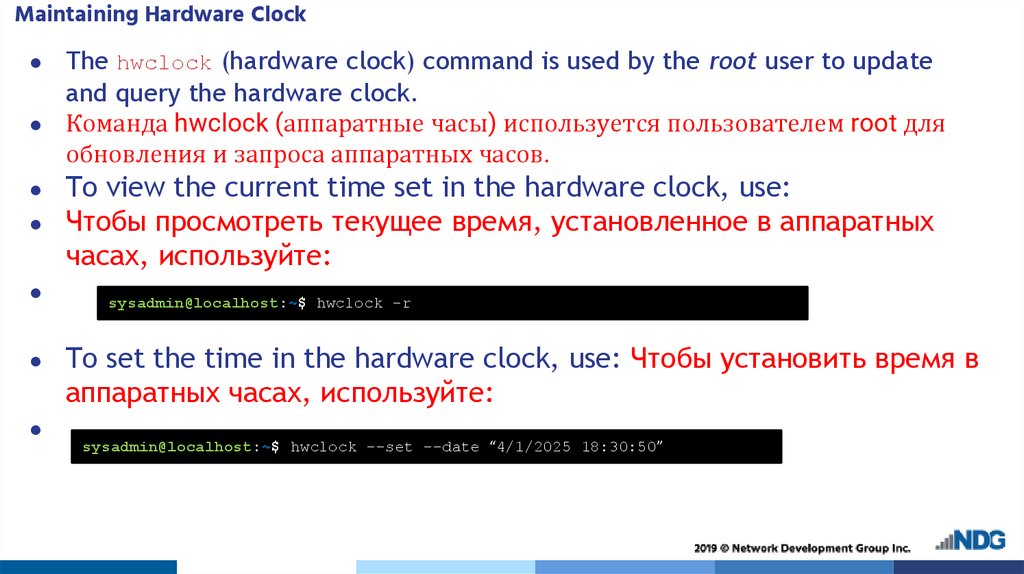
Maintaining Hardware ClockThe hwclock (hardware clock) command is used by the root user to update
and query the hardware clock.
● Команда hwclock (аппаратные часы) используется пользователем root для
обновления и запроса аппаратных часов.
To view the current time set in the hardware clock, use:
Чтобы просмотреть текущее время, установленное в аппаратных
часах, используйте:
sysadmin@localhost:~$ hwclock -r
To set the time in the hardware clock, use: Чтобы установить время в
аппаратных часах, используйте:
sysadmin@localhost:~$ hwclock --set --date “4/1/2025 18:30:50”
6.
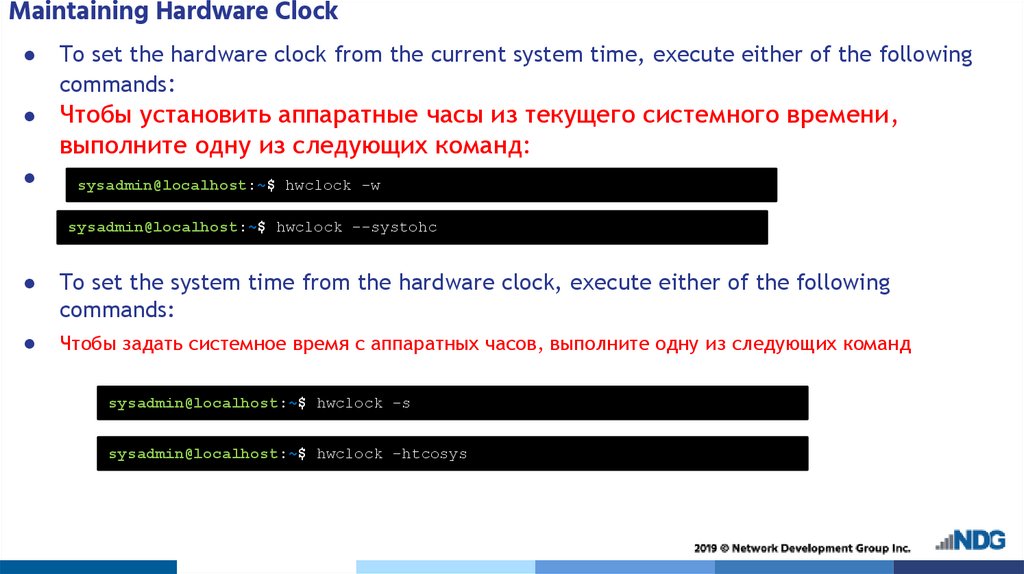
Maintaining Hardware ClockTo set the hardware clock from the current system time, execute either of the following
commands:
Чтобы установить аппаратные часы из текущего системного времени,
выполните одну из следующих команд:
sysadmin@localhost:~$ hwclock -w
sysadmin@localhost:~$ hwclock --systohc
To set the system time from the hardware clock, execute either of the following
commands:
Чтобы задать системное время с аппаратных часов, выполните одну из следующих команд
sysadmin@localhost:~$ hwclock -s
sysadmin@localhost:~$ hwclock -htcosys
7.
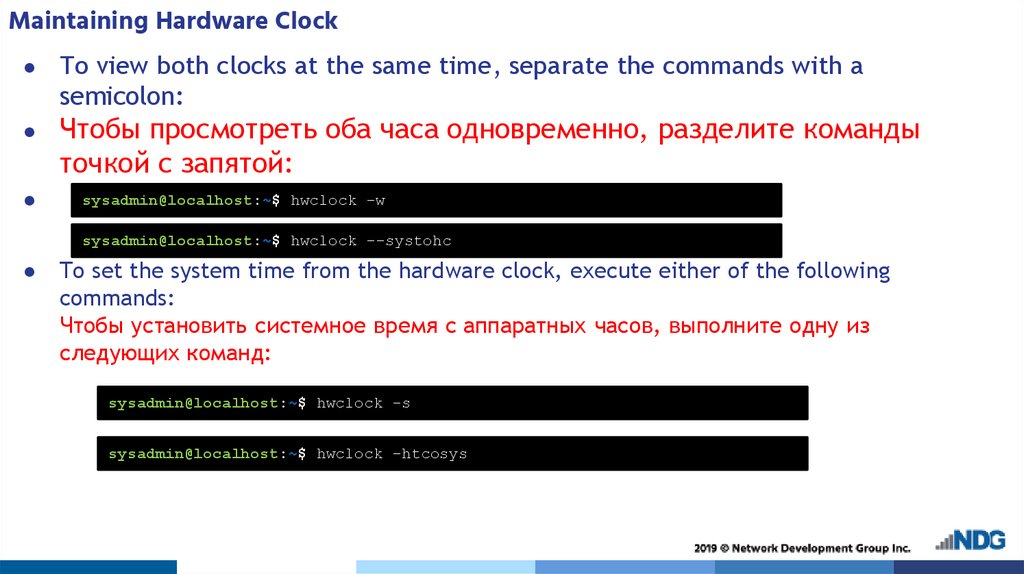
Maintaining Hardware ClockTo view both clocks at the same time, separate the commands with a
semicolon:
Чтобы просмотреть оба часа одновременно, разделите команды
точкой с запятой:
sysadmin@localhost:~$ hwclock -w
sysadmin@localhost:~$ hwclock --systohc
To set the system time from the hardware clock, execute either of the following
commands:
Чтобы установить системное время с аппаратных часов, выполните одну из
следующих команд:
sysadmin@localhost:~$ hwclock -s
sysadmin@localhost:~$ hwclock -htcosys
8.
System Clock9.
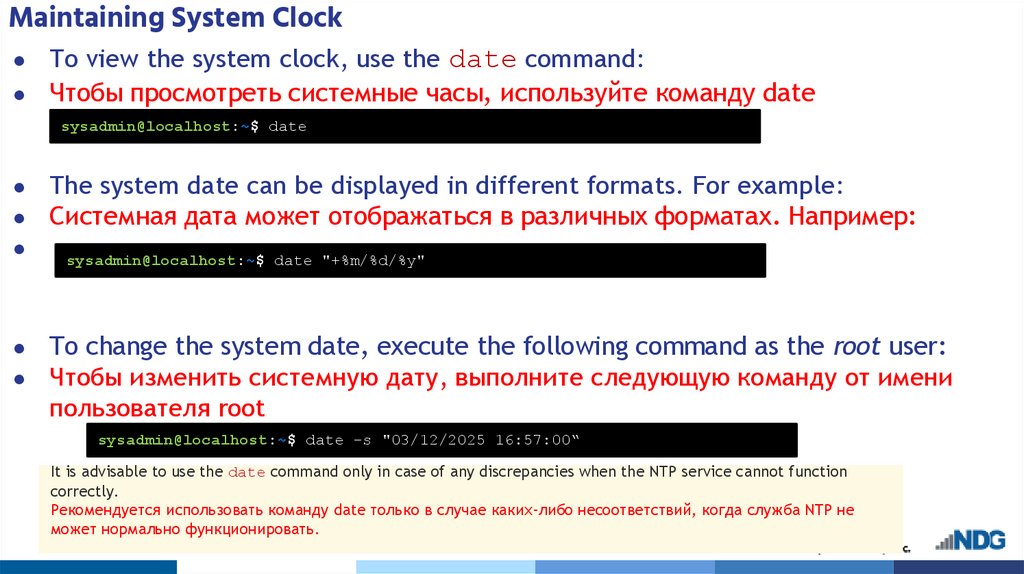
Maintaining System ClockTo view the system clock, use the date command:
Чтобы просмотреть системные часы, используйте команду date
sysadmin@localhost:~$ date
The system date can be displayed in different formats. For example:
Системная дата может отображаться в различных форматах. Например:
To change the system date, execute the following command as the root user:
Чтобы изменить системную дату, выполните следующую команду от имени
пользователя root
sysadmin@localhost:~$ date "+%m/%d/%y"
sysadmin@localhost:~$ date -s "03/12/2025 16:57:00“
It is advisable to use the date command only in case of any discrepancies when the NTP service cannot function
correctly.
Рекомендуется использовать команду date только в случае каких-либо несоответствий, когда служба NTP не
может нормально функционировать.
10.
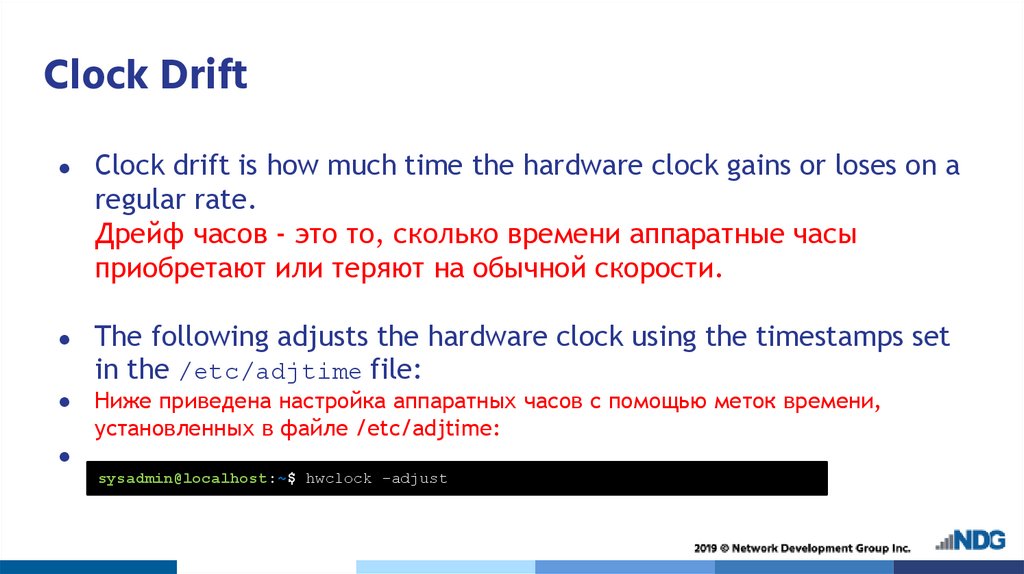
Clock DriftClock drift is how much time the hardware clock gains or loses on a
regular rate.
Дрейф часов - это то, сколько времени аппаратные часы
приобретают или теряют на обычной скорости.
The following adjusts the hardware clock using the timestamps set
in the /etc/adjtime file:
Ниже приведена настройка аппаратных часов с помощью меток времени,
установленных в файле /etc/adjtime:
sysadmin@localhost:~$ hwclock -adjust
11.
Setting Timezones12.
Setting TimezoneThe /usr/share/zoneinfo directory contains timezone date for
different regions.
Каталог /usr/share/zoneinfo содержит дату часового пояса для
разных регионов.
sysadmin@localhost:~$ ls /usr/share/zoneinfo
To set the time zone to the America Tijuana time zone (PST), execute the
following link ln command as the root user:
Чтобы установить часовой пояс Америки Тихуаны (PST), выполните
следующую команду link ln от имени пользователя root:
sysadmin@localhost:~$ ln -sf /usr/share/zoneinfo/America/Tijuana
Users can override the system timezone by setting the TZ environment
variable
Пользователи могут переопределить системный часовой пояс, задав переменную
среды TZ
13.
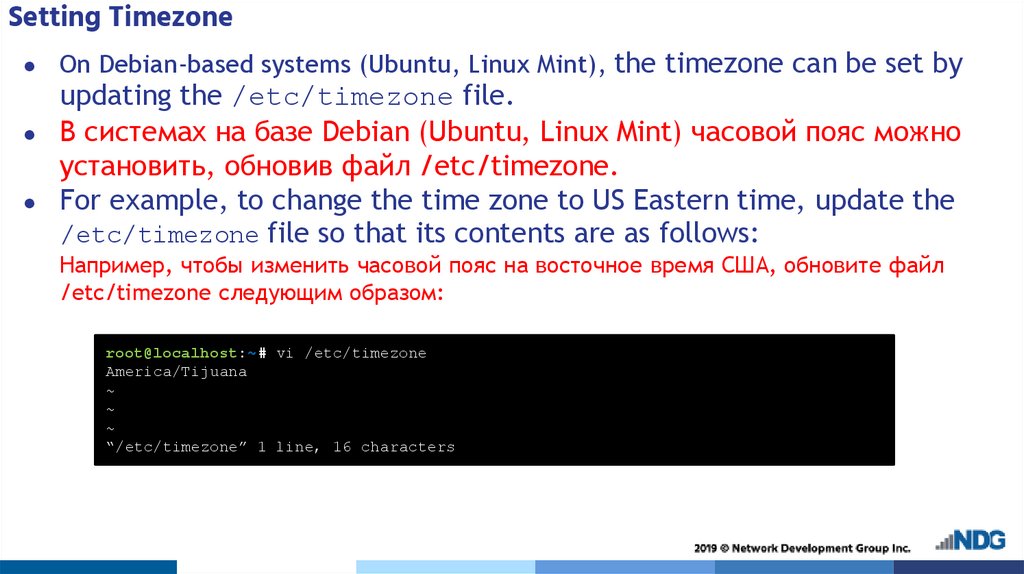
Setting TimezoneOn Debian-based systems (Ubuntu, Linux Mint), the timezone can be set by
updating the /etc/timezone file.
В системах на базе Debian (Ubuntu, Linux Mint) часовой пояс можно
установить, обновив файл /etc/timezone.
For example, to change the time zone to US Eastern time, update the
/etc/timezone file so that its contents are as follows:
Например, чтобы изменить часовой пояс на восточное время США, обновите файл
/etc/timezone следующим образом:
root@localhost:~# vi /etc/timezone
America/Tijuana
~
~
~
“/etc/timezone” 1 line, 16 characters
14.
Network Time Protocol (NTP)15.
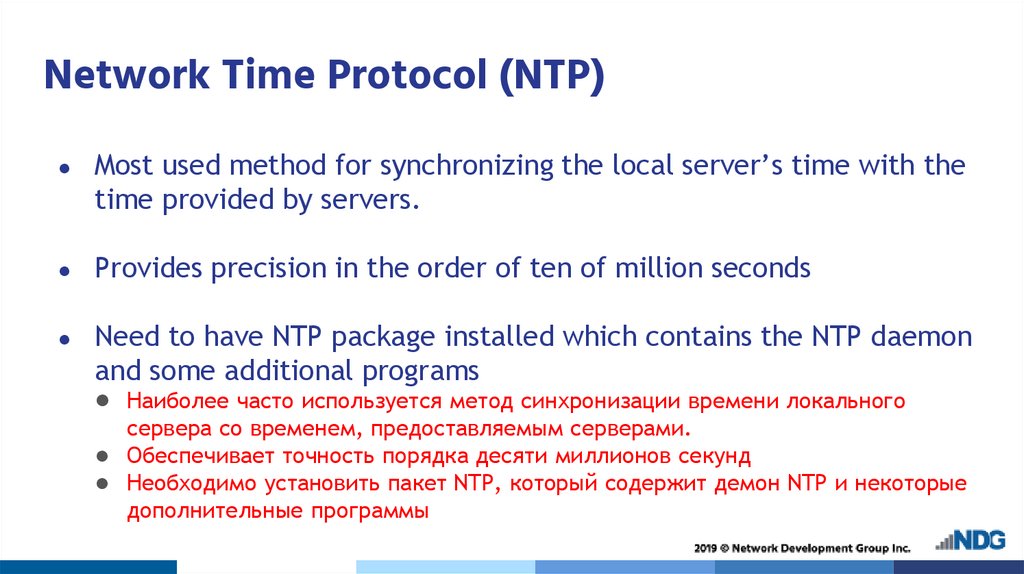
Network Time Protocol (NTP)Most used method for synchronizing the local server’s time with the
time provided by servers.
Provides precision in the order of ten of million seconds
Need to have NTP package installed which contains the NTP daemon
and some additional programs
● Наиболее часто используется метод синхронизации времени локального
сервера со временем, предоставляемым серверами.
● Обеспечивает точность порядка десяти миллионов секунд
● Необходимо установить пакет NTP, который содержит демон NTP и некоторые
дополнительные программы
16.
The ntpd daemonSets and updates the system time in synchronization with reference
time servers.
Sends messages to and receives messages from preconfigured servers
at certain intervals.
Can read data from external hardware resources such as GPS receivers.
Can optionally be configured as a time server.
● Задает и обновляет системное время при синхронизации с эталонными
серверами времени.
● Отправляет сообщения и получает сообщения от предварительно настроенных
серверов через определенные промежутки времени.
● Может считывать данные с внешних аппаратных ресурсов, таких как GPSприемники.
● При необходимости можно настроить в качестве сервера времени.
17.
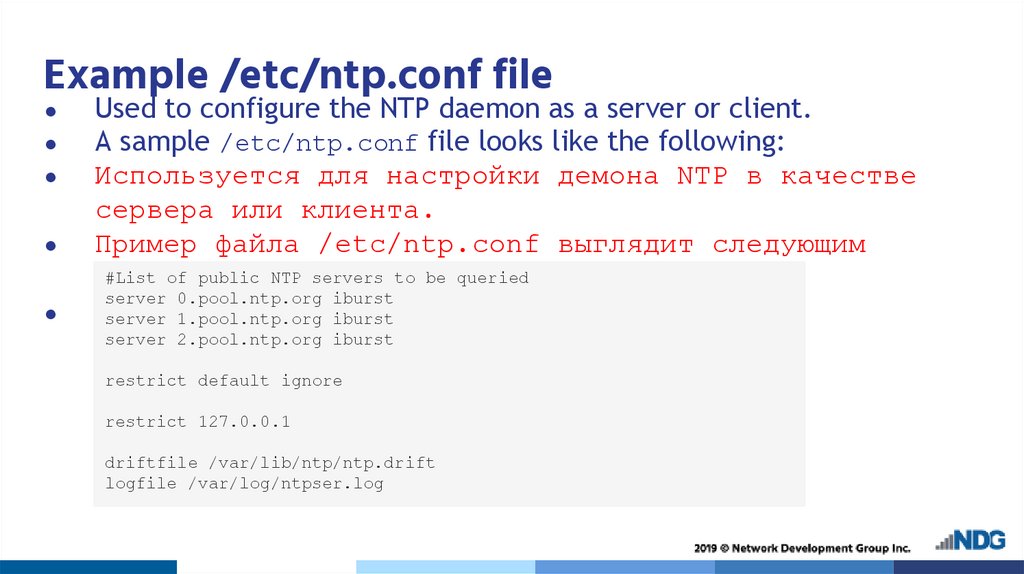
Example /etc/ntp.conf fileUsed to configure the NTP daemon as a server or client.
A sample /etc/ntp.conf file looks like the following:
Используется для настройки демона NTP в качестве
сервера или клиента.
Пример файла /etc/ntp.conf выглядит следующим
#List of public NTP servers to be queried
образом:
server 0.pool.ntp.org iburst
server 1.pool.ntp.org iburst
server 2.pool.ntp.org iburst
○
…
restrict default ignore
restrict 127.0.0.1
driftfile /var/lib/ntp/ntp.drift
logfile /var/log/ntpser.log
18.
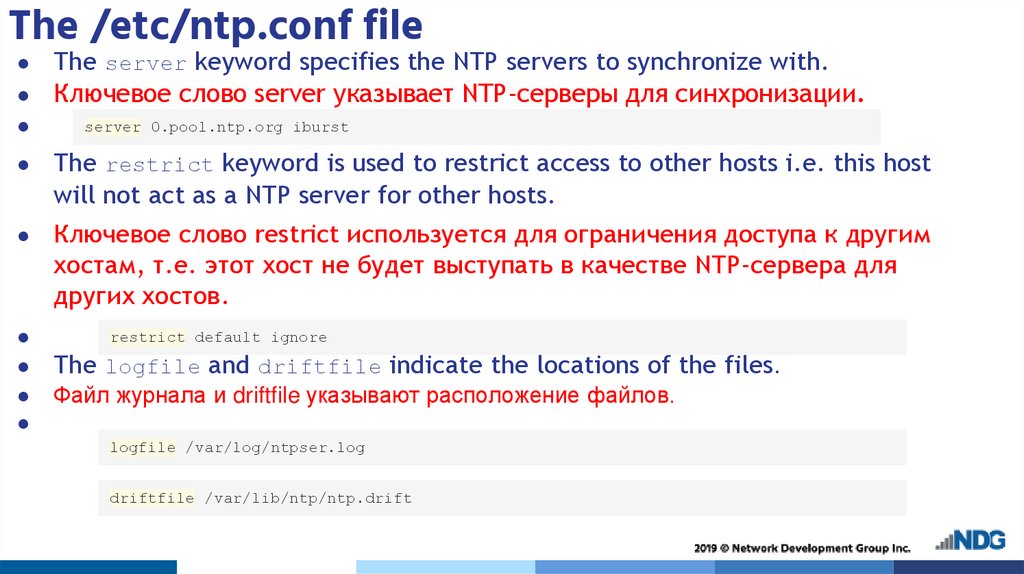
The /etc/ntp.conf fileThe server keyword specifies the NTP servers to synchronize with.
Ключевое слово server указывает NTP-серверы для синхронизации.
The restrict keyword is used to restrict access to other hosts i.e. this host
will not act as a NTP server for other hosts.
Ключевое слово restrict используется для ограничения доступа к другим
хостам, т.е. этот хост не будет выступать в качестве NTP-сервера для
других хостов.
server 0.pool.ntp.org iburst
restrict default ignore
The logfile and driftfile indicate the locations of the files.
Файл журнала и driftfile указывают расположение файлов.
logfile /var/log/ntpser.log
driftfile /var/lib/ntp/ntp.drift
19.
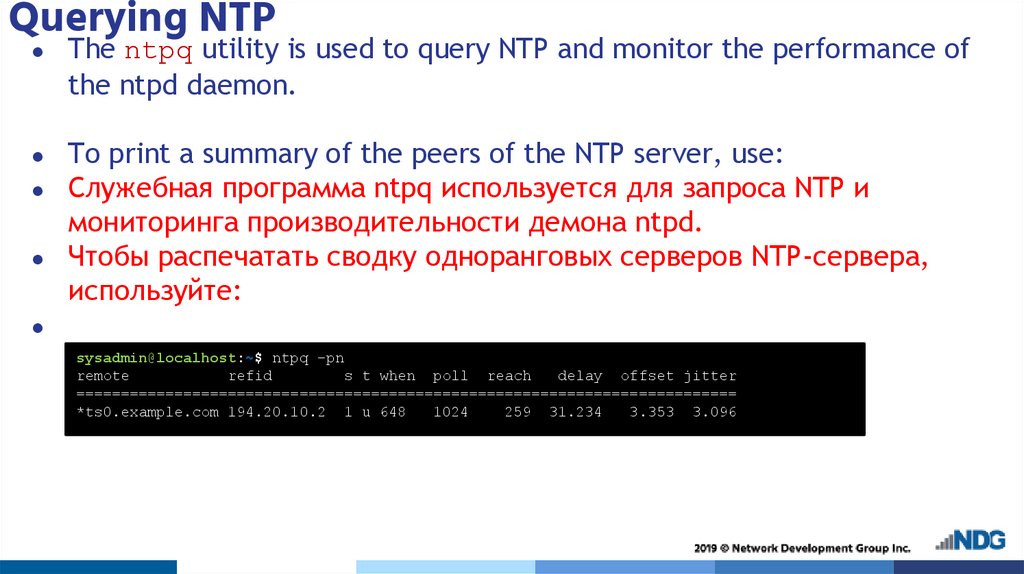
Querying NTPThe ntpq utility is used to query NTP and monitor the performance of
the ntpd daemon.
To print a summary of the peers of the NTP server, use:
Служебная программа ntpq используется для запроса NTP и
мониторинга производительности демона ntpd.
Чтобы распечатать сводку одноранговых серверов NTP-сервера,
используйте:
sysadmin@localhost:~$ ntpq –pn
remote
refid
s t when poll reach
delay offset jitter
==========================================================================
*ts0.example.com 194.20.10.2 1 u 648
1024
259 31.234
3.353 3.096
20.
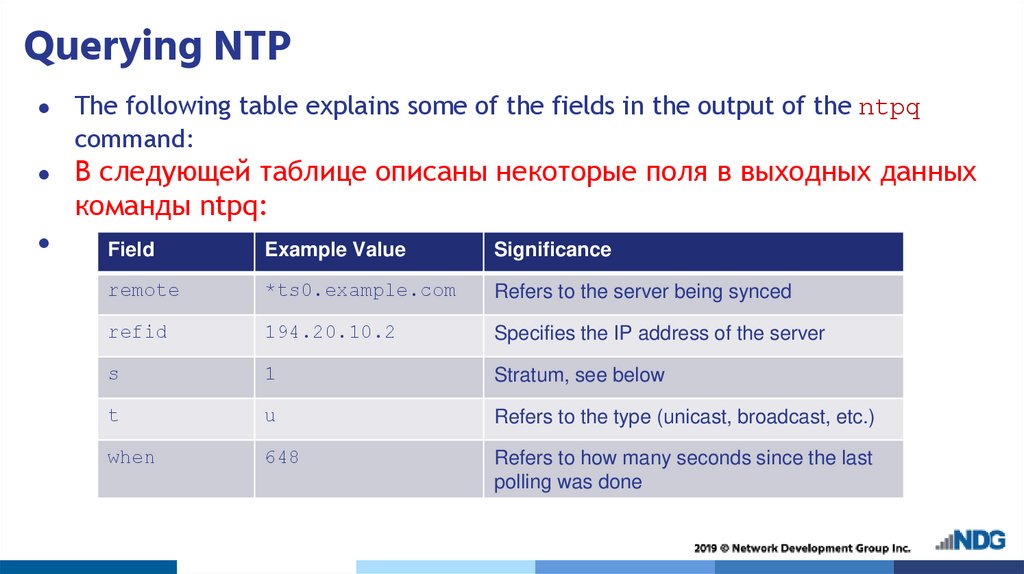
Querying NTPThe following table explains some of the fields in the output of the ntpq
command:
В следующей таблице описаны некоторые поля в выходных данных
команды ntpq:
Field
Example Value
Significance
remote
*ts0.example.com
Refers to the server being synced
refid
194.20.10.2
Specifies the IP address of the server
s
1
Stratum, see below
t
u
Refers to the type (unicast, broadcast, etc.)
when
648
Refers to how many seconds since the last
polling was done
21.
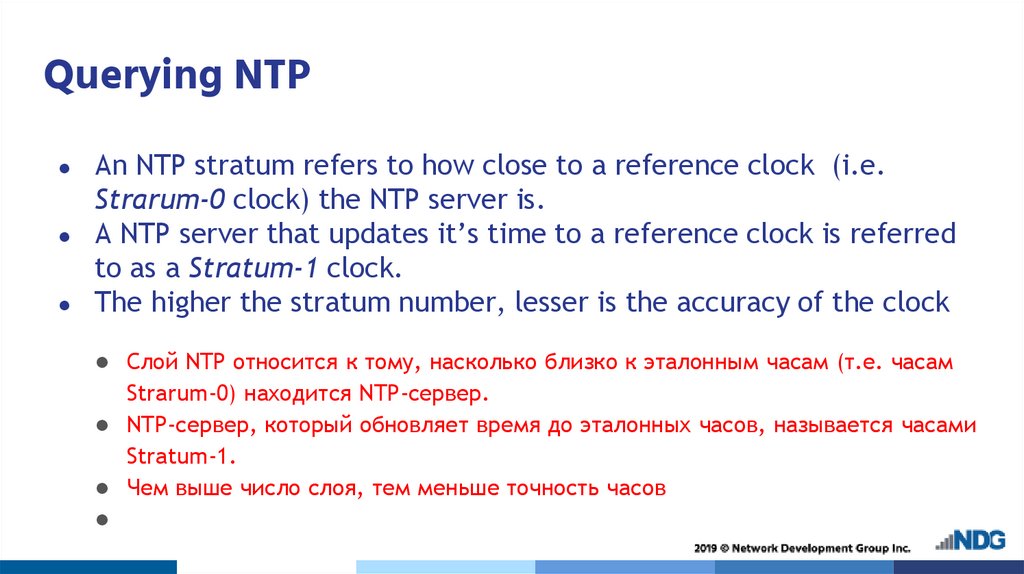
Querying NTPAn NTP stratum refers to how close to a reference clock (i.e.
Strarum-0 clock) the NTP server is.
A NTP server that updates it’s time to a reference clock is referred
to as a Stratum-1 clock.
The higher the stratum number, lesser is the accuracy of the clock
● Слой NTP относится к тому, насколько близко к эталонным часам (т.е. часам
Strarum-0) находится NTP-сервер.
● NTP-сервер, который обновляет время до эталонных часов, называется часами
Stratum-1.
● Чем выше число слоя, тем меньше точность часов
22.
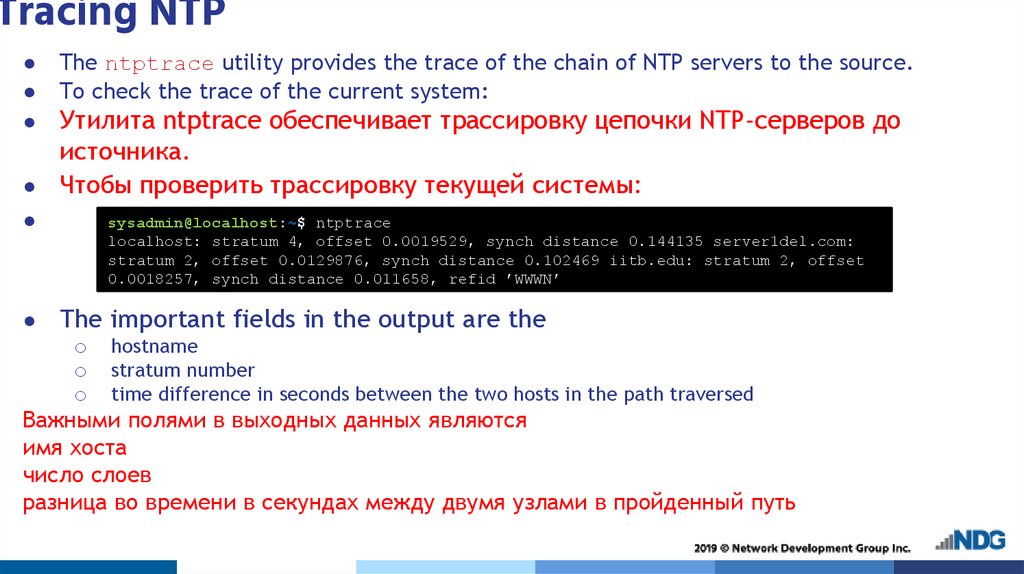
Tracing NTPThe ntptrace utility provides the trace of the chain of NTP servers to the source.
To check the trace of the current system:
Утилита ntptrace обеспечивает трассировку цепочки NTP-серверов до
источника.
● Чтобы проверить трассировку текущей системы:
sysadmin@localhost:~$ ntptrace
localhost: stratum 4, offset 0.0019529, synch distance 0.144135 server1del.com:
stratum 2, offset 0.0129876, synch distance 0.102469 iitb.edu: stratum 2, offset
0.0018257, synch distance 0.011658, refid ’WWWN’
The important fields in the output are the
o hostname
o stratum number
o time difference in seconds between the two hosts in the path traversed
Важными полями в выходных данных являются
имя хоста
число слоев
разница во времени в секундах между двумя узлами в пройденный путь
23.
The ntpdate CommandThe ntpdate command is used to set the system date and time.
Using ntpdate is functionally equivalent to the ntpd –q command.
Used to set the time if the NTP daemon is not started.
● Команда ntpdate используется для установки системной даты и времени.
● Использование ntpdate функционально эквивалентно команде ntpd –q.
● Используется для установки времени, если демон NTP не запущен
24.
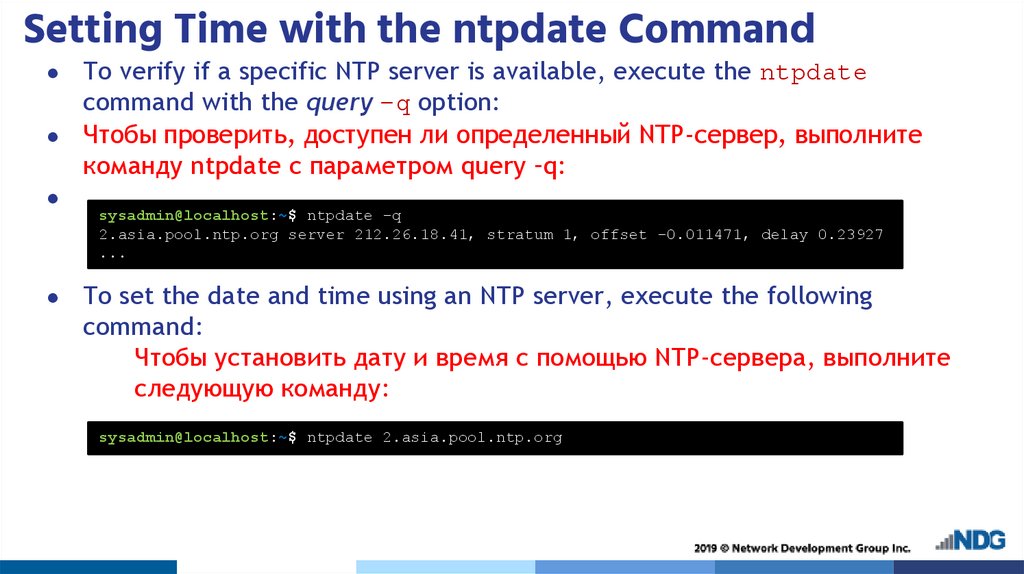
Setting Time with the ntpdate CommandTo verify if a specific NTP server is available, execute the ntpdate
command with the query –q option:
● Чтобы проверить, доступен ли определенный NTP-сервер, выполните
команду ntpdate с параметром query –q:
sysadmin@localhost:~$ ntpdate -q
2.asia.pool.ntp.org server 212.26.18.41, stratum 1, offset -0.011471, delay 0.23927
...
To set the date and time using an NTP server, execute the following
command:
Чтобы установить дату и время с помощью NTP-сервера, выполните
следующую команду:
sysadmin@localhost:~$ ntpdate 2.asia.pool.ntp.org
25.
Using pool.ntp.orgVirtual cluster of time servers providing NTP service globally.
Uses a server pool implementation which allocates the geographically closest server to
the NTP daemon.
Can specify preference of continent or country zone to pick up server pool from.
For example, to specify the Asia servers, the /etc/ntp.conf file will contain:
● Виртуальный кластер серверов времени, предоставляющих услуги NTP по всему
миру.
● Использует реализацию пула серверов, которая выделяет географически
ближайший сервер к демону NTP.
● Может указать предпочтения континента или зоны страны для получения пула
серверов.
● Например, чтобы указать азиатские серверы, файл /etc/ntp.conf будет
содержать:
server 0.asia.pool.ntp.org
server 1.asia.pool.ntp.org
server 2.asia.pool.ntp.org
26.
Understanding chrony27.
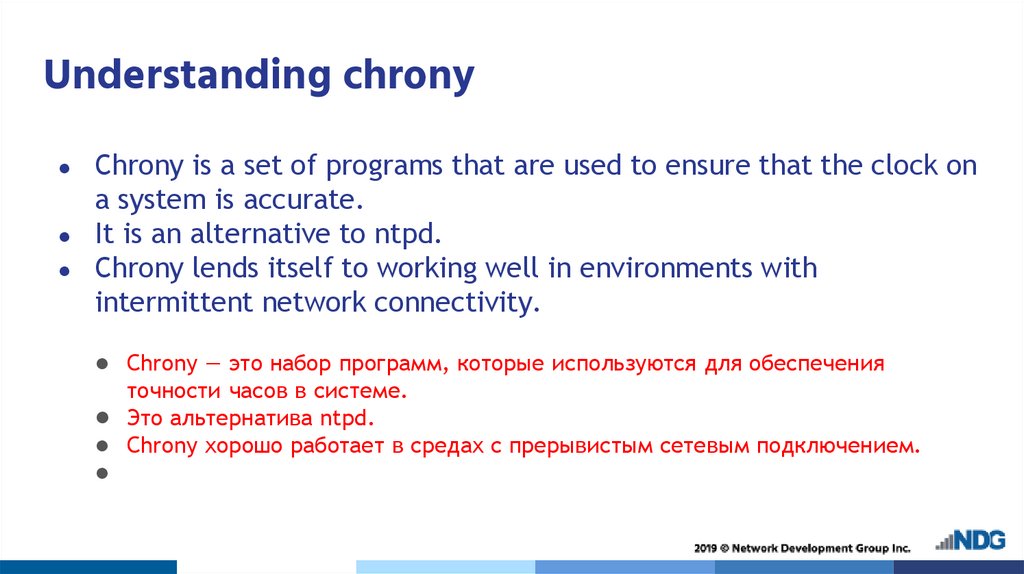
Understanding chronyChrony is a set of programs that are used to ensure that the clock on
a system is accurate.
It is an alternative to ntpd.
Chrony lends itself to working well in environments with
intermittent network connectivity.
● Chrony — это набор программ, которые используются для обеспечения
точности часов в системе.
● Это альтернатива ntpd.
● Chrony хорошо работает в средах с прерывистым сетевым подключением.
28.
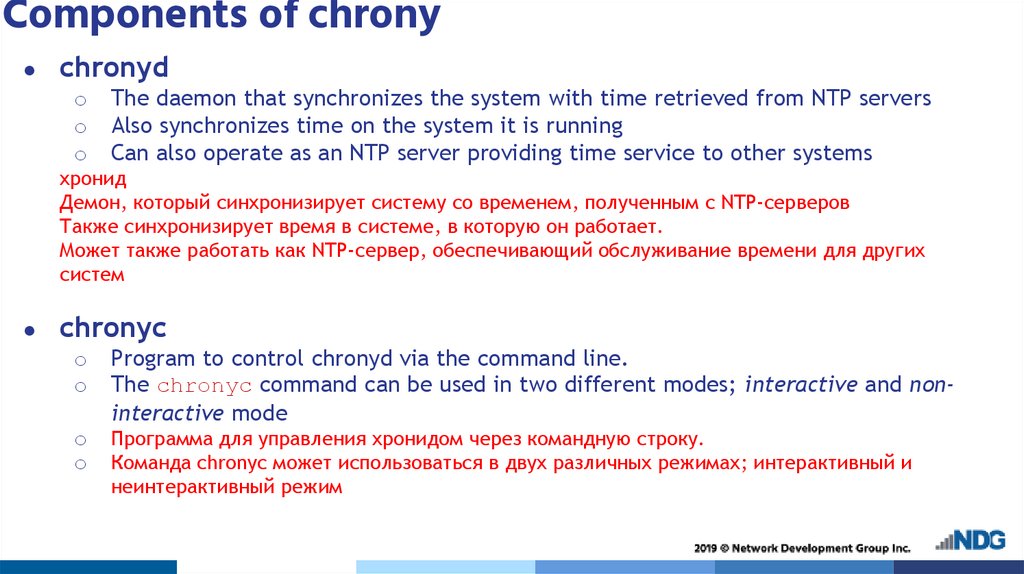
Components of chronychronyd
o
o
o
The daemon that synchronizes the system with time retrieved from NTP servers
Also synchronizes time on the system it is running
Can also operate as an NTP server providing time service to other systems
хронид
Демон, который синхронизирует систему со временем, полученным с NTP-серверов
Также синхронизирует время в системе, в которую он работает.
Может также работать как NTP-сервер, обеспечивающий обслуживание времени для других
систем
chronyc
o
o
Program to control chronyd via the command line.
The chronyc command can be used in two different modes; interactive and noninteractive mode
o
o
Программа для управления хронидом через командную строку.
Команда chronyc может использоваться в двух различных режимах; интерактивный и
неинтерактивный режим
29.
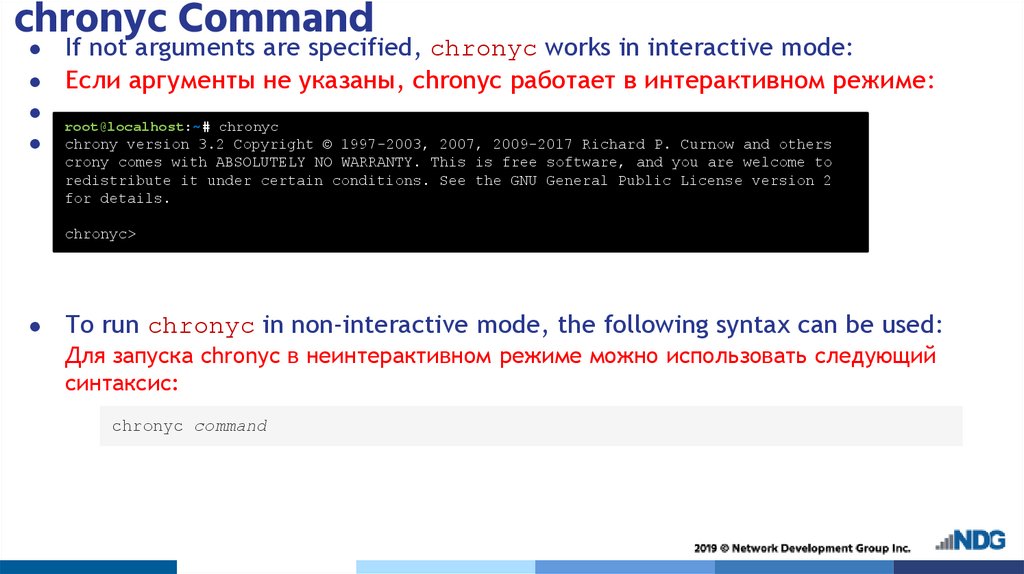
chronyc CommandIf not arguments are specified, chronyc works in interactive mode:
Если аргументы не указаны, chronyc работает в интерактивном режиме:
root@localhost:~# chronyc
chrony version 3.2 Copyright © 1997-2003, 2007, 2009-2017 Richard P. Curnow and others
crony comes with ABSOLUTELY NO WARRANTY. This is free software, and you are welcome to
redistribute it under certain conditions. See the GNU General Public License version 2
for details.
chronyc>
To run chronyc in non-interactive mode, the following syntax can be used:
Для запуска chronyc в неинтерактивном режиме можно использовать следующий
синтаксис:
chronyc command
30.
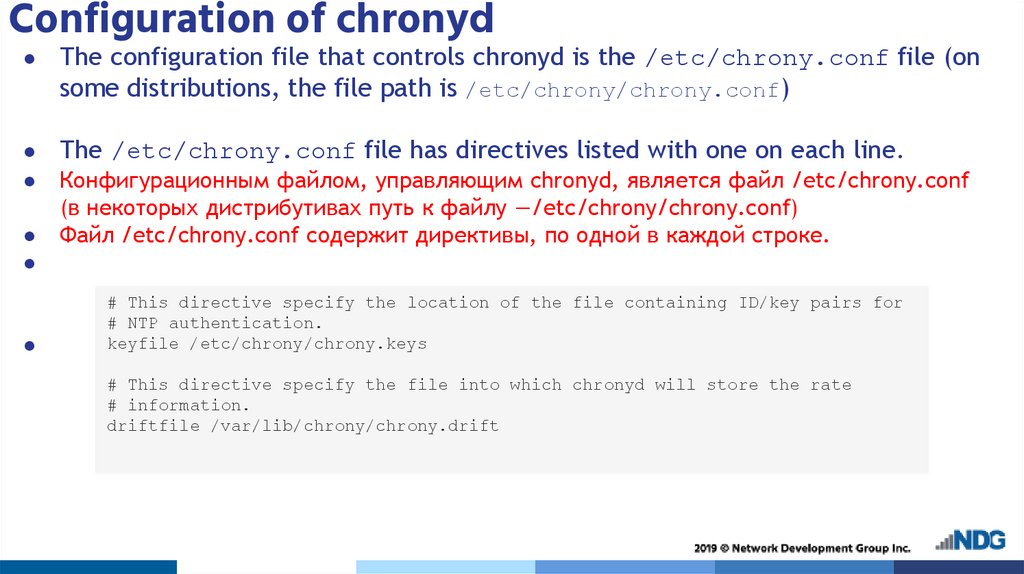
Configuration of chronydThe configuration file that controls chronyd is the /etc/chrony.conf file (on
some distributions, the file path is /etc/chrony/chrony.conf)
The /etc/chrony.conf file has directives listed with one on each line.
Конфигурационным файлом, управляющим chronyd, является файл /etc/chrony.conf
(в некоторых дистрибутивах путь к файлу —/etc/chrony/chrony.conf)
Файл /etc/chrony.conf содержит директивы, по одной в каждой строке.
# This directive specify the location of the file containing ID/key pairs for
# NTP authentication.
keyfile /etc/chrony/chrony.keys
# This directive specify the file into which chronyd will store the rate
# information.
driftfile /var/lib/chrony/chrony.drift
31.
System Logging32.
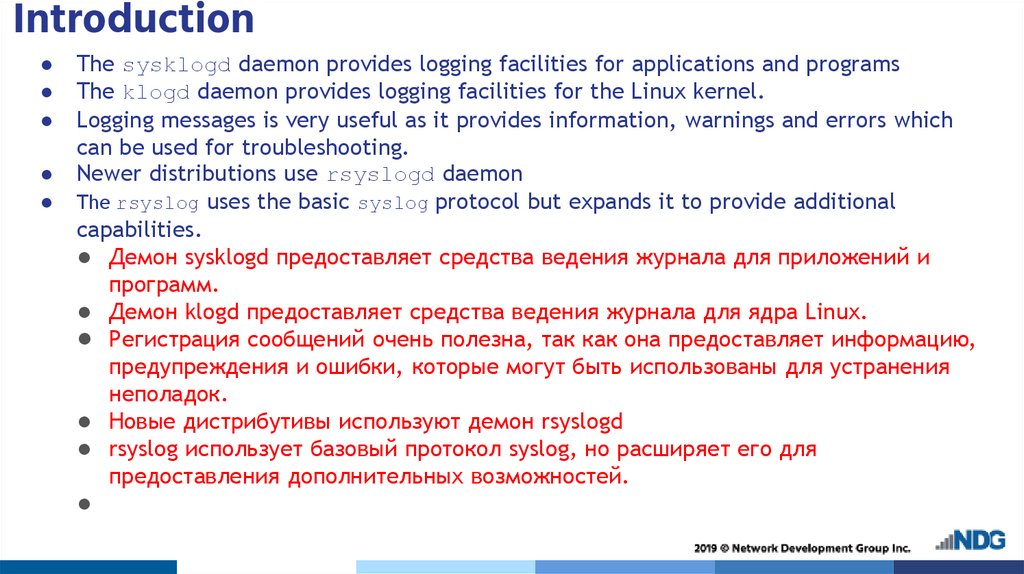
IntroductionThe sysklogd daemon provides logging facilities for applications and programs
The klogd daemon provides logging facilities for the Linux kernel.
Logging messages is very useful as it provides information, warnings and errors which
can be used for troubleshooting.
Newer distributions use rsyslogd daemon
The rsyslog uses the basic syslog protocol but expands it to provide additional
capabilities.
● Демон sysklogd предоставляет средства ведения журнала для приложений и
программ.
● Демон klogd предоставляет средства ведения журнала для ядра Linux.
● Регистрация сообщений очень полезна, так как она предоставляет информацию,
предупреждения и ошибки, которые могут быть использованы для устранения
неполадок.
● Новые дистрибутивы используют демон rsyslogd
● rsyslog использует базовый протокол syslog, но расширяет его для
предоставления дополнительных возможностей.
33.
Log File LocationsThe rsyslogd daemon is configured using the /etc/rsyslog.conf file.
Демон rsyslogd настраивается с помощью файла /etc/rsyslog.conf.
File
Purpose
/var/log/messages or
/var/log rsyslog
General message and system-related information
Общее сообщение и информация, связанная с системой
/var/log/secure or
/var/log/auth.log
Authentication log
Журнал аутентификации
/var/log/mailog
Mail server logs Журналы почтового сервера
/var/log/kern.log
Kernel logs
/var/log/boot.log
System boot log
/var/log/cron.log
crond logs
34.
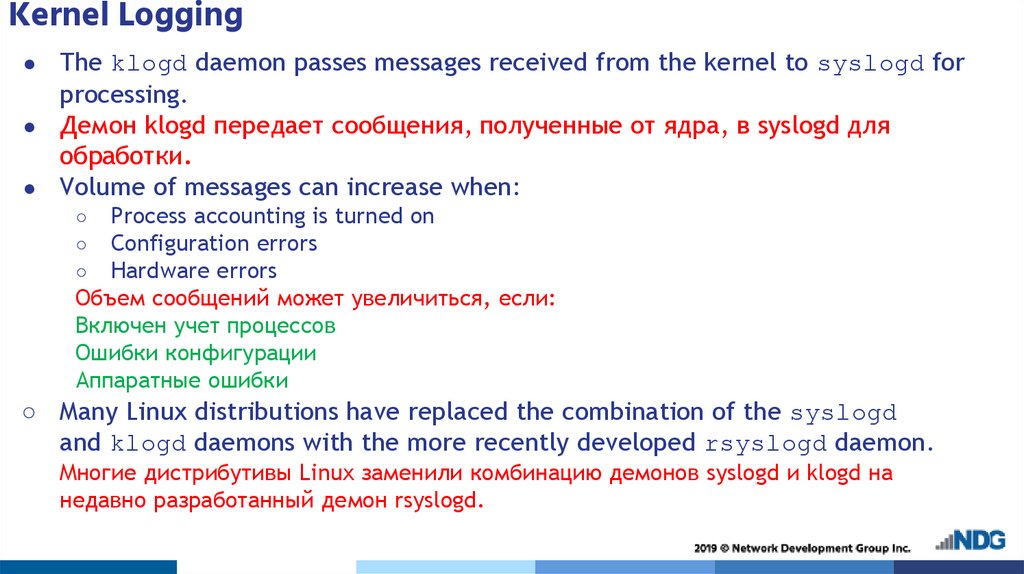
Kernel LoggingThe klogd daemon passes messages received from the kernel to syslogd for
processing.
● Демон klogd передает сообщения, полученные от ядра, в syslogd для
обработки.
● Volume of messages can increase when:
Process accounting is turned on
Configuration errors
Hardware errors
Объем сообщений может увеличиться, если:
Включен учет процессов
Ошибки конфигурации
Аппаратные ошибки
○
○
○
○ Many Linux distributions have replaced the combination of the syslogd
and klogd daemons with the more recently developed rsyslogd daemon.
Многие дистрибутивы Linux заменили комбинацию демонов syslogd и klogd на
недавно разработанный демон rsyslogd.
35.
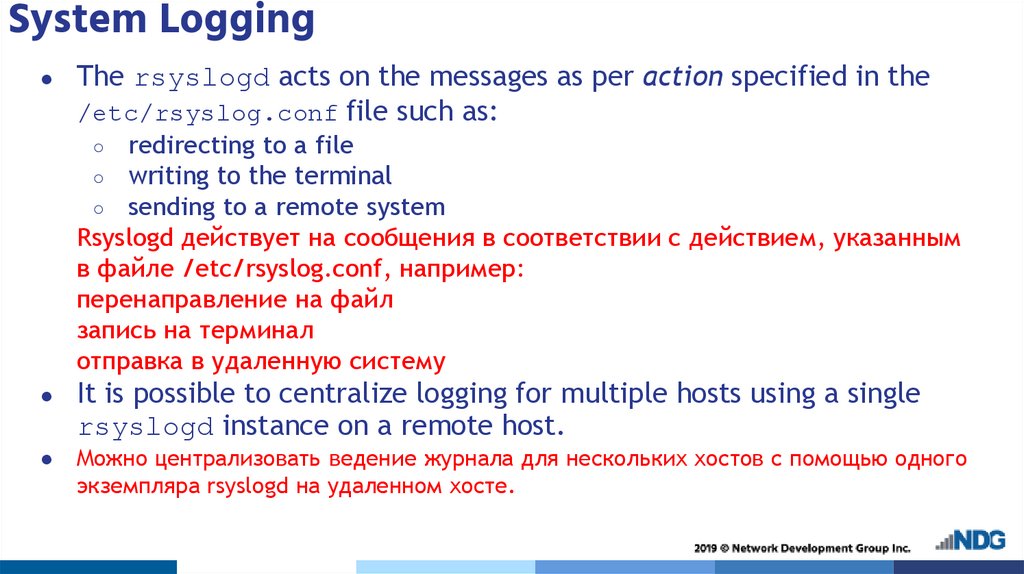
System LoggingThe rsyslogd acts on the messages as per action specified in the
/etc/rsyslog.conf file such as:
redirecting to a file
○ writing to the terminal
○ sending to a remote system
Rsyslogd действует на сообщения в соответствии с действием, указанным
в файле /etc/rsyslog.conf, например:
перенаправление на файл
запись на терминал
отправка в удаленную систему
○
It is possible to centralize logging for multiple hosts using a single
rsyslogd instance on a remote host.
Можно централизовать ведение журнала для нескольких хостов с помощью одного
экземпляра rsyslogd на удаленном хосте.
36.
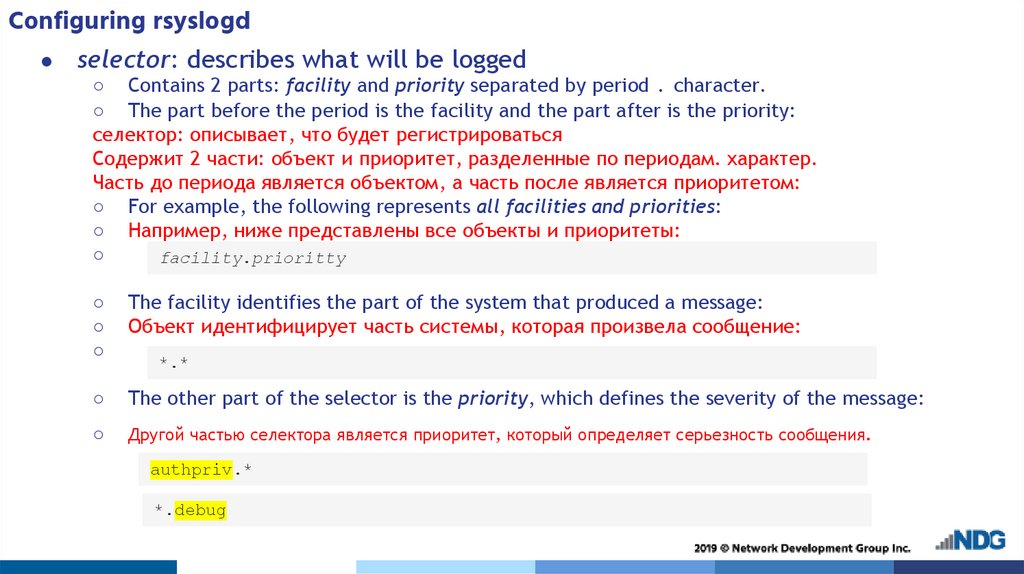
Configuring rsyslogdselector: describes what will be logged
○ Contains 2 parts: facility and priority separated by period . character.
○ The part before the period is the facility and the part after is the priority:
селектор: описывает, что будет регистрироваться
Содержит 2 части: объект и приоритет, разделенные по периодам. характер.
Часть до периода является объектом, а часть после является приоритетом:
○ For example, the following represents all facilities and priorities:
○ Например, ниже представлены все объекты и приоритеты:
○
facility.prioritty
○
○
○
The facility identifies the part of the system that produced a message:
Объект идентифицирует часть системы, которая произвела сообщение:
○
The other part of the selector is the priority, which defines the severity of the message:
○
Другой частью селектора является приоритет, который определяет серьезность сообщения.
*.*
authpriv.*
*.debug
37.
Configuring rsyslogdaction: describes where to send the log information
○
Specify the full path to the log file:
○
Действие: описывает, куда отправлять сведения журнала
○
Укажите полный путь к файлу журнала:
○
○
authpriv.*
/dev/tty10 : specify a terminal or console
authpriv.*
○
/var/log/secure
/dev/tty10
@10.0.0.1 : specify the IP address or host name of a remote host
authpriv.*
@10.0.0.1
38.
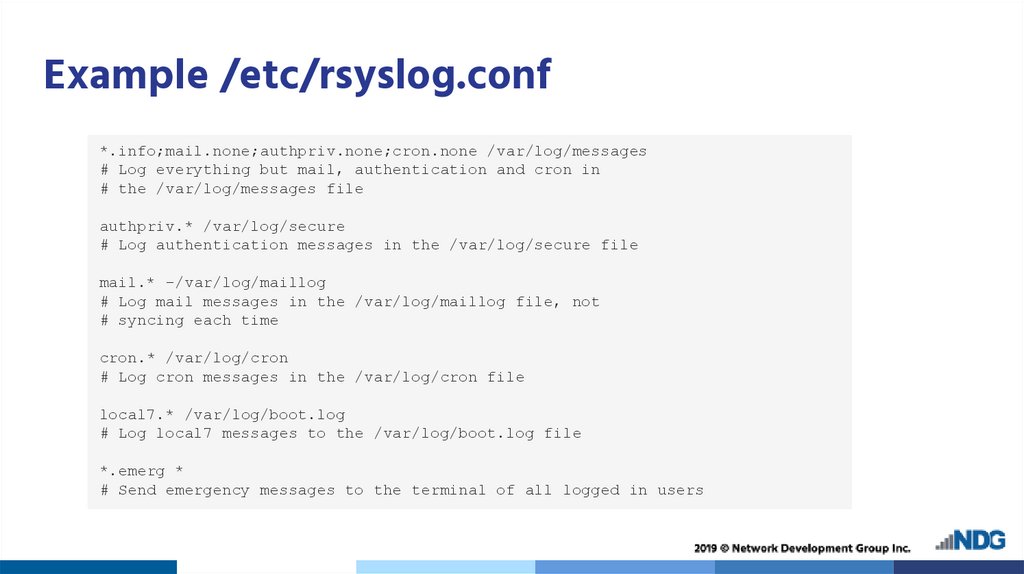
Example /etc/rsyslog.conf*.info;mail.none;authpriv.none;cron.none /var/log/messages
# Log everything but mail, authentication and cron in
# the /var/log/messages file
authpriv.* /var/log/secure
# Log authentication messages in the /var/log/secure file
mail.* -/var/log/maillog
# Log mail messages in the /var/log/maillog file, not
# syncing each time
cron.* /var/log/cron
# Log cron messages in the /var/log/cron file
local7.* /var/log/boot.log
# Log local7 messages to the /var/log/boot.log file
*.emerg *
# Send emergency messages to the terminal of all logged in users
39.
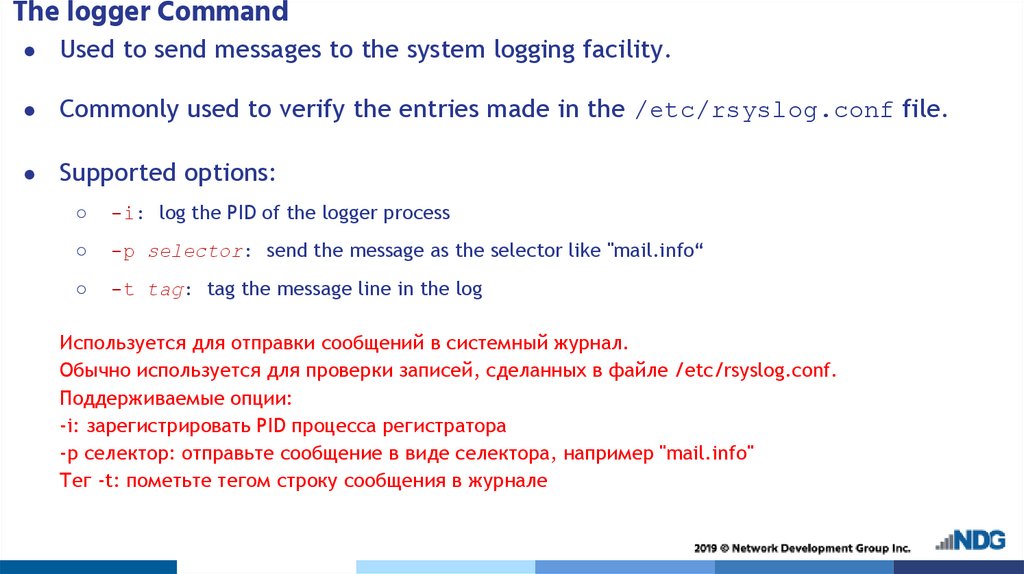
The logger CommandUsed to send messages to the system logging facility.
Commonly used to verify the entries made in the /etc/rsyslog.conf file.
Supported options:
○
-i: log the PID of the logger process
○
-p selector: send the message as the selector like "mail.info“
○
-t tag: tag the message line in the log
Используется для отправки сообщений в системный журнал.
Обычно используется для проверки записей, сделанных в файле /etc/rsyslog.conf.
Поддерживаемые опции:
-i: зарегистрировать PID процесса регистратора
-p селектор: отправьте сообщение в виде селектора, например "mail.info"
Тег -t: пометьте тегом строку сообщения в журнале
40.
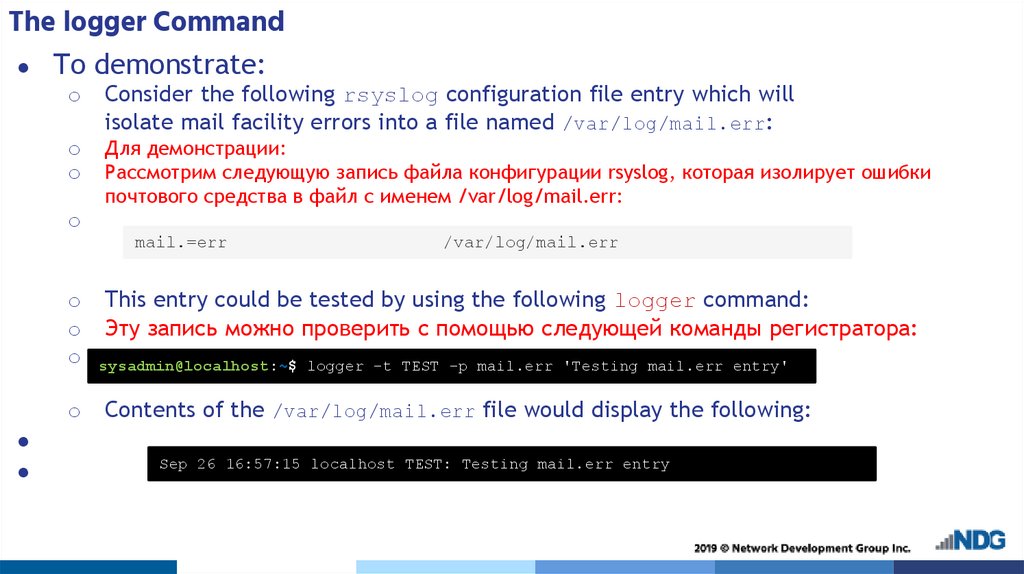
The logger CommandTo demonstrate:
o
Consider the following rsyslog configuration file entry which will
isolate mail facility errors into a file named /var/log/mail.err:
o
o
Для демонстрации:
Рассмотрим следующую запись файла конфигурации rsyslog, которая изолирует ошибки
почтового средства в файл с именем /var/log/mail.err:
o
mail.=err
o
o
o
o
/var/log/mail.err
This entry could be tested by using the following logger command:
Эту запись можно проверить с помощью следующей команды регистратора:
sysadmin@localhost:~$ logger -t TEST -p mail.err 'Testing mail.err entry'
Contents of the /var/log/mail.err file would display the following:
Sep 26 16:57:15 localhost TEST: Testing mail.err entry
41.
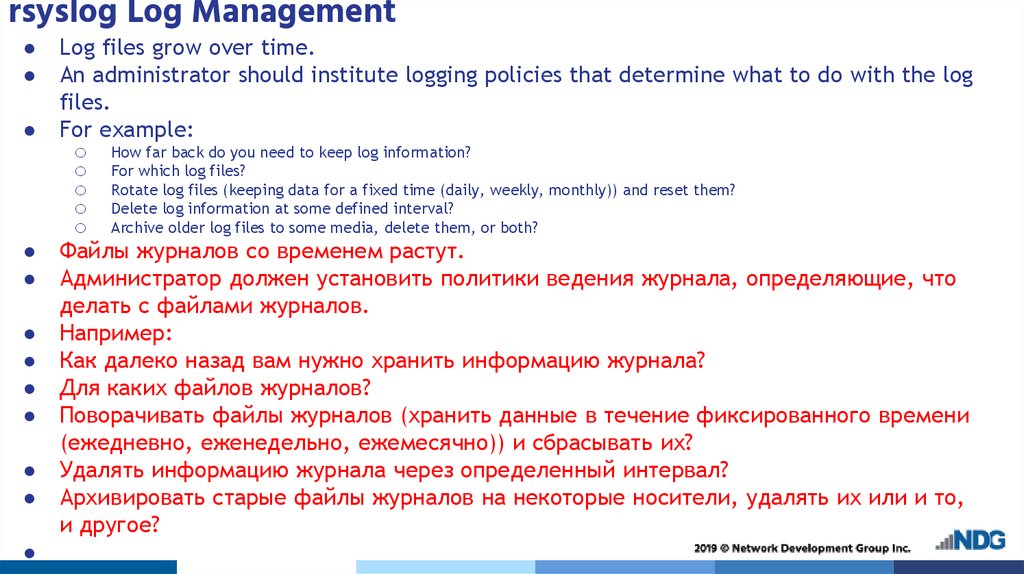
rsyslog Log ManagementLog files grow over time.
An administrator should institute logging policies that determine what to do with the log
files.
For example:
o How far back do you need to keep log information?
o For which log files?
o Rotate log files (keeping data for a fixed time (daily, weekly, monthly)) and reset them?
o Delete log information at some defined interval?
o Archive older log files to some media, delete them, or both?
Файлы журналов со временем растут.
Администратор должен установить политики ведения журнала, определяющие, что
делать с файлами журналов.
Например:
Как далеко назад вам нужно хранить информацию журнала?
Для каких файлов журналов?
Поворачивать файлы журналов (хранить данные в течение фиксированного времени
(ежедневно, еженедельно, ежемесячно)) и сбрасывать их?
Удалять информацию журнала через определенный интервал?
Архивировать старые файлы журналов на некоторые носители, удалять их или и то,
и другое?
42.
logrotate CommandThe logrotate tool is used to automate the rotation of log files with
different settings for different services.
● General settings for logrotate are controlled by
the /etc/logrotate.conf file.
● Service-specific settings are controlled with configuration files in
the /etc/logrotate.d/ directory.
● The /etc/logrotate.conf file contains directives for the default
configuration for logrotate.
● Инструмент logrotate используется для автоматизации ротации
файлов журналов с различными настройками для разных служб.
● Общие настройки logrotate управляются файлом
/etc/logrotate.conf.
● Настройки службы управляются конфигурационными файлами в
каталоге /etc/logrotate.d/.
● Файл /etc/logrotate.conf содержит директивы для конфигурации
по умолчанию для logrotate.
43.
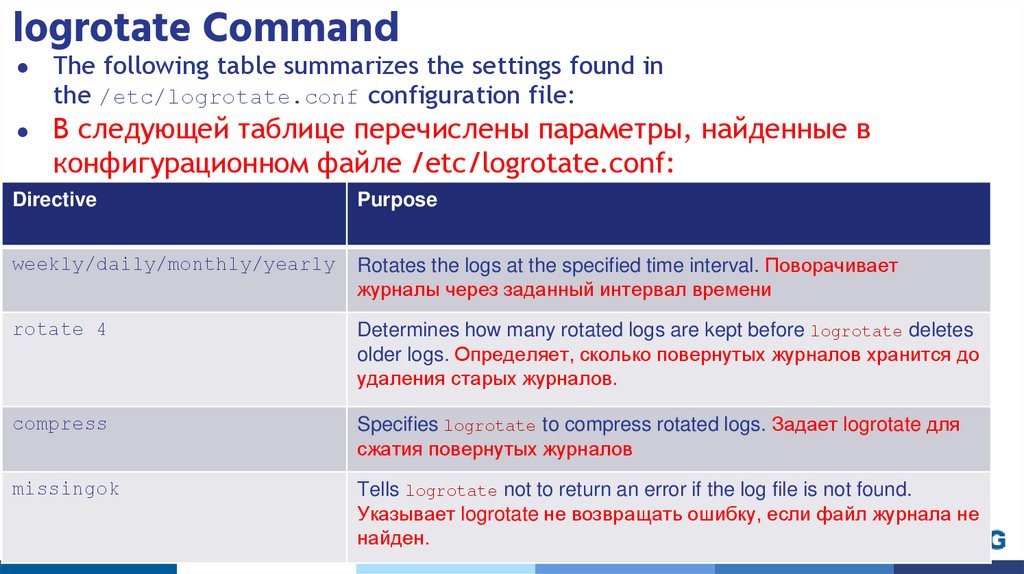
logrotate CommandThe following table summarizes the settings found in
the /etc/logrotate.conf configuration file:
В следующей таблице перечислены параметры, найденные в
конфигурационном файле /etc/logrotate.conf:
Directive
Purpose
weekly/daily/monthly/yearly
Rotates the logs at the specified time interval. Поворачивает
журналы через заданный интервал времени
rotate 4
Determines how many rotated logs are kept before logrotate deletes
older logs. Определяет, сколько повернутых журналов хранится до
удаления старых журналов.
compress
Specifies logrotate to compress rotated logs. Задает logrotate для
сжатия повернутых журналов
missingok
Tells logrotate not to return an error if the log file is not found.
Указывает logrotate не возвращать ошибку, если файл журнала не
найден.
44.
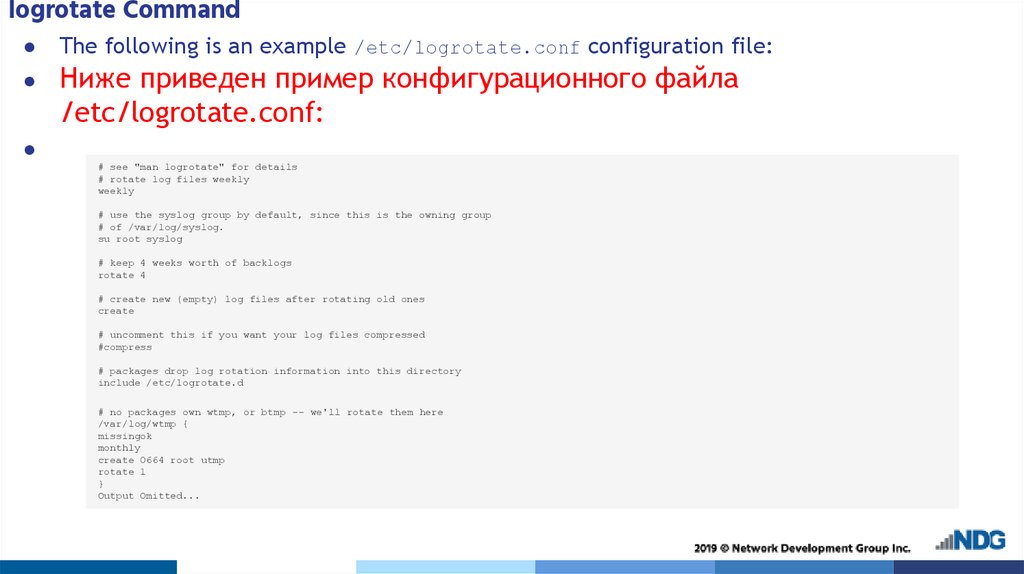
logrotate CommandThe following is an example /etc/logrotate.conf configuration file:
Ниже приведен пример конфигурационного файла
/etc/logrotate.conf:
# see "man logrotate" for details
# rotate log files weekly
weekly
# use the syslog group by default, since this is the owning group
# of /var/log/syslog.
su root syslog
# keep 4 weeks worth of backlogs
rotate 4
# create new (empty) log files after rotating old ones
create
# uncomment this if you want your log files compressed
#compress
# packages drop log rotation information into this directory
include /etc/logrotate.d
# no packages own wtmp, or btmp -- we'll rotate them here
/var/log/wtmp {
missingok
monthly
create 0664 root utmp
rotate 1
}
Output Omitted...
45.
Systemd JournalFor systems using systemd as their init system, rsyslog has been replaced by the systemd-journal.
A systemd unit named systemd-journald handles logs from other systemd units.
The log information is written to binary databases in the /var/log/journal/directory (instead of
writing to text files like rsyslog).
With the systemd-journal you need to use a program (usually journalctl) to interpret and present
the logs in a human-readable format.
● Для систем, использующих systemd в качестве системы init, rsyslog
был заменен на systemd-journal.
● Системный блок с именем systemd-journald обрабатывает журналы
из других системных блоков.
● Информация журнала записывается в двоичные базы данных в
каталоге /var/log/journal/(вместо записи в текстовые файлы, такие
как rsyslog).
● С systemd-journal вам нужно использовать программу (обычно
journalctl) для интерпретации и представления журналов в
человекочитаемом формате.
46.
Systemd Journal ConfigurationThe /etc/systemd/journald.conf file controls the systemd-journal.
The most used directive in the file controls the amount of space that is used for
storing persistent logs found in /var/log/journal/ (if it exists).
● Persistent storage:
o
Type of storage used to ensure that data is not modified after it is stored
o
Is available even if updates are made to the storage software.
● Файл /etc/systemd/journald.conf управляет systemd-journal.
● Наиболее часто используемая директива в файле управляет объемом
пространства, используемого для хранения постоянных журналов,
найденных в /var/log/journal/ (если он существует).
● Постоянное хранилище:
● Тип хранилища, используемого для обеспечения того, чтобы данные
не изменялись после их сохранения
● Доступен, даже если в программное обеспечение хранилища внесены
обновления.
47.
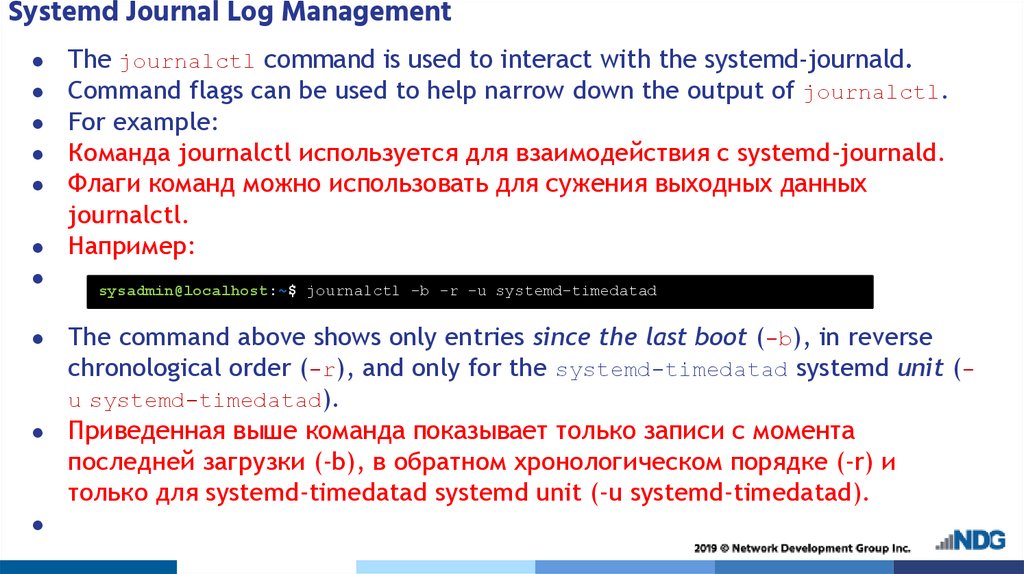
Systemd Journal Log ManagementThe journalctl command is used to interact with the systemd-journald.
Command flags can be used to help narrow down the output of journalctl.
For example:
Команда journalctl используется для взаимодействия с systemd-journald.
Флаги команд можно использовать для сужения выходных данных
journalctl.
● Например:
sysadmin@localhost:~$ journalctl -b -r -u systemd-timedatad
The command above shows only entries since the last boot (-b), in reverse
chronological order (-r), and only for the systemd-timedatad systemd unit (u systemd-timedatad).
● Приведенная выше команда показывает только записи с момента
последней загрузки (-b), в обратном хронологическом порядке (-r) и
только для systemd-timedatad systemd unit (-u systemd-timedatad).
48.
system-cat CommandThe systemd-cat command allows you to add to the systemd-journald data.
The output from a command can be piped into systemd-cat so that the output
is entered into the logs.
● It works like the logger command.
o
o
o
o
o
o
o
o
The systemd-cat command can be used to send command output to logs.
Can be used to verify that entries that have been made in
the /etc/systemd/journald.conf file.
Команда systemd-cat позволяет добавлять к данным, заносяемым в журнал
systemd.
Выходные данные команды могут быть переданы по конвейеру в systemd-cat,
так что выходные данные будут введены в журналы.
Он работает как команда регистратора.
Команда systemd-cat может использоваться для отправки выходных данных
команды в журналы.
Может использоваться для проверки записей, сделанных в файле
/etc/systemd/journald.conf.
49.
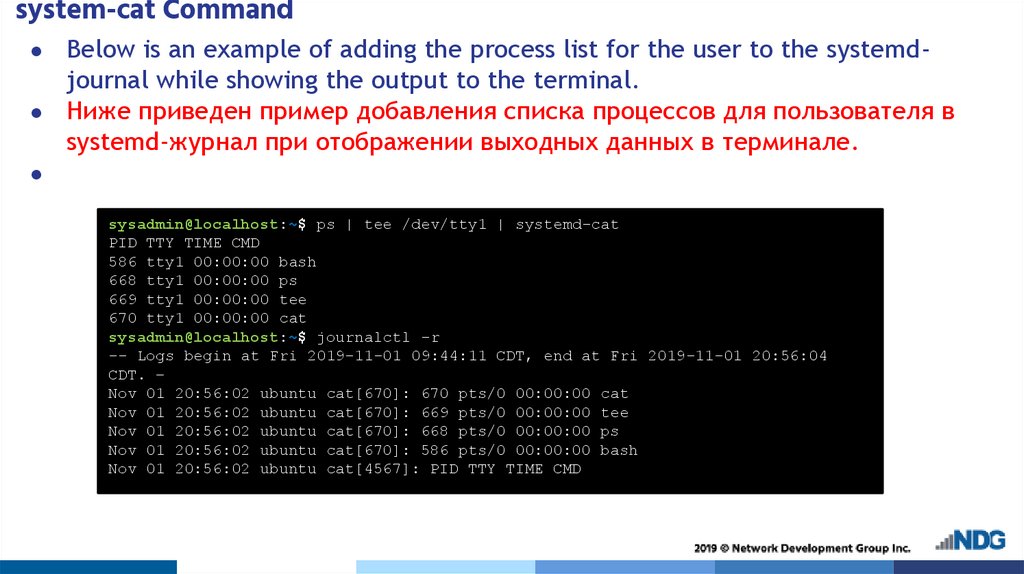
system-cat CommandBelow is an example of adding the process list for the user to the systemdjournal while showing the output to the terminal.
● Ниже приведен пример добавления списка процессов для пользователя в
systemd-журнал при отображении выходных данных в терминале.
sysadmin@localhost:~$ ps | tee /dev/tty1 | systemd-cat
PID TTY TIME CMD
586 tty1 00:00:00 bash
668 tty1 00:00:00 ps
669 tty1 00:00:00 tee
670 tty1 00:00:00 cat
sysadmin@localhost:~$ journalctl -r
-- Logs begin at Fri 2019-11-01 09:44:11 CDT, end at Fri 2019-11-01 20:56:04
CDT. –
Nov 01 20:56:02 ubuntu cat[670]: 670 pts/0 00:00:00 cat
Nov 01 20:56:02 ubuntu cat[670]: 669 pts/0 00:00:00 tee
Nov 01 20:56:02 ubuntu cat[670]: 668 pts/0 00:00:00 ps
Nov 01 20:56:02 ubuntu cat[670]: 586 pts/0 00:00:00 bash
Nov 01 20:56:02 ubuntu cat[4567]: PID TTY TIME CMD
50.
Email Configuration51.
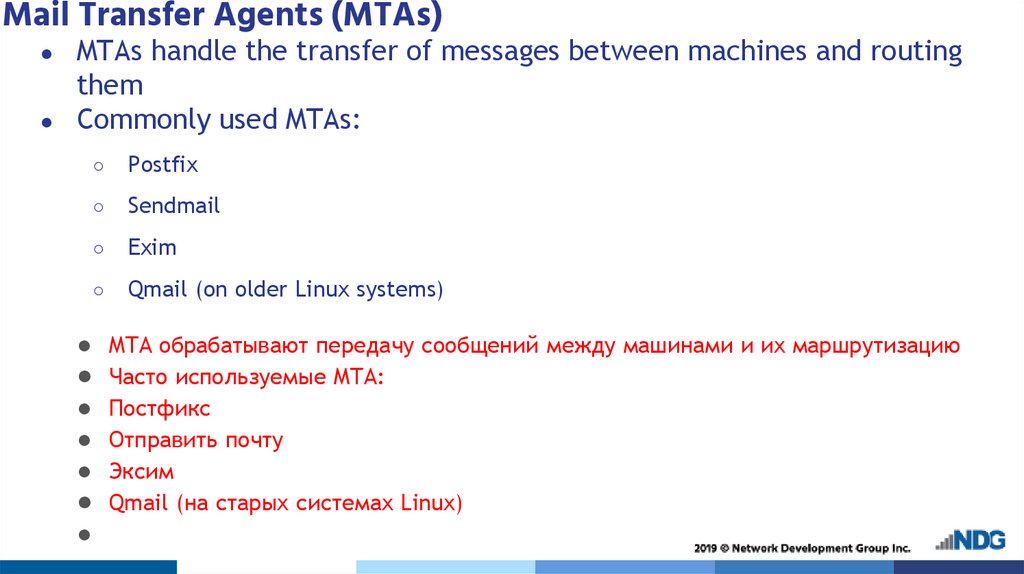
Mail Transfer Agents (MTAs)MTAs handle the transfer of messages between machines and routing
them
Commonly used MTAs:
○
Postfix
○
Sendmail
○
Exim
○
Qmail (on older Linux systems)
MTA обрабатывают передачу сообщений между машинами и их маршрутизацию
Часто используемые MTA:
Постфикс
Отправить почту
Эксим
Qmail (на старых системах Linux)
52.
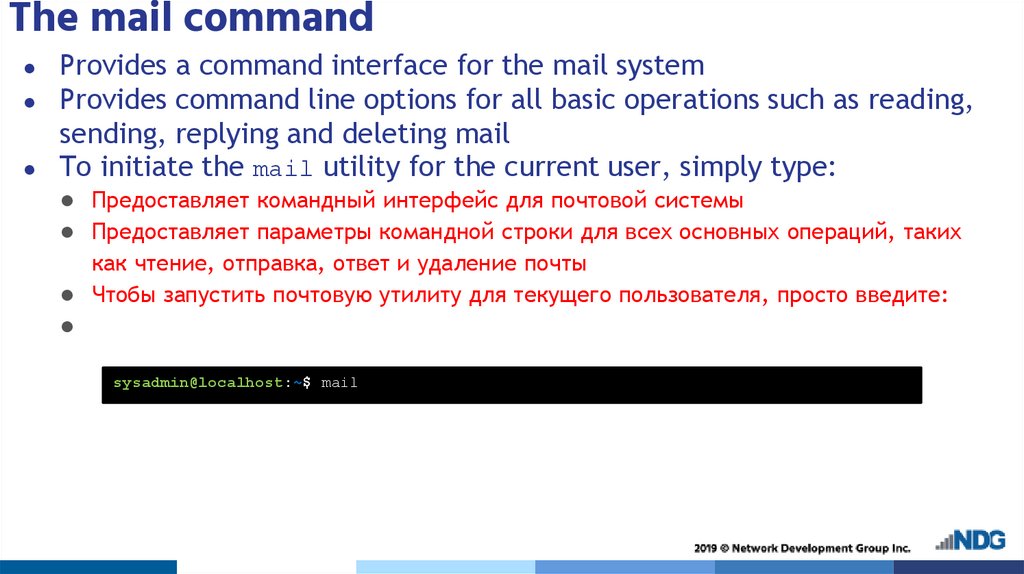
The mail commandProvides a command interface for the mail system
Provides command line options for all basic operations such as reading,
sending, replying and deleting mail
To initiate the mail utility for the current user, simply type:
● Предоставляет командный интерфейс для почтовой системы
● Предоставляет параметры командной строки для всех основных операций, таких
как чтение, отправка, ответ и удаление почты
● Чтобы запустить почтовую утилиту для текущего пользователя, просто введите:
sysadmin@localhost:~$ mail
53.
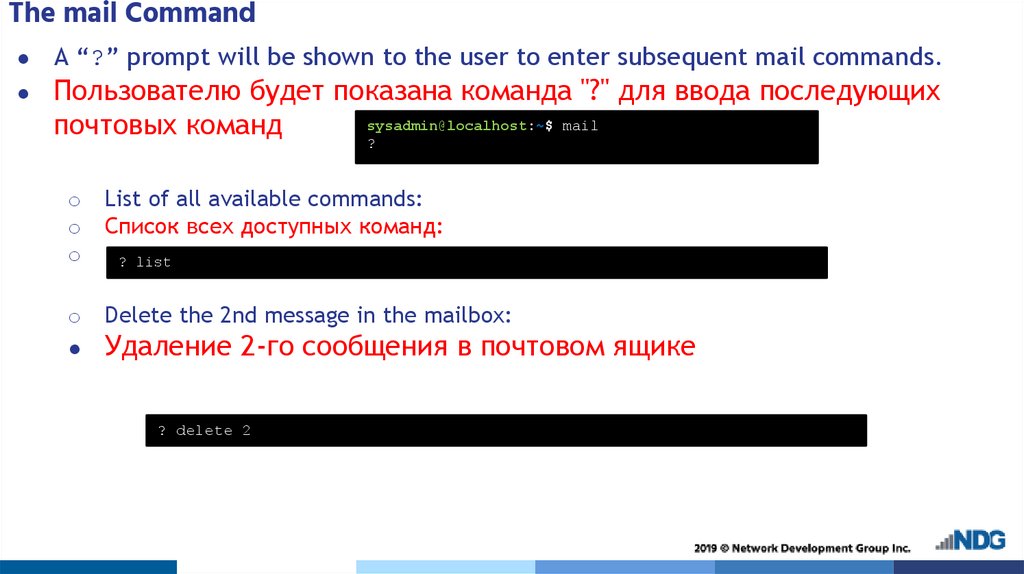
The mail CommandA “?” prompt will be shown to the user to enter subsequent mail commands.
Пользователю будет показана команда "?" для ввода последующих
sysadmin@localhost:~$ mail
почтовых команд
?
o
o
o
List of all available commands:
Список всех доступных команд:
o
Delete the 2nd message in the mailbox:
? list
Удаление 2-го сообщения в почтовом ящике
? delete 2
54.
The mail Commando
o
o
o
o
o
o
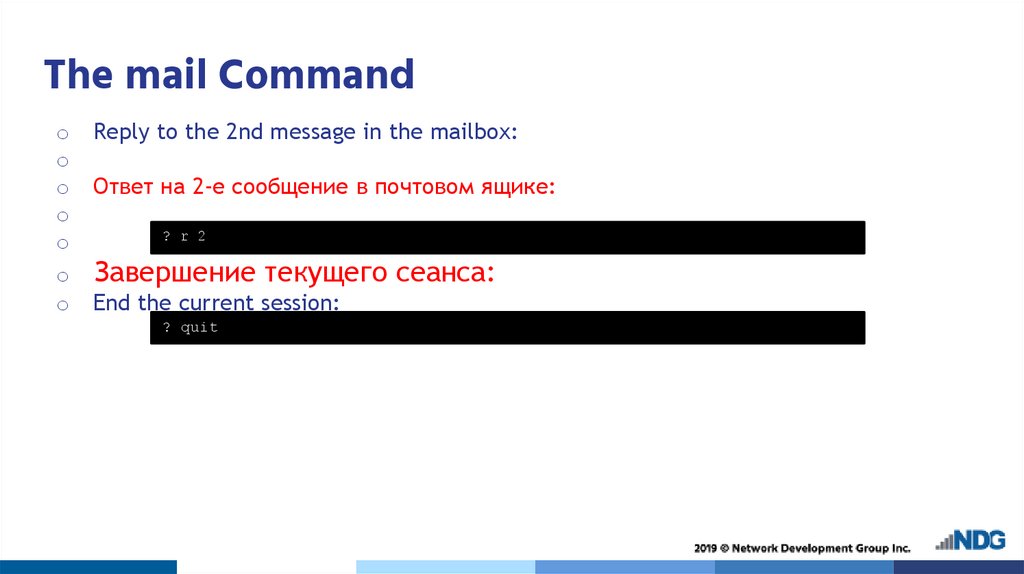
Reply to the 2nd message in the mailbox:
Ответ на 2-е сообщение в почтовом ящике:
? r 2
Завершение текущего сеанса:
End the current session:
? quit
55.
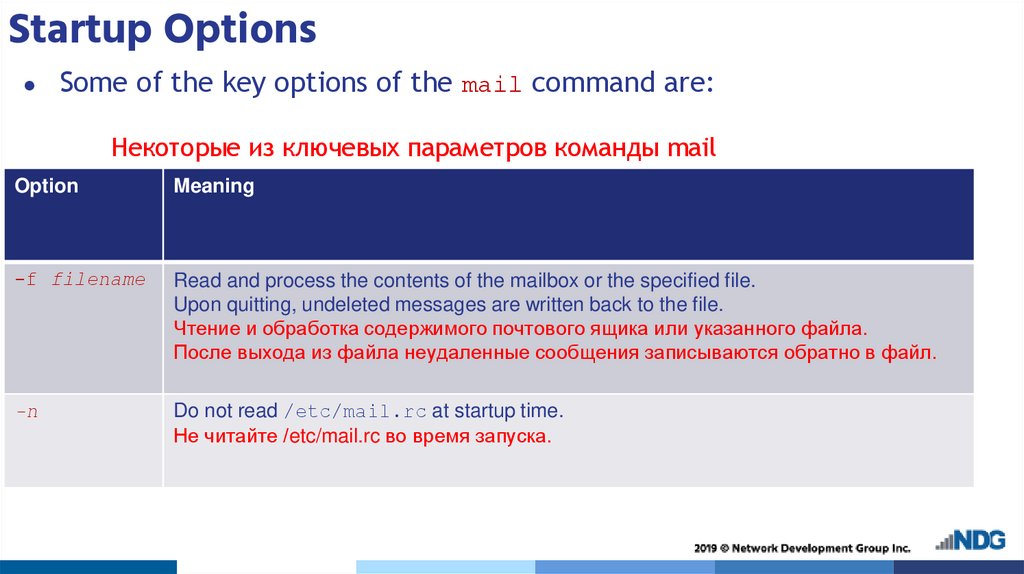
Startup OptionsSome of the key options of the mail command are:
Некоторые из ключевых параметров команды mail
Option
Meaning
-f filename
Read and process the contents of the mailbox or the specified file.
Upon quitting, undeleted messages are written back to the file.
Чтение и обработка содержимого почтового ящика или указанного файла.
После выхода из файла неудаленные сообщения записываются обратно в файл.
-n
Do not read /etc/mail.rc at startup time.
Не читайте /etc/mail.rc во время запуска.
56.
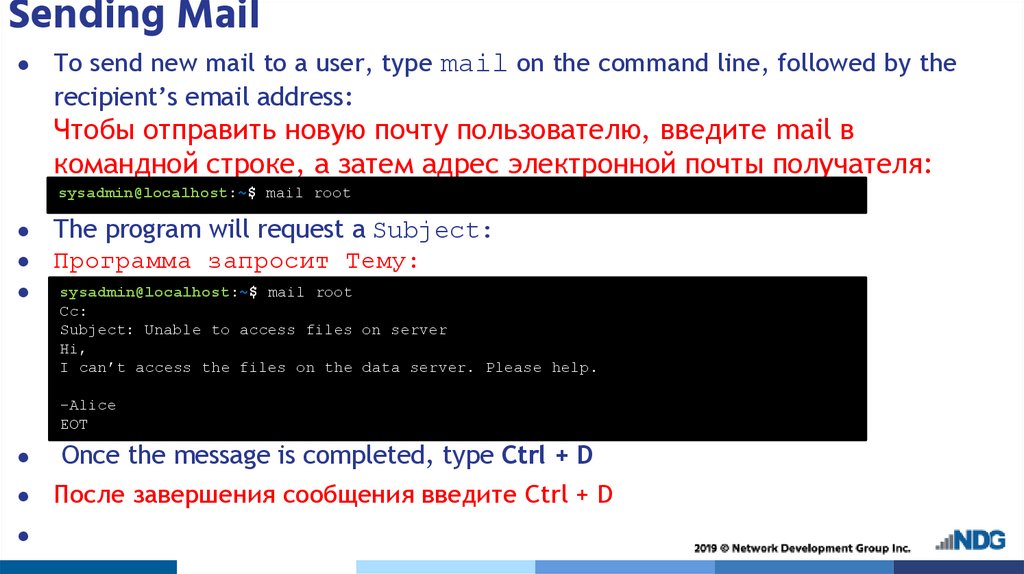
Sending MailTo send new mail to a user, type mail on the command line, followed by the
recipient’s email address:
Чтобы отправить новую почту пользователю, введите mail в
командной строке, а затем адрес электронной почты получателя:
sysadmin@localhost:~$ mail root
The program will request a Subject:
Программа запросит Тему:
sysadmin@localhost:~$ mail root
Cc:
Subject: Unable to access files on server
Hi,
I can’t access the files on the data server. Please help.
-Alice
EOT
Once the message is completed, type Ctrl + D
После завершения сообщения введите Ctrl + D
57.
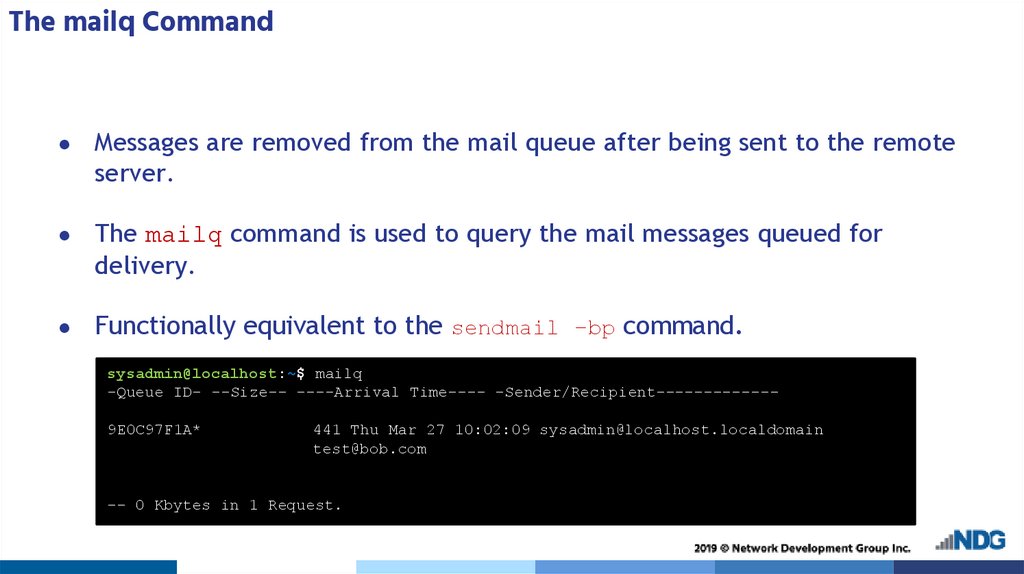
The mailq CommandMessages are removed from the mail queue after being sent to the remote
server.
The mailq command is used to query the mail messages queued for
delivery.
Functionally equivalent to the sendmail –bp command.
sysadmin@localhost:~$ mailq
-Queue ID- --Size-- ----Arrival Time---- -Sender/Recipient------------9E0C97F1A*
441 Thu Mar 27 10:02:09 sysadmin@localhost.localdomain
test@bob.com
-- 0 Kbytes in 1 Request.
58.
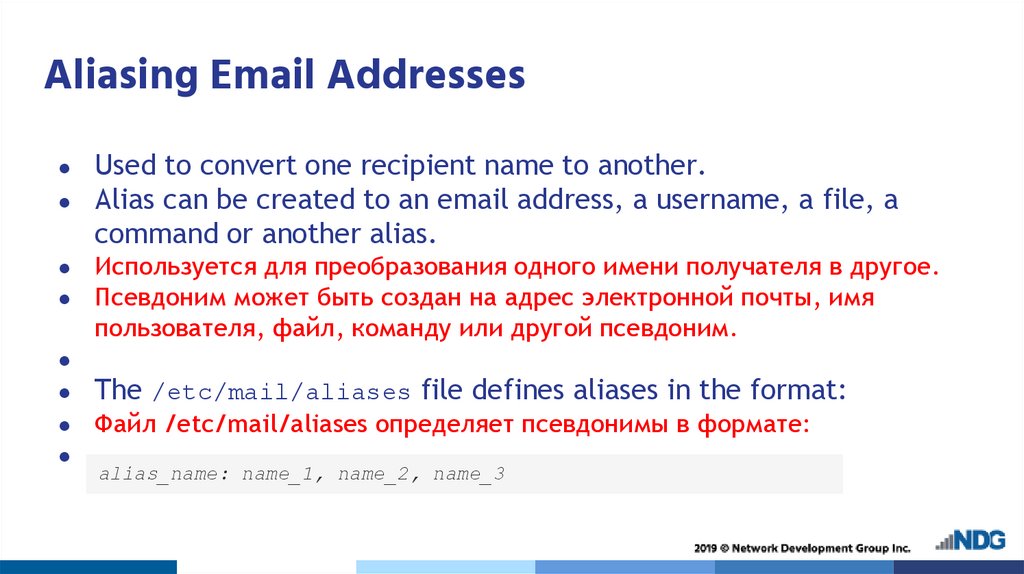
Aliasing Email AddressesUsed to convert one recipient name to another.
Alias can be created to an email address, a username, a file, a
command or another alias.
Используется для преобразования одного имени получателя в другое.
Псевдоним может быть создан на адрес электронной почты, имя
пользователя, файл, команду или другой псевдоним.
The /etc/mail/aliases file defines aliases in the format:
Файл /etc/mail/aliases определяет псевдонимы в формате:
alias_name: name_1, name_2, name_3
59.
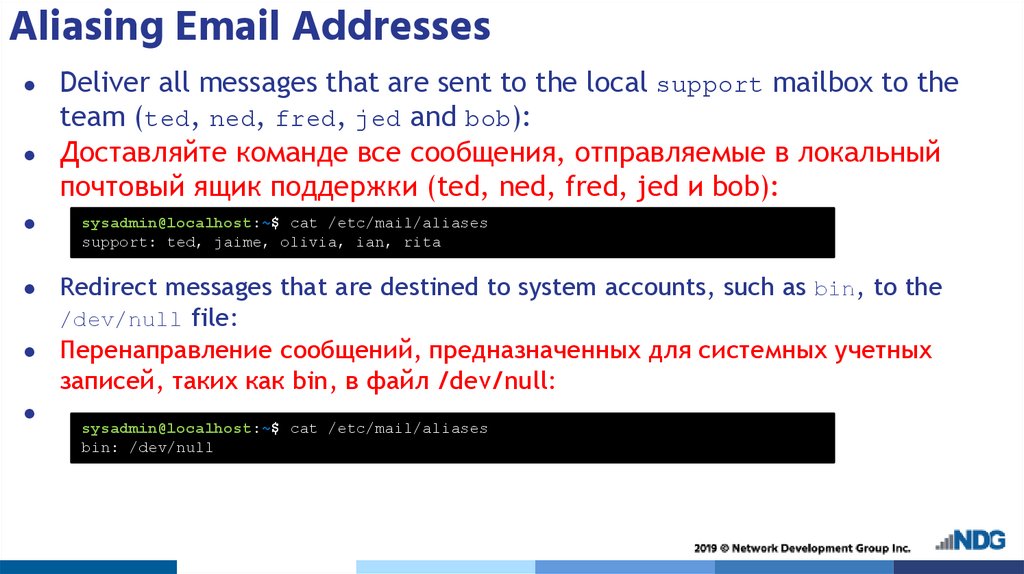
Aliasing Email AddressesDeliver all messages that are sent to the local support mailbox to the
team (ted, ned, fred, jed and bob):
Доставляйте команде все сообщения, отправляемые в локальный
почтовый ящик поддержки (ted, ned, fred, jed и bob):
sysadmin@localhost:~$ cat /etc/mail/aliases
support: ted, jaime, olivia, ian, rita
Redirect messages that are destined to system accounts, such as bin, to the
/dev/null file:
● Перенаправление сообщений, предназначенных для системных учетных
записей, таких как bin, в файл /dev/null:
sysadmin@localhost:~$ cat /etc/mail/aliases
bin: /dev/null
60.
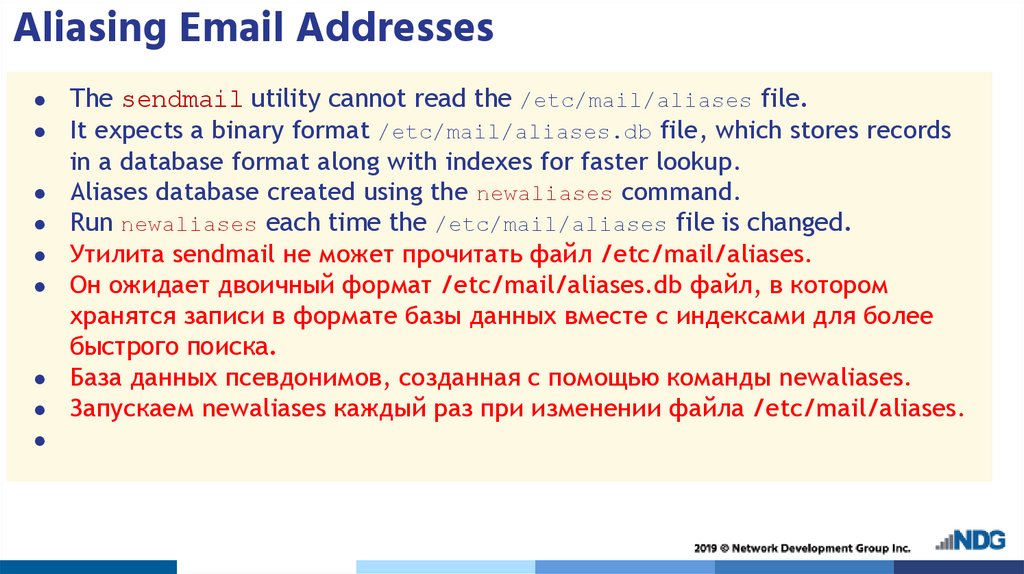
Aliasing Email AddressesThe sendmail utility cannot read the /etc/mail/aliases file.
It expects a binary format /etc/mail/aliases.db file, which stores records
in a database format along with indexes for faster lookup.
Aliases database created using the newaliases command.
Run newaliases each time the /etc/mail/aliases file is changed.
Утилита sendmail не может прочитать файл /etc/mail/aliases.
Он ожидает двоичный формат /etc/mail/aliases.db файл, в котором
хранятся записи в формате базы данных вместе с индексами для более
быстрого поиска.
База данных псевдонимов, созданная с помощью команды newaliases.
Запускаем newaliases каждый раз при изменении файла /etc/mail/aliases.
61.
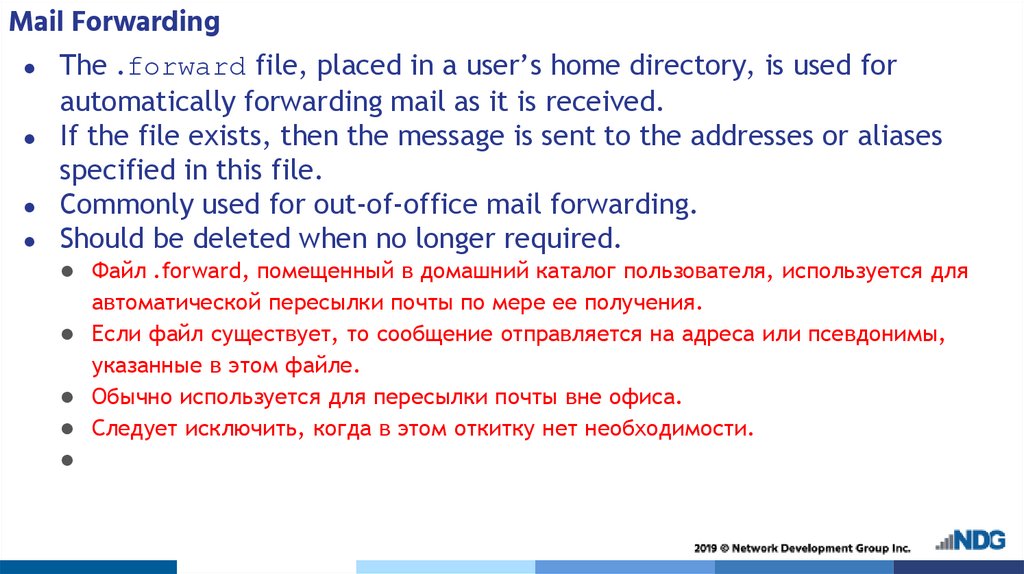
Mail ForwardingThe .forward file, placed in a user’s home directory, is used for
automatically forwarding mail as it is received.
If the file exists, then the message is sent to the addresses or aliases
specified in this file.
Commonly used for out-of-office mail forwarding.
Should be deleted when no longer required.
● Файл .forward, помещенный в домашний каталог пользователя, используется для
автоматической пересылки почты по мере ее получения.
● Если файл существует, то сообщение отправляется на адреса или псевдонимы,
указанные в этом файле.
● Обычно используется для пересылки почты вне офиса.
● Следует исключить, когда в этом откитку нет необходимости.
62.
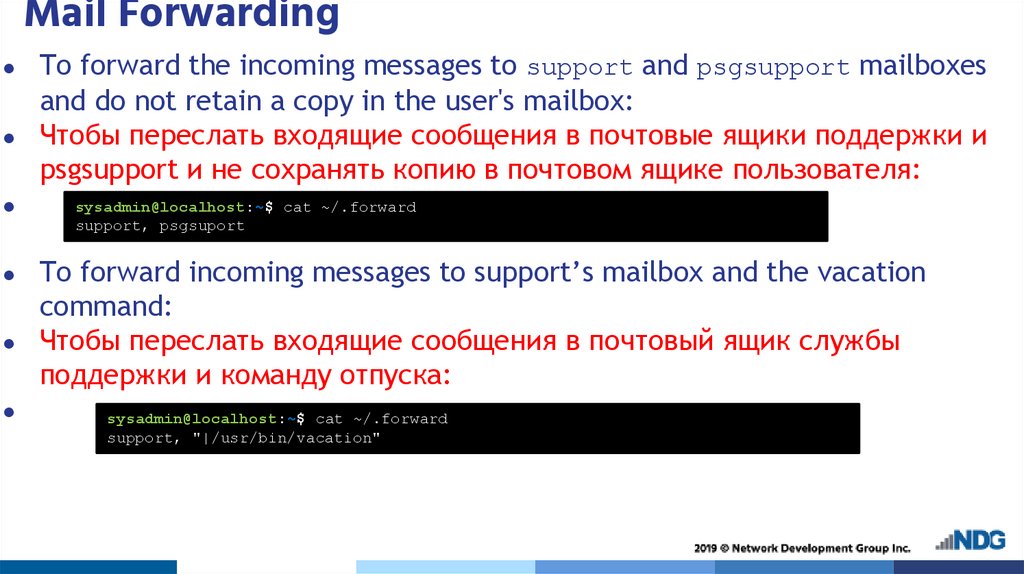
Mail ForwardingTo forward the incoming messages to support and psgsupport mailboxes
and do not retain a copy in the user's mailbox:
Чтобы переслать входящие сообщения в почтовые ящики поддержки и
psgsupport и не сохранять копию в почтовом ящике пользователя:
sysadmin@localhost:~$ cat ~/.forward
support, psgsuport
To forward incoming messages to support’s mailbox and the vacation
command:
Чтобы переслать входящие сообщения в почтовый ящик службы
поддержки и команду отпуска:
sysadmin@localhost:~$ cat ~/.forward
support, "|/usr/bin/vacation"
63.
SMTPSimple Mail Transfer Protocol (SMTP) is the standard for email servers
communication.
Uses port 25, SMTP will not work if this port is blocked.
Uses a set of codes to classify the email message for the email
application.
Defines server handshake mechanism and error handling.
Простой протокол передачи почты (SMTP) является стандартом для связи с
почтовыми серверами.
● Использует порт 25, SMTP не будет работать, если этот порт заблокирован.
● Использует набор кодов для классификации сообщения электронной почты
для почтового приложения.
● Определяет механизм подтверждения сервера и обработку ошибок.
64.
Sendmail● Released in 1979 as “delivermail”, rewritten later to adapt TCP.
● Was the standard MTA at one point.
● Uses DNS for host name translation.
● Support message transport between different systems such as Solaris,
Linux and AIX.
● Major drawback is complex configuration file which is the heart of
Sendmail.
Выпущен в 1979 году как «delivermail», переписанный позже для адаптации TCP.
Был стандартным MTA в какой-то момент.
Использует DNS для преобразования имени узла.
Поддержка передачи сообщений между различными системами, такими как Solaris,
Linux и AIX.
Основным недостатком является сложный конфигурационный файл, который
является сердцем Sendmail.
65.
SendmailUses /usr/sbin/mail.local program if both the sender and receiver are
on the same machine.
Uses uux if the sender and the receiver share a UUCP connection.
Uses SMTP if the recipient has an Internet address.
Messages are queued if they cannot be delivered instantaneously.
● Использует программу /usr/sbin/mail.local, если отправитель и получатель
находятся на одной машине.
● Использует uux, если отправитель и получатель совместно используют соединение
UUCP.
● Использует SMTP, если у получателя есть адрес в Интернете.
● Сообщения ставятся в очередь, если они не могут быть доставлены мгновенно.
66.
SendmailMessage header contains routing information
Sendmail daemon configured using the
/etc/mail/sendmail.cf file
Uses a single binary for all functions
Заголовок сообщения содержит сведения о маршрутизации
Демон Sendmail настроен с помощью файла /etc/mail/sendmail.cf
Использует один двоичный файл для всех функций
67.
sendmail CommandUsed to send messages to recipients.
Handles message routing.
Mainly used to deliver pre-formatted messages.
Can test the sendmail daemon using the “Sendmail emulation layer”
commands.
Sendmail daemon configured using the /etc/mail/sendmail.cf file.
Используется для отправки сообщений получателям.
Обрабатывает маршрутизацию сообщений.
В основном используется для доставки предварительно отформатированных
сообщений.
Может тестировать демон sendmail с помощью команд "Слой эмуляции Sendmail".
Демон Sendmail настроен с помощью файла /etc/mail/sendmail.cf.
68.
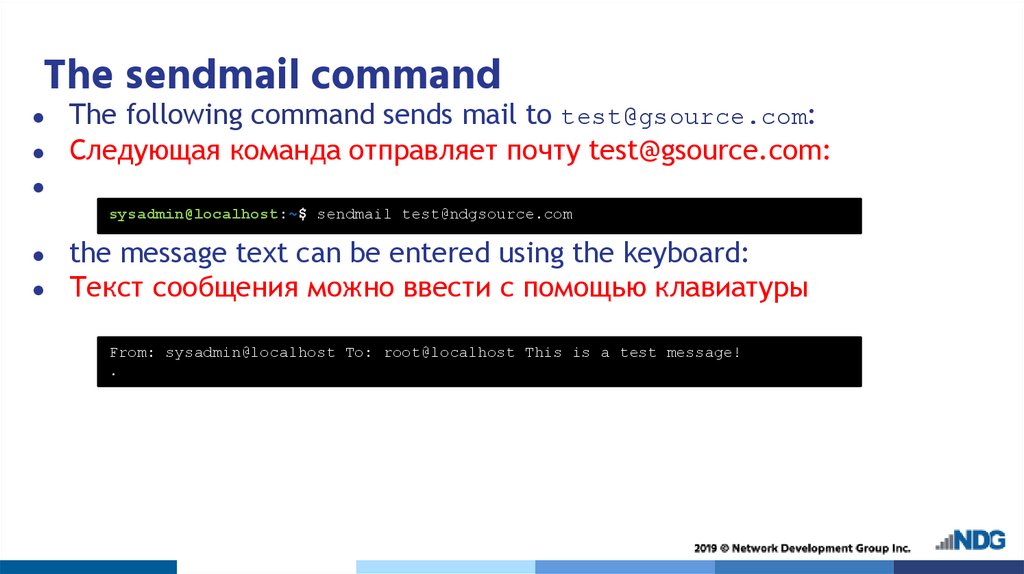
The sendmail commandThe following command sends mail to test@gsource.com:
Следующая команда отправляет почту test@gsource.com:
sysadmin@localhost:~$ sendmail test@ndgsource.com
the message text can be entered using the keyboard:
Текст сообщения можно ввести с помощью клавиатуры
From: sysadmin@localhost To: root@localhost This is a test message!
.
69.
PostfixDeveloped at IBM in the 1990s.
Alternative to Sendmail’s single executable design which causes
security concerns.
Generally the default MTA for Red Hat systems.
Runs in a router like mode with a master daemon overseeing the
operations of other daemons such as queue manage and SMTP.
Simpler user interface driven configuration.
Разработан в IBM в 1990-х годах.
Альтернатива единому исполняемому дизайну Sendmail, который вызывает
проблемы безопасности.
Как правило, MTA по умолчанию для систем Red Hat.
Работает в режиме маршрутизатора с главным демоном, контролирующим операции
других демонов, таких как управление очередью и SMTP.
Упрощенная конфигурация, управляемая пользовательским интерфейсом.
70.
EximDeveloped in 1995 at University of Cambridge.
Follows single binary design similar to sendmail.
Increased focus on security.
Does not use message queuing to reduce delivery time.
Разработан в 1995 году в Кембриджском университете.
Следует единому двоичному дизайну, аналогичному sendmail.
Повышенное внимание к безопасности.
Не использует очередь сообщений для сокращения времени доставки.