


 informatics
Similar presentations:


 — Chapter 1 — Farid Feyzi")

Introduction to Data Capture. Module 6
1.
Module 6Introduction to Data Capture
Slide 1
2.
Introduction to Data CaptureSlide 2
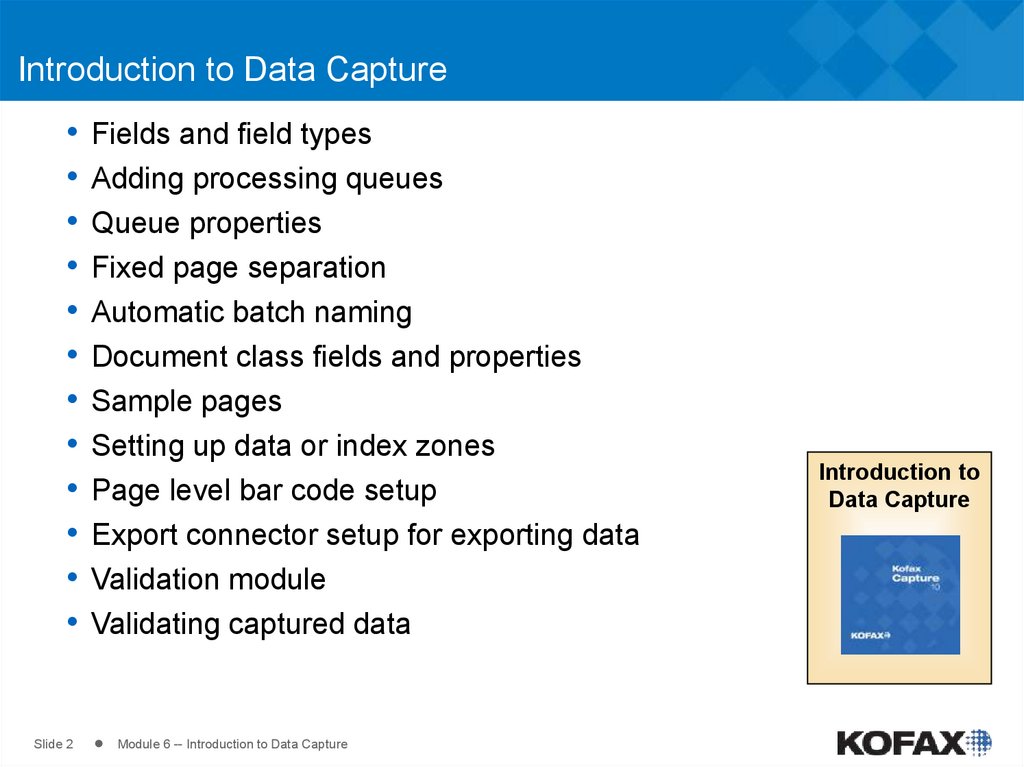
Fields and field types
Adding processing queues
Queue properties
Fixed page separation
Automatic batch naming
Document class fields and properties
Sample pages
Setting up data or index zones
Page level bar code setup
Export connector setup for exporting data
Validation module
Validating captured data
Module 6 -- Introduction to Data Capture
Introduction to
Data Capture
3.
Fields and Field Types• A Field is a container for
data. For example, the bar
code circled on the right
encodes data for the
Customer Number field.
The Customer Number
field will hold the data.
• A Field Type is a SQL
Data type template or
profile. It sets the rules for
what kind of data a field
will accept.
• A field type is a required
component of an index
field.
Slide 3
Module 6 -- Introduction to Data Capture
4.
Create a Field TypeCreate a new field type in one of three ways:
1) Click on the Field Type icon in the Quick
Access Tool Bar
2) Right mouse click in the Definitions Panel |
Field Types tab and select “New Field
Type…”
3) Click on “Field Type” icon on the Insert panel
Slide 4
Module 6 -- Introduction to Data Capture
5.
Field Type PropertiesAssign a Name
Choose one of the 11
SQL data types
Assign an optional
Description
Subtypes are
available for Email
and Fax
Assign maximum
number of characters
Click [Save] the field type
settings are complete
Slide 5
Module 6 -- Introduction to Data Capture
6.
Field Type Properties – Support Local FormatSupport Locale Format
option allows operators to
enter values in their locale
format. Only available for
Date, Time, Decimal, Double,
Float, Real, Integer, SmallInt,
and Numeric data types.
Slide 6
Module 6 -- Introduction to Data Capture
7.
Field Types are Created and AvailableField types are created and
available for batch class fields,
document class index fields, and
folder class fields
This field type will allow from
0 – 20 characters or numbers
Slide 7
Module 6 -- Introduction to Data Capture
8.
Accessing the Batch Class PropertiesFor this batch class, documents will
be scanned and the bar code will be
read on a page-level at scan time, the
data will be validated and then the
data and documents will be
exported.
To access the properties of a batch
class, right mouse click on the batch
class and select [Properties] or click
on the Properties icon in the Home
tab in the ribbon.
Slide 8
Module 6 -- Introduction to Data Capture
9.
Adding the Validation ModuleHighlight
Validation and
select [Properties]
to set the
properties
Validation properties
include “Allow batch
editing.” If checked,
the validation operator
would be able to do
things like rotate and
save pages, reorder
pages in the batch, etc.
Slide 9
Module 6 -- Introduction to Data Capture
10.
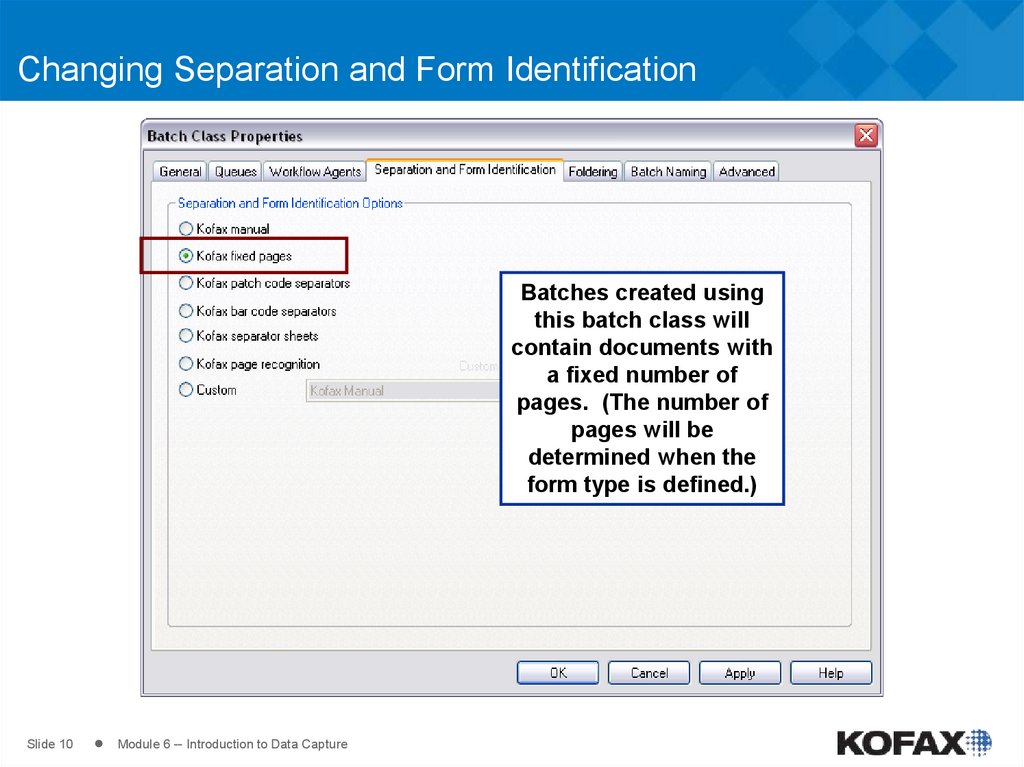
Changing Separation and Form IdentificationBatches created using
this batch class will
contain documents with
a fixed number of
pages. (The number of
pages will be
determined when the
form type is defined.)
Slide 10
Module 6 -- Introduction to Data Capture
11.
Automatic Batch NamingUse the Batch Naming
tab to configure the
default naming
convention for
batches created using
this batch class.
Slide 11
Module 6 -- Introduction to Data Capture
12.
Determining the Default Batch Naming ConventionThe format of the batch
name will reflect the
values selected from
the list below.
Select the values
from the supplied list
of available values
and click [Add].
Slide 12
Module 6 -- Introduction to Data Capture
A sample format of the batch
name is created reflecting the
selected values.
13.
Setting Document Class PropertiesRight mouse click on the
document class and select
[Properties] or click on the
Properties icon in the Home tab in
the ribbon to access the
properties of the document class.
Slide 13
Module 6 -- Introduction to Data Capture
14.
Document Class Setup -- Adding Index FieldsSet the document
class properties
Click “New Index
Field” to add an
index field
Slide 14
Module 6 -- Introduction to Data Capture
15.
Index (or Data) Field SettingsOvertype “Name0”
with the index field
name.
Enter a different value
for Display Label if the
label viewed by the
Validation and
Verification operators is
to be different than the
field name.
Slide 15
Module 6 -- Introduction to Data Capture
Select from the dropdown
for Field Type.
(We’ll discuss the
other settings in later
training modules.)
16.
Saving Index FieldsCreate additional index
fields as required.
For convenience, a new field type can be created
right from the Document Class Properties
window by clicking on [New Field Type]
Click [OK] when
settings are complete
Slide 16
Module 6 -- Introduction to Data Capture
17.
Adding Index Fields to the Export ConnectorAs soon as [OK] is clicked on the
Document Class Properties
window, Kofax Capture will open
the export connector setup
window
Click [Add],
then…
Select index fields from the
fly-out menu options.
Slide 17
Module 6 -- Introduction to Data Capture
Click [OK] when all index
fields have been added
18.
Modifying Form Type PropertiesRight mouse click
on the form type
and select
[Properties]
Slide 18
Module 6 -- Introduction to Data Capture
19.
Setting Fixed Number of PagesSince “Kofax Fixed Pages”
is being used as the method
of separation for this batch
class, the number of pages
must be set for the form
type here.
Slide 19
Module 6 -- Introduction to Data Capture
20.
Setting Page Level BarcodesAccept the “Kofax 3 of 9
Bar Code” profile. There is
only one bar code per line.
Slide 20
Module 6 -- Introduction to Data Capture
Two bar code options are
available out-of-the-box:
“3 of 9” and “128”. If the
bar code is a different
type, these standard
profiles could be edited
(via the [Edit] button).
21.
Sample Pages• Kofax Capture uses template-based extraction.
• Elements (for example, data to be extracted) on structured
documents is consistently located in the same location.
• A template that closely approximates the pages being input
or scanned in production can be utilized to define all the
actions Kofax Capture needs to perform in production.
• A sample page is a template.
• Administrators use sample pages in the Administration
module to define the specific locations (via zones), the
activities to be performed, and the technology to be used by
Kofax Capture.
Slide 21
Module 6 -- Introduction to Data Capture
22.
Requirements and Guidelines for Sample Pages• A sample page is required when:
• Setting automatic form identification
• Defining zones for indexing, recognition, registration, or
separation
• Setting page-level barcodes
• Requirements/guidelines for creating a sample page
include:
• Input using same make/model of scanner as used in
production
• Input using same resolution (dpi) as used in production
• Must have same number of pages as production
documents
• Must be a TIF file – no eDocuments
Slide 22
Module 6 -- Introduction to Data Capture
23.
Adding Sample PagesRight mouse click
on the form type
and select [Add
Sample Pages]
BEFORE adding sample page(s),
make sure that the scanner
properties replicate what is being
used in production
Slide 23
Module 6 -- Introduction to Data Capture
24.
Set Scanner Properties to Match ProductionREMEMBER: Capture sample pages using the
same make/model of scanner as used in
production and the same resolution (dpi) as
used in production.
Slide 24
Module 6 -- Introduction to Data Capture
25.
Scanner Properties and Profiles• Source Properties provide parameters for continued use after
being setup once
• Scan resolution (examples:100, 200, 300 dots per inch [dpi])
• Paper size (examples: legal, letter, A4)
• Blank Page Thresholds
• Color modes (color or black-and-white scanning)
• Orientation (landscape versus portrait)
• Simplex versus duplex mode
• Advanced properties
• Scanner Profiles provide parameters for attached scanners
• Scanner settings are defined once
• Profiles can be selected from an available list
• Scanners may have multiple profiles for added flexibility
Slide 25
Module 6 -- Introduction to Data Capture
26.
Select the Scan SourceSelect the scan source
Click the [Edit Scan
Source Settings] icon
Slide 26
Module 6 -- Introduction to Data Capture
27.
Set the Source PropertiesSource Properties change based
on the scanner installed
Select [Options] to review
or define scanner options
Slide 27
Module 6 -- Introduction to Data Capture
28.
Scanner OptionsAdditional scanner options are
available based on the scanner
Slide 28
Module 6 -- Introduction to Data Capture
29.
Advanced PropertiesSelect [Advanced] to review
or define additional scanner
properties
Slide 29
Module 6 -- Introduction to Data Capture
30.
Advanced Options – the VRS Interactive ViewerThe [Advanced] button launches the
Kofax VRS Interactive Viewer for
configuring VRS-related scan settings
Slide 30
Module 6 -- Introduction to Data Capture
31.
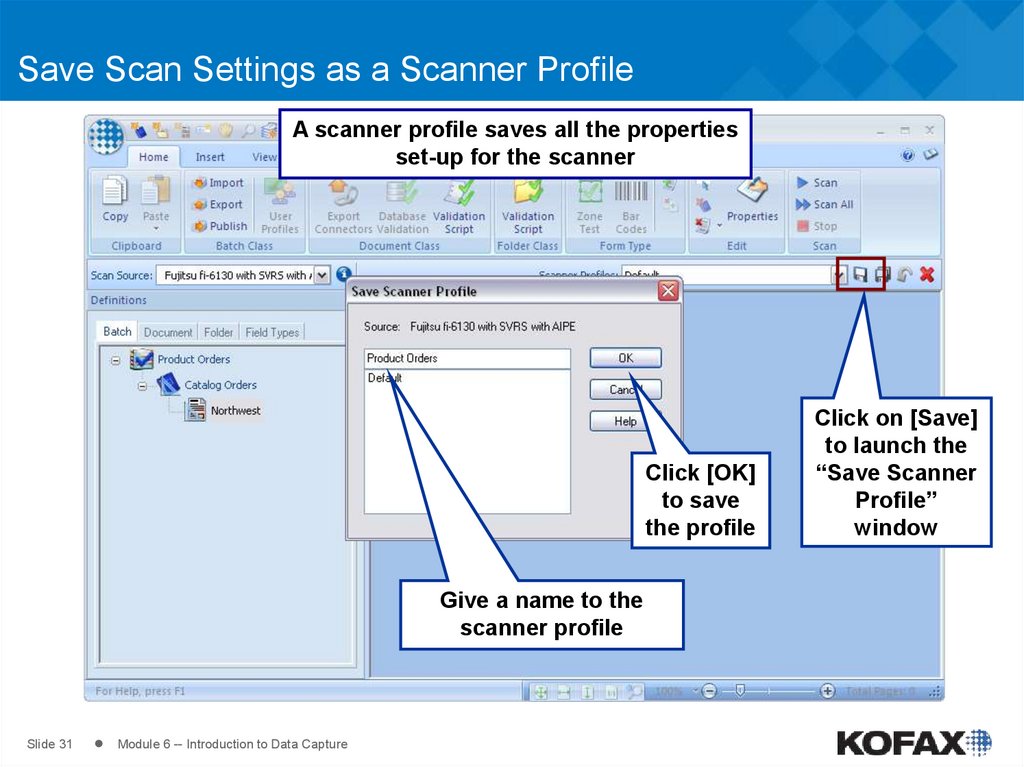
Save Scan Settings as a Scanner ProfileA scanner profile saves all the properties
set-up for the scanner
Click [OK]
to save
the profile
Give a name to the
scanner profile
Slide 31
Module 6 -- Introduction to Data Capture
Click on [Save]
to launch the
“Save Scanner
Profile”
window
32.
Naming and Loading Scanner Profiles• Normally, when a batch is opened in the Scan module,
Kofax Capture searches for and loads scan profiles in the
following order:
1. Looks for a profile with the same name as the batch
class for that batch.
2. If there is none, then looks for a profile called "Default".
3. If there is none, then leaves the existing profile in place
(if any) or defaults to the default settings of the scanner.
• Therefore, if specific settings for a batch are desired to load
automatically at scan time, create a scan profile with the
same name as the associated batch class.
Batch Class
(Product Orders)
Automatically loaded
Scanner Profile
(Product Orders)
Automatically loaded
VRS Profile
(Product Orders)
Slide 32
Module 6 -- Introduction to Data Capture
33.
Saved Scanner Profile Source FilesScanner profiles are stored as .ini files in a directory created by Kofax
Capture identified by the scan source in the following directory:
ProgramData\Kofax\Capture\Local\ScannerProfiles [scan source]
Slide 33
Module 6 -- Introduction to Data Capture
34.
Viewing Scanner Profile File ContentsOpening the
scanner profiles in
a test editor
(Notepad) will
display all the scan
settings
Slide 34
Module 6 -- Introduction to Data Capture
35.
Centralized Scanner Configuration• Once created, scanner profiles can be shared over the entire
Kofax Capture network in a client-server deployment.
• When setting the profile at one client station, an option is
provided to save the profile to the Kofax Capture server.
• All other clients logged-in can access that profile.
Kofax
Capture
Server or
Central Site
Kofax Capture Client
Kofax Capture Client
Kofax Capture Client
Slide 35
Module 6 -- Introduction to Data Capture
36.
Capture the Sample PageScan or import the
sample page.
Slide 36
Module 6 -- Introduction to Data Capture
37.
The Sample Page is Ready for SetupA sample page icon is
attached to the form
type. When expanded,
place holders for zones
are visible.
Slide 37
Module 6 -- Introduction to Data Capture
38.
Setting up Page level Bar CodesExpand the Sample Page
icon and select [Page
Level Bar Codes], then
[Properties]
Page level barcodes are
read left-to-right and top-tobottom.
The (skip bar code)
function may be used
multiple times.
Associate the index field(s) with
the bar code(s) on the page.
When done, click [Add].
Slide 38
Module 6 -- Introduction to Data Capture
39.
Adding Index FieldsIn addition to the
page level barcodes,
we also want to
capture a value for
the customer name
Slide 39
Module 6 -- Introduction to Data Capture
40.
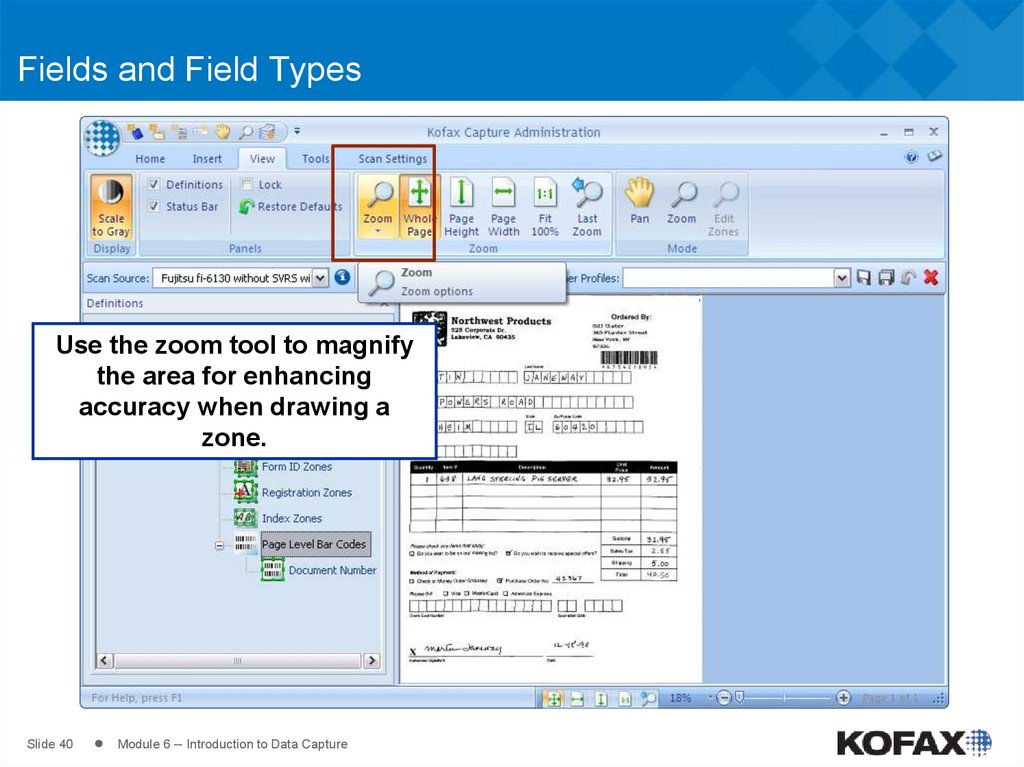
Fields and Field TypesUse the zoom tool to magnify
the area for enhancing
accuracy when drawing a
zone.
Slide 40
Module 6 -- Introduction to Data Capture
41.
Choose the Index Zone IconSelect the
“Index Zone”
icon from the
Insert tab
Slide 41
Module 6 -- Introduction to Data Capture
42.
Draw the Zone and Configure the PropertiesWith the left mouse
button depressed,
draw a box around
the element.
Leave extra room on the
right to accommodate longer
values than the sample.
Release the mouse button.
When the Create
Index Zone window
appears, select the
associated field from
the dropdown.
Slide 42
Module 6 -- Introduction to Data Capture
Click [OK] to
complete the setup.
43.
Publish After ChangesRemember, publishing after changes are
made to a batch class makes these
changes effective for all new batches.
Slide 43
Module 6 -- Introduction to Data Capture
44.
Creating the BatchBecause Fixed Pages was
selected as the separation
method, documents are
separated automatically at
scan time.
Slide 44
Module 6 -- Introduction to Data Capture
In processing the batch,
first open the Scan
module, create the batch,
and capture the
documents.
45.
Opening the Validation ModuleAfter the Scan module is closed, the
Validation queue is opened from the
Kofax Capture program group.
Remember, in this
batch class,
Validation was
configured as part
of the workflow
Slide 45
Module 6 -- Introduction to Data Capture
46.
Selecting and Opening BatchesWhen the Validation
module is first opened,
the operator is prompted
to process batches that
are ready and waiting.
Slide 46
Module 6 -- Introduction to Data Capture
47.
Validation Module – Processing the BatchThe Validation model
consists of an index
panel (where index data
can be entered or
changed) and a viewer
panel where the images
are displayed.
Slide 47
Module 6 -- Introduction to Data Capture
48.
Manual Data EntryIn this batch, the value
for the Customer
Number field was
acquired when the bar
code was read
The Validation
operator can
enter data from
the image which
has not been
automatically
extracted.
Slide 48
Module 6 -- Introduction to Data Capture
49.
Validation ModuleRight mouse click on
the Kofax button to
expose view options
Slide 49
Module 6 -- Introduction to Data Capture
50.
Validation Module OptionsLeft mouse click on the
Kofax Button to expose
the menu items
NOTE: The Tab key
is the default
termination key.
Left mouse click on
[Options] provides for
settings designed to
enhance the Validation
operators’ productivity
and accuracy
Slide 50
Module 6 -- Introduction to Data Capture
51.
Filtering BatchesBatches can be
filtered for selective
viewing and
processing
Select the criteria, and
then apply the settings to
filter the batches
Slide 51
Module 6 -- Introduction to Data Capture
52.
Display OptionsFrom the View tab, a
variety of settings are
available to enhance the
display of the
documents and data in
the batch, including the
Batch Contents window
Slide 52
Module 6 -- Introduction to Data Capture
53.
Lock Toolbars and Restore DefaultsLock Toolbars and
Restore Defaults
features provide a
convenient way to
lock all docked
toolbars and panels
in place, and to
recover them if
undocked and lost.
Slide 53
Module 6 -- Introduction to Data Capture
54.
Run the Export ModuleAt the conclusion of the
Validation operation, run
the Export module to
archive the data and the
documents.
Slide 54
Module 6 -- Introduction to Data Capture
55.
DemonstrationField types, bar code setup, sample pages,
setting up zones, using the Validation
module, processing data
Slide 55
Module 6 -- Introduction to Data Capture
56.
Lab• Setting up field types
• Adding fields for data
• Adding and configuring sample pages
• Setting up zones
• Setting up page level bar codes
• Using the Validation module
• Processing data
Refer to the Kofax Capture 10 Lab and Reference Guide
Slide 56
Module 6 -- Introduction to Data Capture