


 programming
Similar presentations:


Basic Switch. Setup
1.
ATP. Lecture 2Basic Switch
Setup
1
2.
Objectives1. Describe out-of-band
management. Navigate the HP
ProVision and Comware
command line interfaces (CLIs).
2. Verify your configuration
settings.
2
3.
Basic SwitchSetup
1. Describe out-of-band management.
Navigate the HP ProVision and Comware
command line interfaces (CLIs)
3
4.
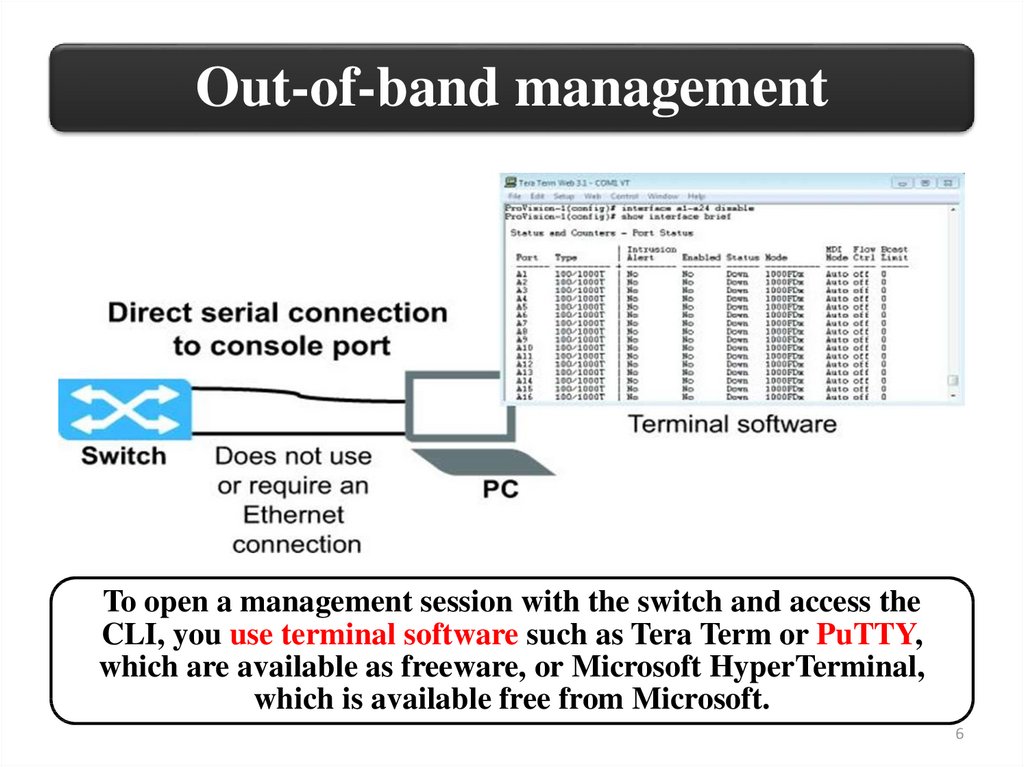
Out-of-band managementWhen you initially configure a switch, you
will typically use out-of-band management.
For out-of-band management, you must have
physical access to the switch.
You connect your management station to the
switch’s console port using the serial cable
that ships with the switch. This connection is
dedicated to the management session. Out-ofband management does not require the switch
to have network connectivity.
4
5.
Out-of-band managementHP ProVision switches have one console port.
Comware switches have an auxiliary (aux)
port, which is used for console access.
Comware routers use the console (con) port
for their default console access, but most of
the Comware routers also support an
additional auxiliary port for a secondary CLI
access. This could optionally be used for dialin access.
5
6.
Out-of-band managementTo open a management session with the switch and access the
CLI, you use terminal software such as Tera Term or PuTTY,
which are available as freeware, or Microsoft HyperTerminal,
which is available free from Microsoft.
6
7.
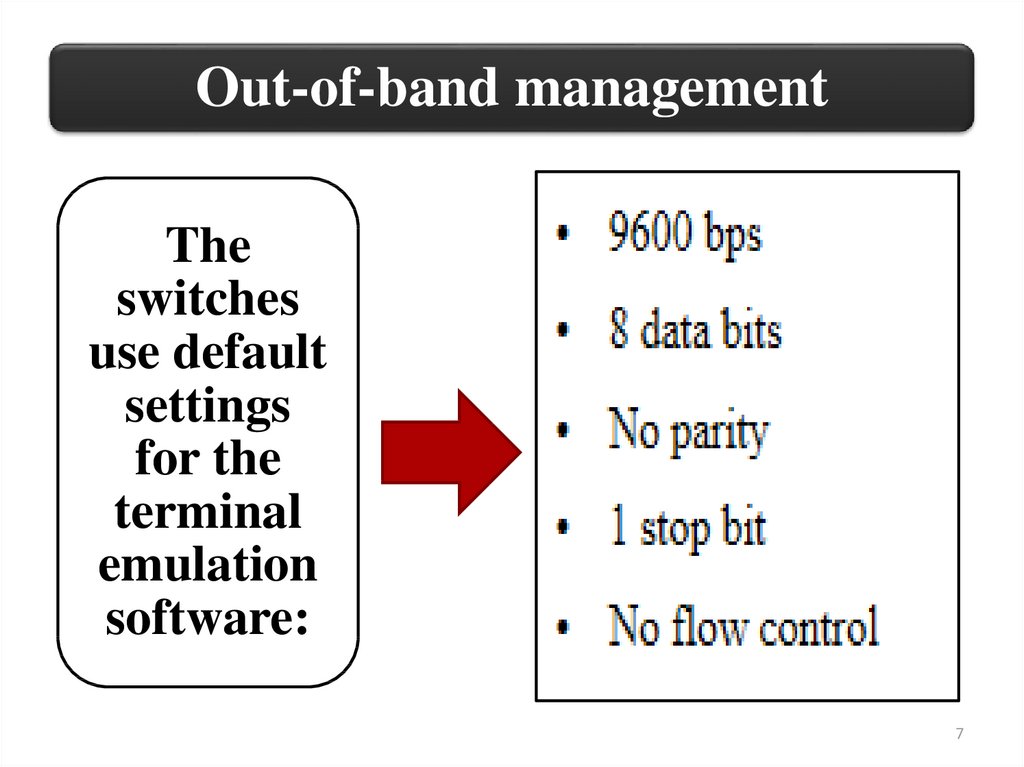
Out-of-band managementThe
switches
use default
settings
for the
terminal
emulation
software:
7
8.
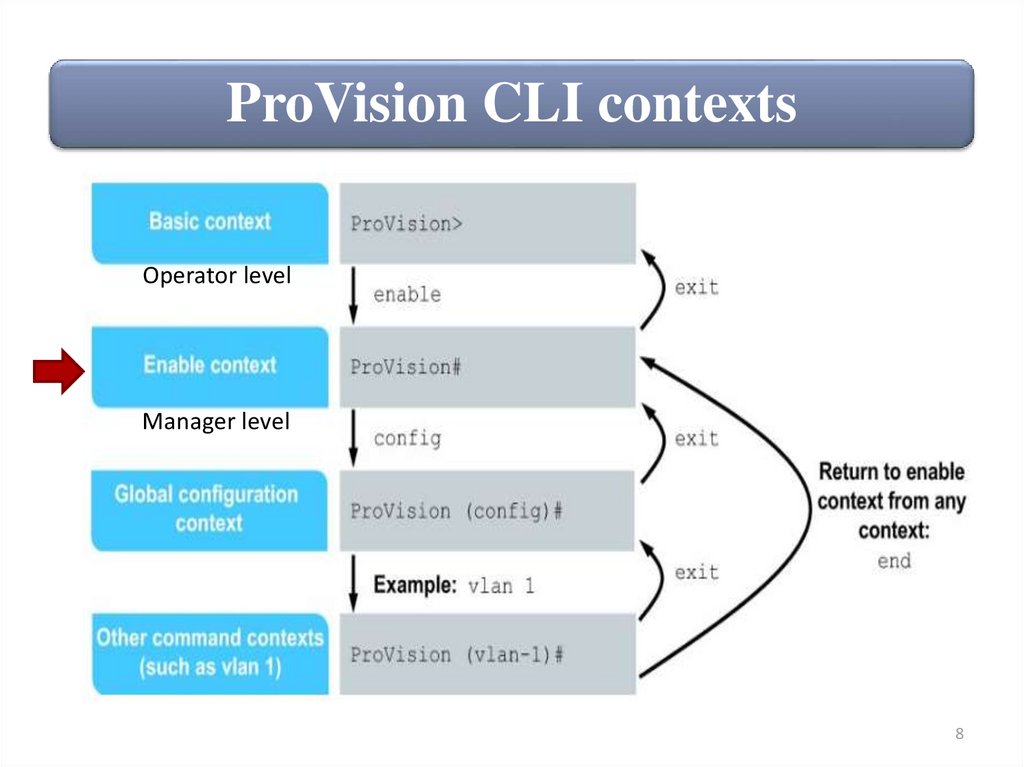
ProVision CLI contextsOperator level
Manager level
8
9.
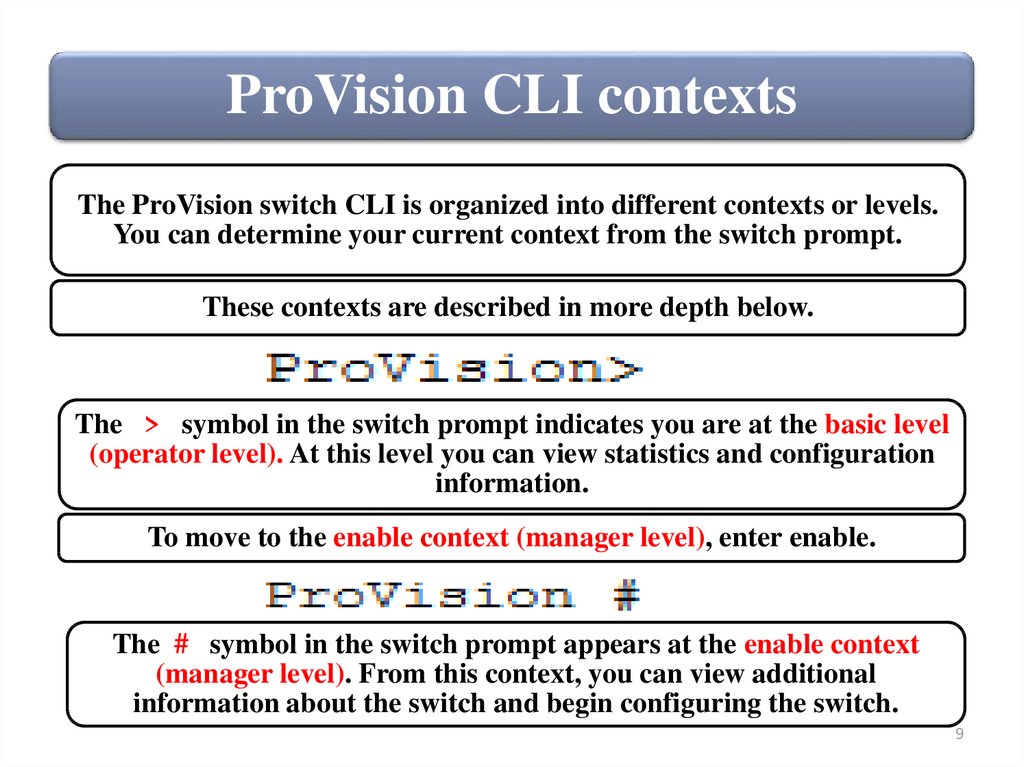
ProVision CLI contextsThe ProVision switch CLI is organized into different contexts or levels.
You can determine your current context from the switch prompt.
These contexts are described in more depth below.
The > symbol in the switch prompt indicates you are at the basic level
(operator level). At this level you can view statistics and configuration
information.
To move to the enable context (manager level), enter enable.
The # symbol in the switch prompt appears at the enable context
(manager level). From this context, you can view additional
information about the switch and begin configuring the switch.
9
10.
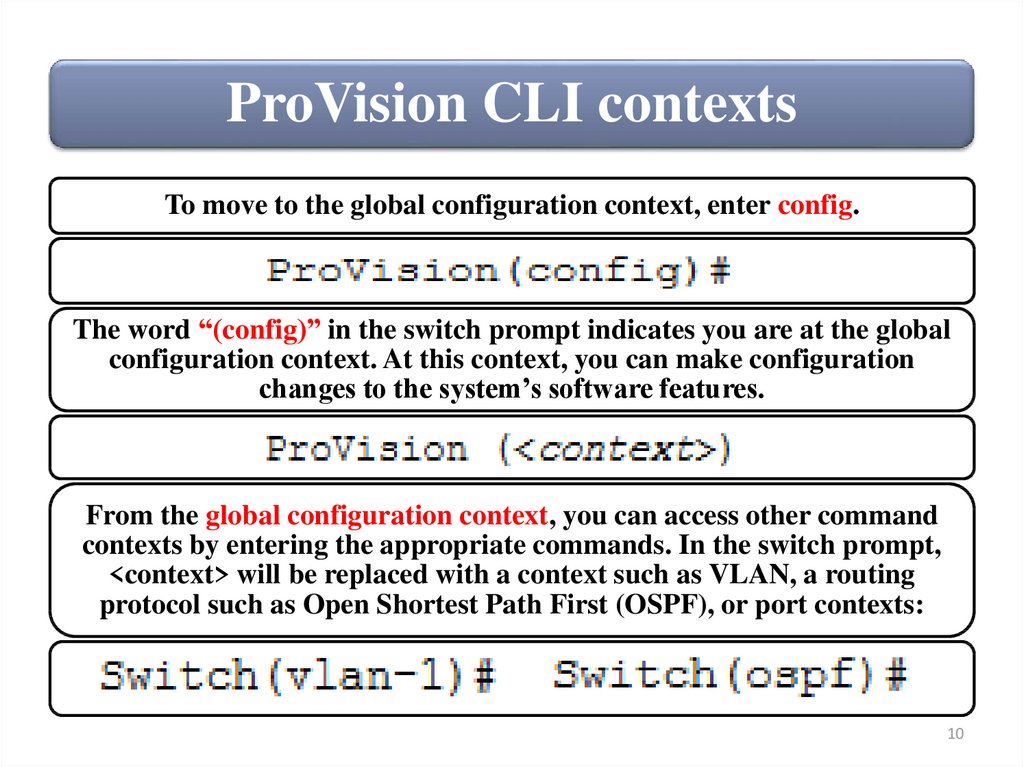
ProVision CLI contextsTo move to the global configuration context, enter config.
The word “(config)” in the switch prompt indicates you are at the global
configuration context. At this context, you can make configuration
changes to the system’s software features.
From the global configuration context, you can access other command
contexts by entering the appropriate commands. In the switch prompt,
<context> will be replaced with a context such as VLAN, a routing
protocol such as Open Shortest Path First (OSPF), or port contexts:
10
11.
ProVision CLI contextsContext
CLI Prompt
Description
Basic
(operator level)
View a limited number of statistics
and configuration settings.
Enable
(manager level)
Begin switch configuration (such
as updating system software).
Global
configuration
Make configuration changes to the
system’s software features.
Other command
contexts
Make configuration changes within
a specific context, such as to a
VLAN, one or more ports, or
routing protocols.
11
12.
Comware CLI views (contexts)12
13.
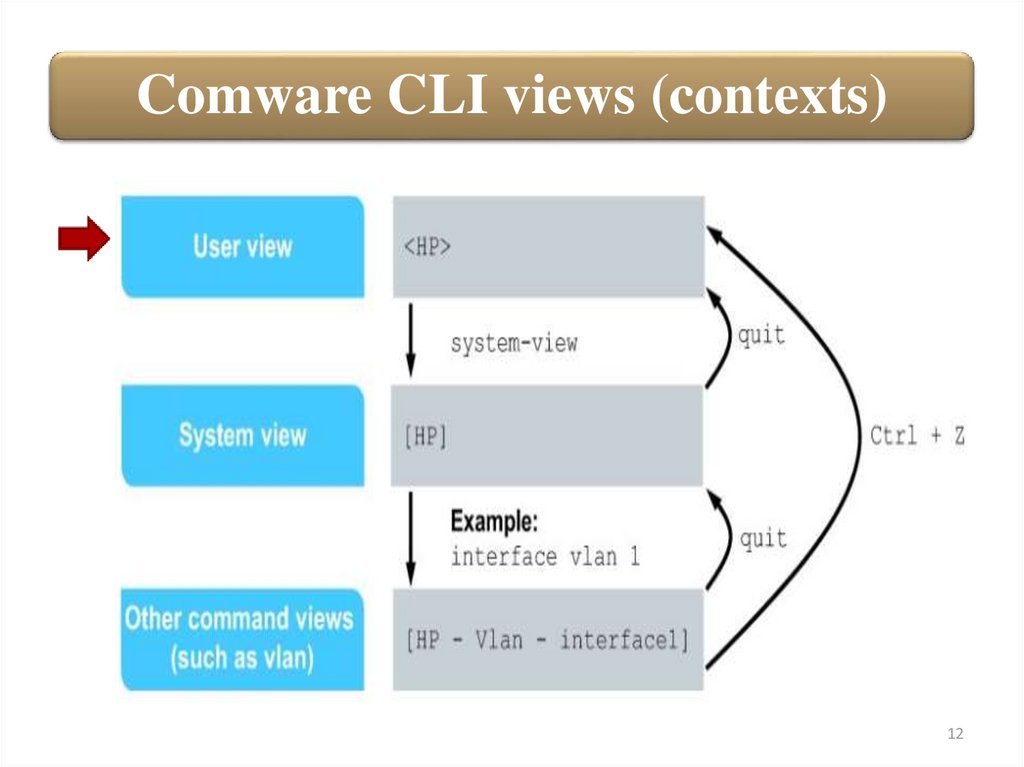
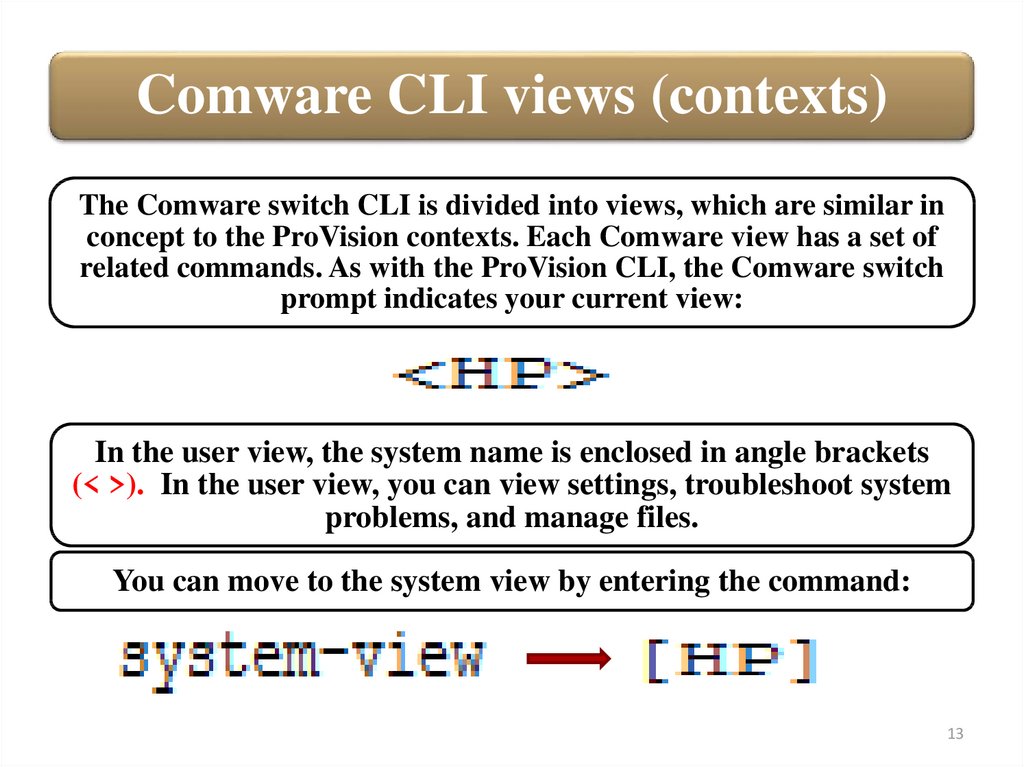
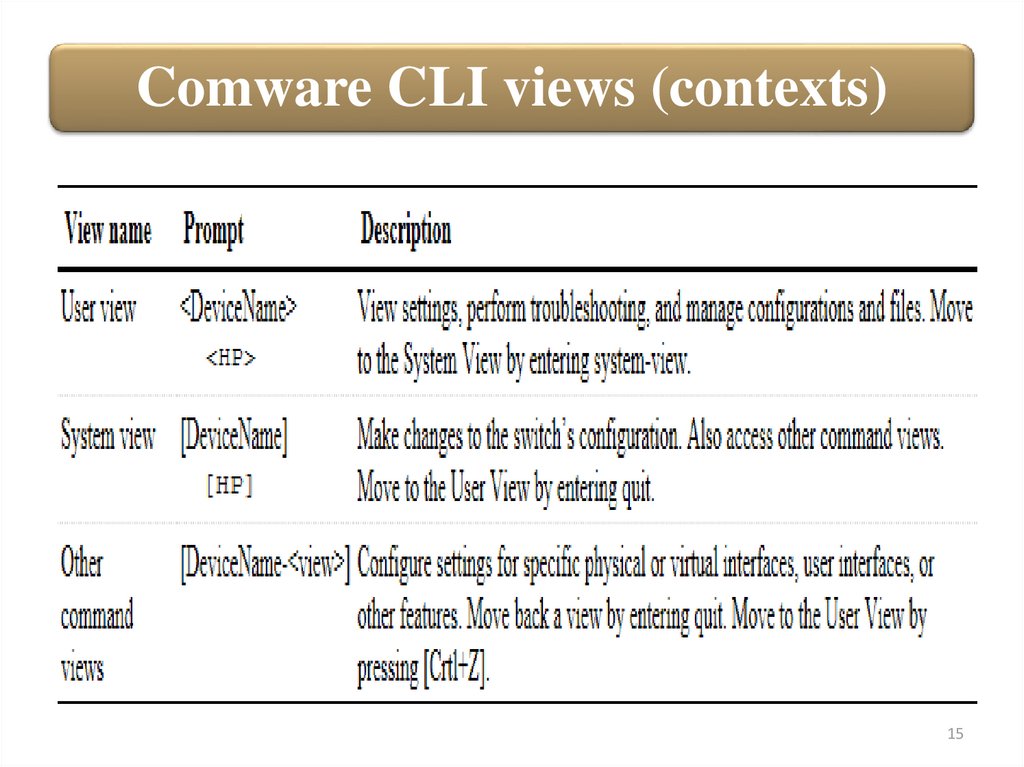
Comware CLI views (contexts)The Comware switch CLI is divided into views, which are similar in
concept to the ProVision contexts. Each Comware view has a set of
related commands. As with the ProVision CLI, the Comware switch
prompt indicates your current view:
In the user view, the system name is enclosed in angle brackets
(< >). In the user view, you can view settings, troubleshoot system
problems, and manage files.
You can move to the system view by entering the command:
13
14.
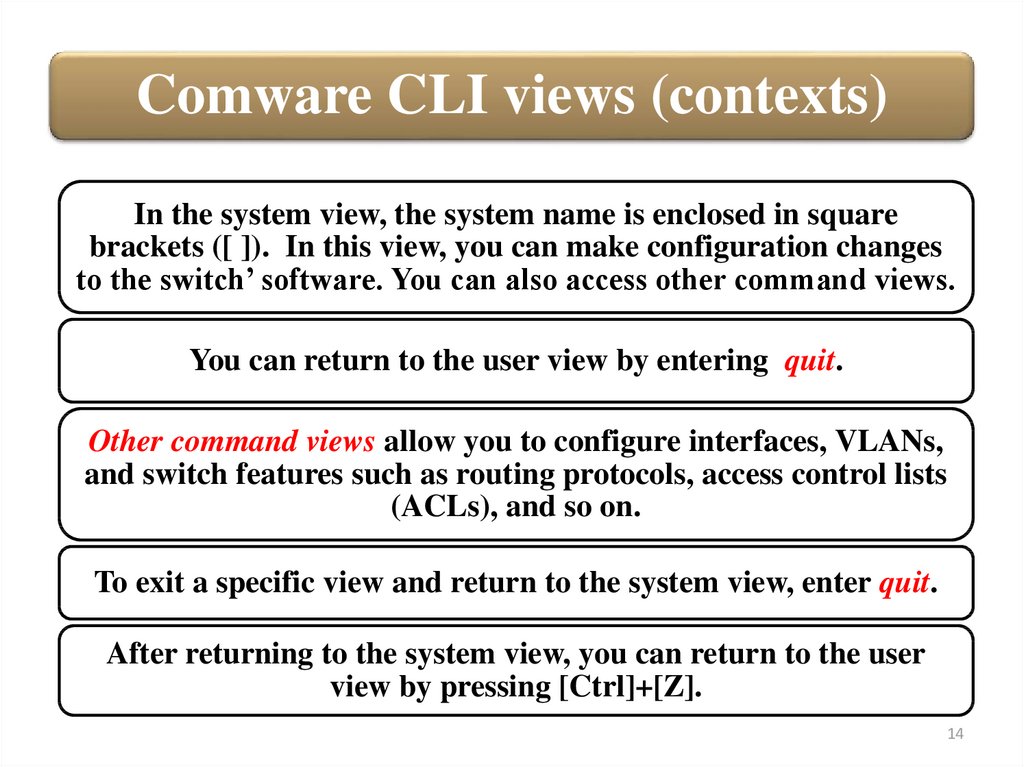
Comware CLI views (contexts)In the system view, the system name is enclosed in square
brackets ([ ]). In this view, you can make configuration changes
to the switch’ software. You can also access other command views.
You can return to the user view by entering quit.
Other command views allow you to configure interfaces, VLANs,
and switch features such as routing protocols, access control lists
(ACLs), and so on.
To exit a specific view and return to the system view, enter quit.
After returning to the system view, you can return to the user
view by pressing [Ctrl]+[Z].
14
15.
Comware CLI views (contexts)15
16.
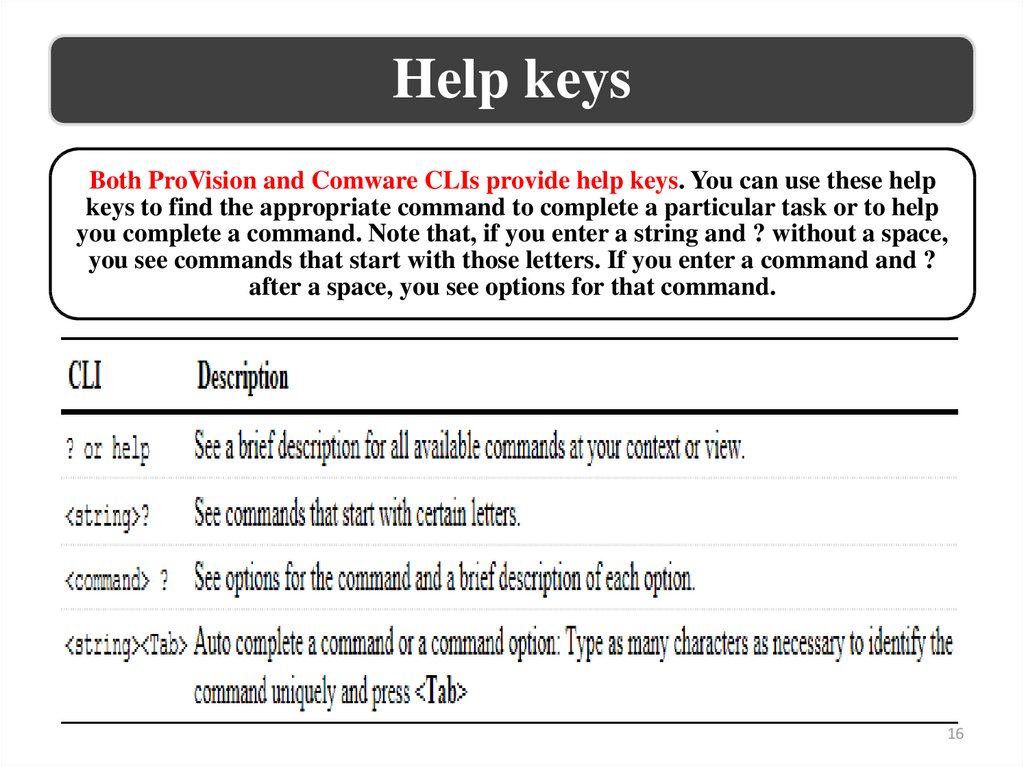
Help keysBoth ProVision and Comware CLIs provide help keys. You can use these help
keys to find the appropriate command to complete a particular task or to help
you complete a command. Note that, if you enter a string and ? without a space,
you see commands that start with those letters. If you enter a command and ?
after a space, you see options for that command.
16
17.
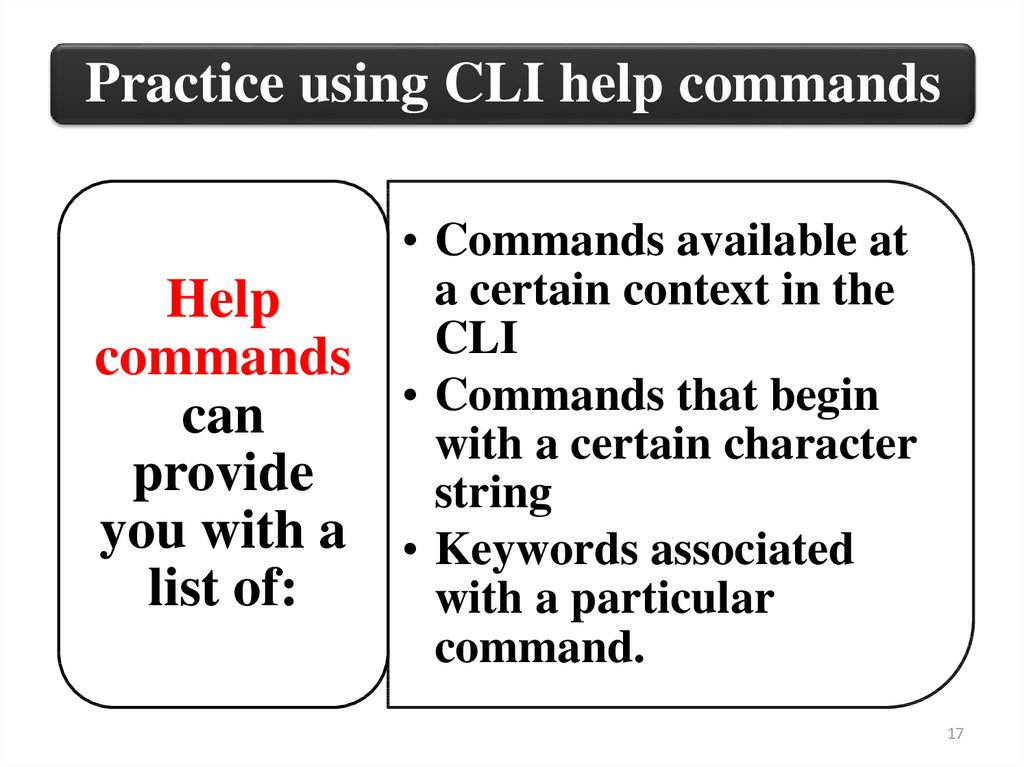
Practice using CLI help commandsHelp
commands
can
provide
you with a
list of:
• Commands available at
a certain context in the
CLI
• Commands that begin
with a certain character
string
• Keywords associated
with a particular
command.
17
18.
HP ProVision switches help commandsTo see which commands are available at the enable
context (ProVision#) in the ProVision CLI, enter the ?
command: ProVision# ?
Some important • show, which enables you to examine
current configuration parameters
commands
• copy, which enables you to back up
available at the
the switch configuration
enable context • ping and traceroute, which are
include:
connectivity test tools
To list the parameters available for the show command,
enter: ProVision# show ?
18
19.
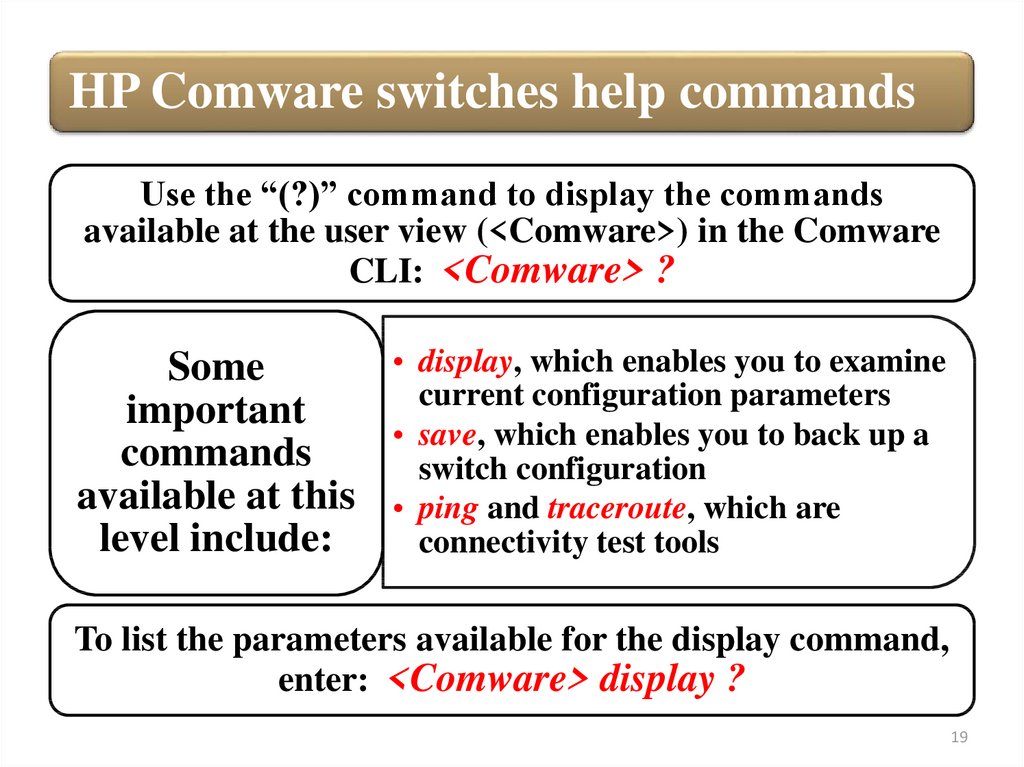
HP Comware switches help commandsUse the “(?)” command to display the commands
available at the user view (<Comware>) in the Comware
CLI: <Comware> ?
Some
important
commands
available at this
level include:
• display, which enables you to examine
current configuration parameters
• save, which enables you to back up a
switch configuration
• ping and traceroute, which are
connectivity test tools
To list the parameters available for the display command,
enter: <Comware> display ?
19
20.
Completing basic configuration tasksNow that you
have a basic
understanding of
the ProVision
and Comware
CLI, you will
learn more about
how to use the
CLI to complete
the following
common
management
tasks:
• Return HP Comware and HP
ProVision switches to factory
default settings
• Configure a hostname on
ProVision switches and a
sysname on Comware
switches
• Disable and enable interfaces
• Use CLI help commands to
navigate the CLI and enter
commands
20
21.
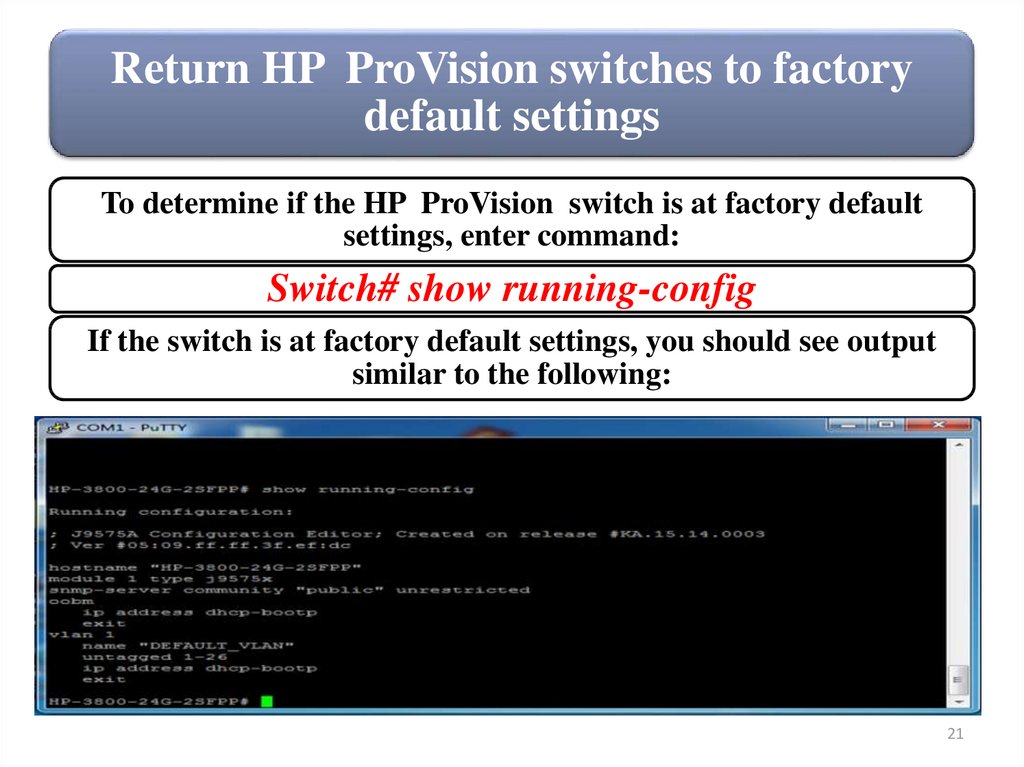
Return HP ProVision switches to factorydefault settings
To determine if the HP ProVision switch is at factory default
settings, enter command:
Switch# show running-config
If the switch is at factory default settings, you should see output
similar to the following:
21
22.
Return HP ProVision switches to factorydefault settings
If the output you see matches what is displayed above, the
switch is already at factory default settings.
If the output includes other commands, however, you can
return the ProVision switch to factory default settings
using the following command:
ProVision# erase startup-config
During the process of returning the switch to factory
default settings, you will be prompted to confirm that you
want to reboot the switch; press y. The switch will be
rebooted.
22
23.
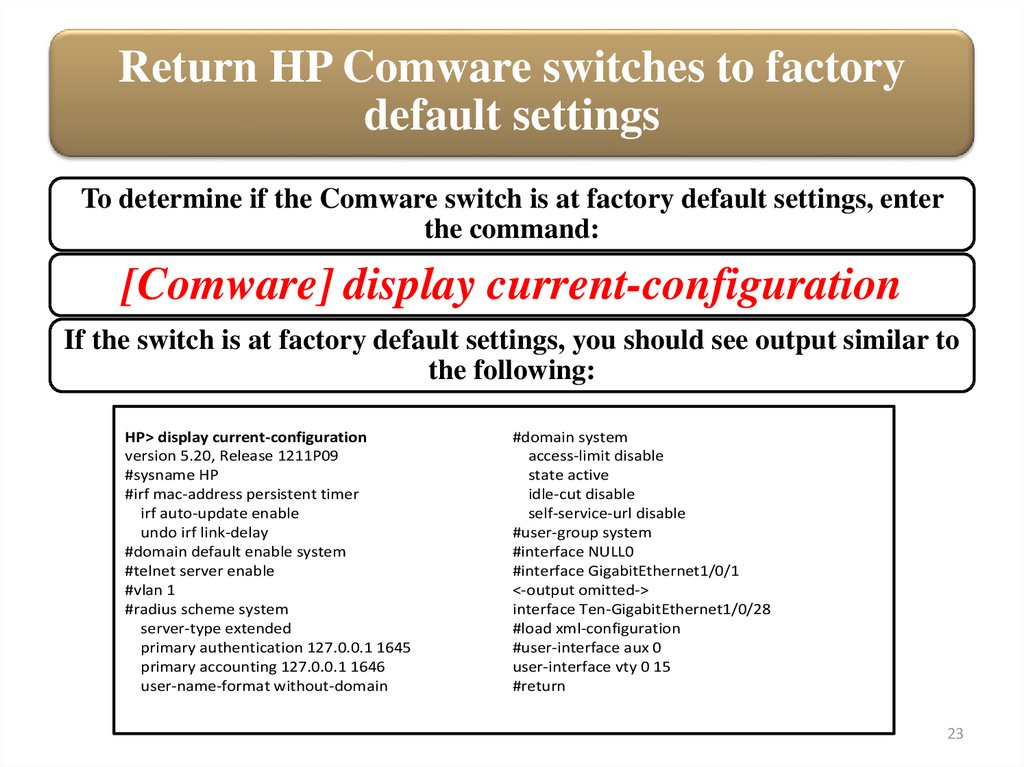
Return HP Comware switches to factorydefault settings
To determine if the Comware switch is at factory default settings, enter
the command:
[Comware] display current-configuration
If the switch is at factory default settings, you should see output similar to
the following:
HP> display current-configuration
version 5.20, Release 1211P09
#sysname HP
#irf mac-address persistent timer
irf auto-update enable
undo irf link-delay
#domain default enable system
#telnet server enable
#vlan 1
#radius scheme system
server-type extended
primary authentication 127.0.0.1 1645
primary accounting 127.0.0.1 1646
user-name-format without-domain
#domain system
access-limit disable
state active
idle-cut disable
self-service-url disable
#user-group system
#interface NULL0
#interface GigabitEthernet1/0/1
<-output omitted->
interface Ten-GigabitEthernet1/0/28
#load xml-configuration
#user-interface aux 0
user-interface vty 0 15
#return
23
24.
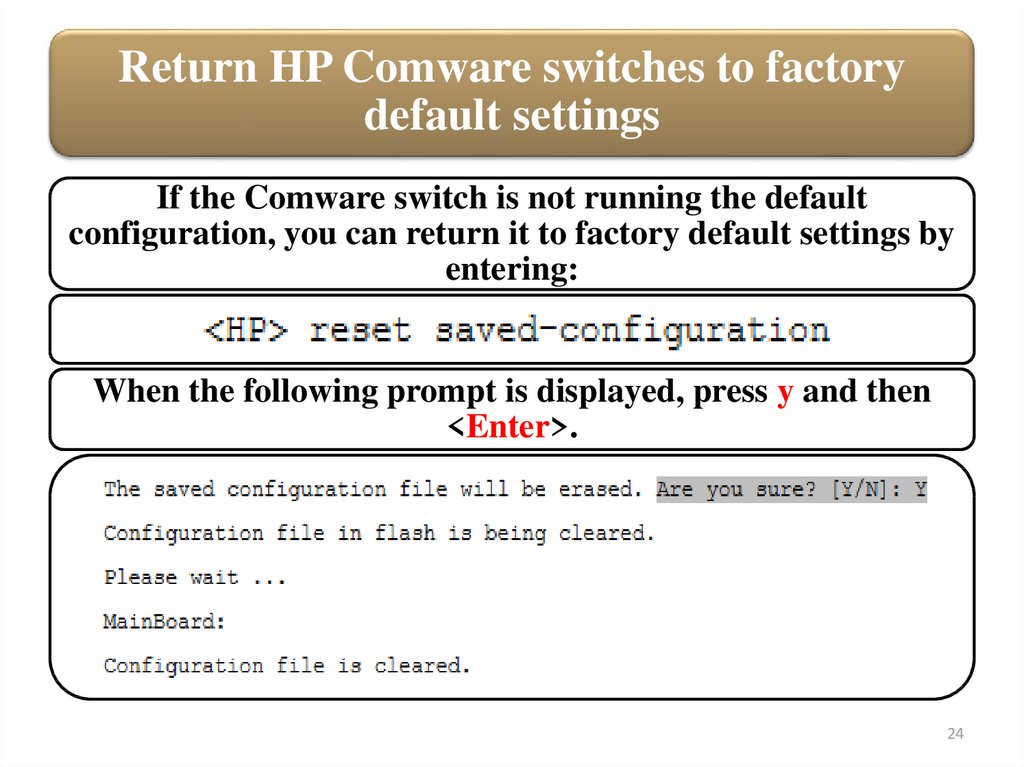
Return HP Comware switches to factorydefault settings
If the Comware switch is not running the default
configuration, you can return it to factory default settings by
entering:
When the following prompt is displayed, press y and then
<Enter>.
24
25.
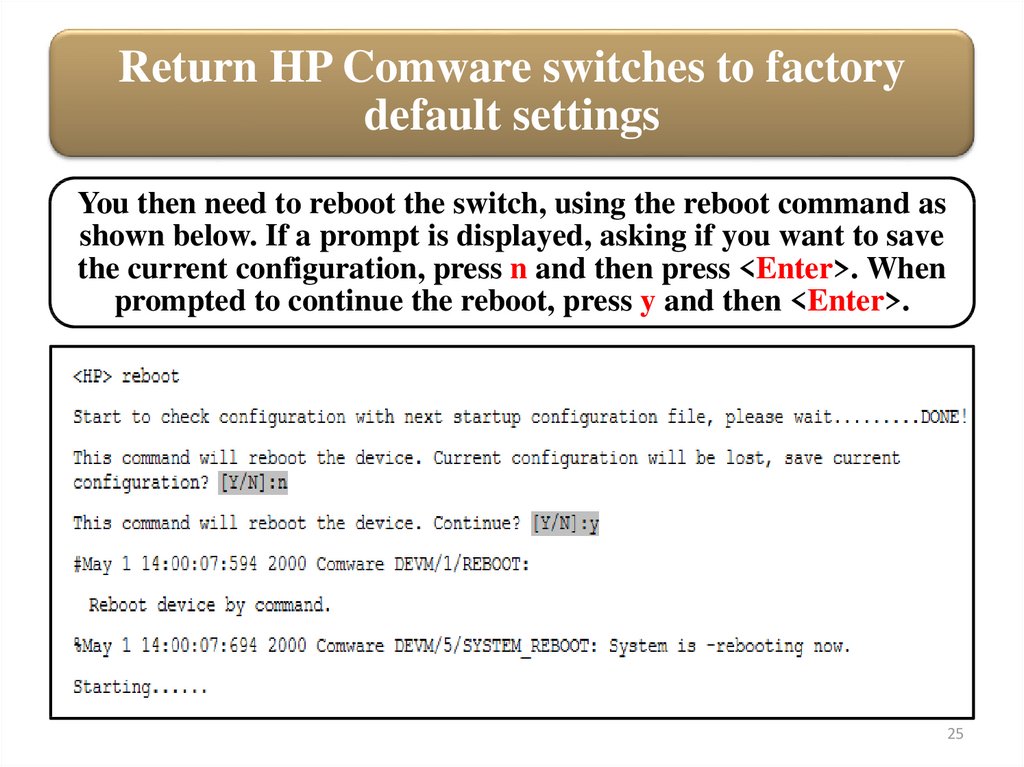
Return HP Comware switches to factorydefault settings
You then need to reboot the switch, using the reboot command as
shown below. If a prompt is displayed, asking if you want to save
the current configuration, press n and then press <Enter>. When
prompted to continue the reboot, press y and then <Enter>.
25
26.
Basic SwitchSetup
3. Verify your configuration
settings
26
27.
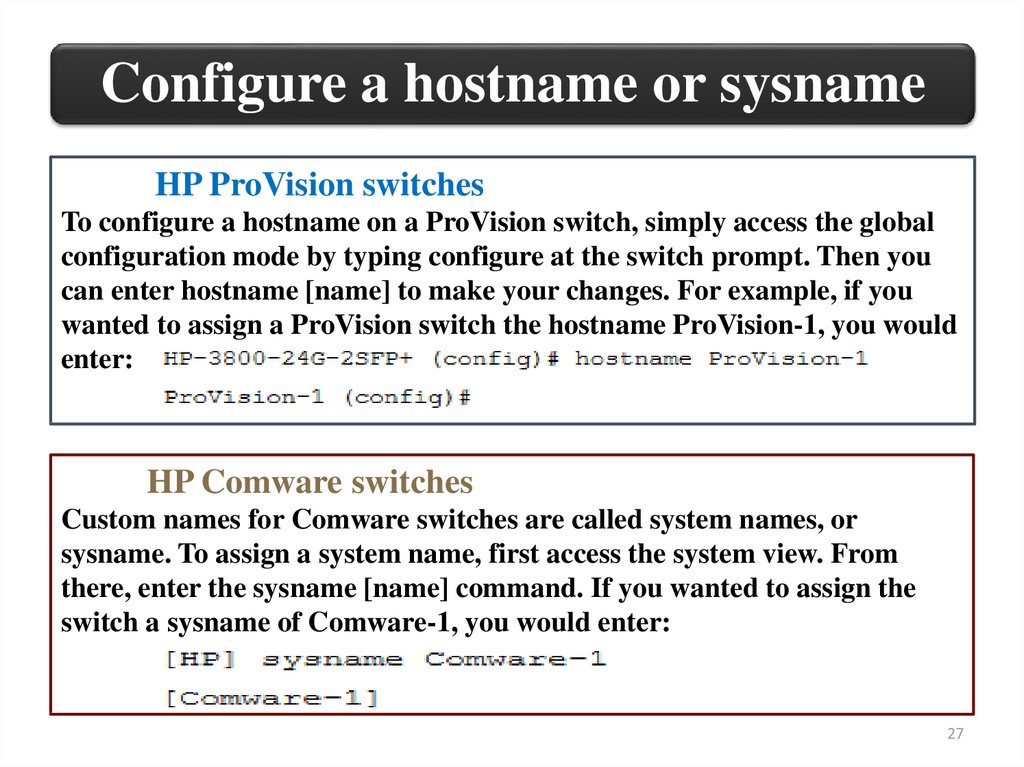
Configure a hostname or sysnameHP ProVision switches
To configure a hostname on a ProVision switch, simply access the global
configuration mode by typing configure at the switch prompt. Then you
can enter hostname [name] to make your changes. For example, if you
wanted to assign a ProVision switch the hostname ProVision-1, you would
enter:
HP Comware switches
Custom names for Comware switches are called system names, or
sysname. To assign a system name, first access the system view. From
there, enter the sysname [name] command. If you wanted to assign the
switch a sysname of Comware-1, you would enter:
27
28.
Disable and enable interfacesBy default, all interfaces on
ProVision and Comware switches are
enabled.
You may want to disable all unused
ports. Disabling ports can strengthen
security, preventing anyone from
connecting unauthorized devices to
the network. It can also help prevent
Layer 2 loops.
28
29.
Accessing HP ProVision switch interfacesYou can configure settings on a range of interfaces at the same time:
ProVision(config)# interface 1,3-6
If you entered the command above, the prompt would reflect these interfaces:
ProVision(eth-1,3-6)#
29
30.
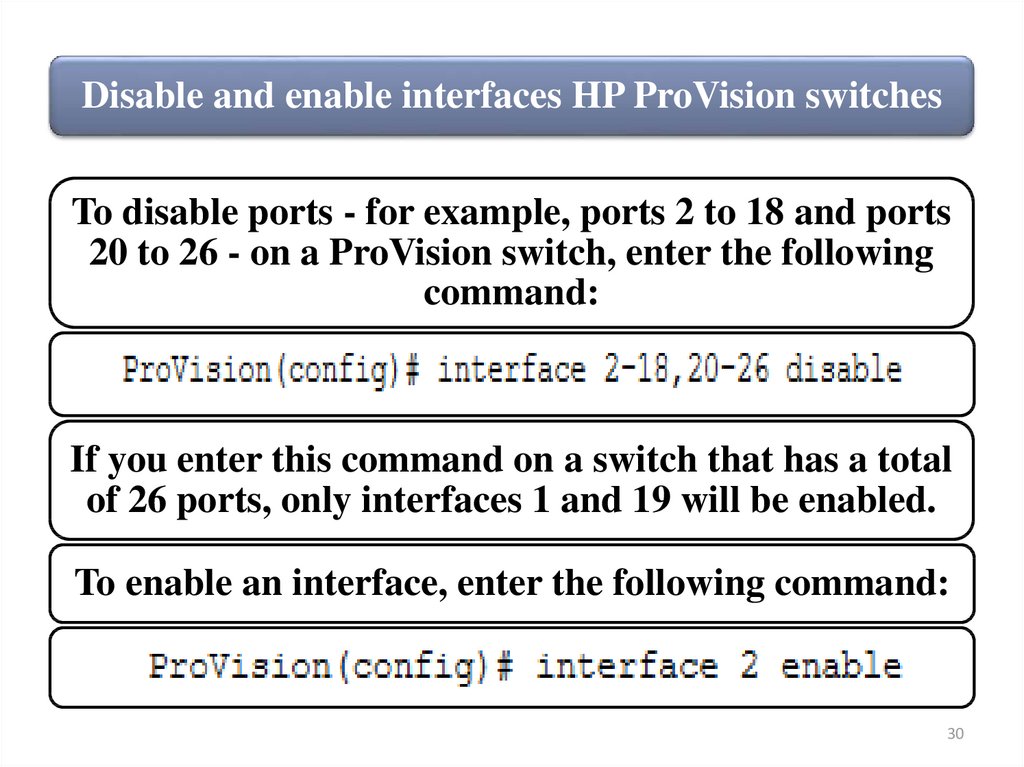
Disable and enable interfaces HP ProVision switchesTo disable ports - for example, ports 2 to 18 and ports
20 to 26 - on a ProVision switch, enter the following
command:
If you enter this command on a switch that has a total
of 26 ports, only interfaces 1 and 19 will be enabled.
To enable an interface, enter the following command:
30
31.
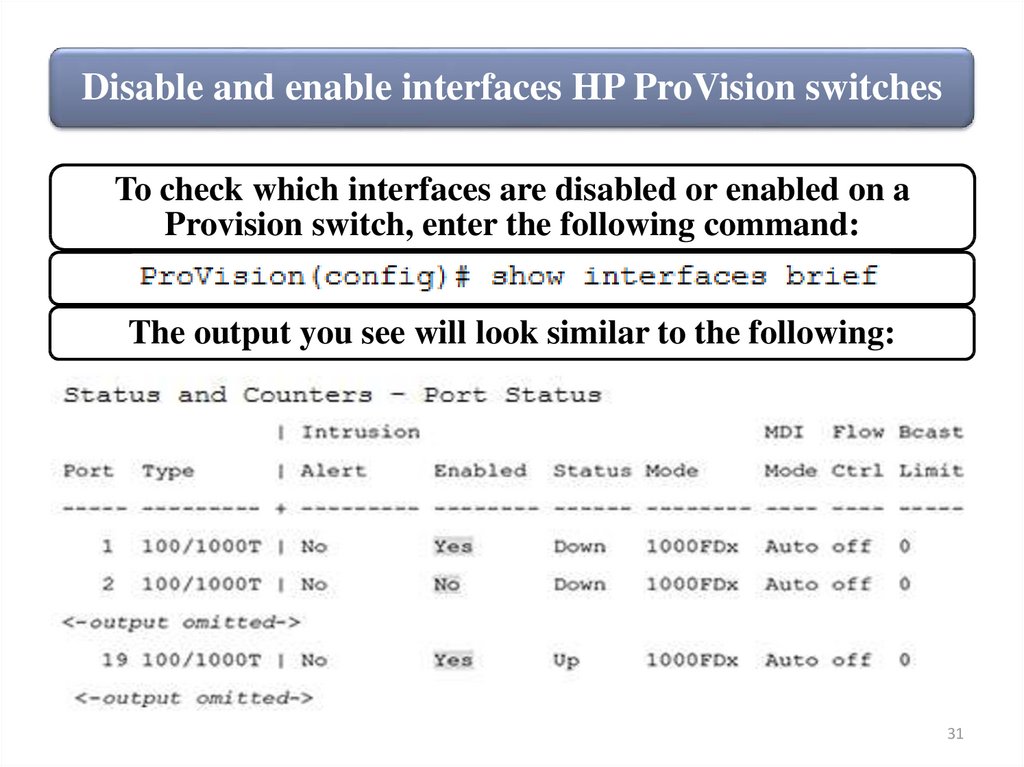
Disable and enable interfaces HP ProVision switchesTo check which interfaces are disabled or enabled on a
Provision switch, enter the following command:
The output you see will look similar to the following:
31
32.
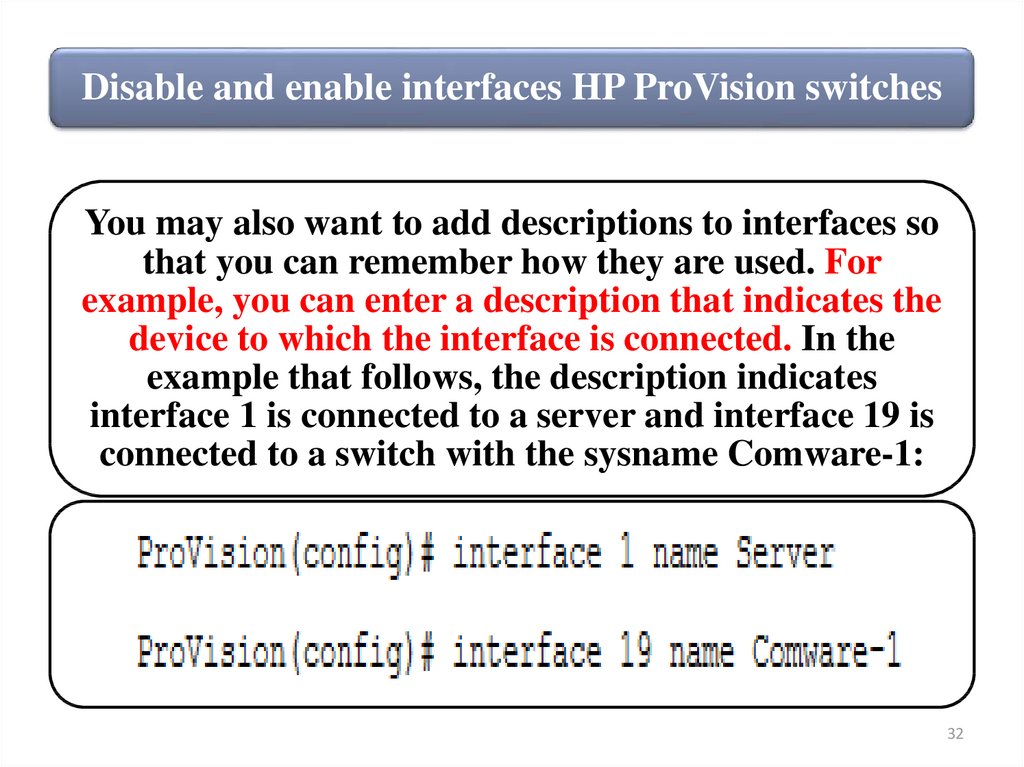
Disable and enable interfaces HP ProVision switchesYou may also want to add descriptions to interfaces so
that you can remember how they are used. For
example, you can enter a description that indicates the
device to which the interface is connected. In the
example that follows, the description indicates
interface 1 is connected to a server and interface 19 is
connected to a switch with the sysname Comware-1:
32
33.
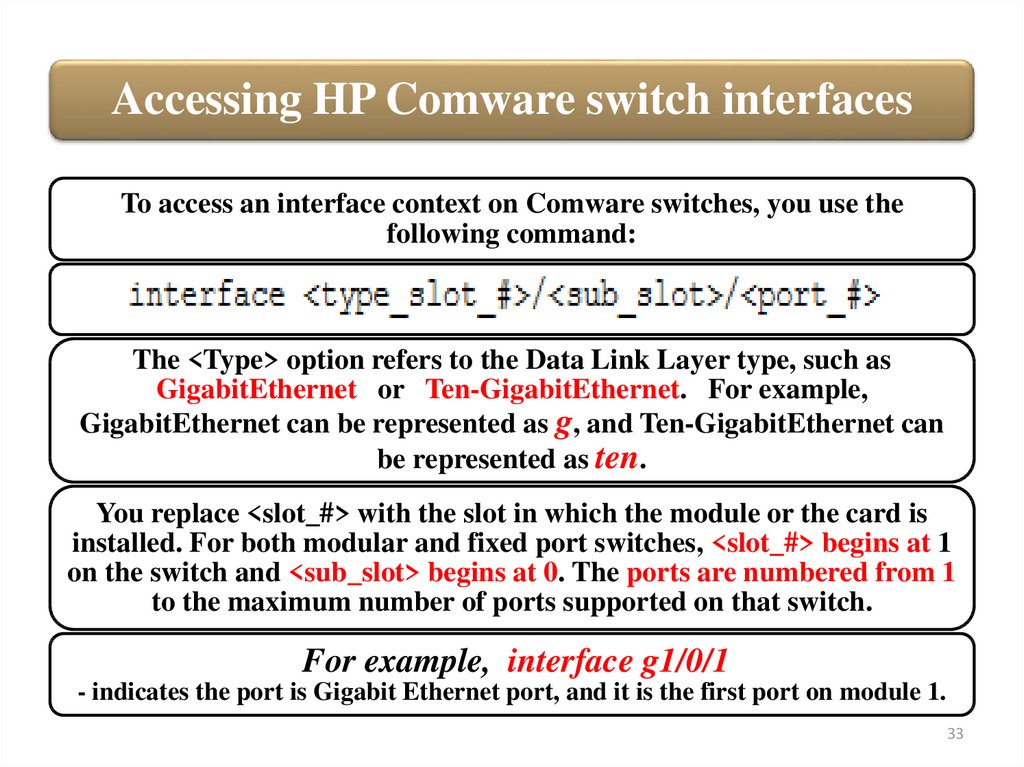
Accessing HP Comware switch interfacesTo access an interface context on Comware switches, you use the
following command:
The <Type> option refers to the Data Link Layer type, such as
GigabitEthernet or Ten-GigabitEthernet. For example,
GigabitEthernet can be represented as g, and Ten-GigabitEthernet can
be represented as ten.
You replace <slot_#> with the slot in which the module or the card is
installed. For both modular and fixed port switches, <slot_#> begins at 1
on the switch and <sub_slot> begins at 0. The ports are numbered from 1
to the maximum number of ports supported on that switch.
For example, interface g1/0/1
- indicates the port is Gigabit Ethernet port, and it is the first port on module 1.
33
34.
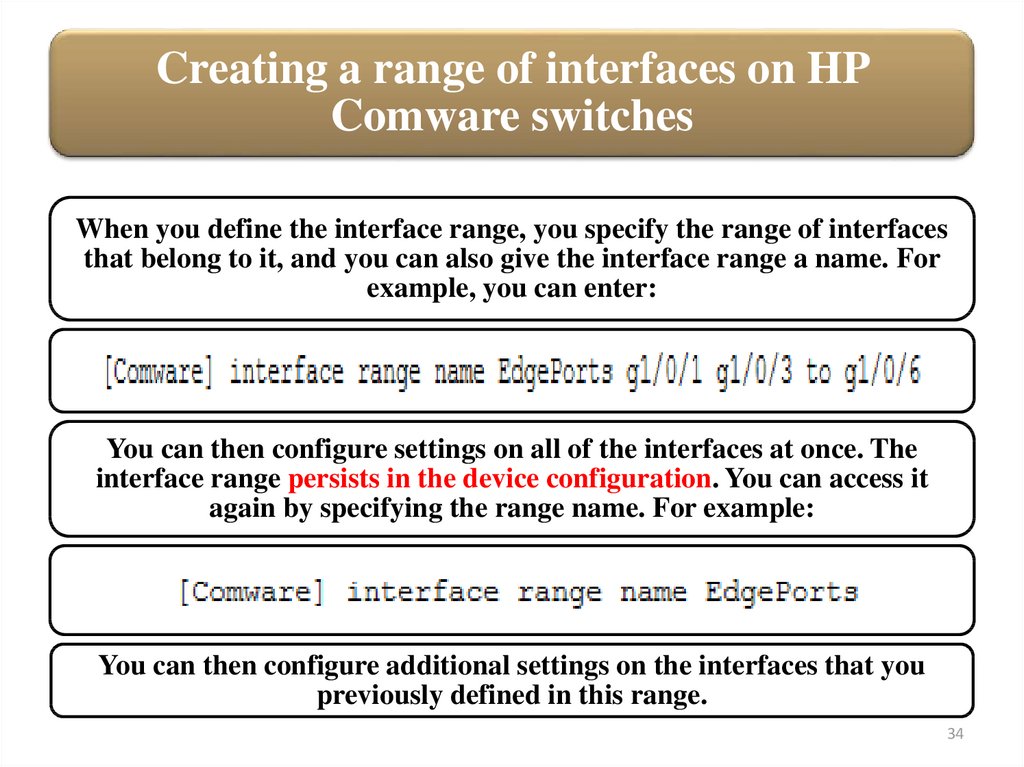
Creating a range of interfaces on HPComware switches
When you define the interface range, you specify the range of interfaces
that belong to it, and you can also give the interface range a name. For
example, you can enter:
You can then configure settings on all of the interfaces at once. The
interface range persists in the device configuration. You can access it
again by specifying the range name. For example:
You can then configure additional settings on the interfaces that you
previously defined in this range.
34
35.
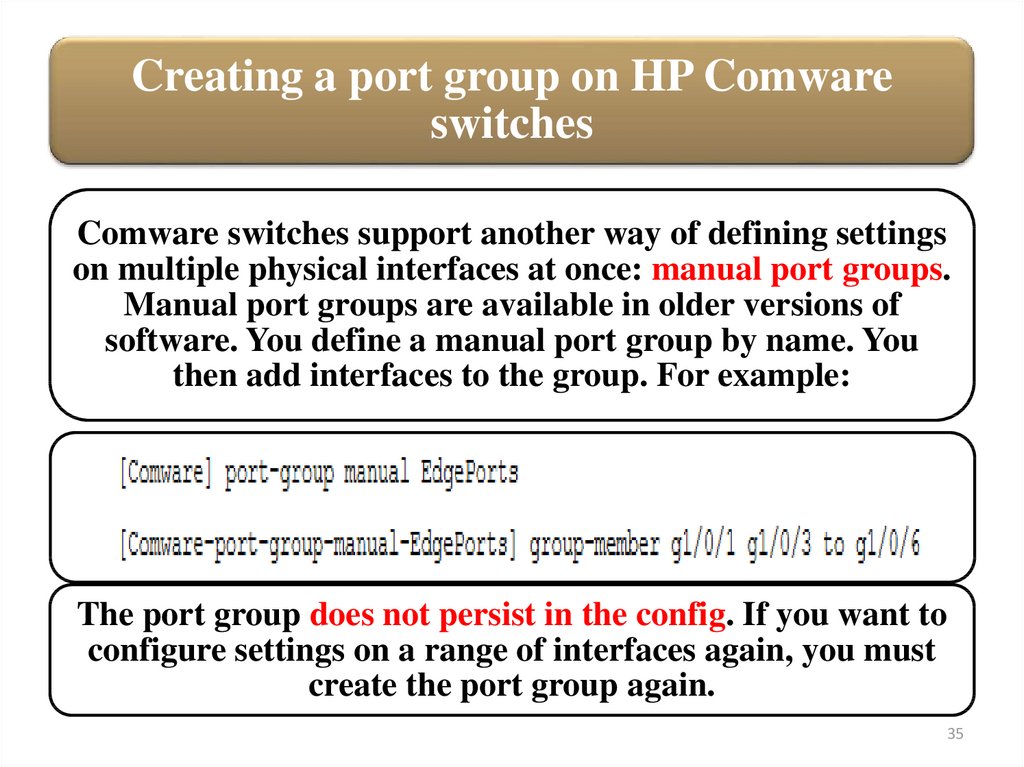
Creating a port group on HP Comwareswitches
Comware switches support another way of defining settings
on multiple physical interfaces at once: manual port groups.
Manual port groups are available in older versions of
software. You define a manual port group by name. You
then add interfaces to the group. For example:
The port group does not persist in the config. If you want to
configure settings on a range of interfaces again, you must
create the port group again.
35
36.
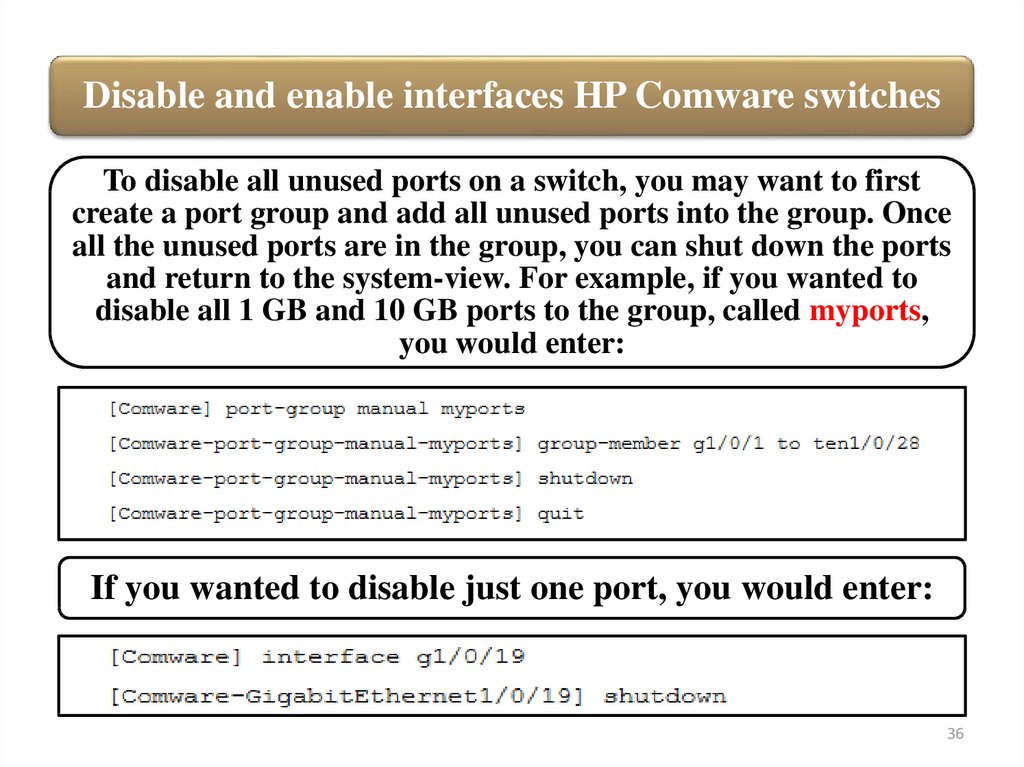
Disable and enable interfaces HP Comware switchesTo disable all unused ports on a switch, you may want to first
create a port group and add all unused ports into the group. Once
all the unused ports are in the group, you can shut down the ports
and return to the system-view. For example, if you wanted to
disable all 1 GB and 10 GB ports to the group, called myports,
you would enter:
If you wanted to disable just one port, you would enter:
36
37.
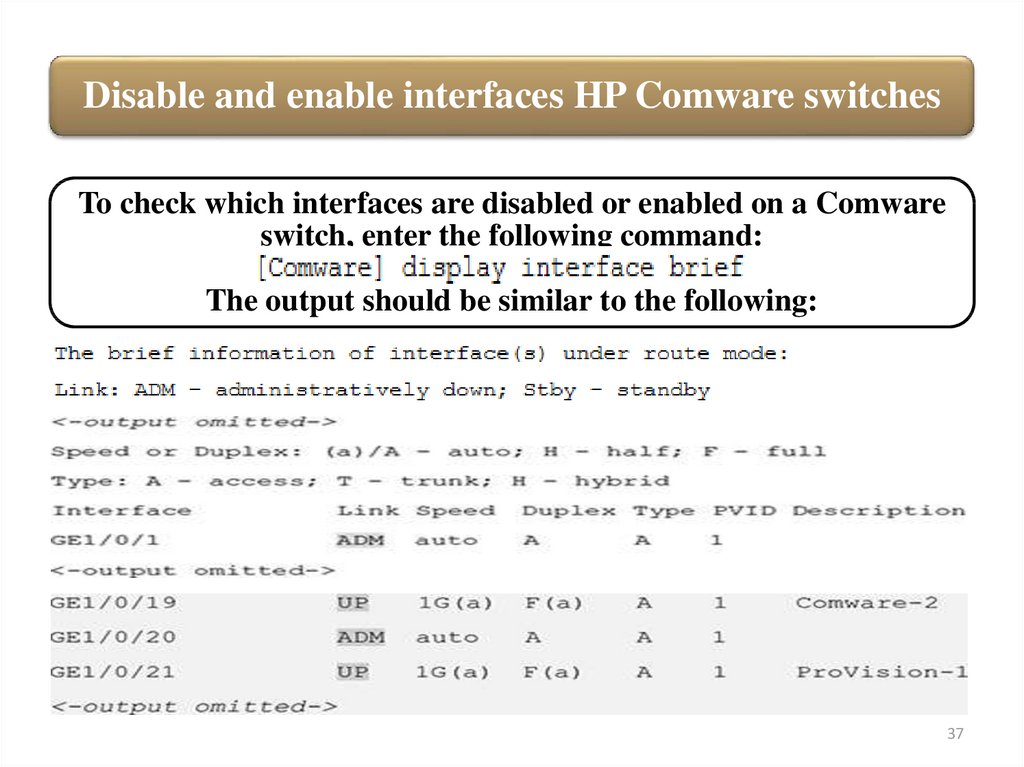
Disable and enable interfaces HP Comware switchesTo check which interfaces are disabled or enabled on a Comware
switch, enter the following command:
The output should be similar to the following:
37
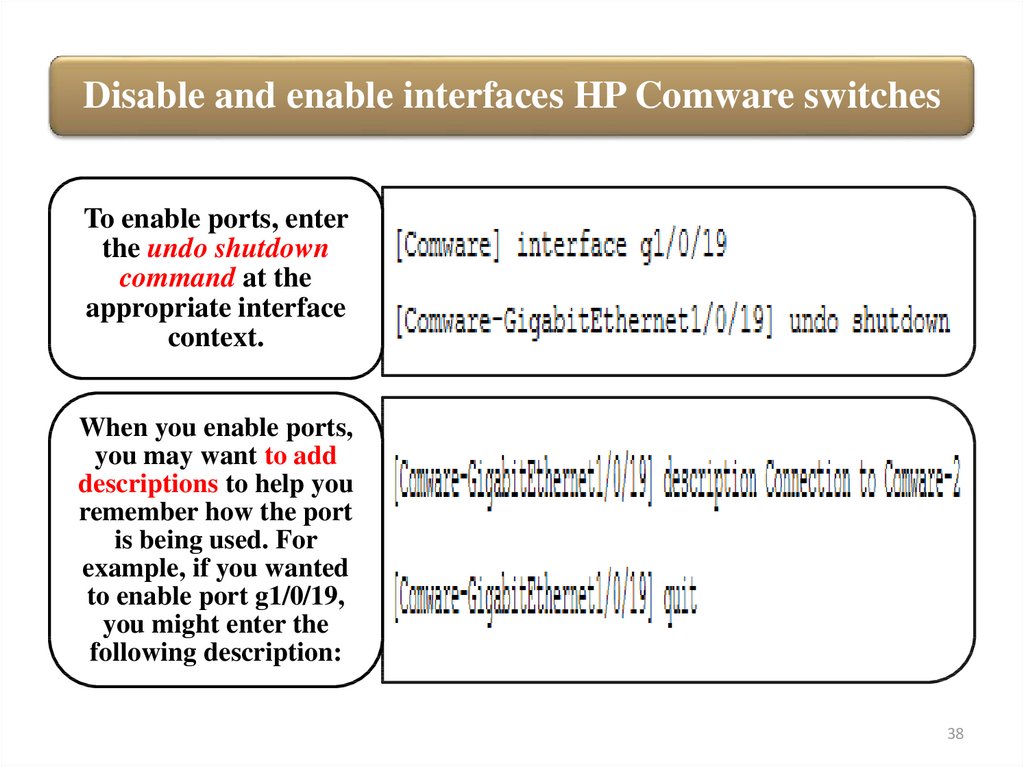
38.
Disable and enable interfaces HP Comware switchesTo enable ports, enter
the undo shutdown
command at the
appropriate interface
context.
When you enable ports,
you may want to add
descriptions to help you
remember how the port
is being used. For
example, if you wanted
to enable port g1/0/19,
you might enter the
following description:
38
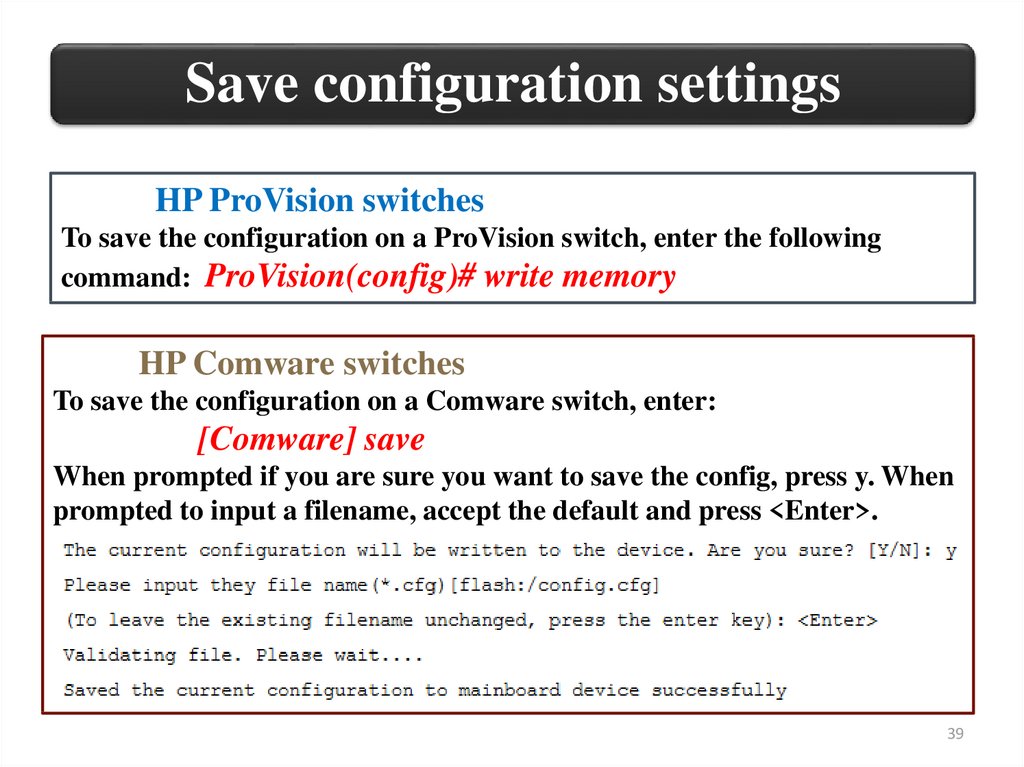
39.
Save configuration settingsHP ProVision switches
To save the configuration on a ProVision switch, enter the following
command: ProVision(config)# write memory
HP Comware switches
To save the configuration on a Comware switch, enter:
[Comware] save
When prompted if you are sure you want to save the config, press y. When
prompted to input a filename, accept the default and press <Enter>.
39
40.
View commands previously executed on the switchHP ProVision switches
On a ProVision switch, enter:
following:
ProVision-1# show history. You will see output similar to the
HP Comware switches
On a Comware switch, enter: [Comware-1] display history. You will see output such as:
40
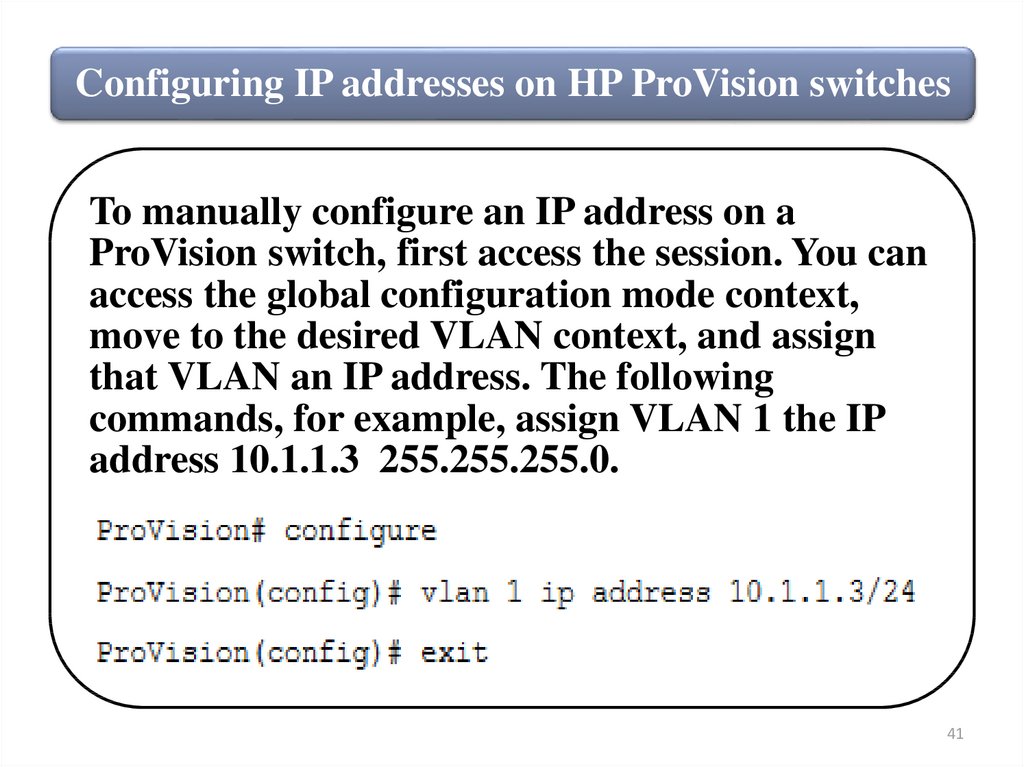
41.
Configuring IP addresses on HP ProVision switchesTo manually configure an IP address on a
ProVision switch, first access the session. You can
access the global configuration mode context,
move to the desired VLAN context, and assign
that VLAN an IP address. The following
commands, for example, assign VLAN 1 the IP
address 10.1.1.3 255.255.255.0.
41
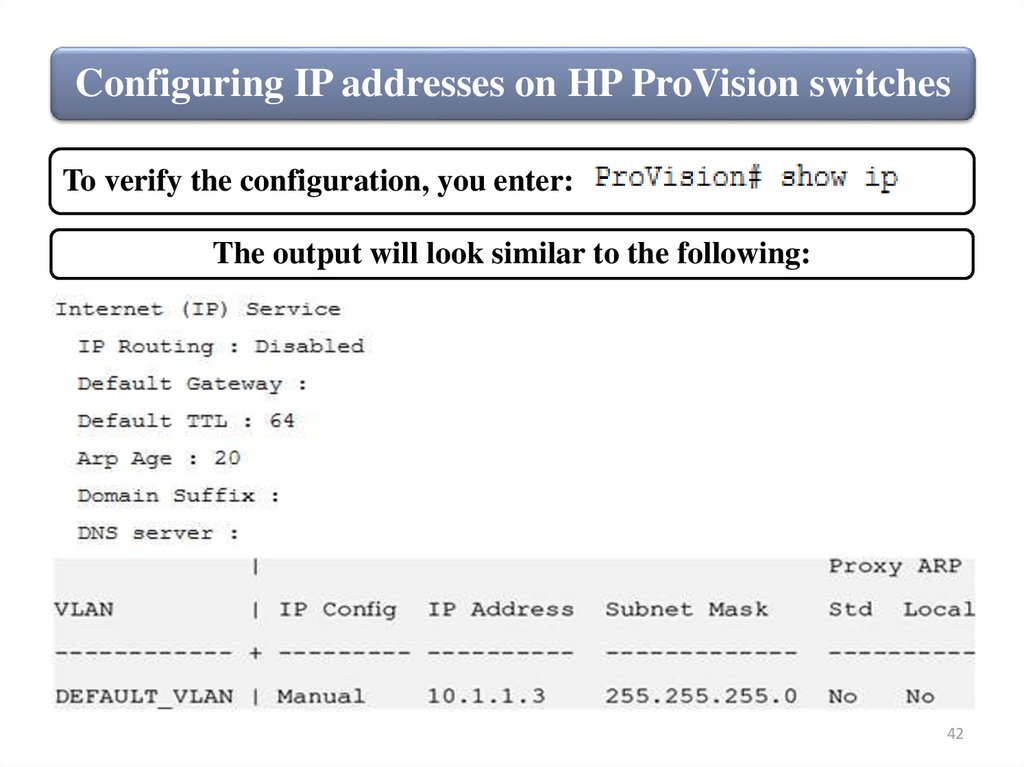
42.
Configuring IP addresses on HP ProVision switchesTo verify the configuration, you enter:
The output will look similar to the following:
42
43.
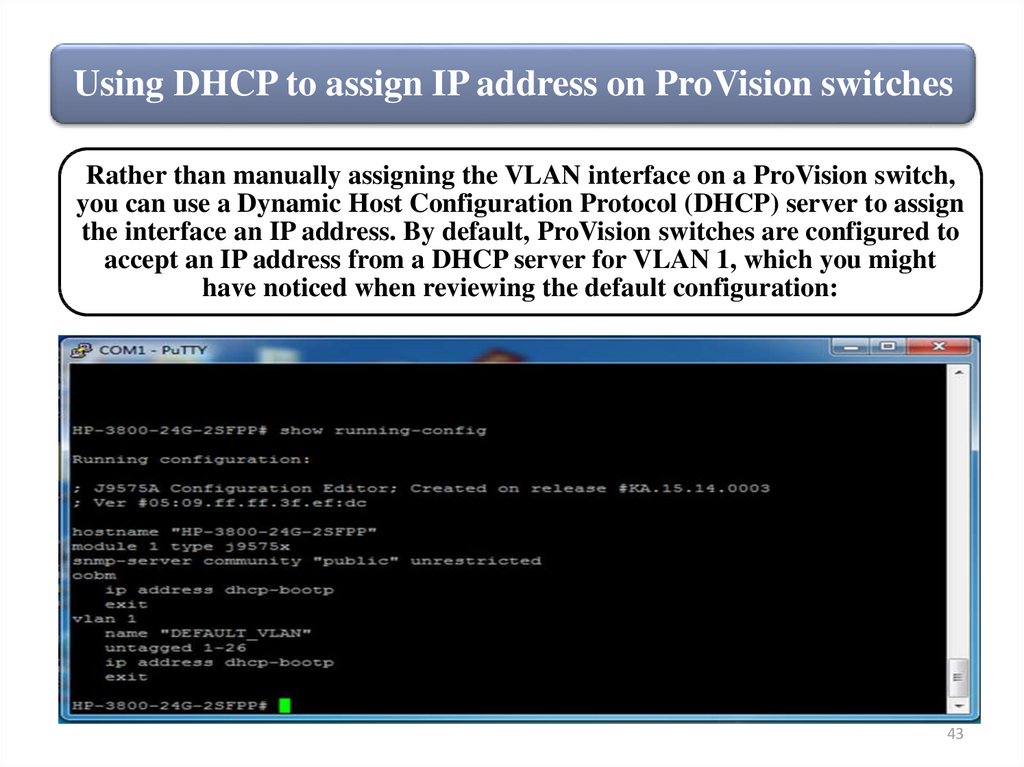
Using DHCP to assign IP address on ProVision switchesRather than manually assigning the VLAN interface on a ProVision switch,
you can use a Dynamic Host Configuration Protocol (DHCP) server to assign
the interface an IP address. By default, ProVision switches are configured to
accept an IP address from a DHCP server for VLAN 1, which you might
have noticed when reviewing the default configuration:
43
44.
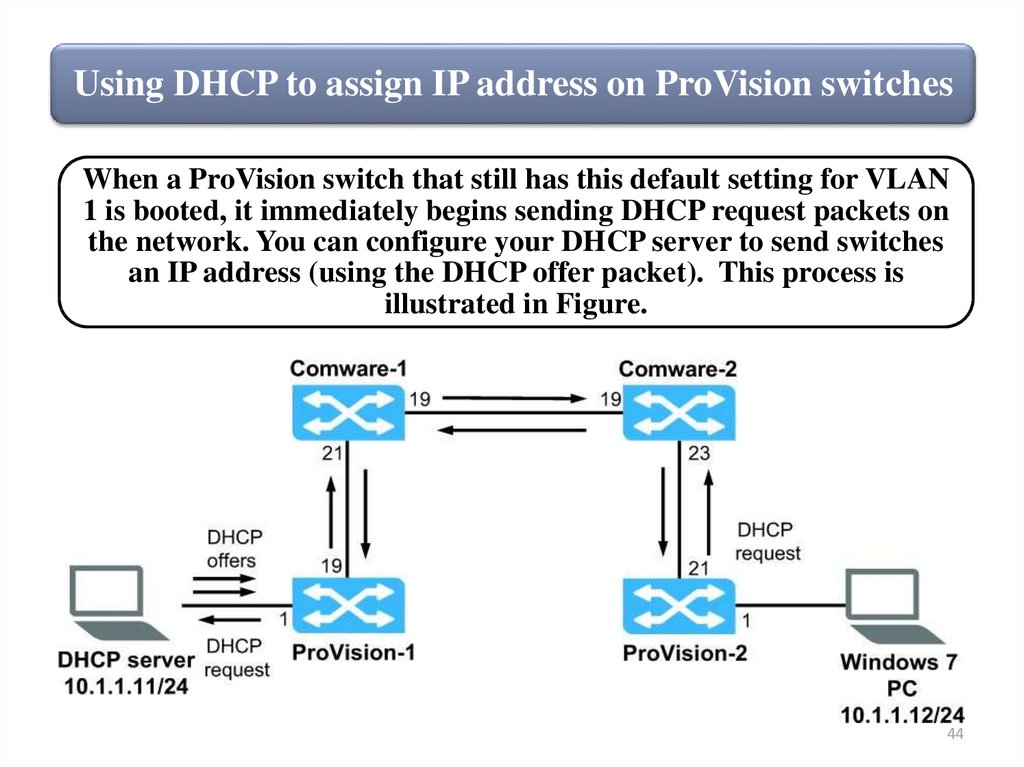
Using DHCP to assign IP address on ProVision switchesWhen a ProVision switch that still has this default setting for VLAN
1 is booted, it immediately begins sending DHCP request packets on
the network. You can configure your DHCP server to send switches
an IP address (using the DHCP offer packet). This process is
illustrated in Figure.
44
45.
Configuring IP addresses on HP Comware switchesTo configure an IP address on a Comware switch, you move to
the system view, then to the view for the appropriate VLAN
interface, and enter the IP address command. In the following
example, VLAN 1 is assigned IP address 10.1.1.1 with a 24-bit
mask.
To verify the configuration, enter the display this command. You
can use this command at any CLI context to display the
commands that apply to that particular context.
45
46.
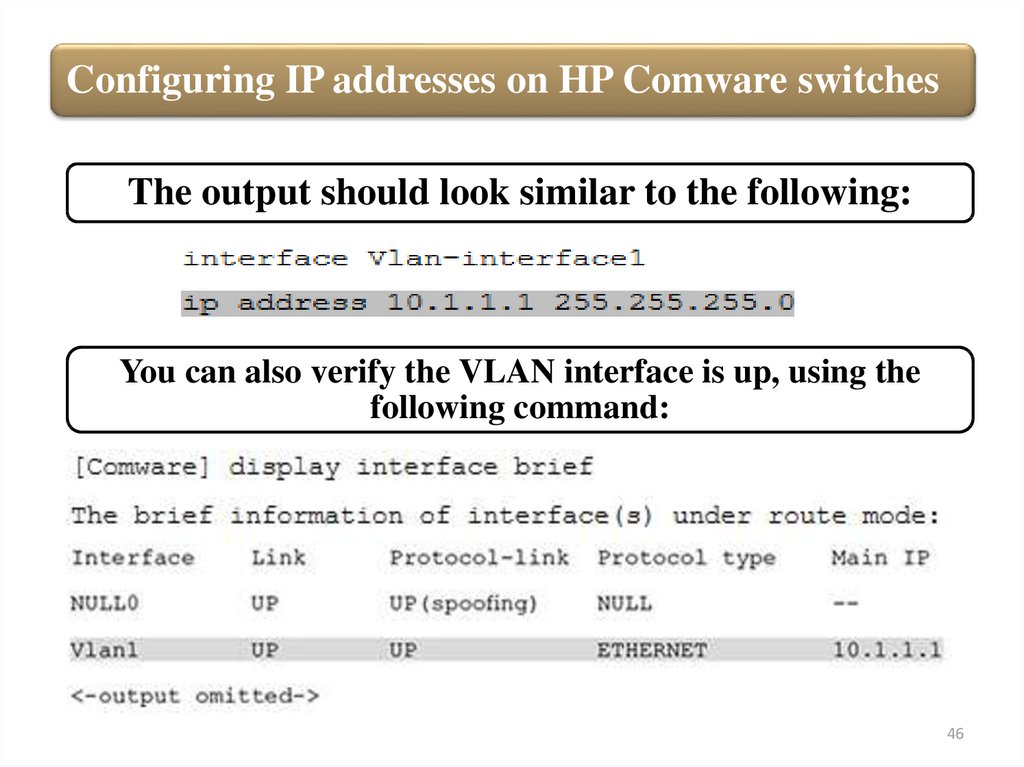
Configuring IP addresses on HP Comware switchesThe output should look similar to the following:
You can also verify the VLAN interface is up, using the
following command:
46
47.
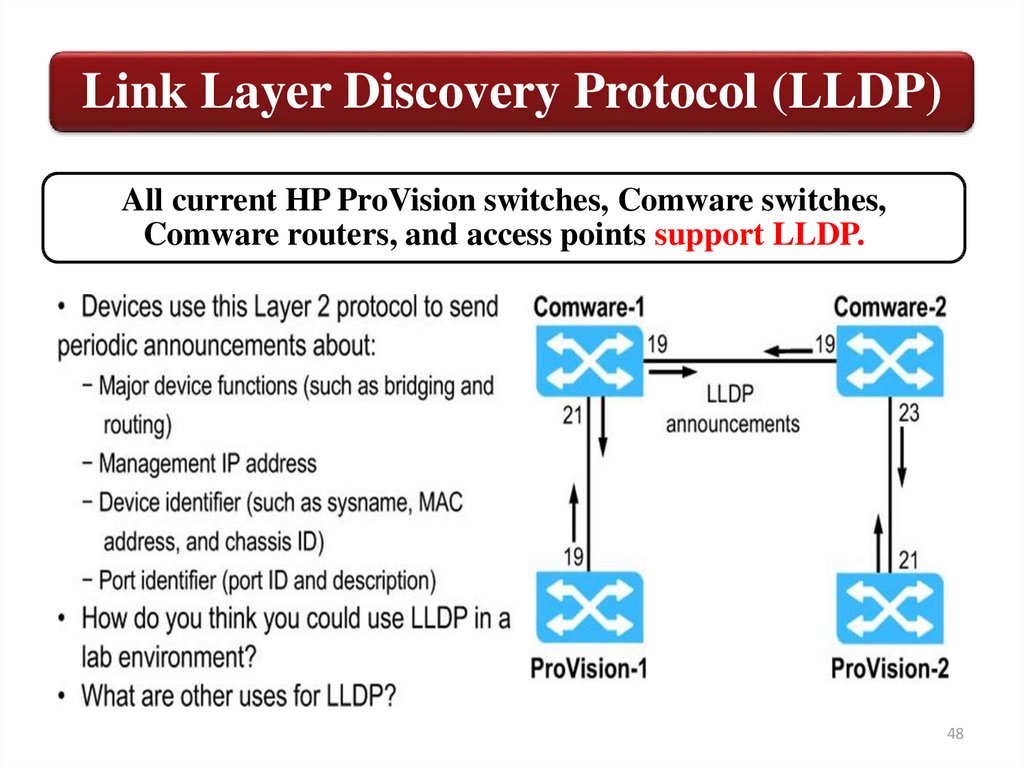
Link Layer Discovery Protocol (LLDP)In a heterogeneous network, devices from different vendors need to be able
to discover one another and exchange configuration information. To enable
this exchange of information, the Internet Engineering Task Force (IETF)
defined LLDP in IEEE 802.1AB. The protocol operates at the Data Link
layer, enabling directly connected devices to exchange information.
With LLDP, devices exchange local device information such as its major
functions, management IP address, device ID, and port ID.
Each device sends this information as type, length, and value (TLV) in LLDP
data units (LLDPDUs) to directly connected devices.
Simple Network Management Protocol (SNMP) programs can use the LLDP
information stored in MIBs to quickly detect Layer 2 network topology
changes and identify each change.
47
48.
Link Layer Discovery Protocol (LLDP)All current HP ProVision switches, Comware switches,
Comware routers, and access points support LLDP.
48
49.
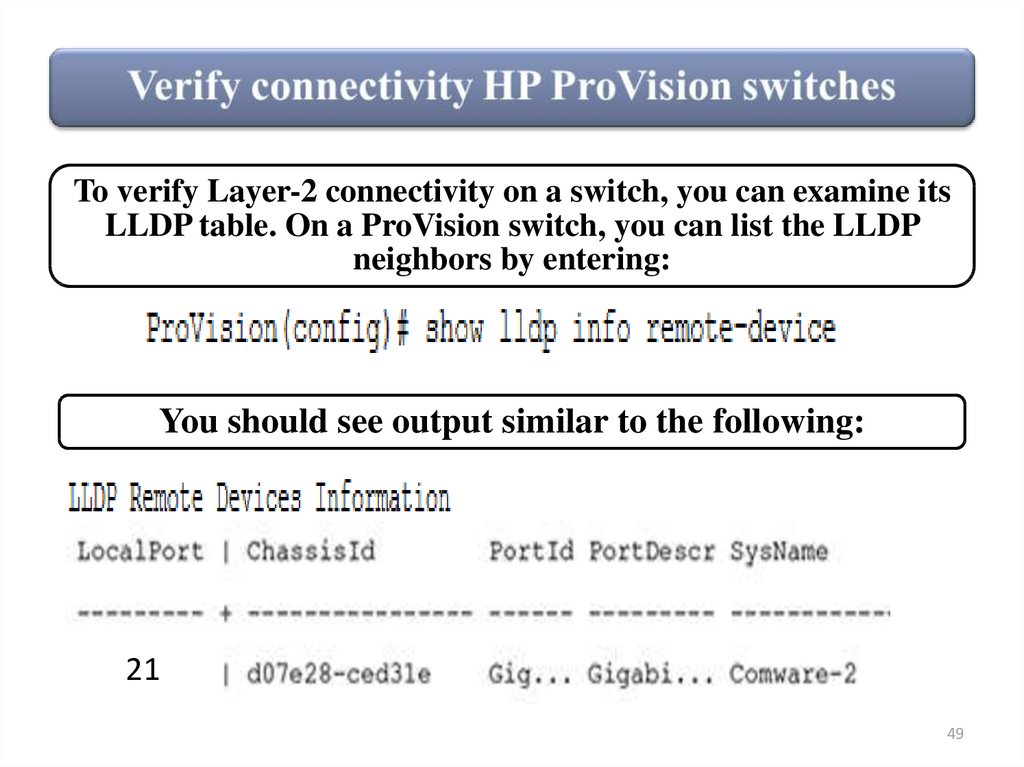
To verify Layer-2 connectivity on a switch, you can examine itsLLDP table. On a ProVision switch, you can list the LLDP
neighbors by entering:
You should see output similar to the following:
21
49
50.
Verify connectivity HP ProVision switchesYou can also view more detailed information about the switch
connected to a specific port, in this case port 21, by entering:
50
51.
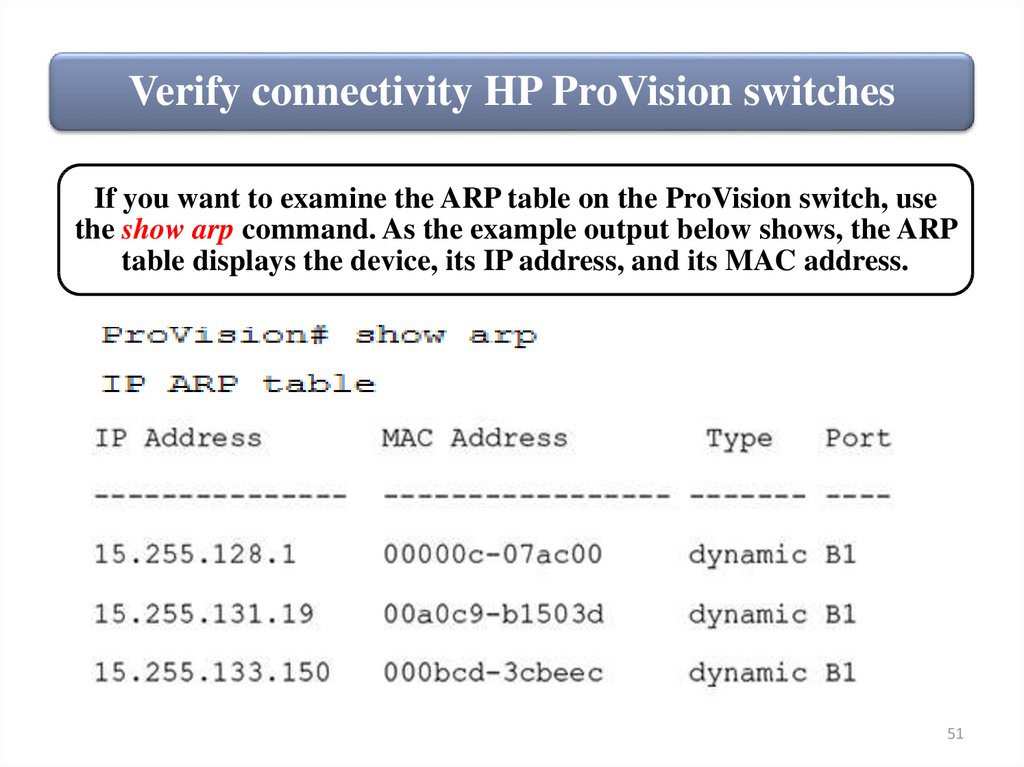
Verify connectivity HP ProVision switchesIf you want to examine the ARP table on the ProVision switch, use
the show arp command. As the example output below shows, the ARP
table displays the device, its IP address, and its MAC address.
51
52.
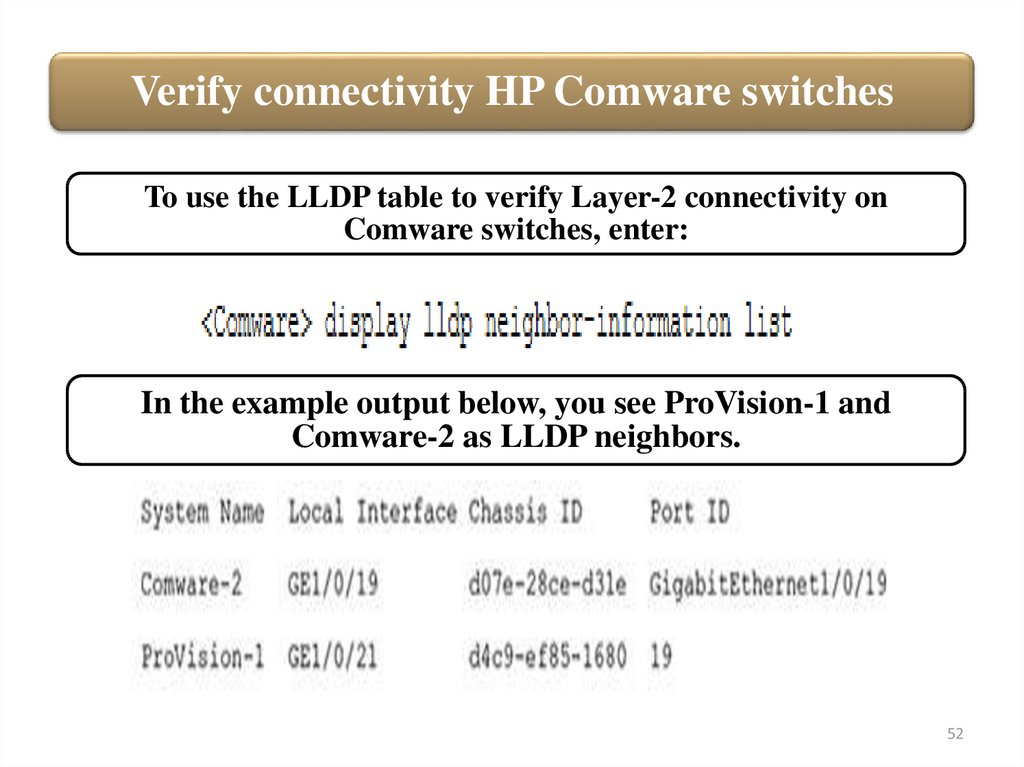
Verify connectivity HP Comware switchesTo use the LLDP table to verify Layer-2 connectivity on
Comware switches, enter:
In the example output below, you see ProVision-1 and
Comware-2 as LLDP neighbors.
52
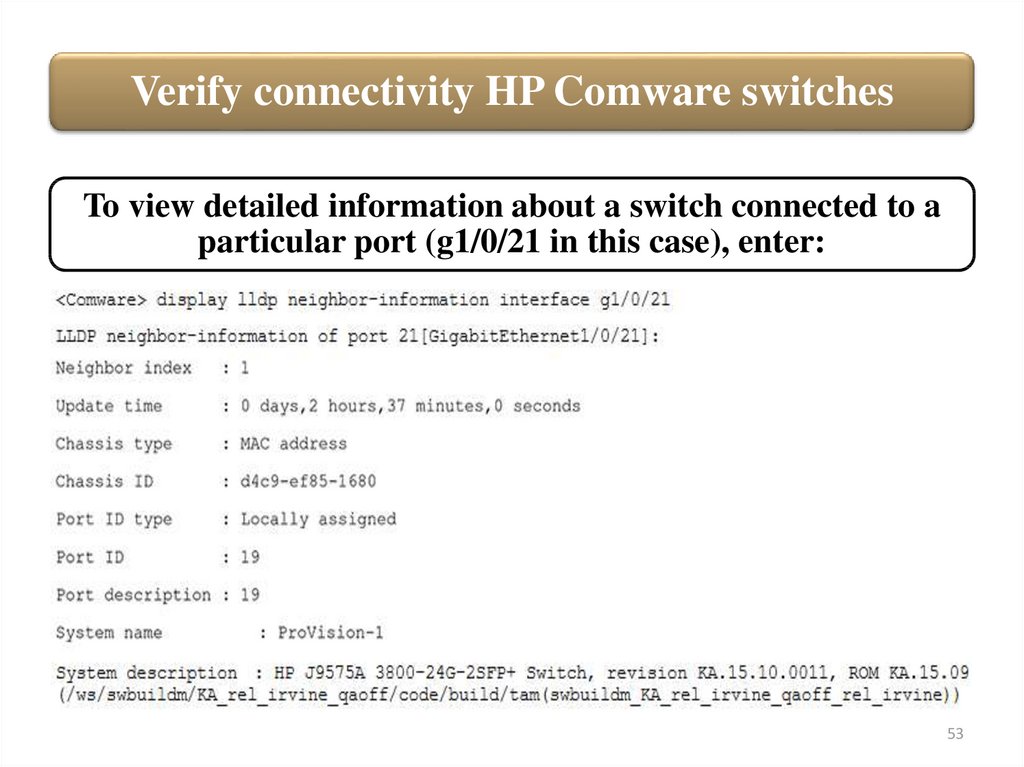
53.
Verify connectivity HP Comware switchesTo view detailed information about a switch connected to a
particular port (g1/0/21 in this case), enter:
53
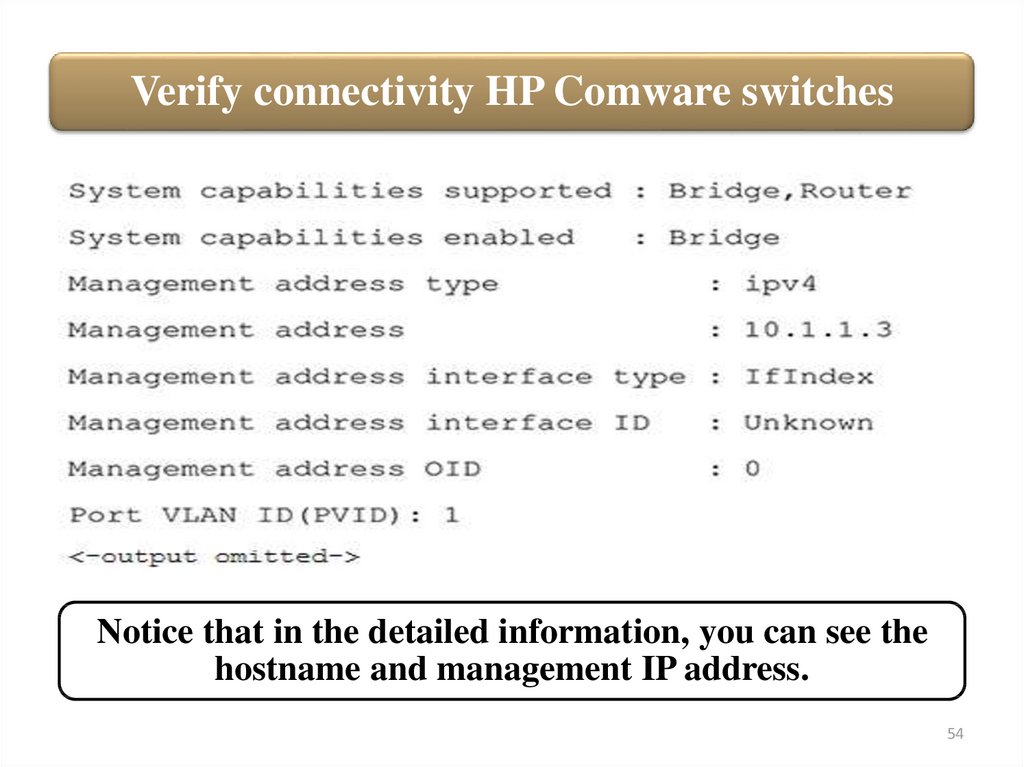
54.
Verify connectivity HP Comware switchesNotice that in the detailed information, you can see the
hostname and management IP address.
54
55.
Verify connectivity HP Comware switchesTo examine the ARP table on a Comware switch, use the
display arp command. You will see output similar to the
following:
55
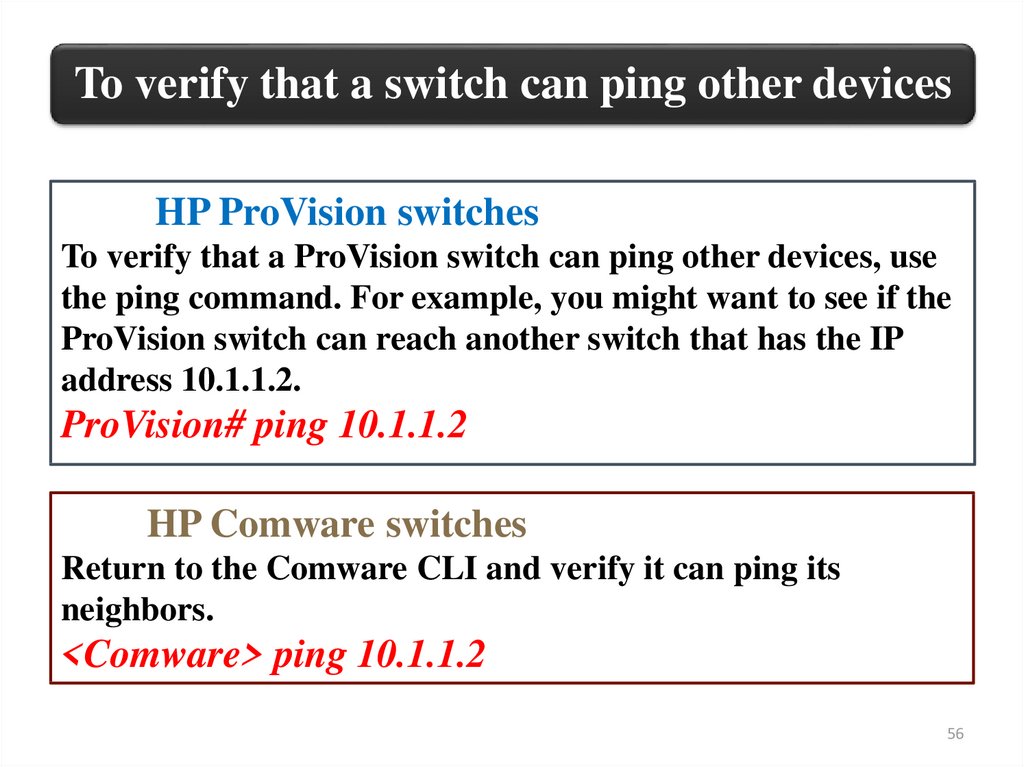
56.
To verify that a switch can ping other devicesHP ProVision switches
To verify that a ProVision switch can ping other devices, use
the ping command. For example, you might want to see if the
ProVision switch can reach another switch that has the IP
address 10.1.1.2.
ProVision# ping 10.1.1.2
HP Comware switches
Return to the Comware CLI and verify it can ping its
neighbors.
<Comware> ping 10.1.1.2
56