


 software
Similar presentations:


")


VGA Test 2019
1.
VGA Test 2019By Maico
2019.07
2.
Agenda1.
2.
3.
4.
5.
6.
Install OS
SIP Download
Test Process
Flash VBIOS& Memory Test
Test Result Upload
Notice& Common Problem
3.
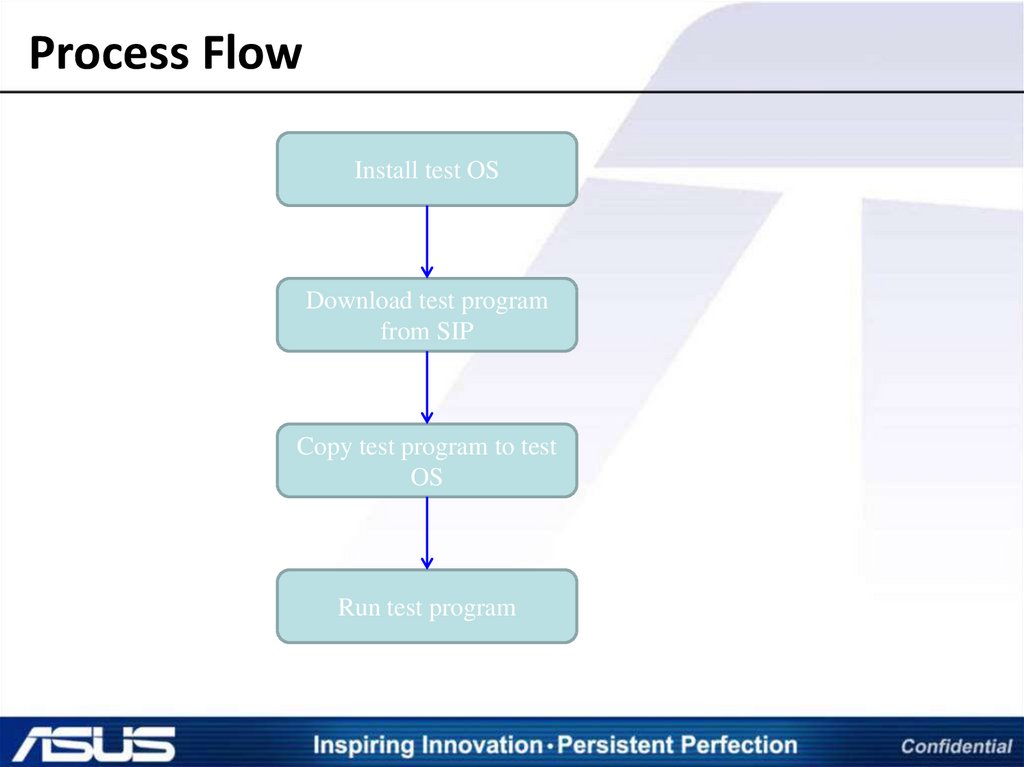
Process FlowInstall test OS
Download test program
from SIP
Copy test program to test
OS
Run test program
4.
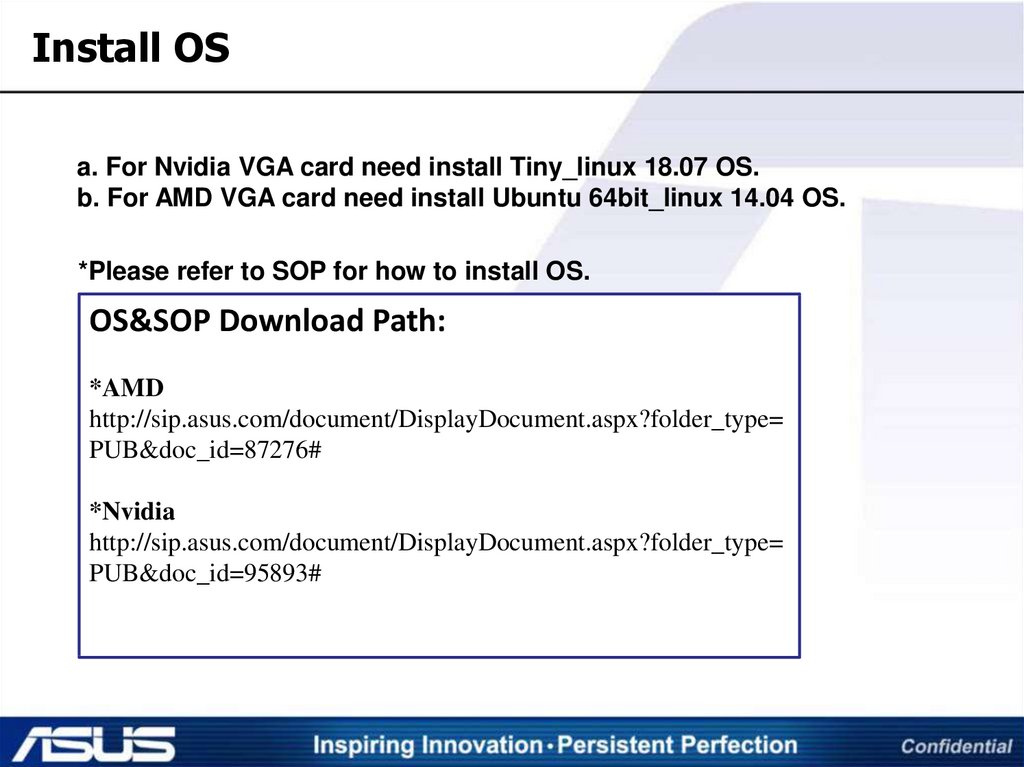
Install OSa. For Nvidia VGA card need install Tiny_linux 18.07 OS.
b. For AMD VGA card need install Ubuntu 64bit_linux 14.04 OS.
*Please refer to SOP for how to install OS.
OS&SOP Download Path:
*AMD
http://sip.asus.com/document/DisplayDocument.aspx?folder_type=
PUB&doc_id=87276#
*Nvidia
http://sip.asus.com/document/DisplayDocument.aspx?folder_type=
PUB&doc_id=95893#
5.
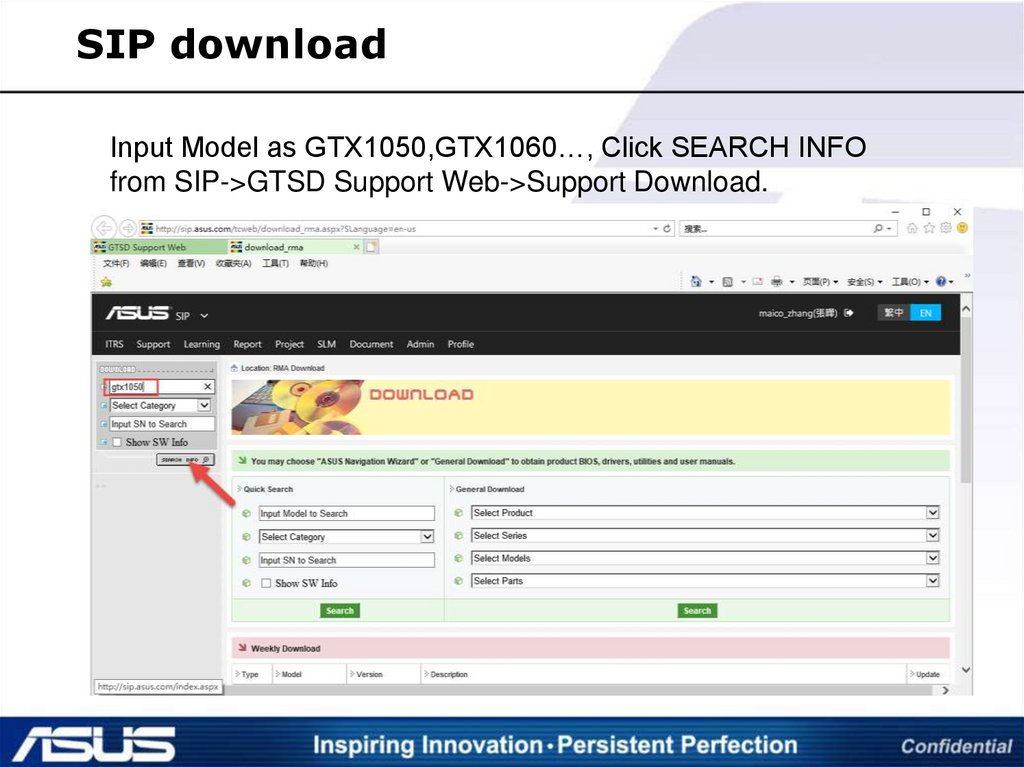
SIP downloadInput Model as GTX1050,GTX1060…, Click SEARCH INFO
from SIP->GTSD Support Web->Support Download.
6.
SIP downloadDown load test program in SIP by Part_No.
Check Part_No. with VGA card
7.
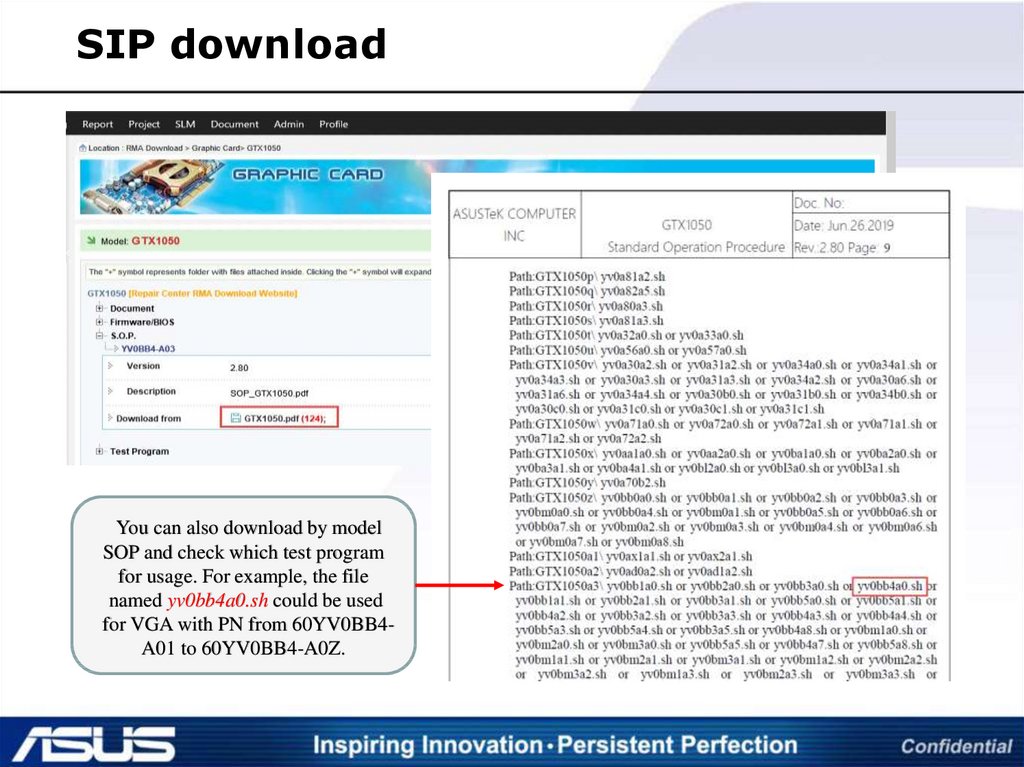
SIP downloadYou can also download by model
SOP and check which test program
for usage. For example, the file
named yv0bb4a0.sh could be used
for VGA with PN from 60YV0BB4A01 to 60YV0BB4-A0Z.
8.
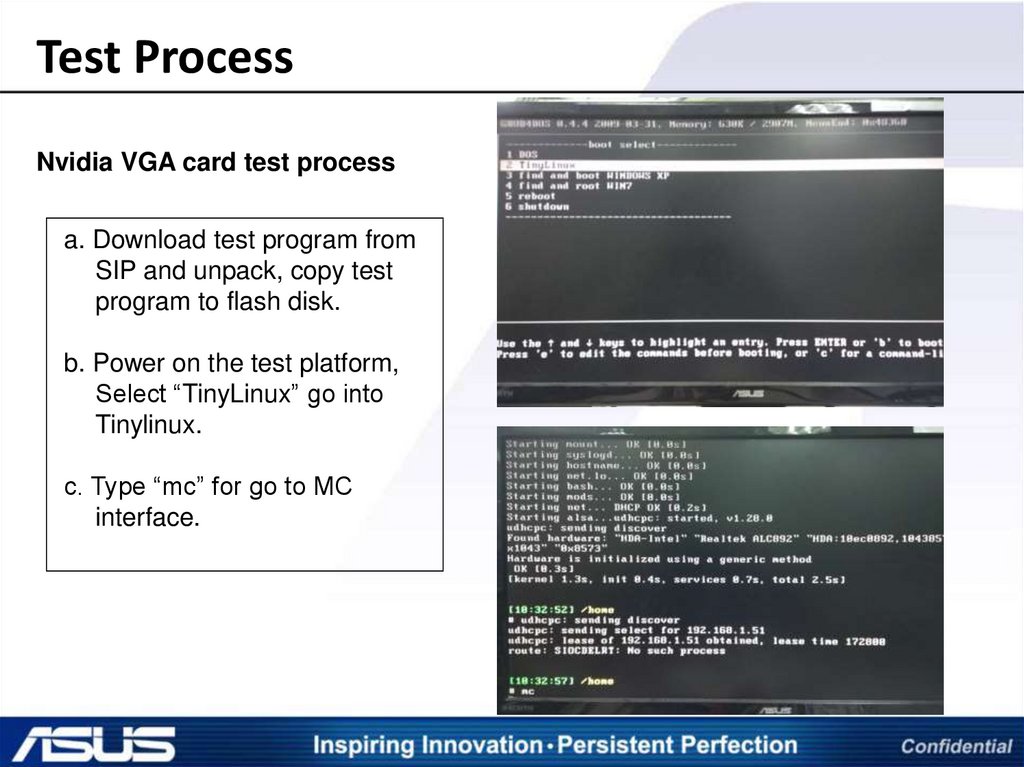
Test ProcessNvidia VGA card test process
a. Download test program from
SIP and unpack, copy test
program to flash disk.
b. Power on the test platform,
Select “TinyLinux” go into
Tinylinux.
c. Type “mc” for go to MC
interface.
9.
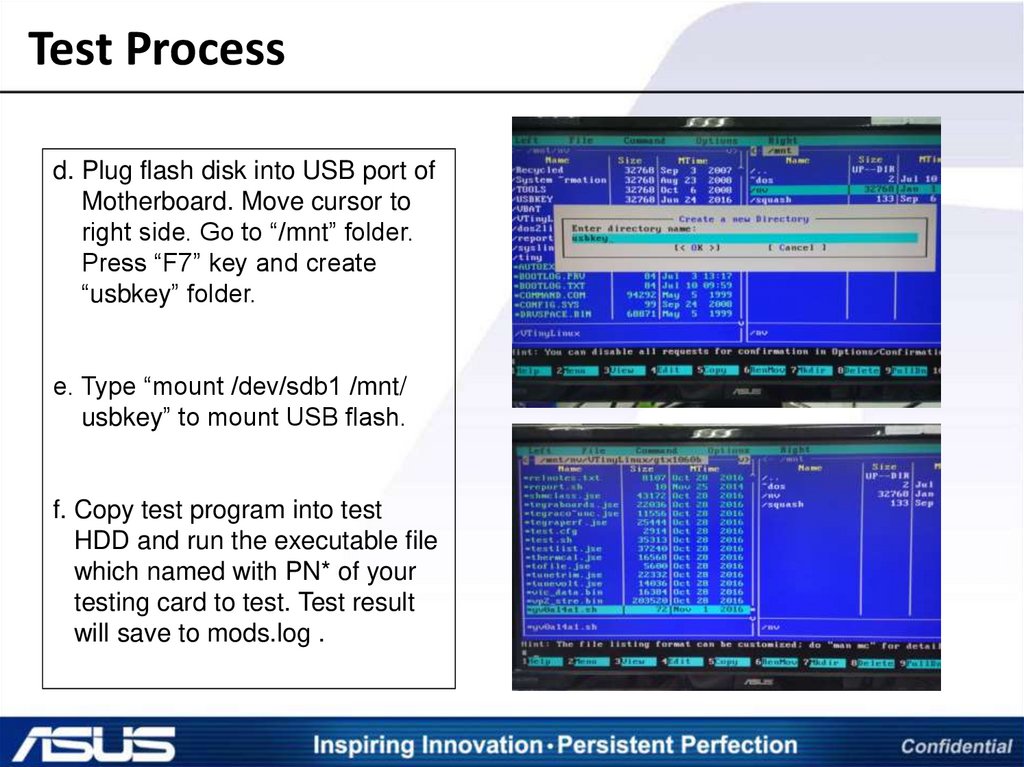
Test Processd. Plug flash disk into USB port of
Motherboard. Move cursor to
right side. Go to “/mnt” folder.
Press “F7” key and create
“usbkey” folder.
e. Type “mount /dev/sdb1 /mnt/
usbkey” to mount USB flash.
f. Copy test program into test
HDD and run the executable file
which named with PN* of your
testing card to test. Test result
will save to mods.log .
10.
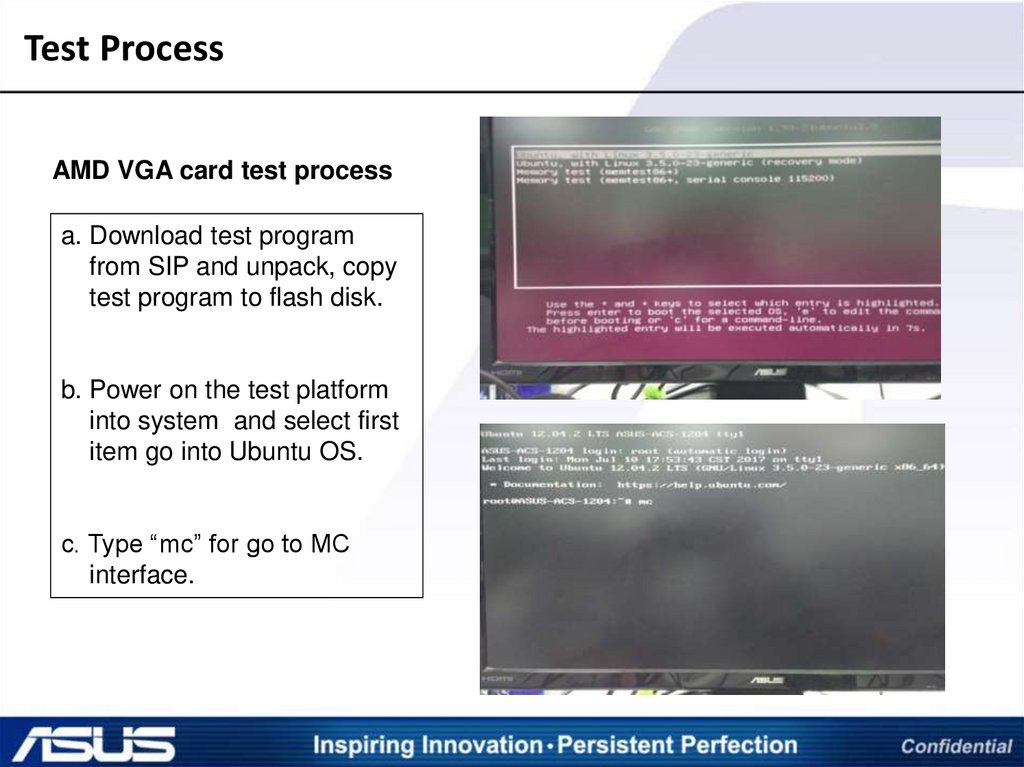
Test ProcessAMD VGA card test process
a. Download test program
from SIP and unpack, copy
test program to flash disk.
b. Power on the test platform
into system and select first
item go into Ubuntu OS.
c. Type “mc” for go to MC
interface.
11.
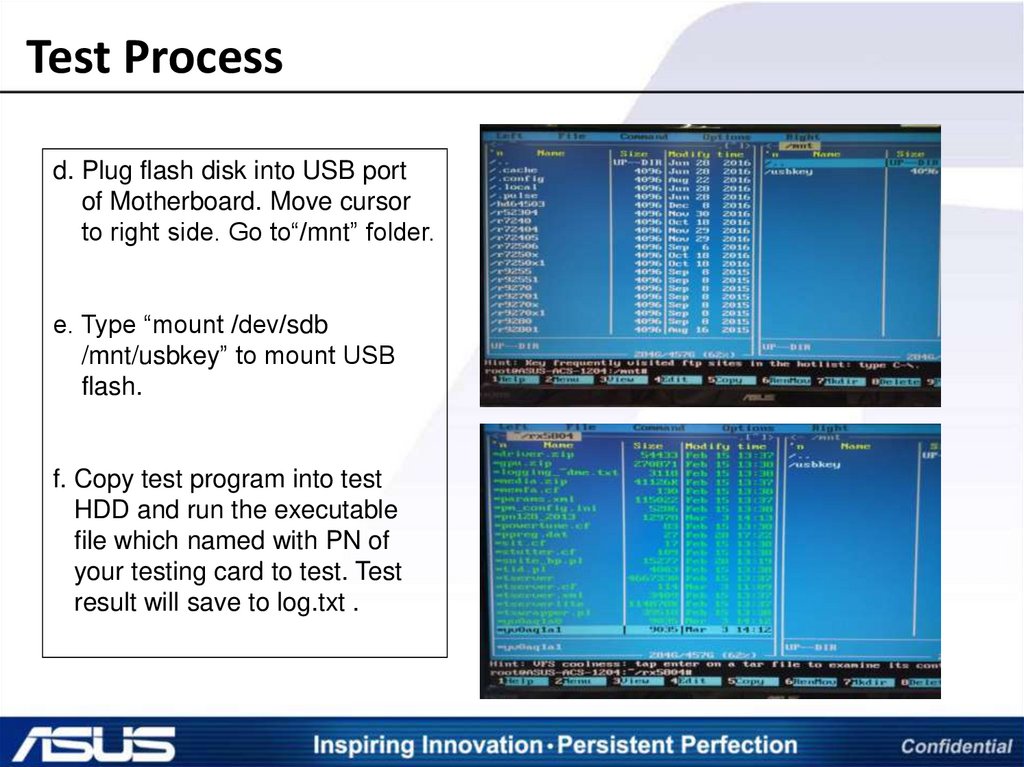
Test Processd. Plug flash disk into USB port
of Motherboard. Move cursor
to right side. Go to“/mnt” folder.
e. Type “mount /dev/sdb
/mnt/usbkey” to mount USB
flash.
f. Copy test program into test
HDD and run the executable
file which named with PN of
your testing card to test. Test
result will save to log.txt .
12.
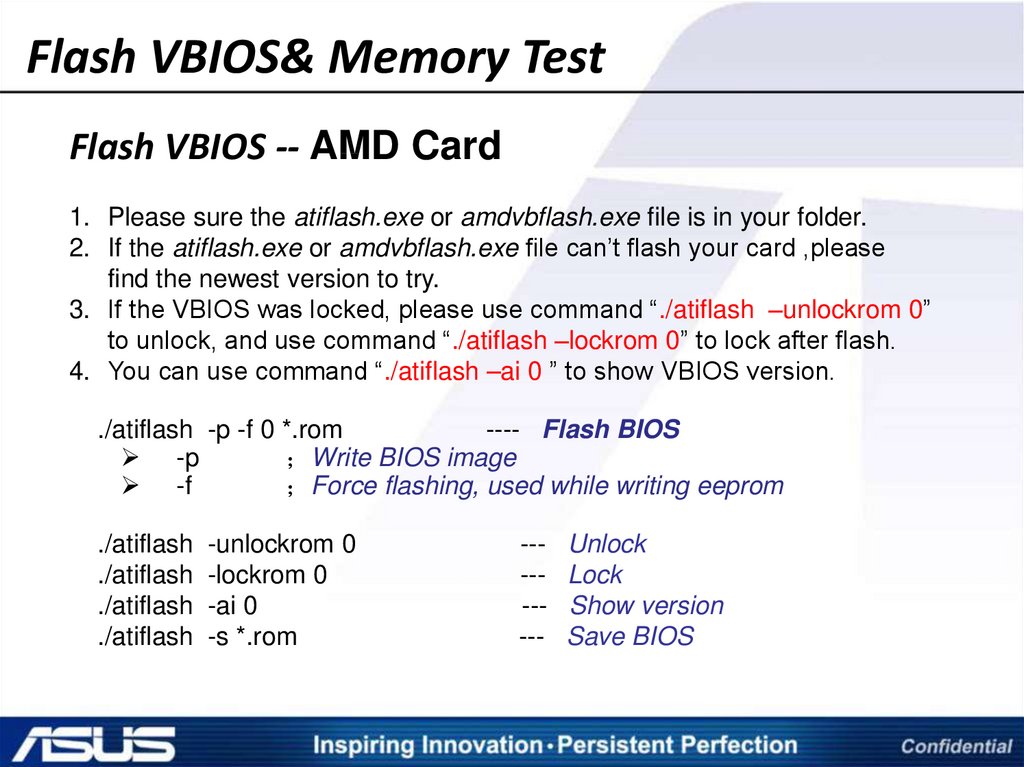
Flash VBIOS& Memory TestFlash VBIOS -- AMD Card
1. Please sure the atiflash.exe or amdvbflash.exe file is in your folder.
2. If the atiflash.exe or amdvbflash.exe file can’t flash your card ,please
find the newest version to try.
3. If the VBIOS was locked, please use command “./atiflash –unlockrom 0”
to unlock, and use command “./atiflash –lockrom 0” to lock after flash.
4. You can use command “./atiflash –ai 0 ” to show VBIOS version.
./atiflash -p -f 0 *.rom
---- Flash BIOS
-p
Write BIOS image
-f
Force flashing, used while writing eeprom
./atiflash
./atiflash
./atiflash
./atiflash
-unlockrom 0
-lockrom 0
-ai 0
-s *.rom
---------
Unlock
Lock
Show version
Save BIOS
13.
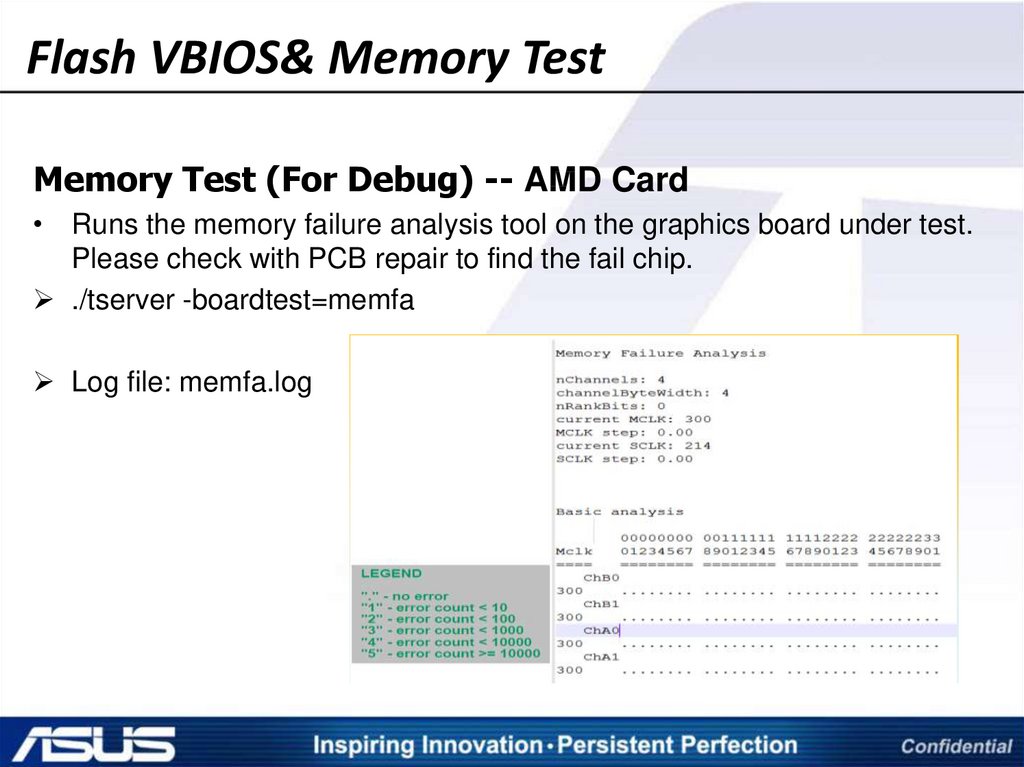
Flash VBIOS& Memory TestMemory Test (For Debug) -- AMD Card
• Runs the memory failure analysis tool on the graphics board under test.
Please check with PCB repair to find the fail chip.
./tserver -boardtest=memfa
Log file: memfa.log
14.
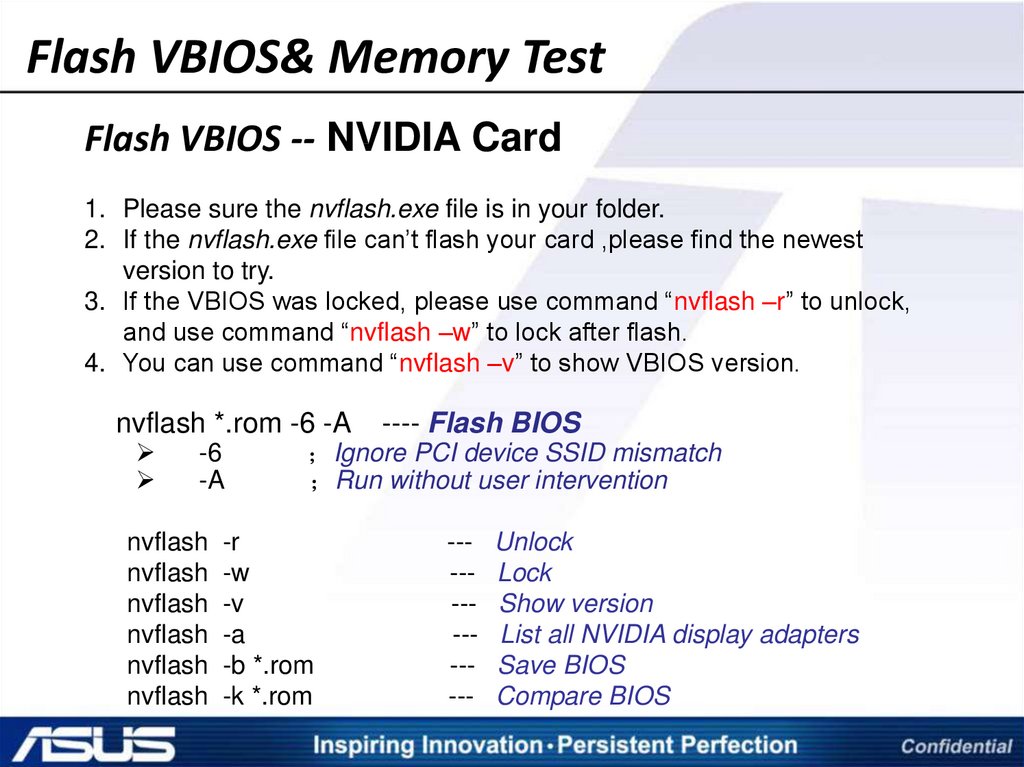
Flash VBIOS& Memory TestFlash VBIOS -- NVIDIA Card
1. Please sure the nvflash.exe file is in your folder.
2. If the nvflash.exe file can’t flash your card ,please find the newest
version to try.
3. If the VBIOS was locked, please use command “nvflash –r” to unlock,
and use command “nvflash –w” to lock after flash.
4. You can use command “nvflash –v” to show VBIOS version.
nvflash *.rom -6 -A
-6
-A
nvflash
nvflash
nvflash
nvflash
nvflash
nvflash
---- Flash BIOS
Ignore PCI device SSID mismatch
Run without user intervention
-r
-w
-v
-a
-b *.rom
-k *.rom
-------------
Unlock
Lock
Show version
List all NVIDIA display adapters
Save BIOS
Compare BIOS
15.
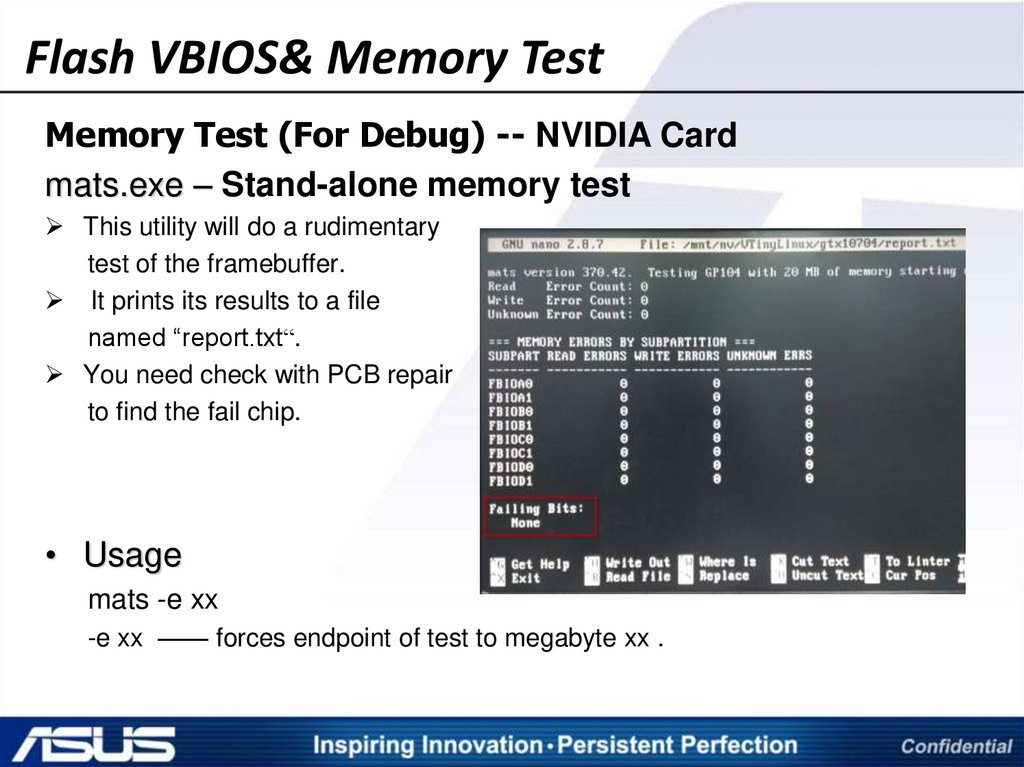
Flash VBIOS& Memory TestMemory Test (For Debug) -- NVIDIA Card
mats.exe – Stand-alone memory test
This utility will do a rudimentary
test of the framebuffer.
It prints its results to a file
named “report.txt“.
You need check with PCB repair
to find the fail chip.
• Usage
mats -e xx
-e xx —— forces endpoint of test to megabyte xx .
16.
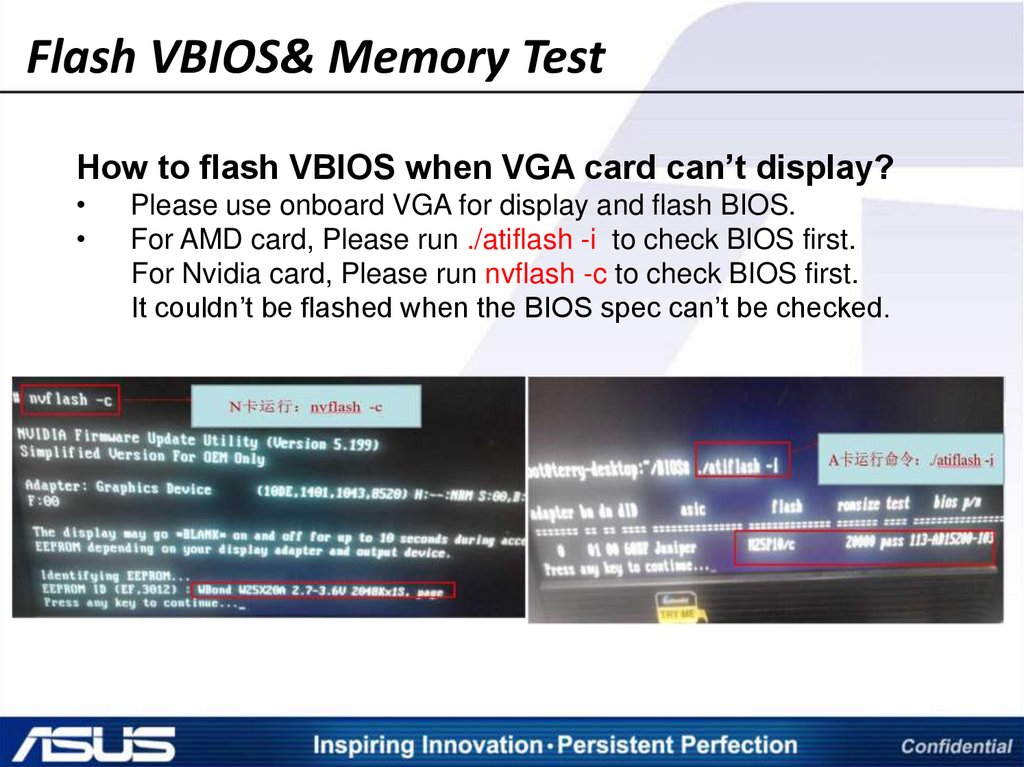
Flash VBIOS& Memory TestHow to flash VBIOS when VGA card can’t display?
Please use onboard VGA for display and flash BIOS.
For AMD card, Please run ./atiflash -i to check BIOS first.
For Nvidia card, Please run nvflash -c to check BIOS first.
It couldn’t be flashed when the BIOS spec can’t be checked.
17.
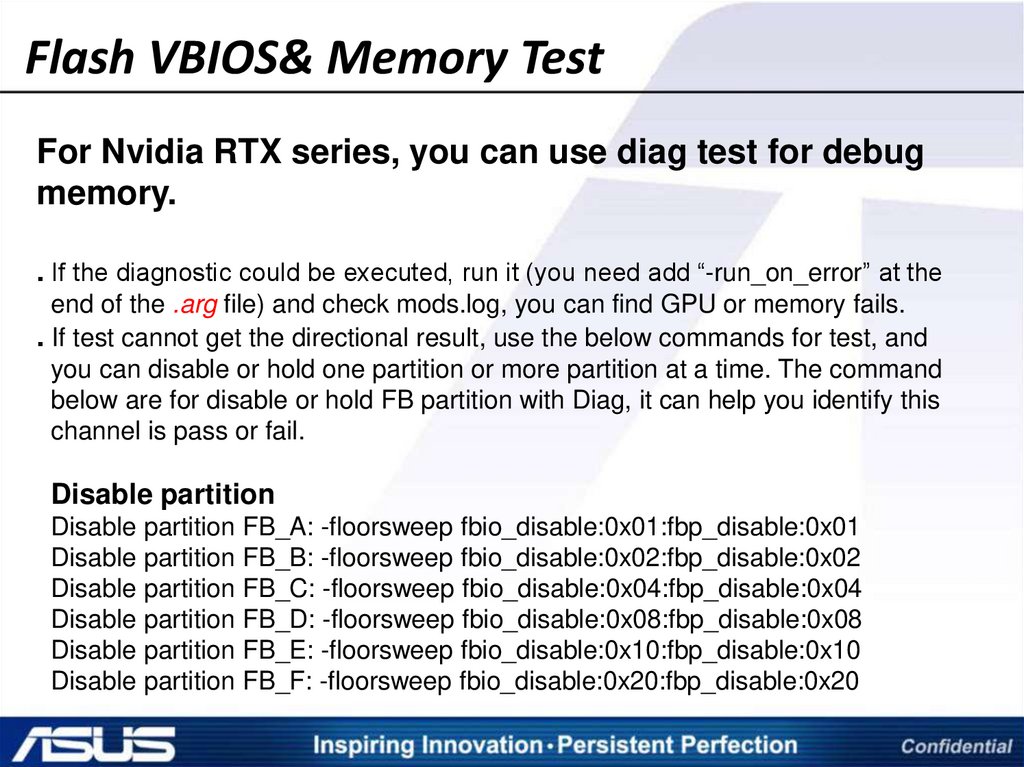
Flash VBIOS& Memory TestFor Nvidia RTX series, you can use diag test for debug
memory.
. If the diagnostic could be executed, run it (you need add “-run_on_error” at the
end of the .arg file) and check mods.log, you can find GPU or memory fails.
. If test cannot get the directional result, use the below commands for test, and
you can disable or hold one partition or more partition at a time. The command
below are for disable or hold FB partition with Diag, it can help you identify this
channel is pass or fail.
Disable partition
Disable partition FB_A: -floorsweep fbio_disable:0x01:fbp_disable:0x01
Disable partition FB_B: -floorsweep fbio_disable:0x02:fbp_disable:0x02
Disable partition FB_C: -floorsweep fbio_disable:0x04:fbp_disable:0x04
Disable partition FB_D: -floorsweep fbio_disable:0x08:fbp_disable:0x08
Disable partition FB_E: -floorsweep fbio_disable:0x10:fbp_disable:0x10
Disable partition FB_F: -floorsweep fbio_disable:0x20:fbp_disable:0x20
18.
Flash VBIOS& Memory TestHold partition
Hold partition FB_A -floorsweep fbio_disable:0x3E:fbp_disable:0x3E
Hold partition FB_B -floorsweep fbio_disable:0x3D:fbp_disable:0x3D
Hold partition FB_C -floorsweep fbio_disable:0x3B:fbp_disable:0x3B
Hold partition FB_D -floorsweep fbio_disable:0x37:fbp_disable:0x37
Hold partition FB_E -floorsweep fbio_disable:0x2F:fbp_disable:0x2F
Hold partition FB_F -floorsweep fbio_disable:0x1F:fbp_disable:0x1F
Hold partition FB_A/B -floorsweep fbio_disable:0x3C:fbp_disable:0x3C
Hold partition FB_C/D -floorsweep fbio_disable:0x33:fbp_disable:0x33
Hold partition FB_E/F -floorsweep fbio_disable:0x0F:fbp_disable:0x0F
You can use disable or hold partition flexibly by yourself for reference.
19.
Flash VBIOS& Memory TestFor example:
First please check PN.sh in diag like yv0c90a0.sh as your test model.
./mods -mle_nv gputest.js -readspec gp104_pg411_sku10_cr.spc @std.arg || exit $?
./mods -a -mle_nv gputest.js @t275.arg -bg_int_temp_flush 5000 1000 || exit $?
So if you want to hold partition A , please edit std.arg as below, add two
command lines at the end :
-adc_cal_check_ignore
-nvlink_force_disable
-timeout_ms 5000
-power_cap_policy 3 74000
-power_cap_policy 4 93000
-power_cap_policy 5 167000
-power_cap_tgp_mw 258000
-dramclk +2pct,0.all
-dramclk +2pct,3.all
-testarg 0 FailIfCapped false
-testarg 1 IgnoreRgbMcuFwCheck true
-testarg 171 SkipSerialNumCheck 1
-skip 78
-floorsweep fbio_disable:0x3E:fbp_disable:0x3E
-run_on_error
Hold partition FB_A
20.
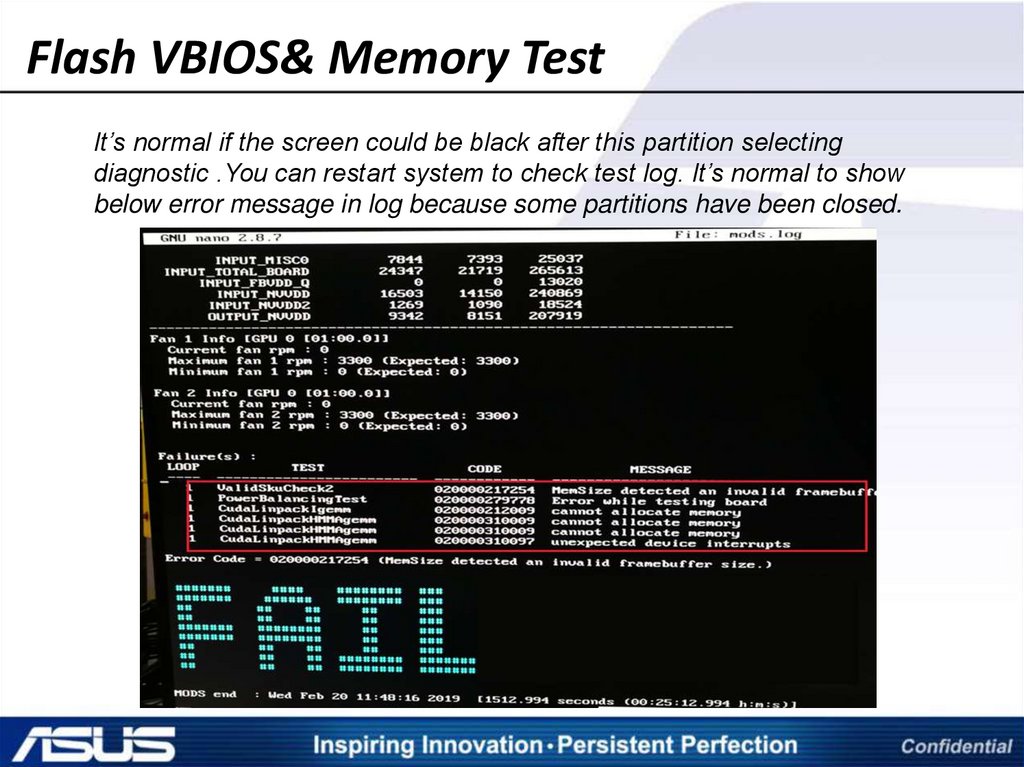
Flash VBIOS& Memory TestIt’s normal if the screen could be black after this partition selecting
diagnostic .You can restart system to check test log. It’s normal to show
below error message in log because some partitions have been closed.
21.
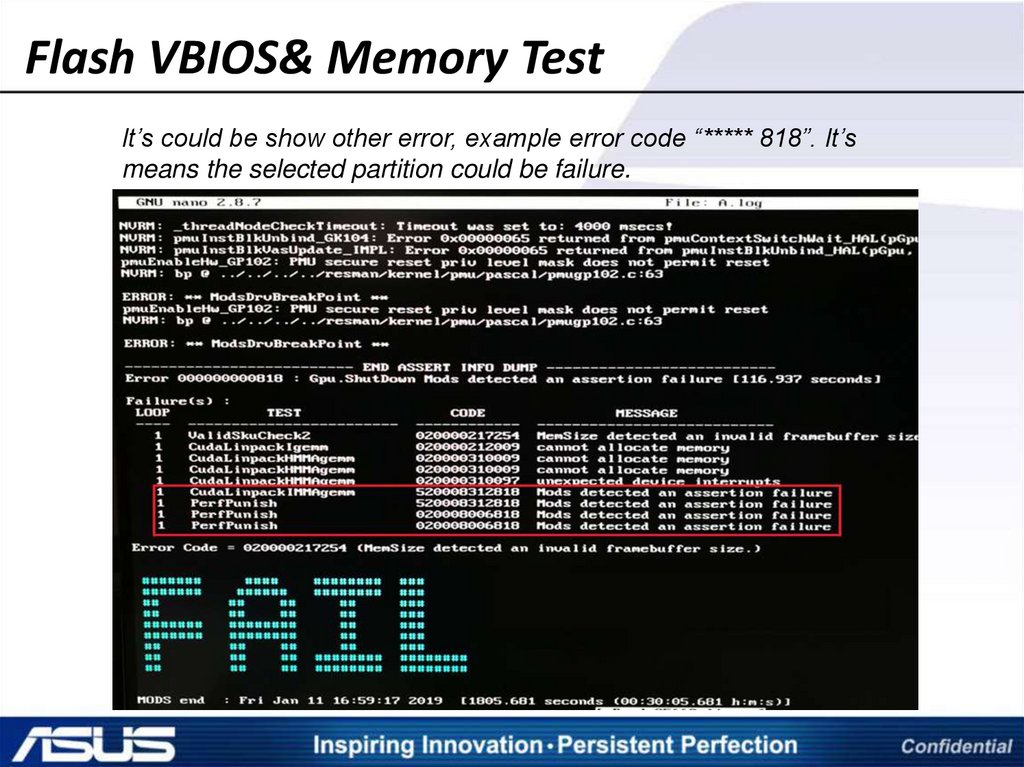
Flash VBIOS& Memory TestIt’s could be show other error, example error code “***** 818”. It’s
means the selected partition could be failure.
22.
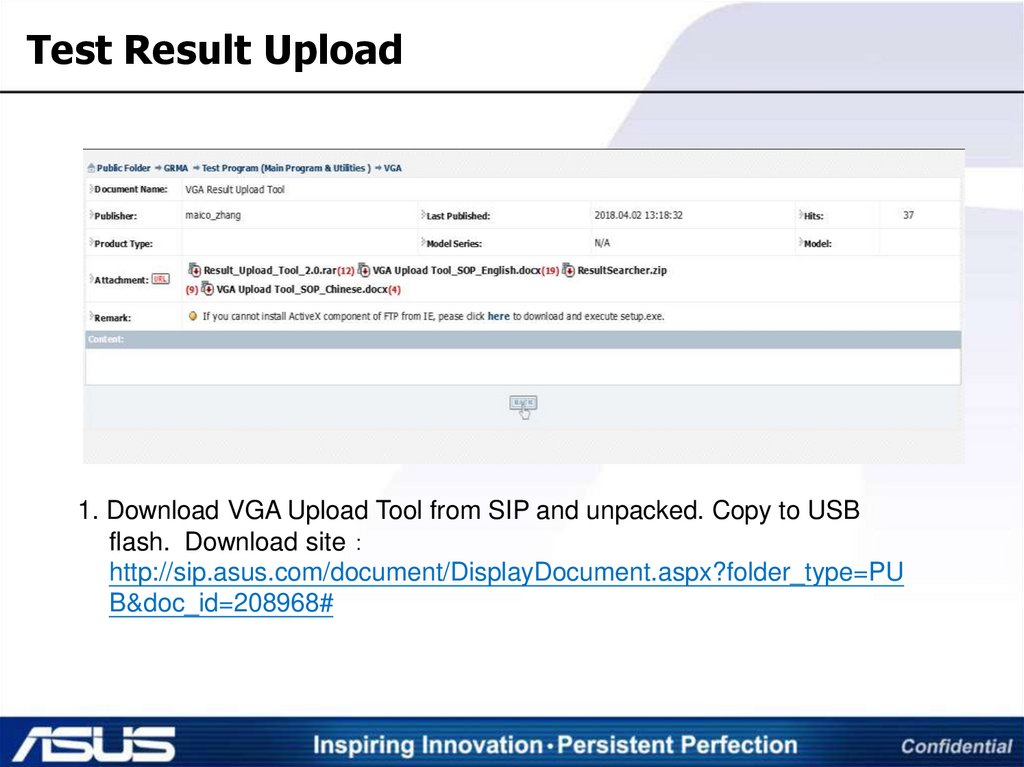
Test Result Upload1. Download VGA Upload Tool from SIP and unpacked. Copy to USB
flash. Download site
http://sip.asus.com/document/DisplayDocument.aspx?folder_type=PU
B&doc_id=208968#
23.
Test Result Upload• The tool of RMA info upload tool
include 3 files:
24.
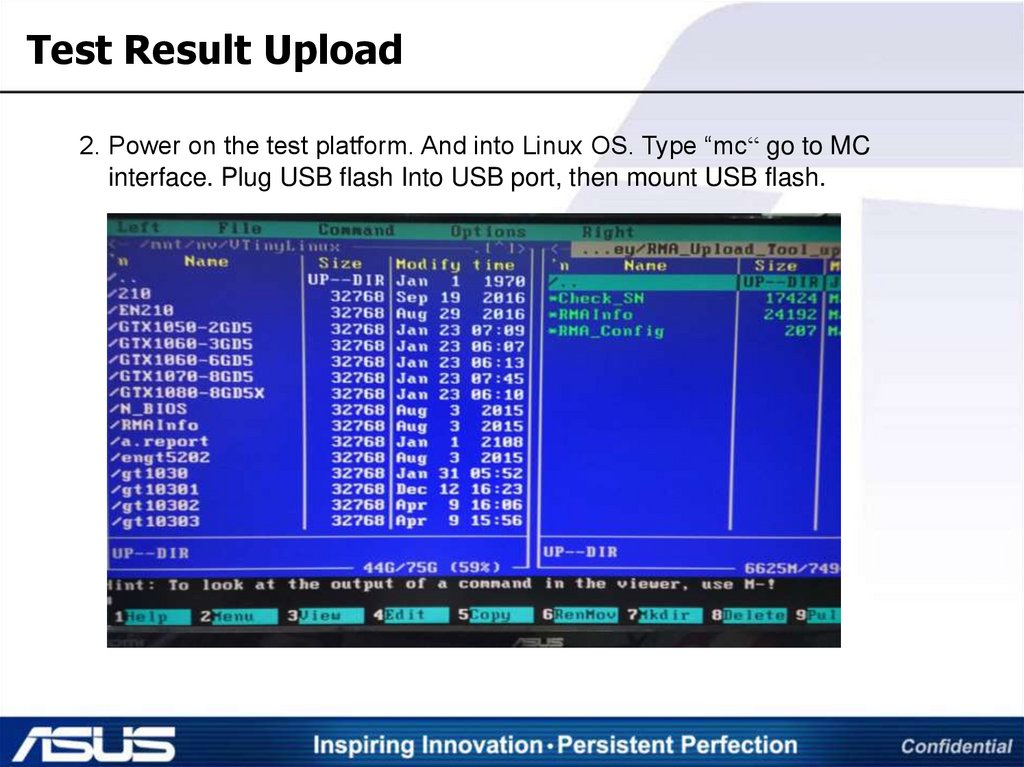
Test Result Upload2. Power on the test platform. And into Linux OS. Type “mc“ go to MC
interface. Plug USB flash Into USB port, then mount USB flash.
25.
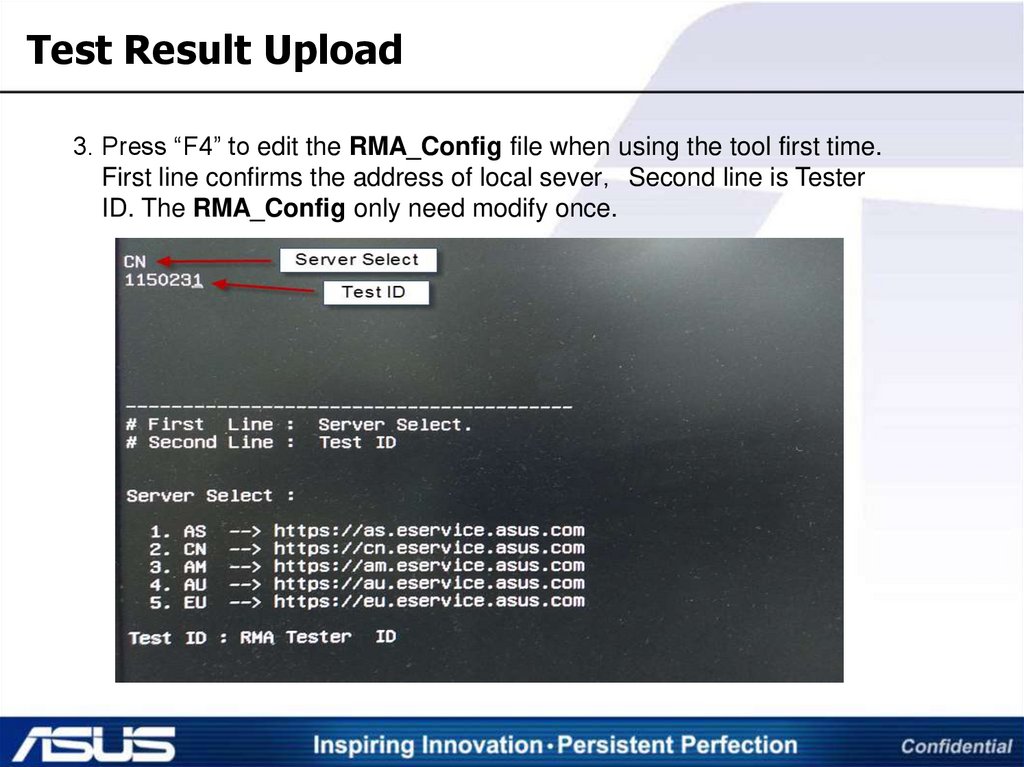
Test Result Upload3. Press “F4” to edit the RMA_Config file when using the tool first time.
First line confirms the address of local sever Second line is Tester
ID. The RMA_Config only need modify once.
26.
Test Result Upload4. Press “F5” to copy 3 file of the tool to the test program folder by model.
27.
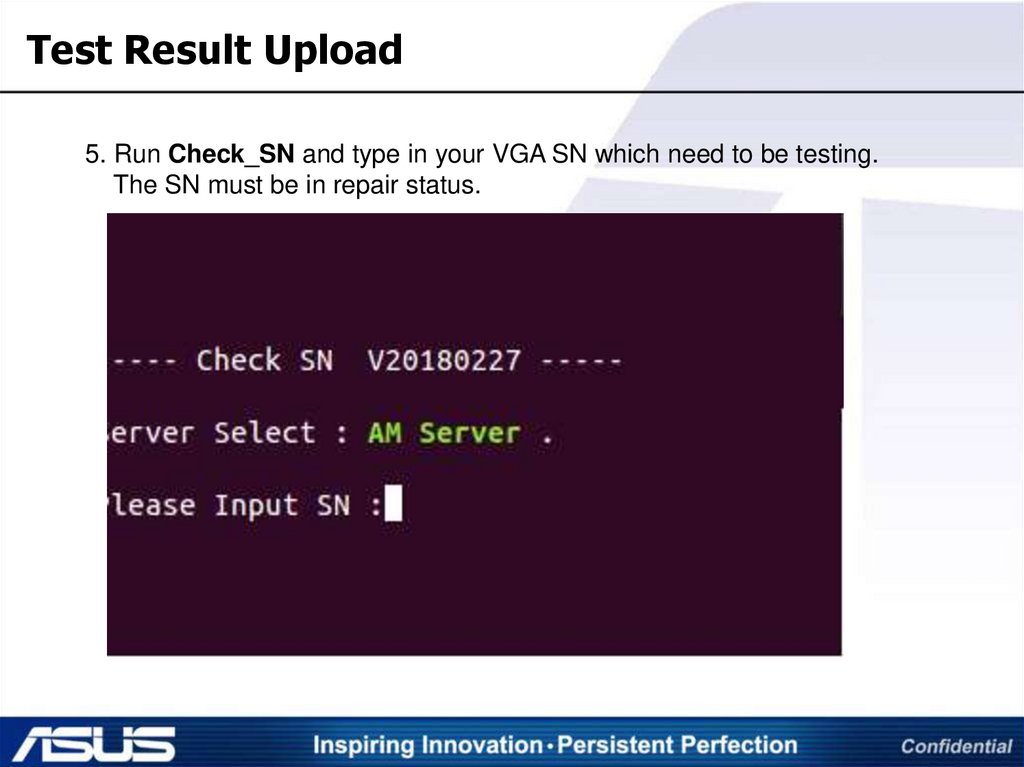
Test Result Upload5. Run Check_SN and type in your VGA SN which need to be testing.
The SN must be in repair status.
28.
Test Result Upload6. Run Diag test and the diag name is same as the PN of your VGA
card.
29.
Test Result Upload7. After Diag test is finished ,run RMAInfo and the test result will be
sent to server.
30.
Notice&Common Problem1. If the screen show “permission denied” error when run AMD diag test,
Please check if the Ubuntu OS installation was correct.
31.
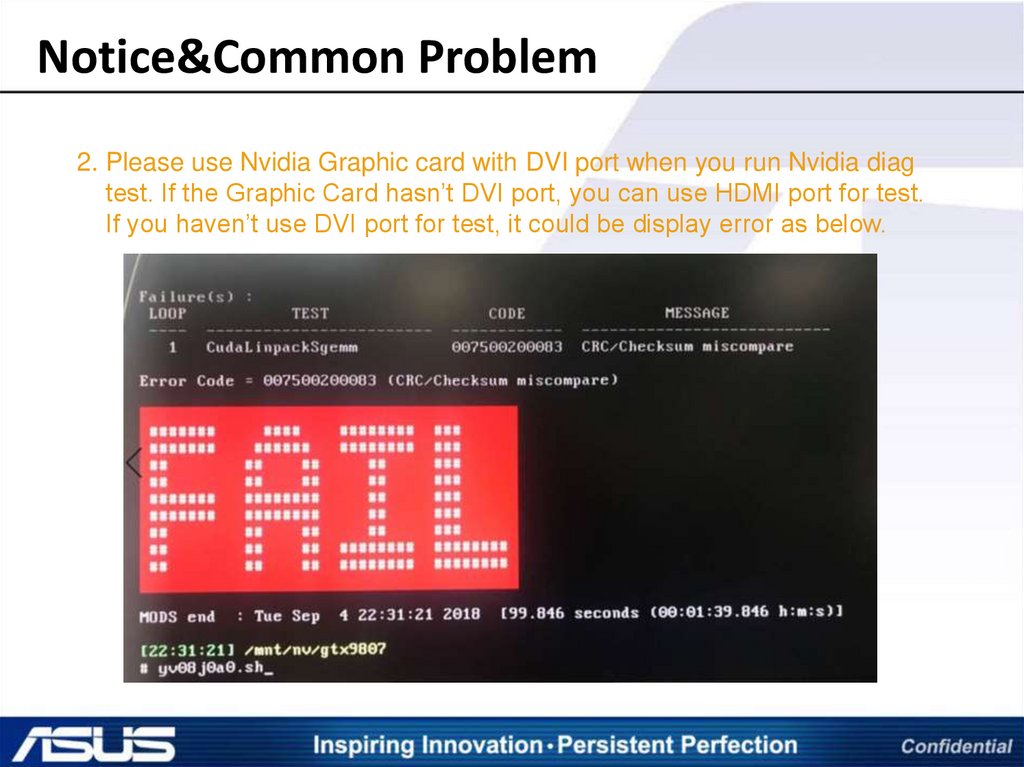
Notice&Common Problem2. Please use Nvidia Graphic card with DVI port when you run Nvidia diag
test. If the Graphic Card hasn’t DVI port, you can use HDMI port for test.
If you haven’t use DVI port for test, it could be display error as below.
32.
Notice&Common Problem3. If you see “Check SSID Fail” as below, Please confirm the PN your VGA
card is matching test diag.
33.
Notice&Common Problem4. Please check your MB could support PCIE3.0 standard when test
result show PCI express fail .
34.
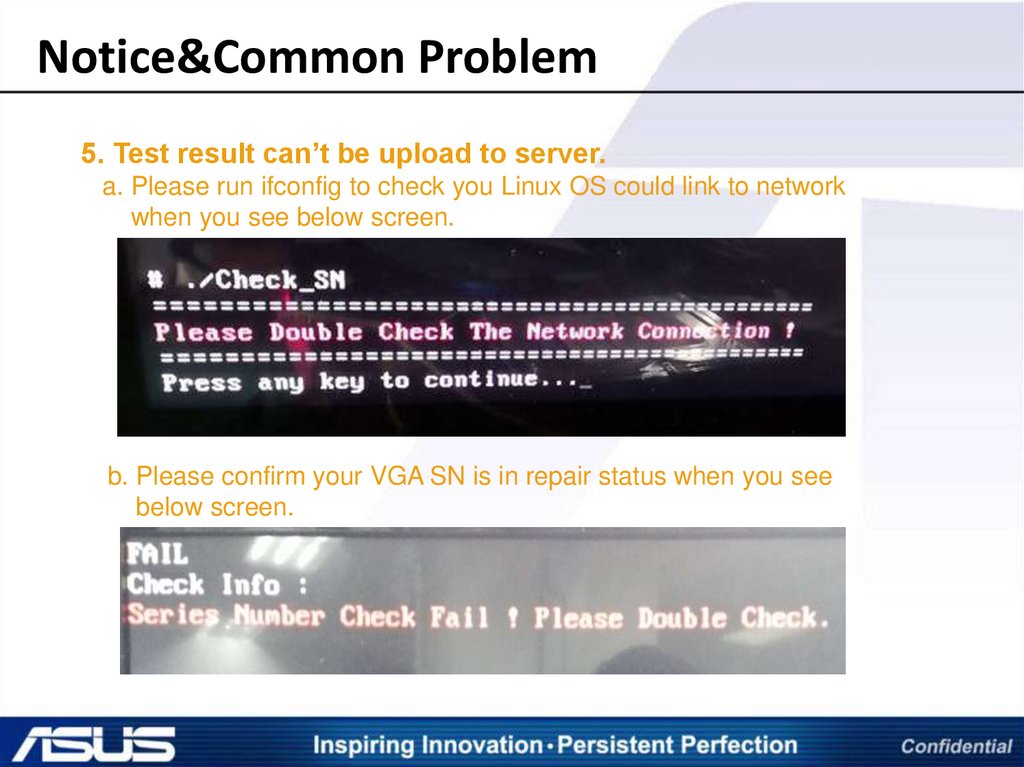
Notice&Common Problem5. Test result can’t be upload to server.
a. Please run ifconfig to check you Linux OS could link to network
when you see below screen.
b. Please confirm your VGA SN is in repair status when you see
below screen.
35.
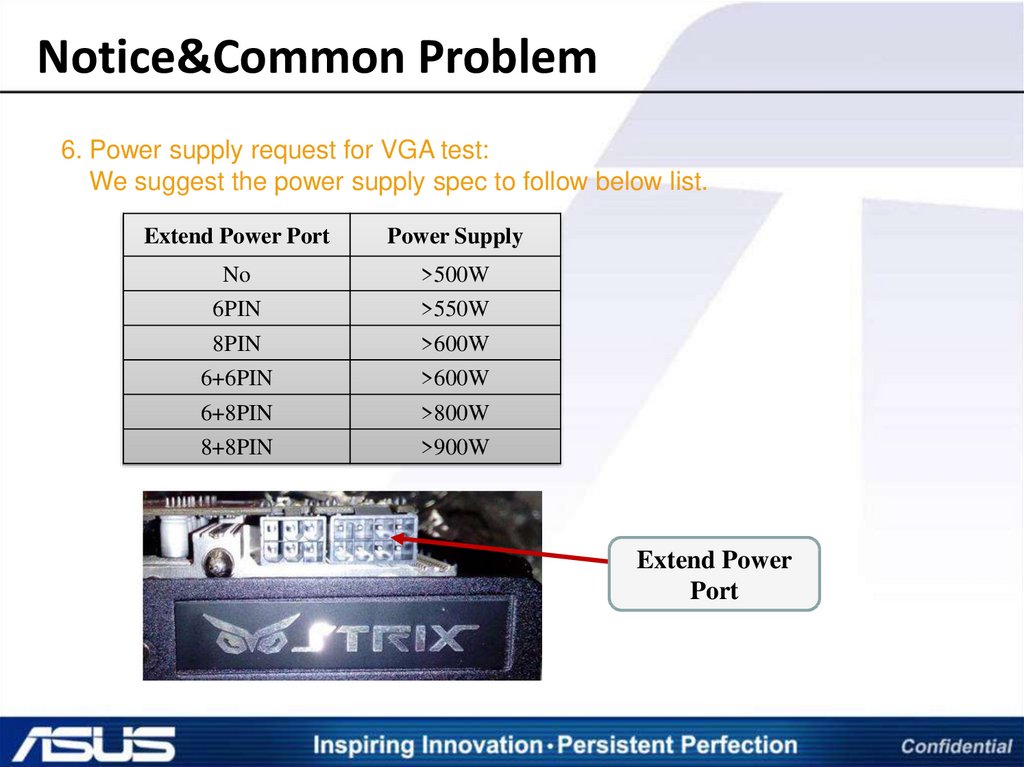
Notice&Common Problem6. Power supply request for VGA test:
We suggest the power supply spec to follow below list.
Extend Power Port
Power Supply
No
>500W
6PIN
>550W
8PIN
>600W
6+6PIN
>600W
6+8PIN
>800W
8+8PIN
>900W
Extend Power
Port