


 informatics
Similar presentations:


Acсess Control Device Manual
1.
Acсess Control Device Manual2. Ticket Sample
3.
Access Control TypesTicket Scan
Ticket Rip
4.
Powering ON/OFF the devices (Saveo scanner)On the underside of the scanner you will find a small recessed button
Use a pen or paper clip to push the Power Switch button until you
hear a notification sound, ensuring the button remains pressed down.
To turn off the device, repeat this action, so the button is released
upwards
Power saving mode is enabled by default and will put the scanner to
sleep after 1 minutes inactivity
To "wake up" the scanner press the trigger/power button once
To prevent the device from slipping off your hands, wear the Wrist
Strap around your wrist
On top of the device there is a mobile case; this is used to firmly
attach the mobile phone
5.
Powering ON/OFF the devices (mobile phone)To power on the mobile device, press the power
button until the device is switched on (1)
Pressing the power button for a few seconds, while
the device is powered on, will cause the device to
be powered off
The return button (2) is locked
power button
1
2
6.
LED indications / Battery status• LED indications will assist in determining the scan /
charging status of a SAVEO scanner (1):
Orange LED ON: Full charged
Orange LED Flashing: Charging / Low battery
Red LED ON: Offline / Out of Range
Green LED ON: Good read
• The battery status of the mobile phone can be
checked via the battery indicator at the top right of
the screen (2)
7.
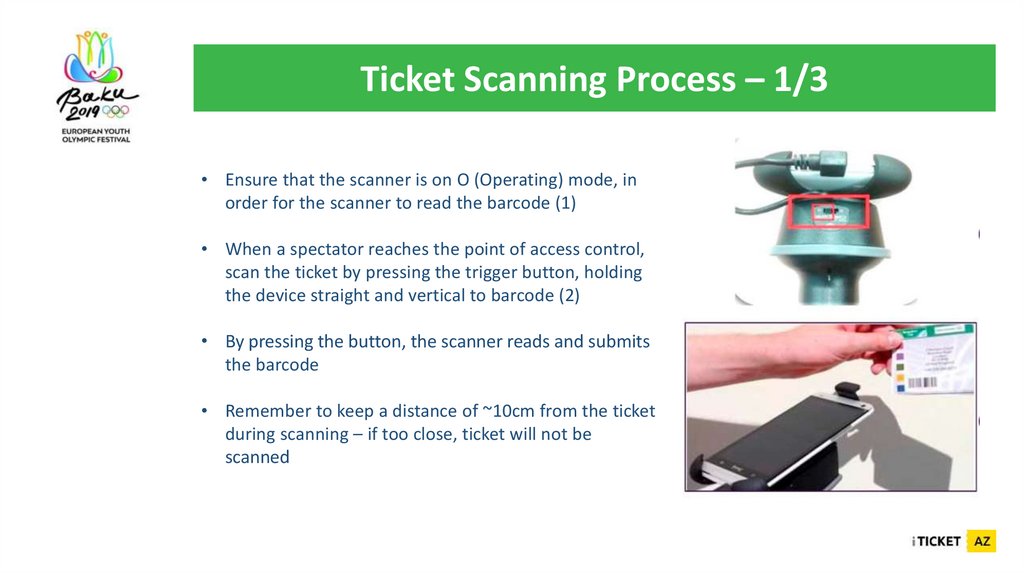
Ticket Scanning Process – 1/3• Ensure that the scanner is on O (Operating) mode, in
order for the scanner to read the barcode (1)
• When a spectator reaches the point of access control,
scan the ticket by pressing the trigger button, holding
the device straight and vertical to barcode (2)
• By pressing the button, the scanner reads and submits
the barcode
• Remember to keep a distance of ~10cm from the ticket
during scanning – if too close, ticket will not be
scanned
8.
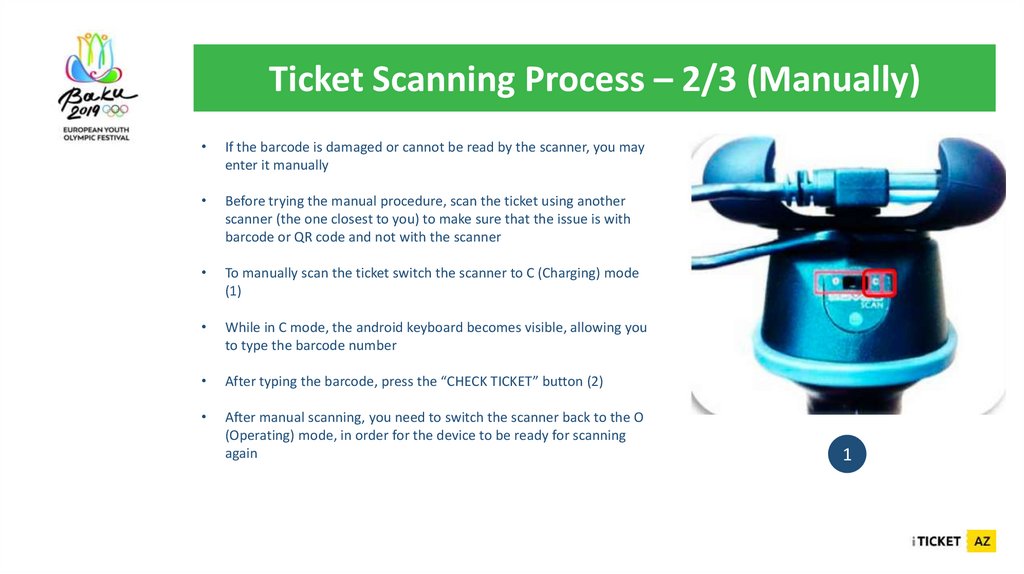
Ticket Scanning Process – 2/3 (Manually)If the barcode is damaged or cannot be read by the scanner, you may
enter it manually
Before trying the manual procedure, scan the ticket using another
scanner (the one closest to you) to make sure that the issue is with
barcode or QR code and not with the scanner
To manually scan the ticket switch the scanner to C (Charging) mode
(1)
While in C mode, the android keyboard becomes visible, allowing you
to type the barcode number
After typing the barcode, press the “CHECK TICKET” button (2)
After manual scanning, you need to switch the scanner back to the O
(Operating) mode, in order for the device to be ready for scanning
again
1
9.
Ticket Scanning Process – 3/3 (Manually)1
2
10.
Valid Ticket ScreenThe following screens appears
when a scanned ticket is valid
Furthermore, in cases of special
buyer types (such as Junior), a
relevant pictogram appears on
the screen along with the
message of validity (1)
Local icon (2)
Button to close ticket screen (3)
History of scanning this ticket (4)
1
2
4
3
11.
Scanned ScreenThe following screens appears
when a scanned ticket is valid,
but it has been scanned earlier
Furthermore, in cases of special
buyer types (such as Junior), a
relevant pictogram appears on
the screen along with the
message of validity (1)
Local icon (2)
Button to close ticket screen (3)
History of scanning this ticket (4)
2
1
4
3
12.
Invalid Tickets Screen (1/2)This ticket has been banned (1)
This ticket has been reprinted (2)
This ticket not found (3)
13.
Invalid Tickets Screen (2/2)1
2
3
14.
Profile• By selecting the menu button from the
main window, you can switch screen to
Profile
• Profile screen gives you the information
about current sessions downloaded,
which is useful to check if the device is
properly configured for the upcoming
session
• Press “CHECK FOR UPDATES” button in
order to update information