


 electronics
Similar presentations:

")


")
Описание возможностей GPIO
1.
Raspberry PI. Описаниевозможностей GPIO
лекция 1
2.
Raspberry PI 33.
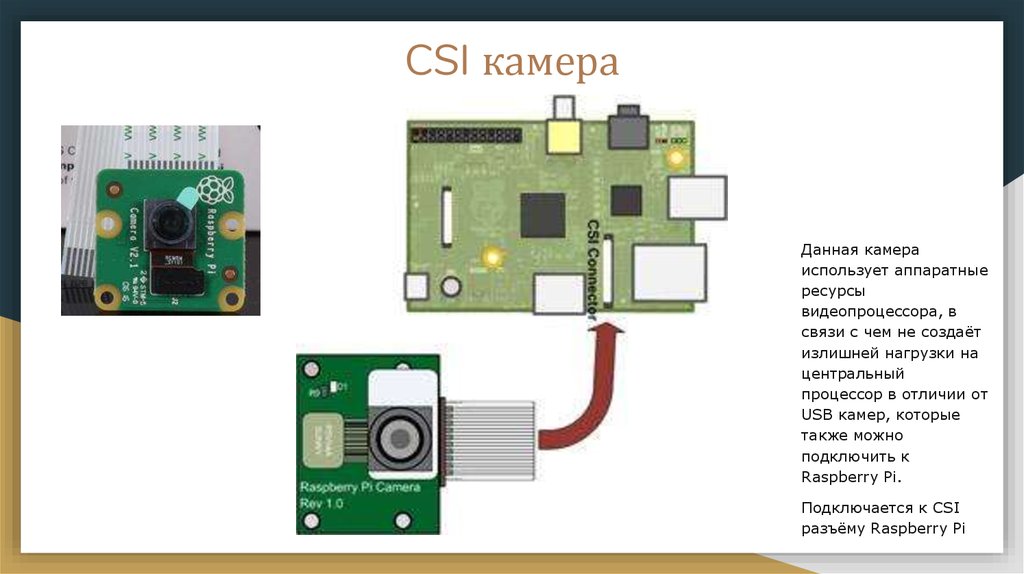
CSI камераДанная камера
использует аппаратные
ресурсы
видеопроцессора, в
связи с чем не создаёт
излишней нагрузки на
центральный
процессор в отличии от
USB камер, которые
также можно
подключить к
Raspberry Pi.
Подключается к CSI
разъёму Raspberry Pi
4.
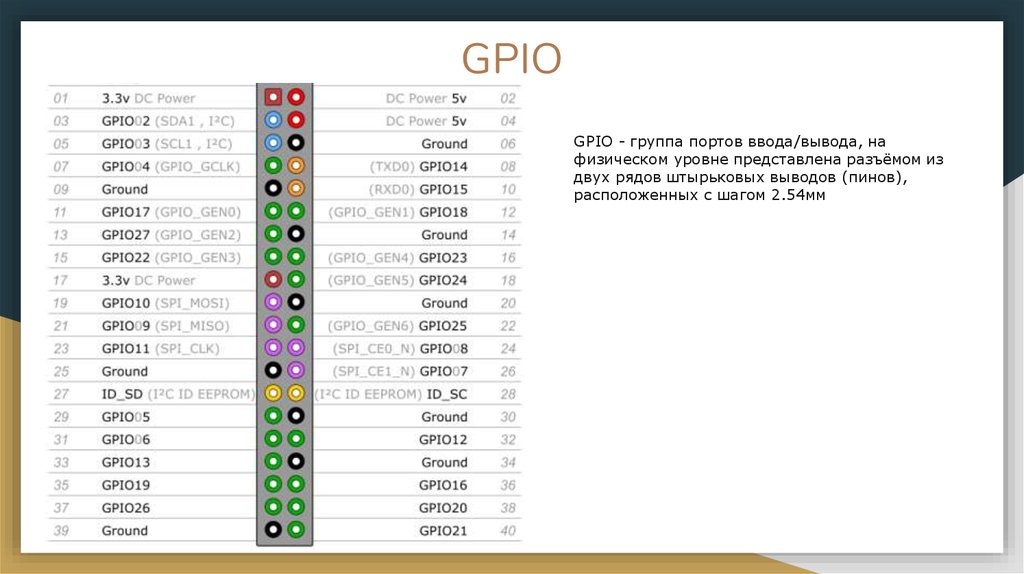
GPIOGPIO - группа портов ввода/вывода, на
физическом уровне представлена разъёмом из
двух рядов штырьковых выводов (пинов),
расположенных с шагом 2.54мм
5.
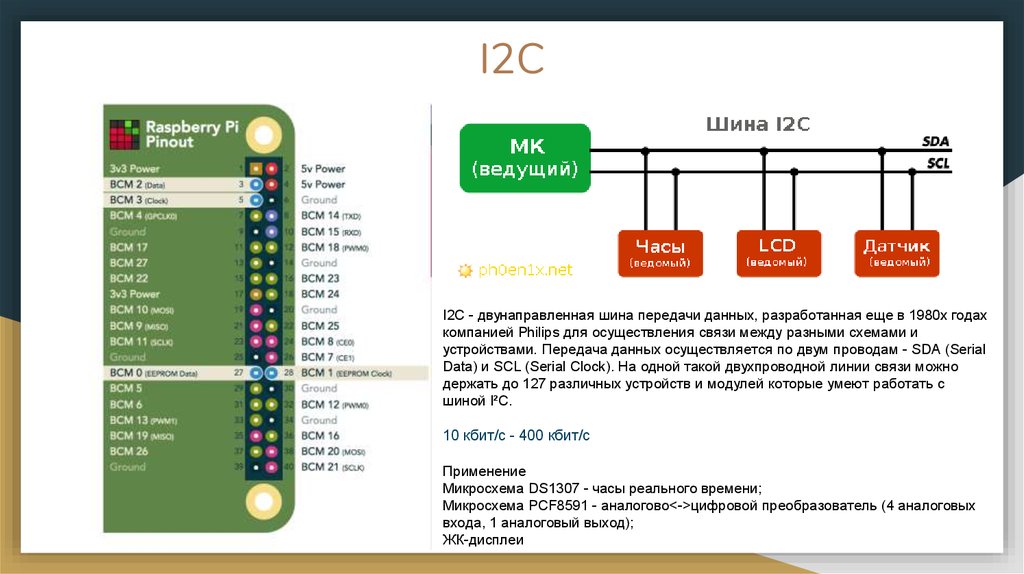
I2CI2C - двунаправленная шина передачи данных, разработанная еще в 1980х годах
компанией Philips для осуществления связи между разными схемами и
устройствами. Передача данных осуществляется по двум проводам - SDA (Serial
Data) и SCL (Serial Clock). На одной такой двухпроводной линии связи можно
держать до 127 различных устройств и модулей которые умеют работать с
шиной I²C.
10 кбит/с - 400 кбит/с
Применение
Микросхема DS1307 - часы реального времени;
Микросхема PCF8591 - аналогово<->цифровой преобразователь (4 аналоговых
входа, 1 аналоговый выход);
ЖК-дисплеи
6.
I2C. Датчика давления, температуры и влажностиBME280 производства Bosch Sensortec
7.
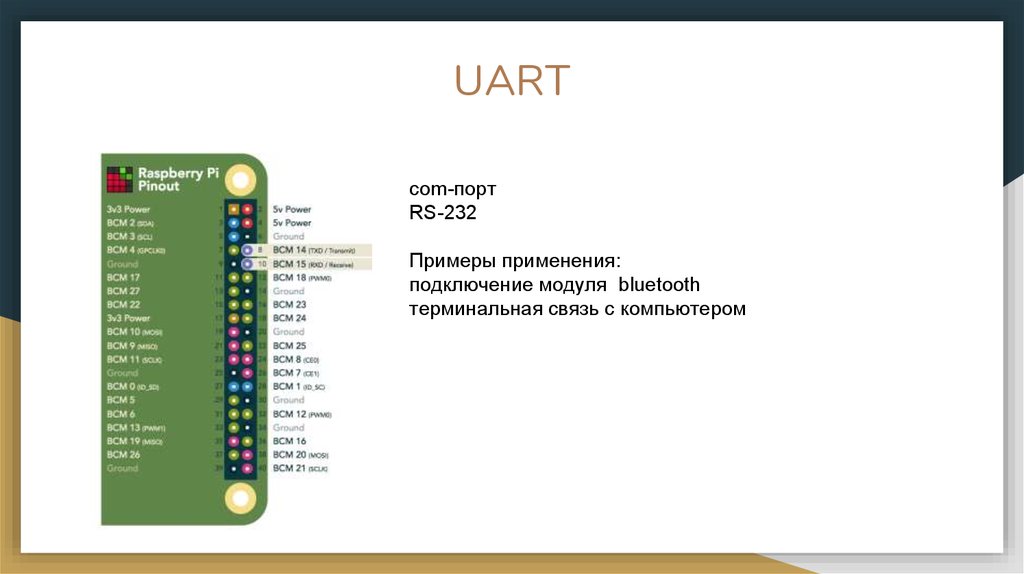
UARTcom-порт
RS-232
Примеры применения:
подключение модуля bluetooth
терминальная связь с компьютером
8.
SPISPI (англ. Serial Peripheral Interface, SPI bus — последовательный периферийный
интерфейс, шина SPI) — последовательный синхронный стандарт передачи данных в
режиме полного дуплекса, предназначенный для обеспечения простого и недорогого
высокоскоростного сопряжения микроконтроллеров и периферии. SPI также иногда
называют четырёхпроводным (англ. four-wire) интерфейсом.
9.
Аналоги RaspberryOrange Pi
Banana Pi BPI-M3
10.
Raspbian11.
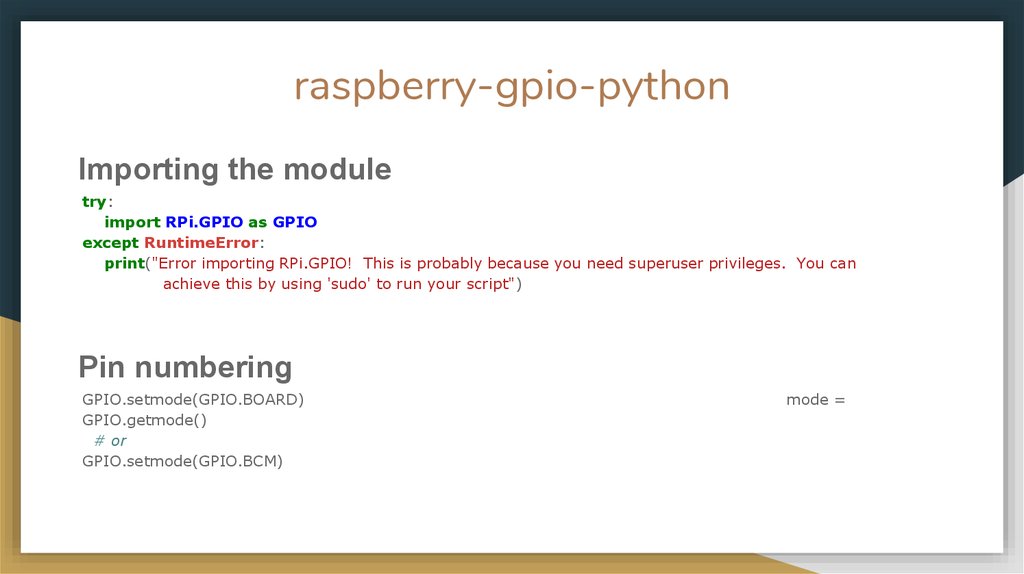
raspberry-gpio-pythonImporting the module
try:
import RPi.GPIO as GPIO
except RuntimeError:
print("Error importing RPi.GPIO! This is probably because you need superuser privileges. You can
achieve this by using 'sudo' to run your script")
Pin numbering
GPIO.setmode(GPIO.BOARD)
GPIO.getmode()
# or
GPIO.setmode(GPIO.BCM)
mode =
12.
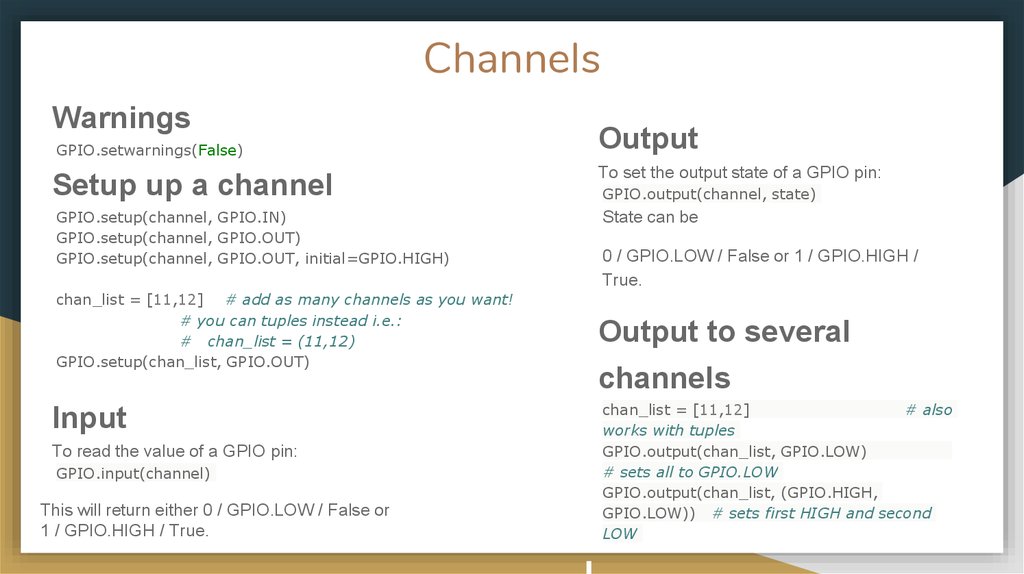
ChannelsWarnings
GPIO.setwarnings(False)
Setup up a channel
GPIO.setup(channel, GPIO.IN)
GPIO.setup(channel, GPIO.OUT)
GPIO.setup(channel, GPIO.OUT, initial=GPIO.HIGH)
chan_list = [11,12] # add as many channels as you want!
# you can tuples instead i.e.:
# chan_list = (11,12)
GPIO.setup(chan_list, GPIO.OUT)
Input
To read the value of a GPIO pin:
GPIO.input(channel)
This will return either 0 / GPIO.LOW / False or
1 / GPIO.HIGH / True.
Output
To set the output state of a GPIO pin:
GPIO.output(channel, state)
State can be
0 / GPIO.LOW / False or 1 / GPIO.HIGH /
True.
Output to several
channels
chan_list = [11,12]
# also
works with tuples
GPIO.output(chan_list, GPIO.LOW)
# sets all to GPIO.LOW
GPIO.output(chan_list, (GPIO.HIGH,
GPIO.LOW)) # sets first HIGH and second
LOW
13.
CleanupGPIO.cleanup(channel)
GPIO.cleanup( (channel1, channel2) )
GPIO.cleanup( [channel1, channel2] )
import atexit
def cleanup():
GPIO.cleanup()
print("Cleaning up!!")
atexit.register(cleanup)
atexit
atexit.register(func[, args[, kwargs]])
добавляет функцию в начало списка функции, которые
должны вызываться перед выходом из программы
14.
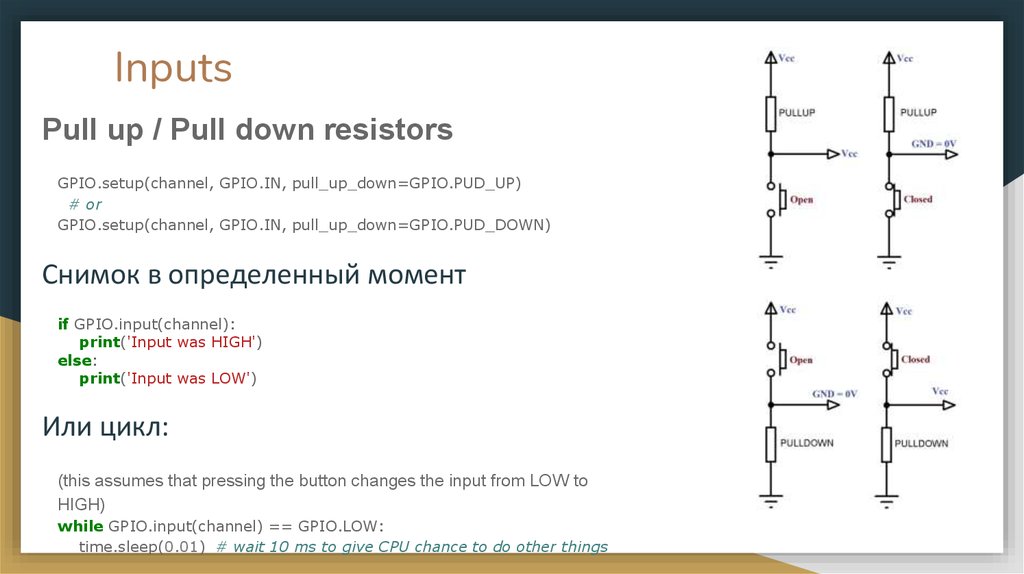
InputsPull up / Pull down resistors
GPIO.setup(channel, GPIO.IN, pull_up_down=GPIO.PUD_UP)
# or
GPIO.setup(channel, GPIO.IN, pull_up_down=GPIO.PUD_DOWN)
Снимок в определенный момент
if GPIO.input(channel):
print('Input was HIGH')
else:
print('Input was LOW')
Или цикл:
(this assumes that pressing the button changes the input from LOW to
HIGH)
while GPIO.input(channel) == GPIO.LOW:
time.sleep(0.01) # wait 10 ms to give CPU chance to do other things
15.
Inputs. Как опрашивать правильно?Interrupts and Edge detection!
LOW -> HIGH = rising edge
HIGH -> LOW = falling edge
wait_for_edge() function
GPIO.wait_for_edge(channel, GPIO.RISING) Блокировка программы!!!
GPIO.RISING
GPIO.FALLING
GPIO.BOTH
# wait for up to 5 seconds for a rising edge (timeout is in milliseconds)
channel = GPIO.wait_for_edge(channel, GPIO_RISING, timeout=5000)
if channel is None:
print('Timeout occurred')
else:
print('Edge detected on channel', channel)
event_detected() function
GPIO.add_event_detect(channel, GPIO.RISING) # add rising edge
detection on a channel
do_something()
if GPIO.event_detected(channel):
print('Button pressed')
Remove event detection
GPIO.remove_event_detect(channel)
16.
Threaded callbacksdef my_callback(channel):
print('This is a edge event callback function!')
print('Edge detected on channel %s'%channel)
print('This is run in a different thread to your main program')
GPIO.add_event_detect(channel, GPIO.RISING, callback=my_callback) # add rising edge detection on
a channel
...the rest of your program...
def my_callback_one(channel):
print('Callback one')
def my_callback_two(channel):
print('Callback two')
GPIO.add_event_detect(channel, GPIO.RISING)
GPIO.add_event_callback(channel, my_callback_one)
GPIO.add_event_callback(channel, my_callback_two)
17.
Switch debounce (шумоподавитель)You may notice that the callbacks are called more than once for each button press. This is as a result of
what is known as 'switch bounce'. There are two ways of dealing with switch bounce:
● add a 0.1uF capacitor across your switch.
● software debouncing
● a combination of both
To debounce using software, add the bouncetime= parameter to a function where you specify a callback
function. Bouncetime should be specified in milliseconds. For example:
# add rising edge detection on a channel, ignoring further edges for 200ms for switch bounce handling
GPIO.add_event_detect(channel, GPIO.RISING, callback=my_callback, bouncetime=200)
or
GPIO.add_event_callback(channel, my_callback, bouncetime=200)
18.
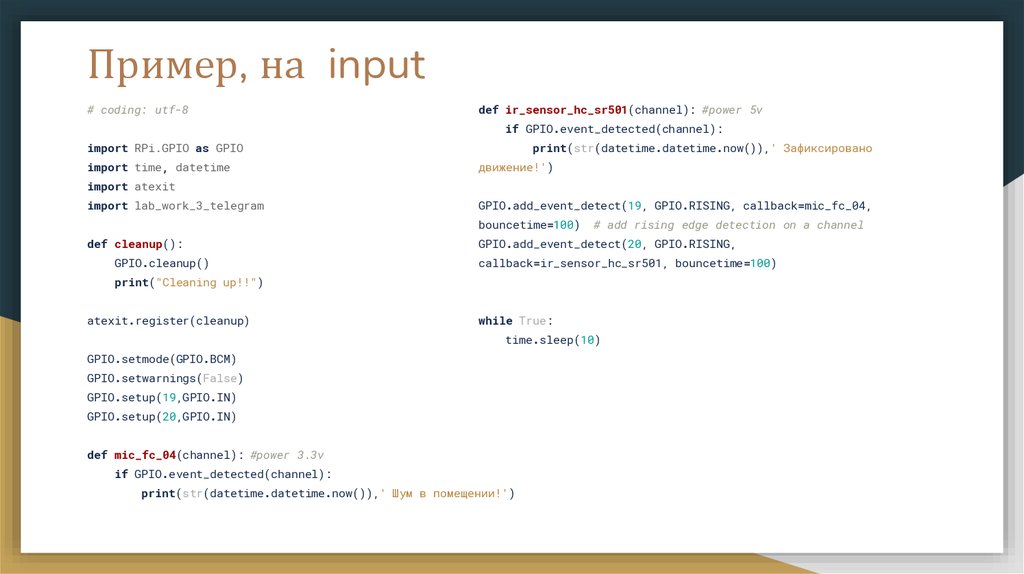
Пример, на input# coding: utf-8
def ir_sensor_hc_sr501(channel): #power 5v
if GPIO.event_detected(channel):
import RPi.GPIO as GPIO
import time, datetime
print(str(datetime.datetime.now()),' Зафиксировано
движение!')
import atexit
import lab_work_3_telegram
GPIO.add_event_detect(19, GPIO.RISING, callback=mic_fc_04,
bouncetime=100)
def cleanup():
GPIO.cleanup()
# add rising edge detection on a channel
GPIO.add_event_detect(20, GPIO.RISING,
callback=ir_sensor_hc_sr501, bouncetime=100)
print("Cleaning up!!")
atexit.register(cleanup)
while True:
time.sleep(10)
GPIO.setmode(GPIO.BCM)
GPIO.setwarnings(False)
GPIO.setup(19,GPIO.IN)
GPIO.setup(20,GPIO.IN)
def mic_fc_04(channel): #power 3.3v
if GPIO.event_detected(channel):
print(str(datetime.datetime.now()),' Шум в помещении!')
19.
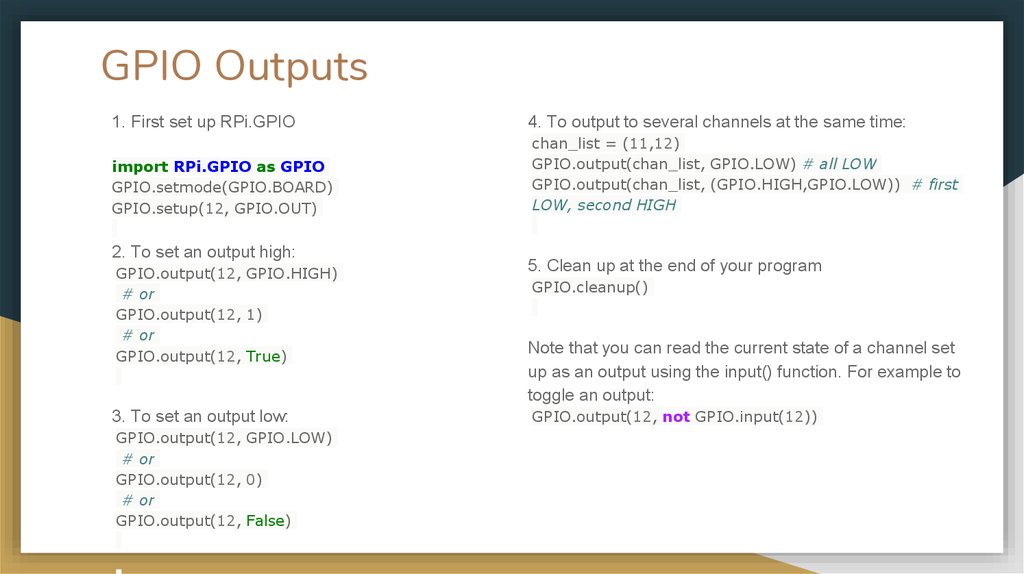
GPIO Outputs1. First set up RPi.GPIO
4. To output to several channels at the same time:
import RPi.GPIO as GPIO
GPIO.setmode(GPIO.BOARD)
GPIO.setup(12, GPIO.OUT)
chan_list = (11,12)
GPIO.output(chan_list, GPIO.LOW) # all LOW
GPIO.output(chan_list, (GPIO.HIGH,GPIO.LOW)) # first
LOW, second HIGH
2. To set an output high:
GPIO.output(12, GPIO.HIGH)
# or
GPIO.output(12, 1)
# or
GPIO.output(12, True)
5. Clean up at the end of your program
3. To set an output low:
GPIO.output(12, not GPIO.input(12))
GPIO.output(12, GPIO.LOW)
# or
GPIO.output(12, 0)
# or
GPIO.output(12, False)
GPIO.cleanup()
Note that you can read the current state of a channel set
up as an output using the input() function. For example to
toggle an output:
20.
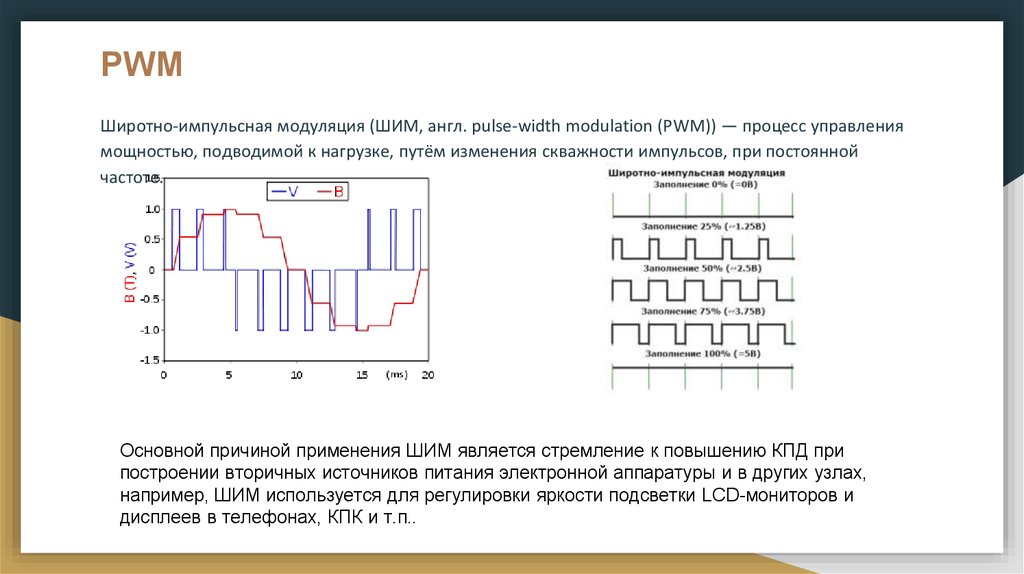
PWMШиротно-импульсная модуляция (ШИМ, англ. pulse-width modulation (PWM)) — процесс управления
мощностью, подводимой к нагрузке, путём изменения скважности импульсов, при постоянной
частоте.
Основной причиной применения ШИМ является стремление к повышению КПД при
построении вторичных источников питания электронной аппаратуры и в других узлах,
например, ШИМ используется для регулировки яркости подсветки LCD-мониторов и
дисплеев в телефонах, КПК и т.п..
21.
Using PWM in RPi.GPIOTo create a PWM instance:
p = GPIO.PWM(channel, frequency)
An example to blink an LED once every two
seconds:
To start PWM:
import RPi.GPIO as GPIO
GPIO.setmode(GPIO.BOARD)
GPIO.setup(12, GPIO.OUT)
p.start(dc)
# where dc is the duty cycle (0.0 <= dc <= 100.0)
To change the frequency:
p.ChangeFrequency(freq)
# where freq is the new frequency in Hz
To change the duty cycle:
p.ChangeDutyCycle(dc) # where 0.0 <= dc <= 100.0
To stop PWM:
p.stop()
p = GPIO.PWM(12, 0.5)
p.start(1)
input('Press return to stop:')
for Python 2
p.stop()
GPIO.cleanup()
# use raw_input
22.
Using PWM in RPi.GPIOAn example to brighten/dim an LED:
import time
import RPi.GPIO as GPIO
GPIO.setmode(GPIO.BOARD)
GPIO.setup(12, GPIO.OUT)
p = GPIO.PWM(12, 50) # channel=12 frequency=50Hz
p.start(0)
try:
while 1:
for dc in range(0, 101, 5):
p.ChangeDutyCycle(dc)
time.sleep(0.1)
for dc in range(100, -1, -5):
p.ChangeDutyCycle(dc)
time.sleep(0.1)
except KeyboardInterrupt:
pass
p.stop()
GPIO.cleanup()
23.
Checking function of GPIO channelsgpio_function(channel)
Shows the function of a GPIO channel.
For example:
import RPi.GPIO as GPIO
GPIO.setmode(GPIO.BOARD)
func = GPIO.gpio_function(pin)
will return a value from:
GPIO.IN, GPIO.OUT, GPIO.SPI, GPIO.I2C, GPIO.HARD_PWM, GPIO.SERIAL, GPIO.UNKNOWN