


Similar presentations:


Basic cross sections
1.
Exercise set 3:Basic cross sections
To view this exercise just press F5 now. Then click the mouse to continue through the slides.
School of Earth and Environment
2.
Introduction to cross sections• This presentation is to be completed in conjunction with exercise worksheet 3.
Objectives:
• By the end of this exercise you should:
• Understand the importance of cross sections.
• Be able to construct cross sections from basic geological maps.
• Be able to calculate true thickness of beds.
School of Earth and Environment
3.
Introductionto
cross
sections
• A key goal of structural geologists is to understand the three dimensional geometry of
rocks.
• Unfortunately all that can be directly observed are rocks at the Earth’s surface or, in special
cases, one dimensional information obtained from well logs.
• The shape of the structures below the surface and the projection of those features into the
air (before they were eroded) must be inferred.
• Cross sections are 2-D educated guesses at the geology along a plane different from the
Earth’s surface.
• Although this plane is almost always vertical, there are instances where it is desirable to
project geologic structures into a dipping plane.
•As is true of many problems in geology, there are often numerous possible interpretations
of the same data.
•The best we can do in drawing a cross section is to come up with an interpretation that is
consistent with all the available data.
School of Earth and Environment
4.
Calculating true thickness of a bed• Calculating true thickness from a map is actually very simple, just plug all the necessary
numbers into the following equation:
True thickness (t) = width of outcrop (w) x sin (θ) (angle of dip)
• Example: If the width of an outcrop is 100m and has a dip of 14o then
t = 100m x sin(14)
t = 24.2 m
School of Earth and Environment
5.
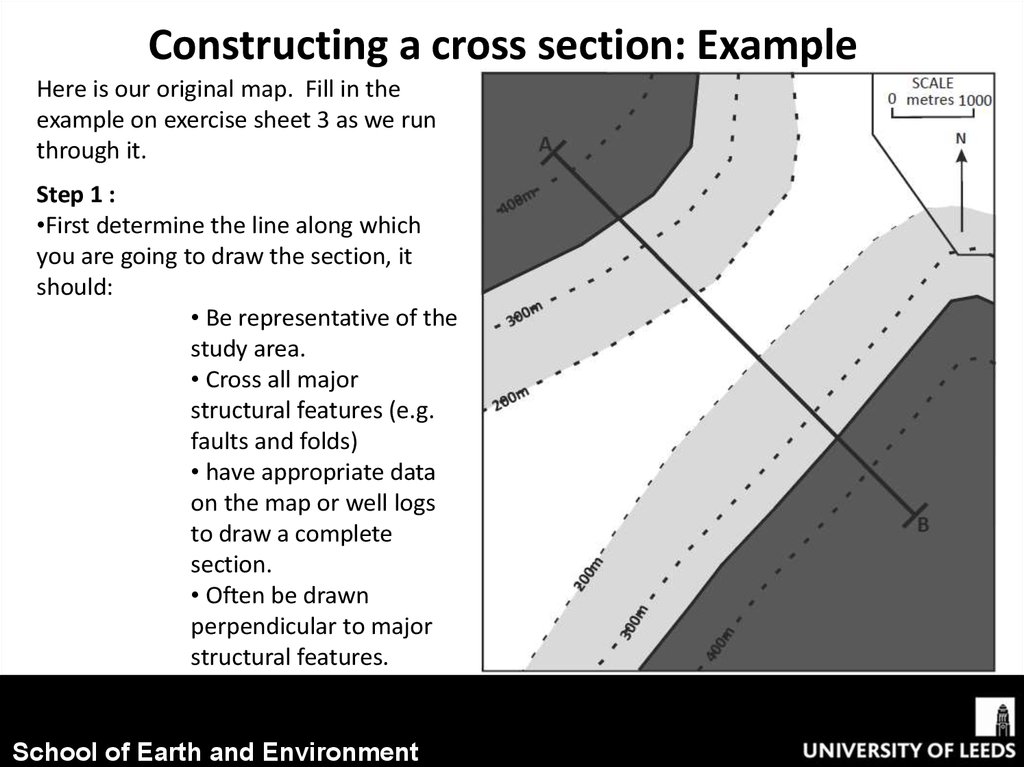
Constructing a cross section: ExampleHere is our original map. Fill in the
example on exercise sheet 3 as we run
through it.
Step 1 :
•First determine the line along which
you are going to draw the section, it
should:
• Be representative of the
study area.
• Cross all major
structural features (e.g.
faults and folds)
• have appropriate data
on the map or well logs
to draw a complete
section.
• Often be drawn
perpendicular to major
structural features.
School of Earth and Environment
6.
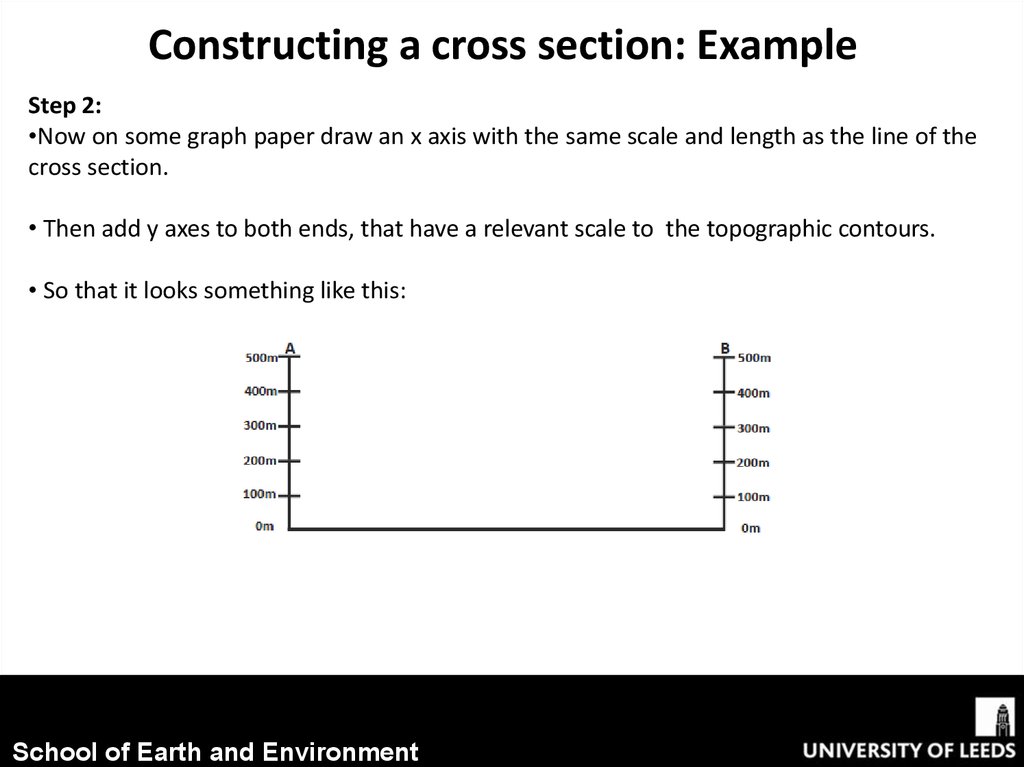
Constructing a cross section: ExampleStep 2:
•Now on some graph paper draw an x axis with the same scale and length as the line of the
cross section.
• Then add y axes to both ends, that have a relevant scale to the topographic contours.
• So that it looks something like this:
School of Earth and Environment
7.
Constructing a cross section: ExampleStep 3 :
• Using a scrap piece of paper, mark on
where structure contours intercept your
cross sectional line.
School of Earth and Environment
8.
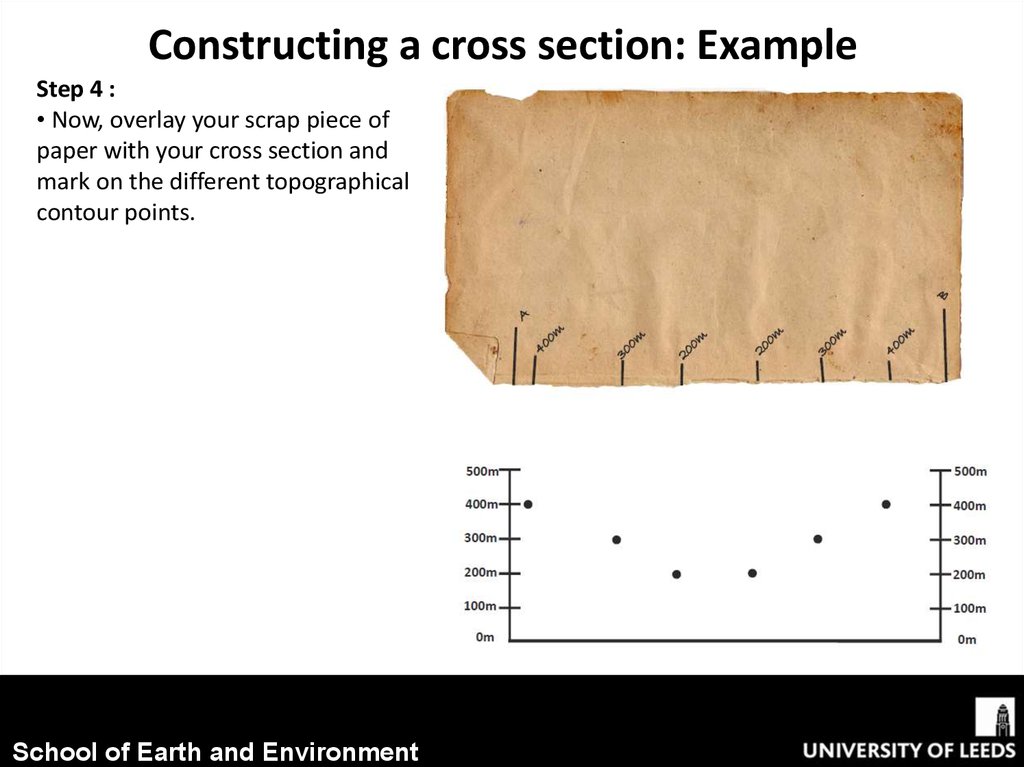
Constructing a cross section: ExampleStep 4 :
• Now, overlay your scrap piece of
paper with your cross section and
mark on the different topographical
contour points.
School of Earth and Environment
9.
Constructing a cross section: ExampleStep 5 :
• If you join these dots up, you should
end up with an accurate scaled
topographic cross section that looks
something like the one below.
School of Earth and Environment
10.
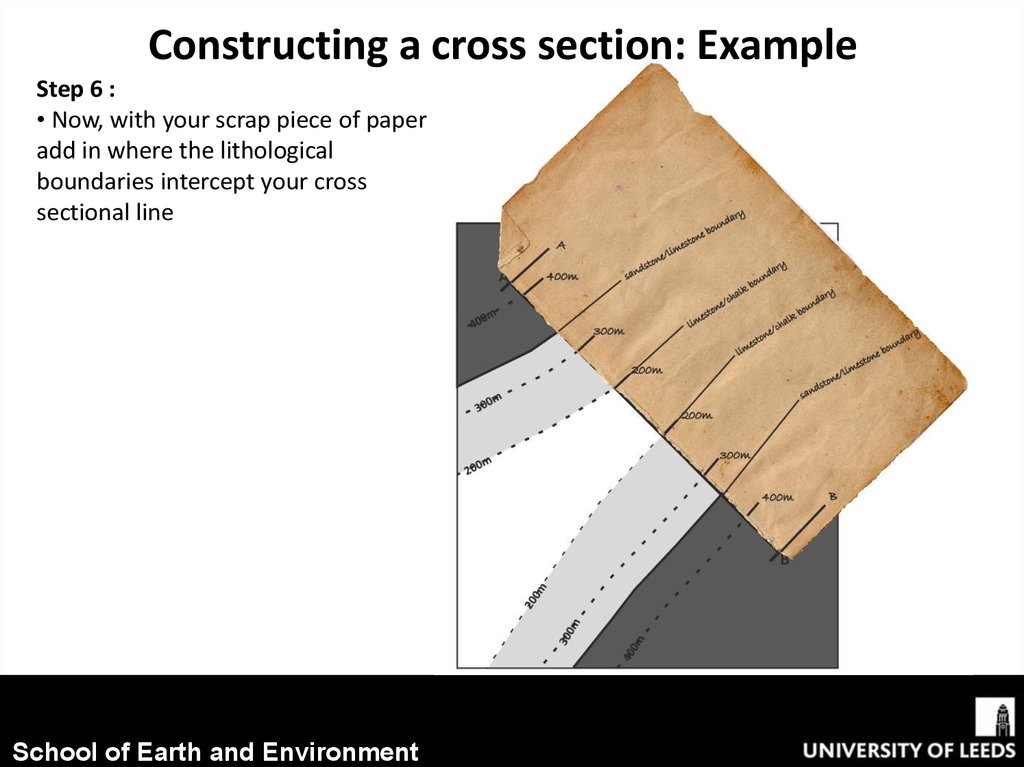
Constructing a cross section: ExampleStep 6 :
• Now, with your scrap piece of paper
add in where the lithological
boundaries intercept your cross
sectional line
School of Earth and Environment
11.
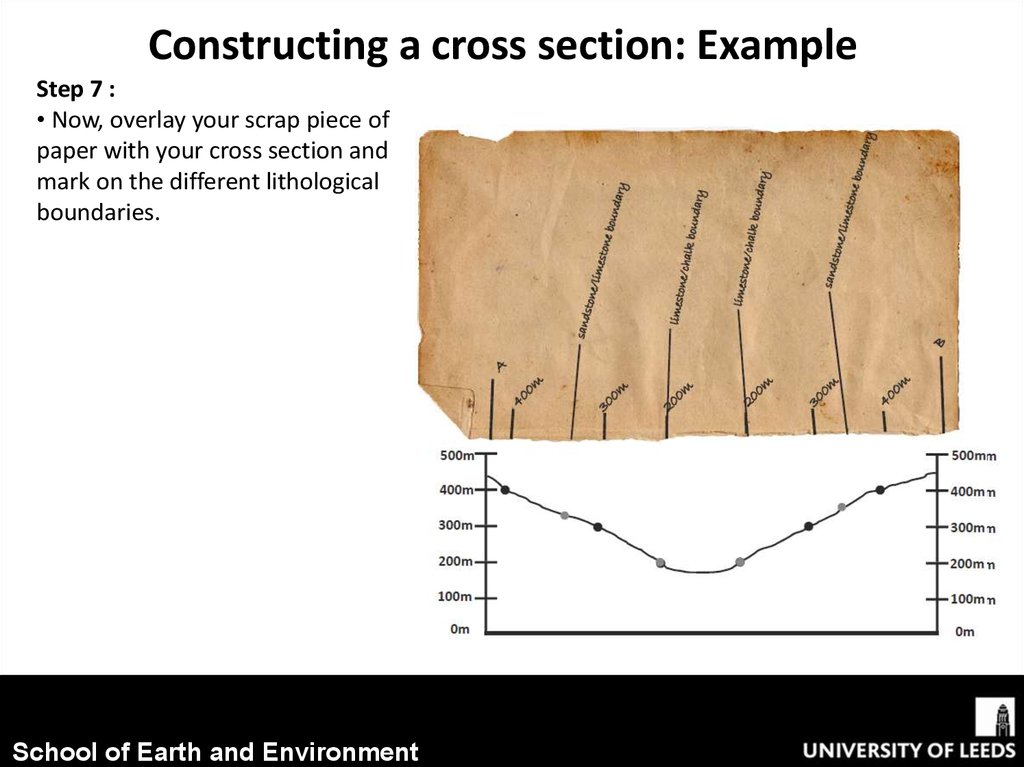
Constructing a cross section: ExampleStep 7 :
• Now, overlay your scrap piece of
paper with your cross section and
mark on the different lithological
boundaries.
School of Earth and Environment
12.
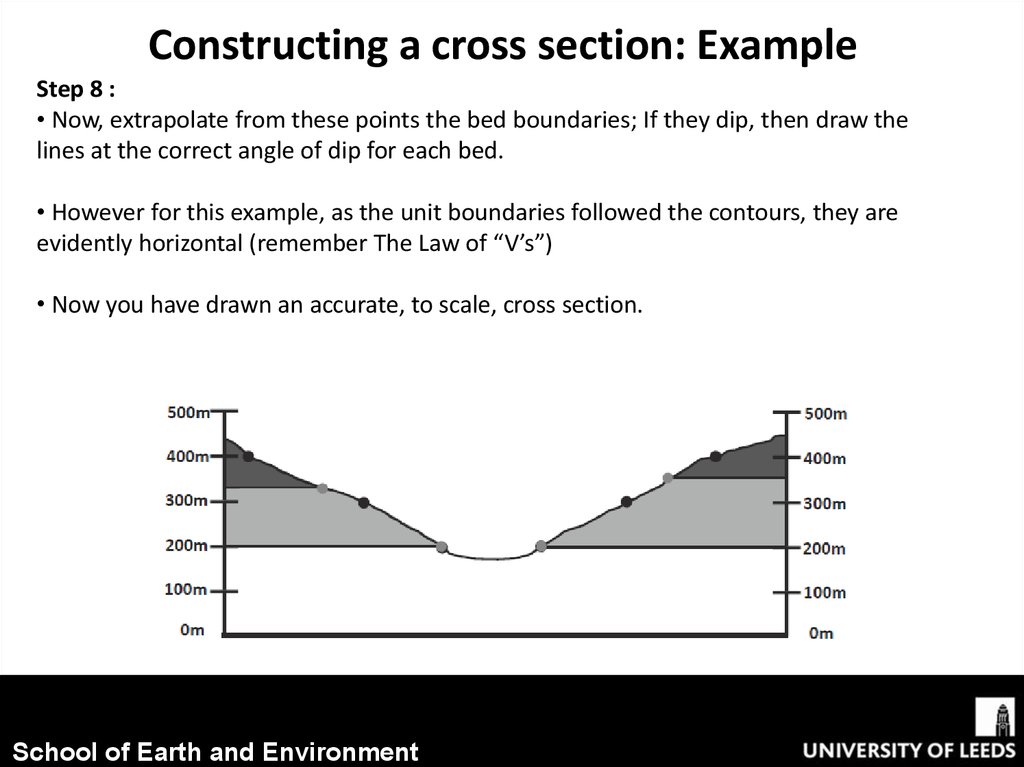
Constructing a cross section: ExampleStep 8 :
• Now, extrapolate from these points the bed boundaries; If they dip, then draw the
lines at the correct angle of dip for each bed.
• However for this example, as the unit boundaries followed the contours, they are
evidently horizontal (remember The Law of “V’s”)
• Now you have drawn an accurate, to scale, cross section.
School of Earth and Environment
13.
Constructing a cross section: Problem• Now have a go at the next problem by yourself, by answering the questions on the graph
paper provided on exercise sheet 3.
• Then check your answers on the following slides.
Questions
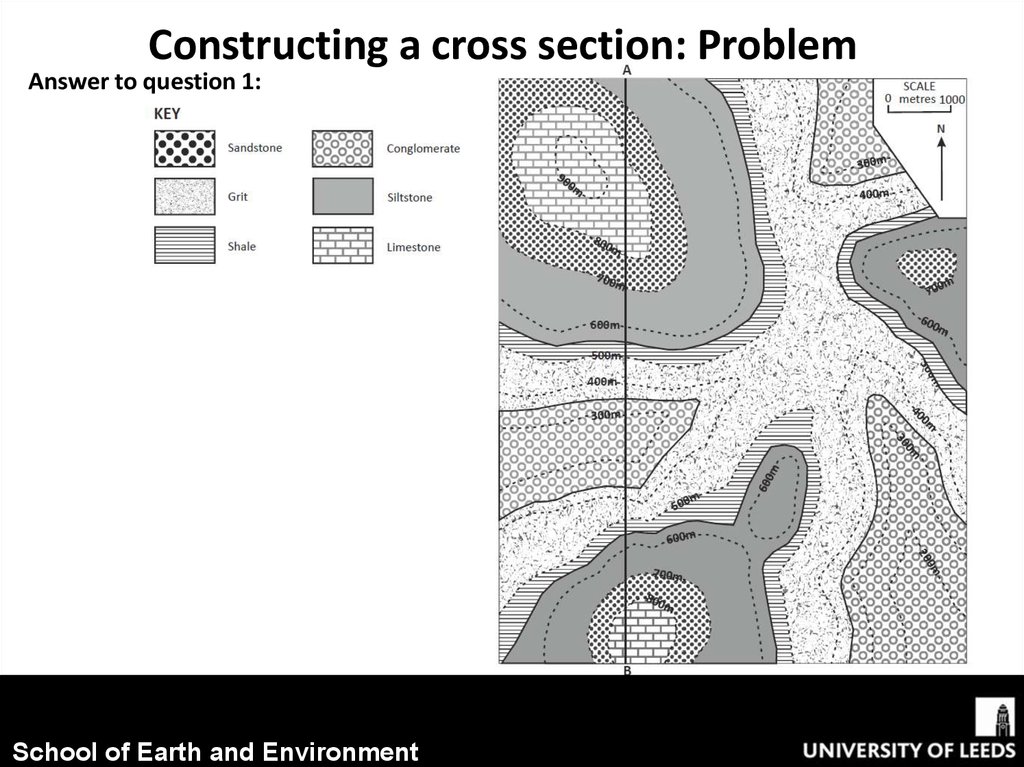
Geological outcrops are shown in the NW corner of the map.
1. Complete the geological outcrops over the whole map.
2. Draw a vertical columns showing each of the beds in stratigraphic order and to scale
(use a scale of 1cm = 100m). Indicate the actual thickness of each bed.
3. Draw a section along the line A-B.
School of Earth and Environment
14.
Constructing a cross section: ProblemAnswer to question 1:
School of Earth and Environment
15.
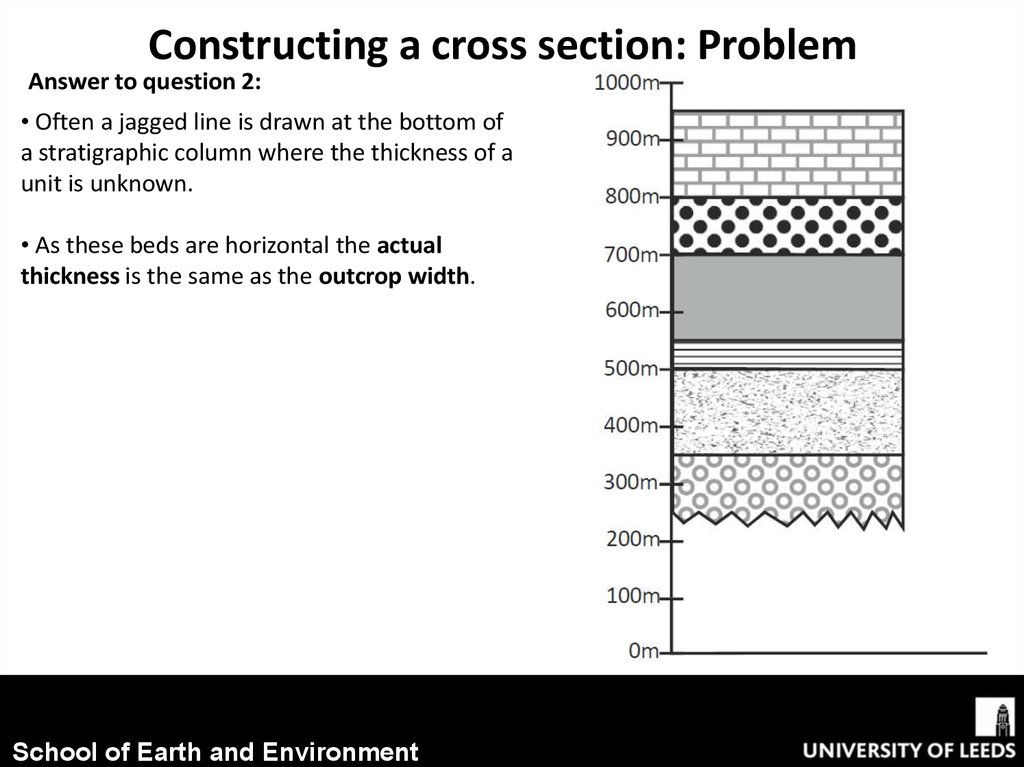
Constructing a cross section: ProblemAnswer to question 2:
• Often a jagged line is drawn at the bottom of
a stratigraphic column where the thickness of a
unit is unknown.
• As these beds are horizontal the actual
thickness is the same as the outcrop width.
School of Earth and Environment
16.
Constructing a cross section: ProblemAnswer to question 3:
School of Earth and Environment
17.
SummaryWe have now worked through:
• Some of the reasons why cross sections are important.
• How to construct a simple cross section from basic geological maps.
• How to calculate the true thickness of beds.
School of Earth and Environment