 Благітко Б.Я. 2019 р.")


 Благітко Б.Я. 2019 р.")
 electronics
Similar presentations:
")
")
")
")
")


Мікропроцесорна техніка (лекція 3)
1. Мікропроцесорна техніка (лекція 3) Благітко Б.Я. 2019 р.
PSoC Creator 4.2Designing with PSoC 3/5
2. PSoC@3/5 CapSense
PSoC Creator 4.2Designing with PSoC 3/5
3. CapSense
34. CapSense
45. CapSense
56. CapSense
67. CapSense
78. CapSense
89. CapSense
910. CapSense
1011. CapSense
1112. CapSense
1213. CapSense
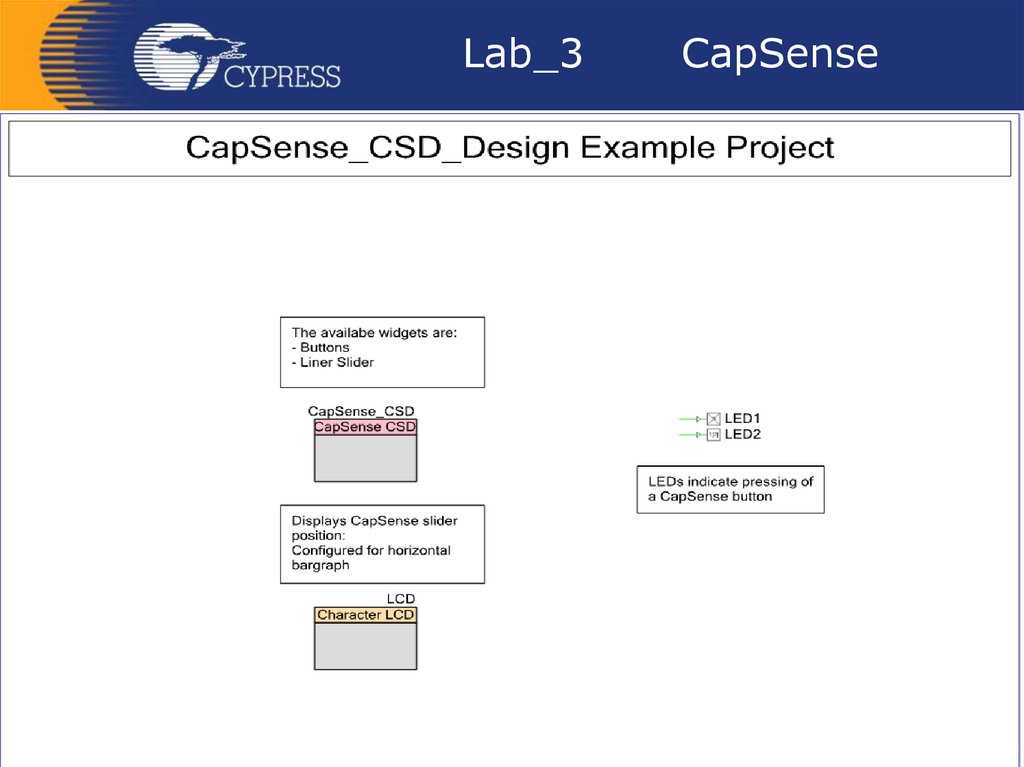
Overview:Activate and use
the 2 CapSense buttons and linear slider
on the DVK board
and
output the results
to the LCD Character screen and Leds.
13
14. CapSense
Objective:1.
For button presses, to indicate which
button is on by Leds.
2.
For the slider, to display the centered
position of the finger on the slider is
hexadecimal format and horizontal bar.
14
15. Модулі PSoC@3/5
1516. Модулі PSoC@3/5
1617. CapSense
Follow the below steps to do this:• The Lab already has the LCD Character
component installed and configured.
• Add a CapSense component from the
component catalog.
• In the general tab, configure the
CapSense component as in the image
below
17
18.
Lab_318
CapSense
19. CapSense
In the general tab configure the CapSense component19
20. CapSense
In the clock source tab, configure the CapSense component20
21. CapSense
2122. CapSense
In the buttons tab, configure the component22
23. CapSense
In the sliders tab configure the component23
24. CapSense
2425. CapSense
In the scan slots tab, configure the buttons (BTN_B1 and BTN_B2)25
26. CapSense
In the scan slots tab configure the slider elements (LS_SL1_e0-to-4)26
27. CapSense
Configure the pins tab in the .cydwr file27
28. Creator
2829. File – New - Projekt
2930. Empty PSoC 3 Design
3031.
Configure LCD31
32.
Configure CSD32
33.
Configure CSD33
34.
Configure CSD34
35.
Configure CSD35
36.
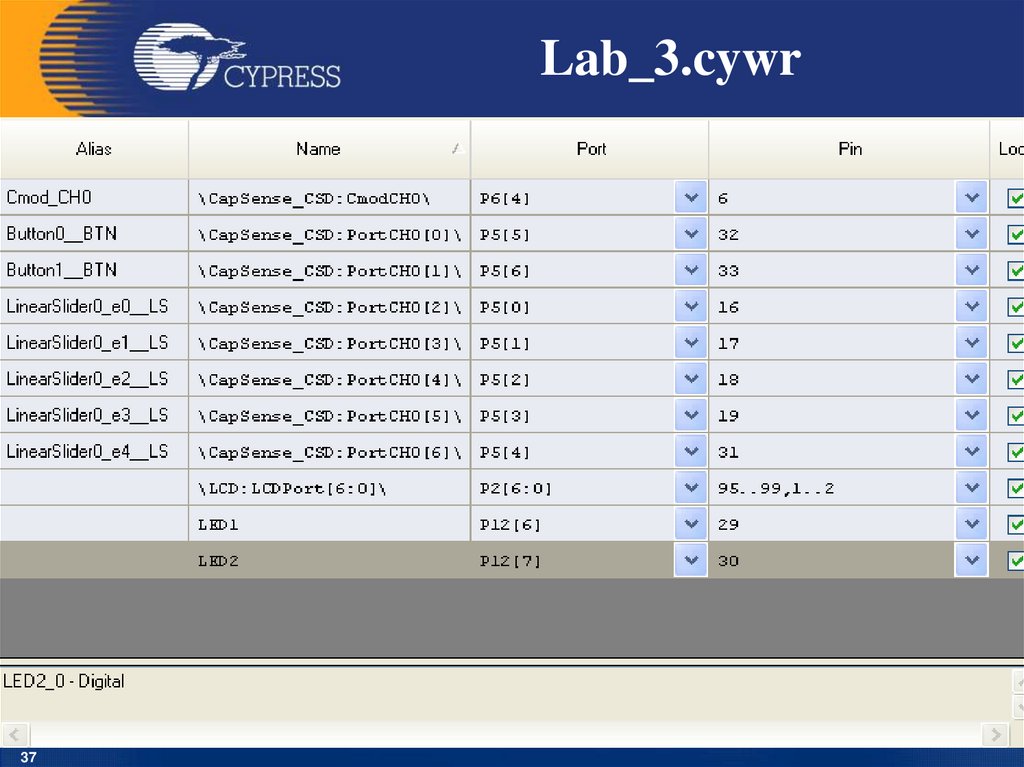
Configure CSDFor
CY8CKIT-030
and
CY8CKIT-050:
Reassign the CapSense LinearSlider and Buttons
in the ‘Pins’ tab of the Design-wide Resources file
to port 5. To be precise, reassign the 5 Slider
segments to P5[4:0], Button0 to P5[5], and
Button1 to P5[6]. Also ensure that the Cmod
capacitor is assigned to P6[4] in the pins tab of
the Design Wide Resources (.cydwr) file in PSoC
Creator.
36
37.
Lab_3.cywr37
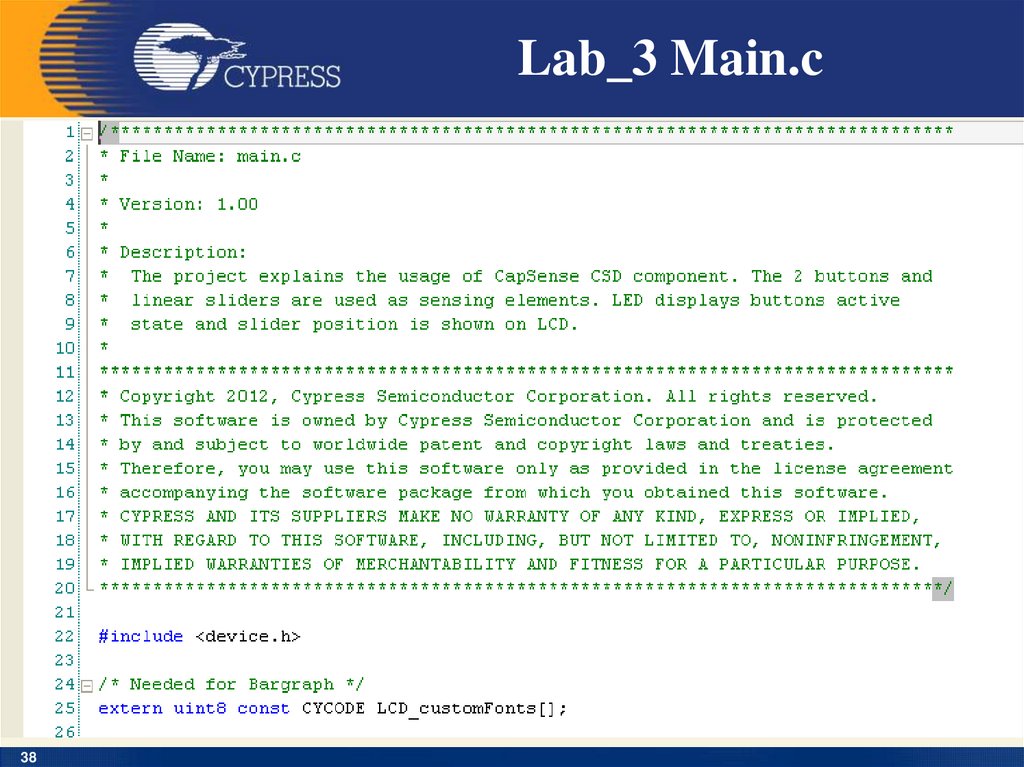
38.
Lab_3 Main.c38
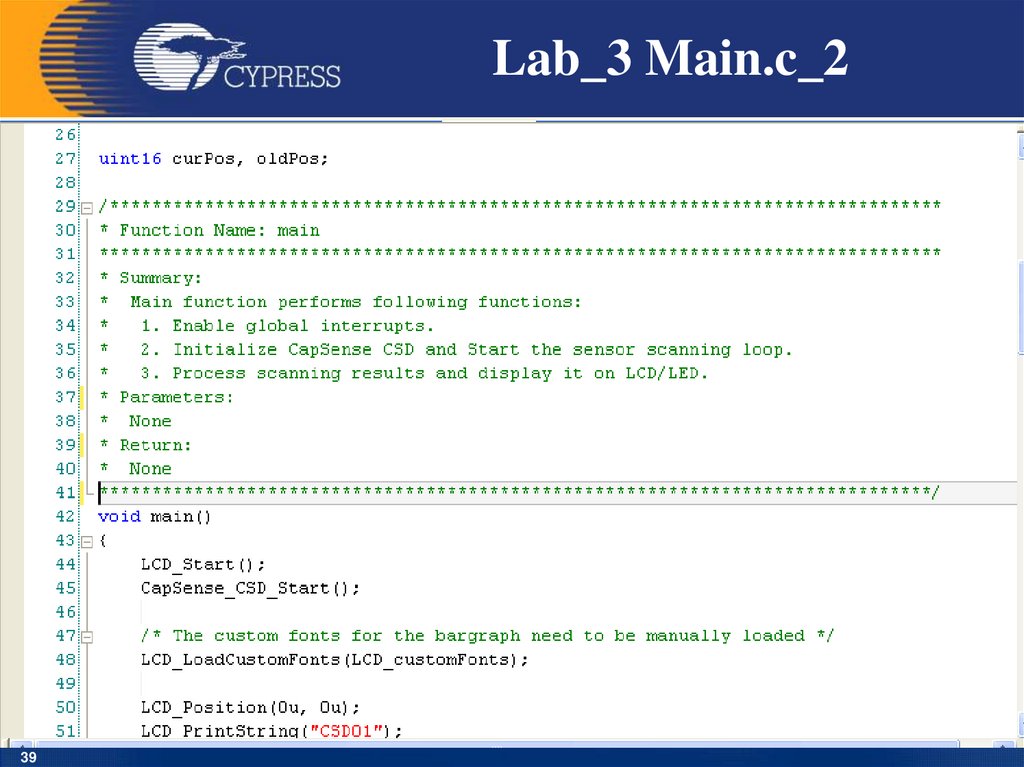
39.
Lab_3 Main.c_239
40.
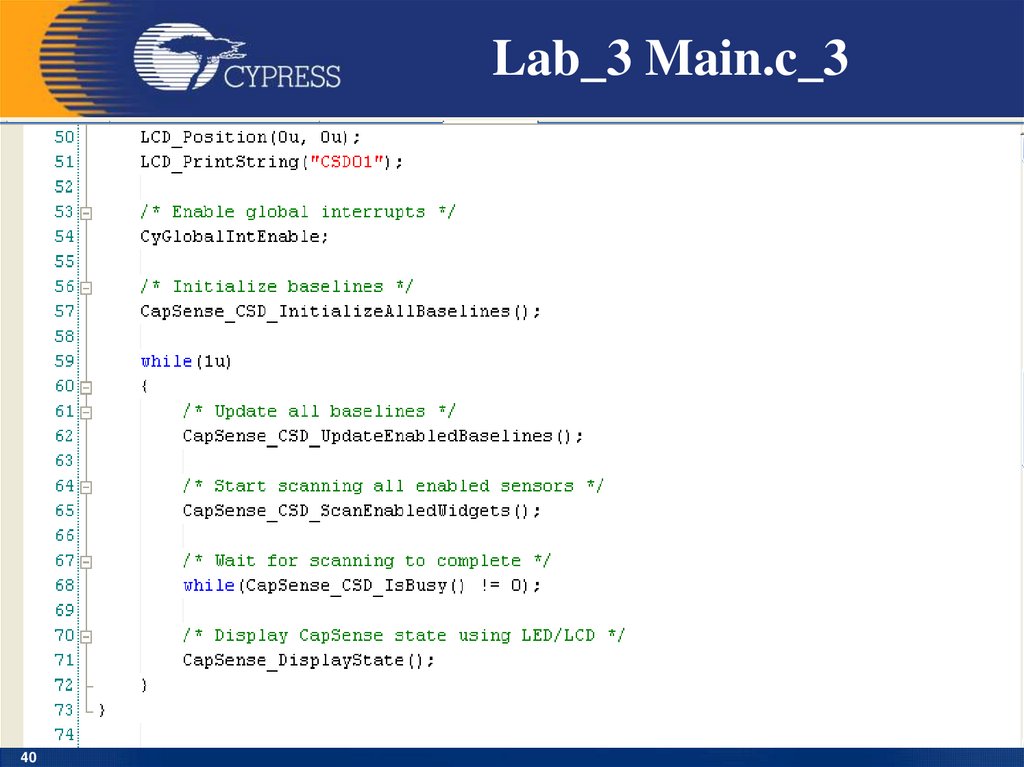
Lab_3 Main.c_340
41.
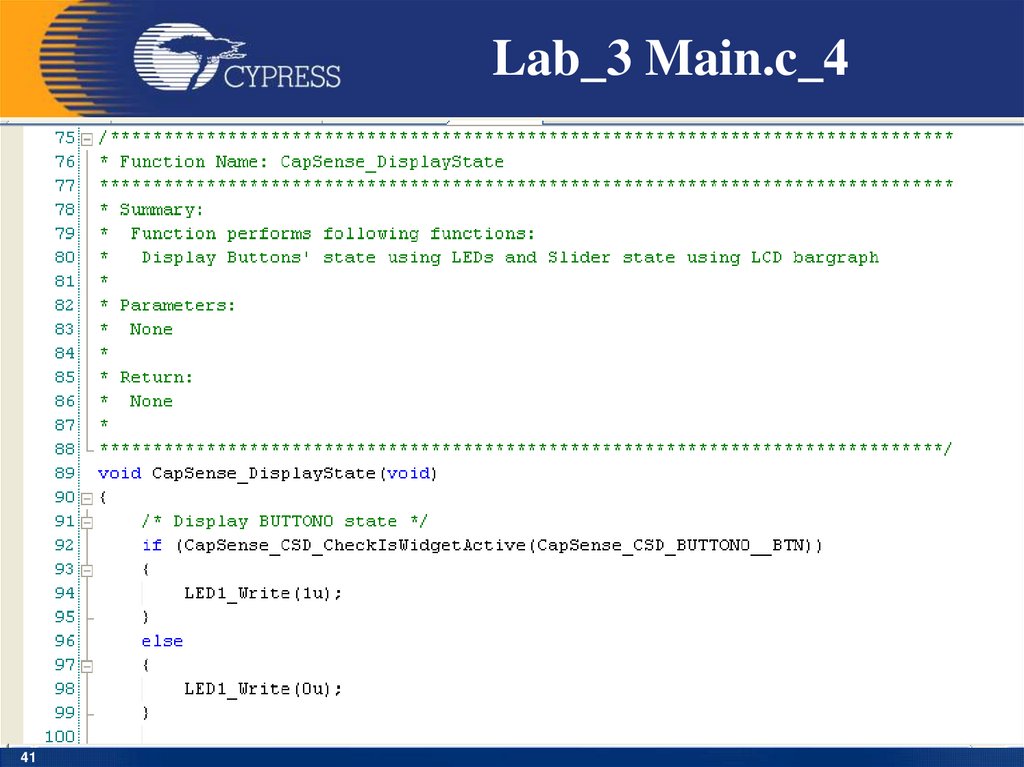
Lab_3 Main.c_441
42.
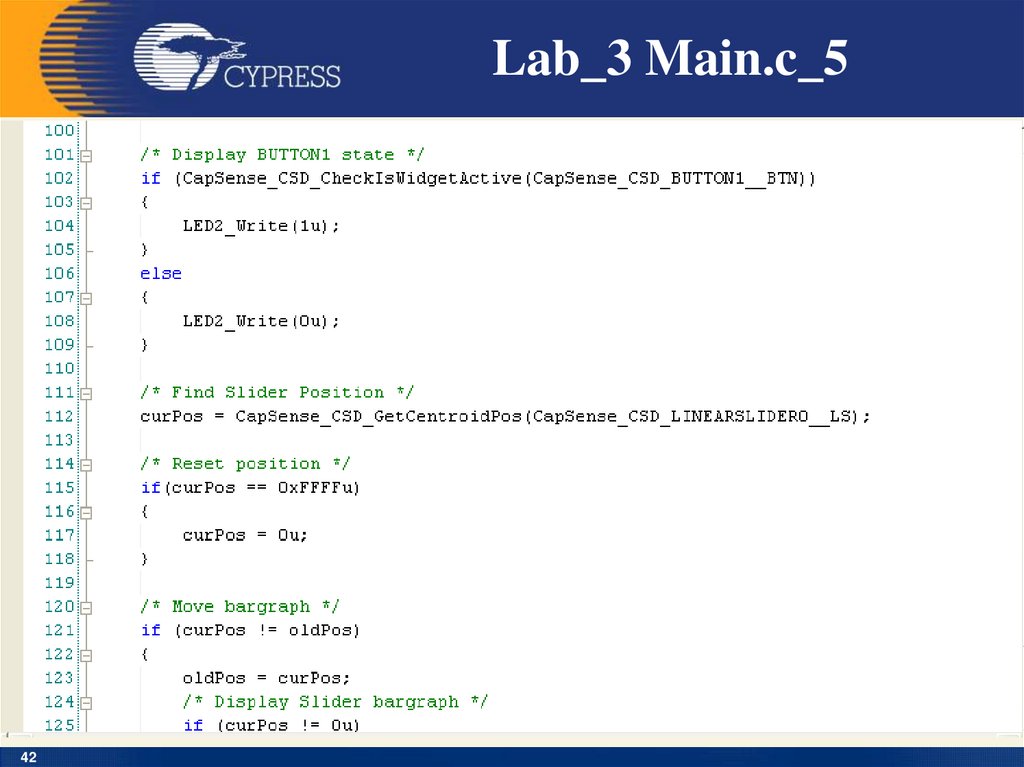
Lab_3 Main.c_542
43.
Lab_3 Main.c_643
44.
Lab_3CapSense
Expected output on LCD
44
45.
Lab_3CapSense
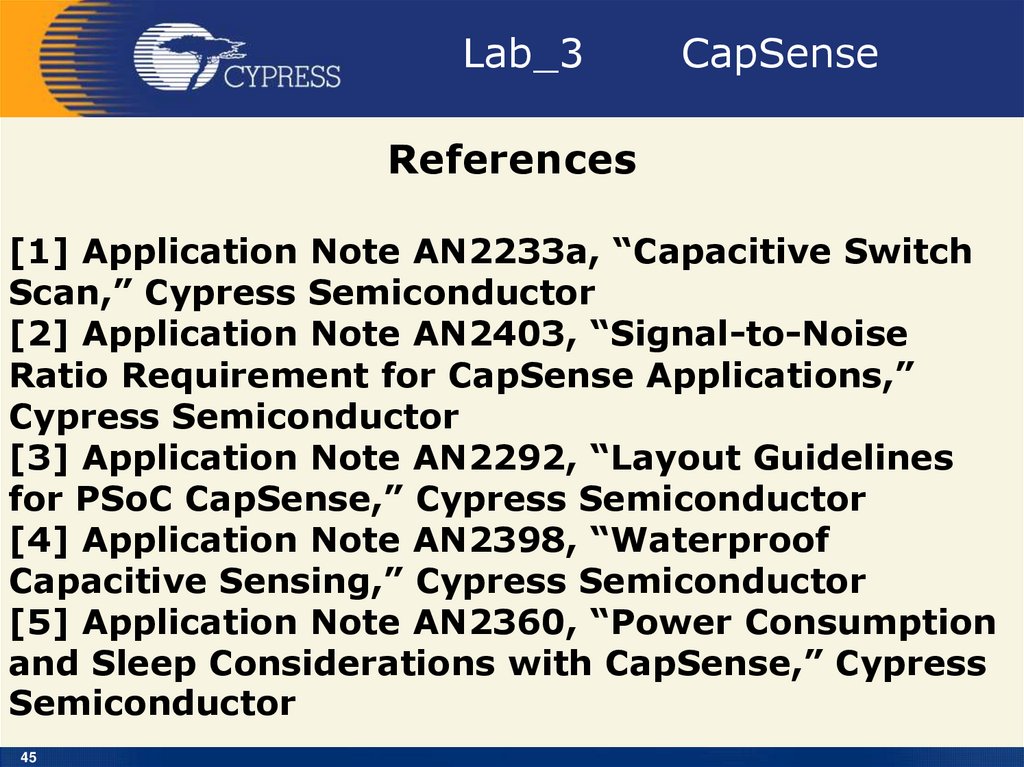
References
[1] Application Note AN2233a, “Capacitive Switch
Scan,” Cypress Semiconductor
[2] Application Note AN2403, “Signal-to-Noise
Ratio Requirement for CapSense Applications,”
Cypress Semiconductor
[3] Application Note AN2292, “Layout Guidelines
for PSoC CapSense,” Cypress Semiconductor
[4] Application Note AN2398, “Waterproof
Capacitive Sensing,” Cypress Semiconductor
[5] Application Note AN2360, “Power Consumption
and Sleep Considerations with CapSense,” Cypress
Semiconductor
45
46.
Lab_3CapSense
References (continue)
[6] Application Note AN2318, “EMC Design
Considerations for PSoC CapSense Applications,”
Cypress Semiconductor
[7] Application Note AN2394, “CapSense Best
Practices,” Cypress Semiconductor
[8] Application Note AN2397, “CapSense Data
Viewing Tool,” Cypress Semiconductor
46
47. Приклади застосування МК PSOC
На сайті фірмиCypress
знаходиться більше
200 Application
Notes і Reference
Designs, які
ілюструють області
застосування
мікроконтролерів
PSoC.
47
48. Мікропроцесорна техніка (лекція 3, кінець) Благітко Б.Я. 2019 р.
Мікропроцесорна
техніка
(лекція 3, кінець)
Благітко Б.Я.
2019 р.