Similar presentations:
Basic information of mold 3D products
1.
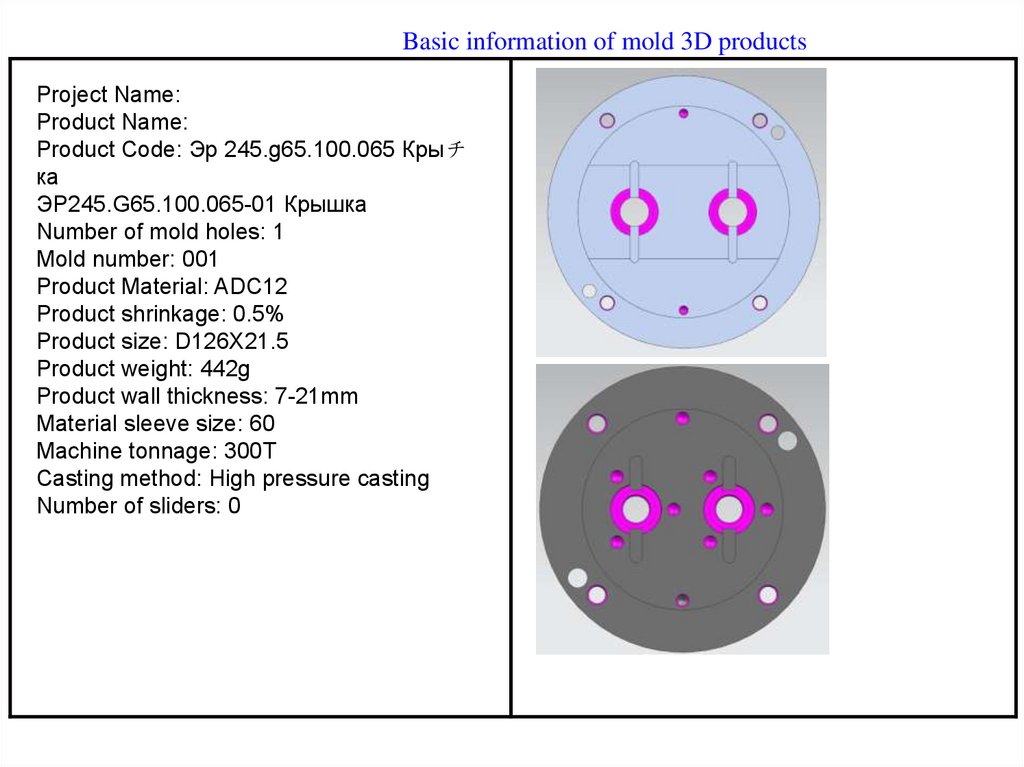
Basic information of mold 3D productsProject Name:
Product Name:
Product Code: Эр 245.g65.100.065 Крыチ
ка
ЭР245.G65.100.065-01 Крышка
Number of mold holes: 1
Mold number: 001
Product Material: ADC12
Product shrinkage: 0.5%
Product size: D126X21.5
Product weight: 442g
Product wall thickness: 7-21mm
Material sleeve size: 60
Machine tonnage: 300T
Casting method: High pressure casting
Number of sliders: 0
2.
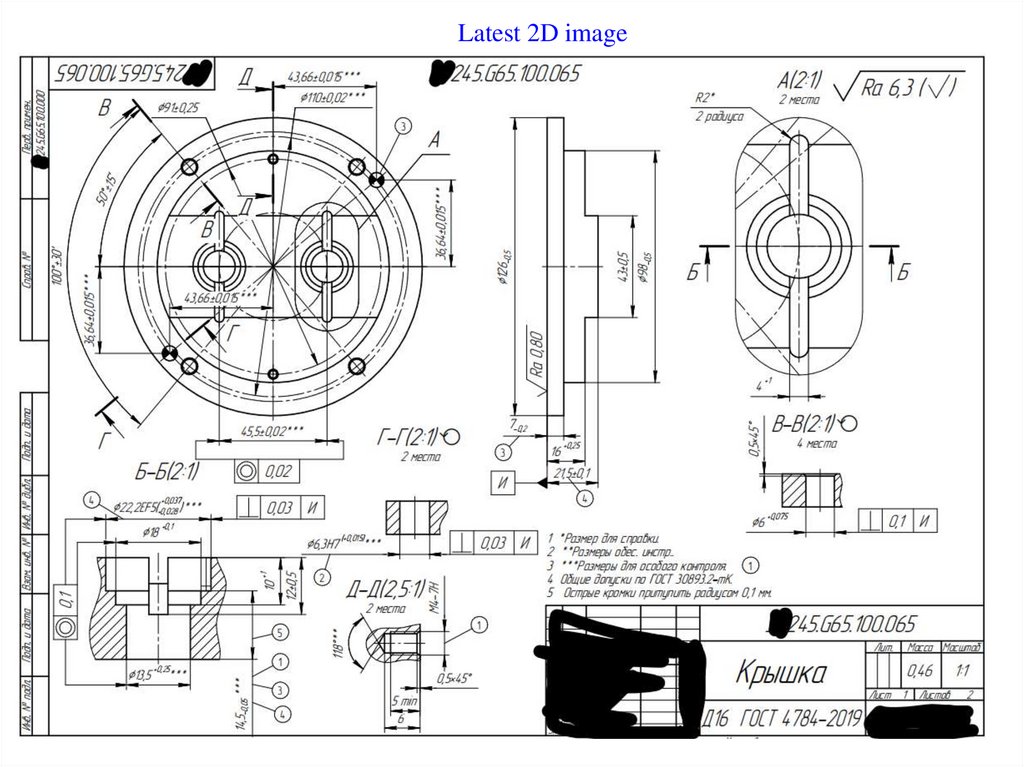
Latest 2D image3.
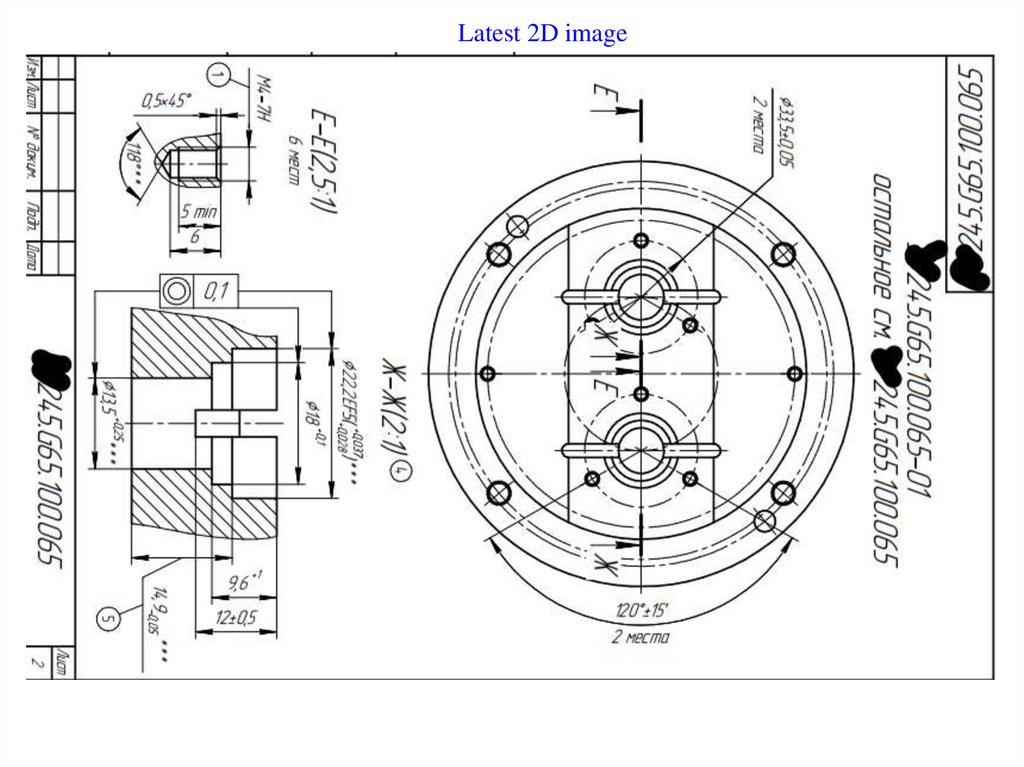
Latest 2D image4.
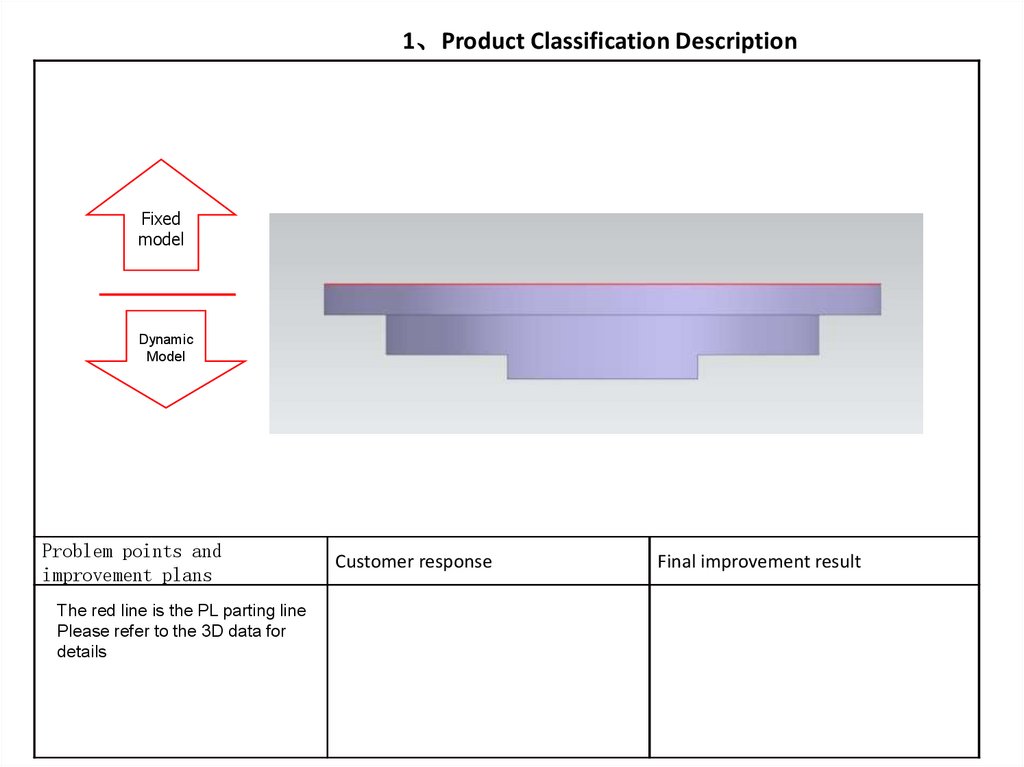
1、Product Classification DescriptionFixed
model
Dynamic
Model
Problem points and
improvement plans
The red line is the PL parting line
Please refer to the 3D data for
details
Customer response
Final improvement result
5.
2、Product Optimization DescriptionProblem points and improvement plans
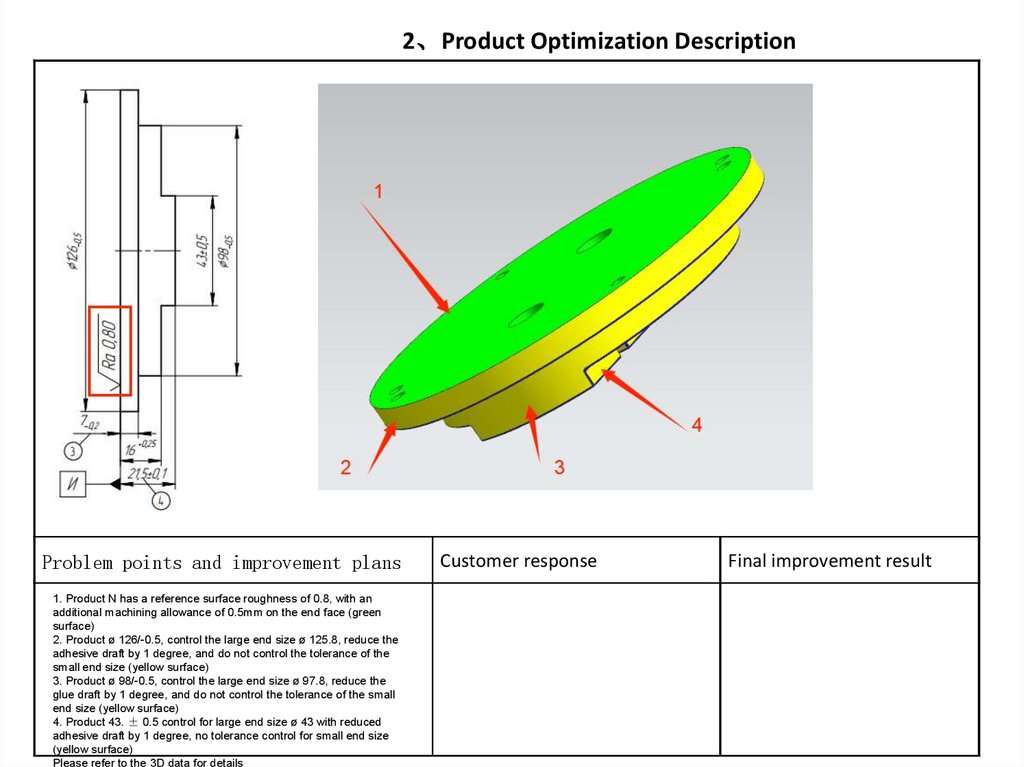
1. Product N has a reference surface roughness of 0.8, with an
additional machining allowance of 0.5mm on the end face (green
surface)
2. Product ø 126/-0.5, control the large end size ø 125.8, reduce the
adhesive draft by 1 degree, and do not control the tolerance of the
small end size (yellow surface)
3. Product ø 98/-0.5, control the large end size ø 97.8, reduce the
glue draft by 1 degree, and do not control the tolerance of the small
end size (yellow surface)
4. Product 43. ± 0.5 control for large end size ø 43 with reduced
adhesive draft by 1 degree, no tolerance control for small end size
(yellow surface)
Please refer to the 3D data for details
Customer response
Final improvement result
6.
2、Product Optimization DescriptionProblem points and improvement plans
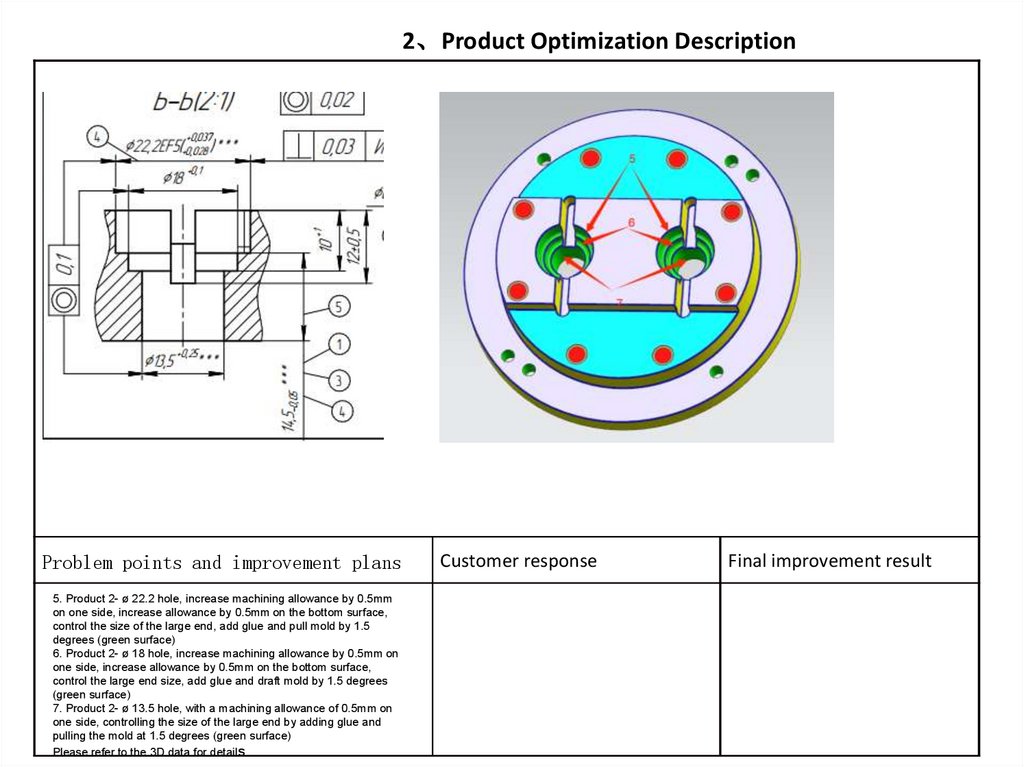
5. Product 2- ø 22.2 hole, increase machining allowance by 0.5mm
on one side, increase allowance by 0.5mm on the bottom surface,
control the size of the large end, add glue and pull mold by 1.5
degrees (green surface)
6. Product 2- ø 18 hole, increase machining allowance by 0.5mm on
one side, increase allowance by 0.5mm on the bottom surface,
control the large end size, add glue and draft mold by 1.5 degrees
(green surface)
7. Product 2- ø 13.5 hole, with a machining allowance of 0.5mm on
one side, controlling the size of the large end by adding glue and
pulling the mold at 1.5 degrees (green surface)
Please refer to the 3D data for details
Customer response
Final improvement result
7.
2、Product Optimization DescriptionProblem points and improvement plans
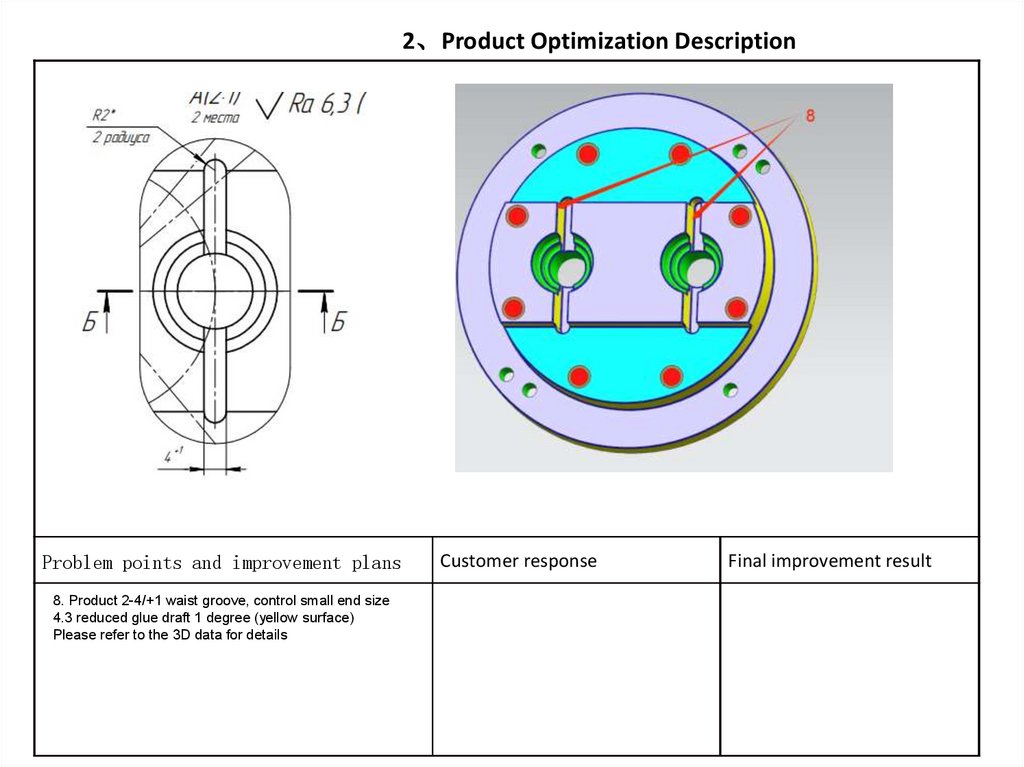
8. Product 2-4/+1 waist groove, control small end size
4.3 reduced glue draft 1 degree (yellow surface)
Please refer to the 3D data for details
Customer response
Final improvement result
8.
2、Product Optimization DescriptionProblem points and improvement plans
9. Product 2- ø 6.3 positioning pin hole and 4- ø 6-hole
machining, controlling the large end size of ø 5 with
adhesive and 1.5 degrees of demolding (green surface)
Please refer to the 3D data for details
Customer response
Final improvement result
9.
2、Product Optimization DescriptionProblem points and improvement plans
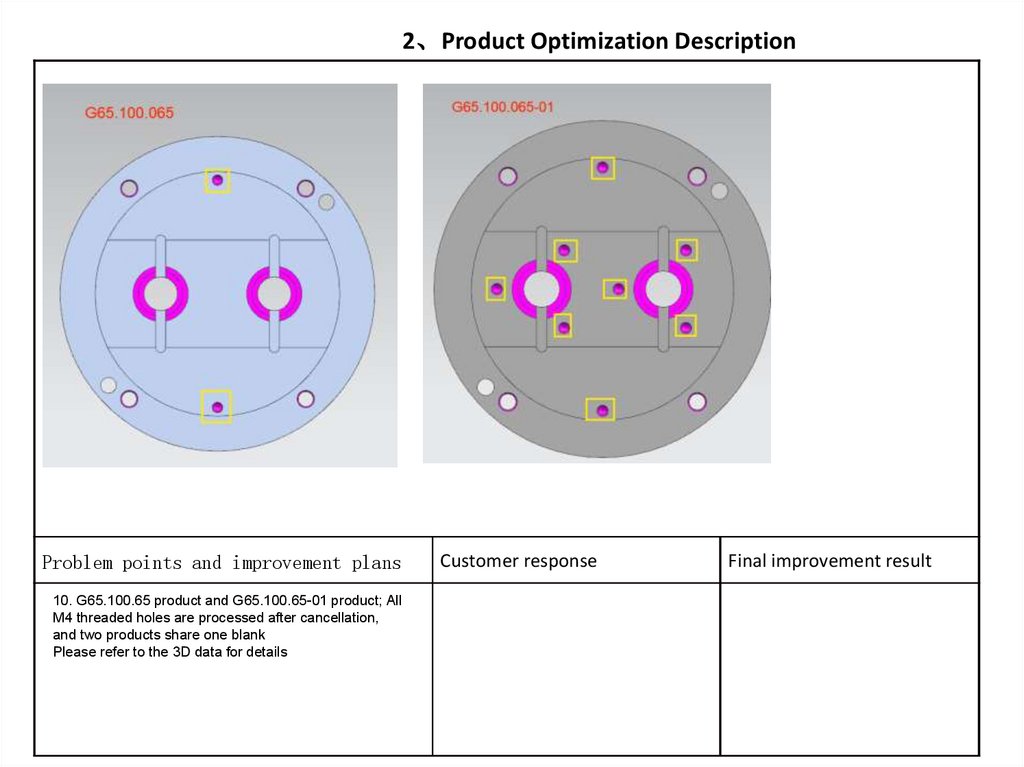
10. G65.100.65 product and G65.100.65-01 product; All
M4 threaded holes are processed after cancellation,
and two products share one blank
Please refer to the 3D data for details
Customer response
Final improvement result
10.
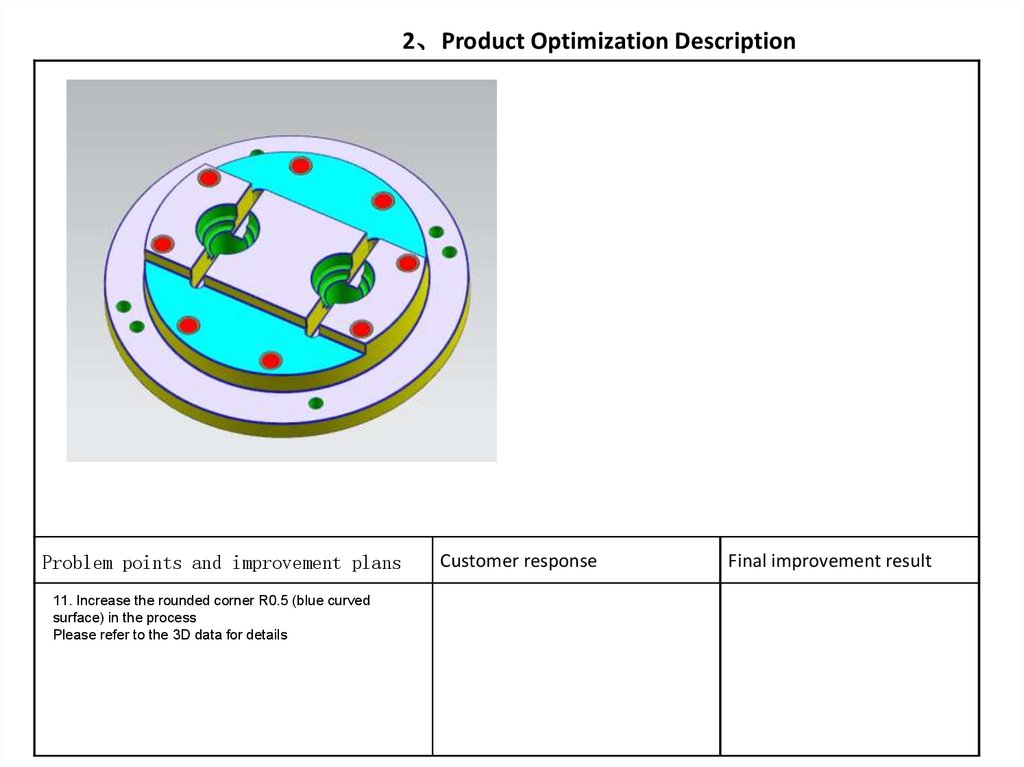
2、Product Optimization DescriptionProblem points and improvement plans
11. Increase the rounded corner R0.5 (blue curved
surface) in the process
Please refer to the 3D data for details
Customer response
Final improvement result
11.
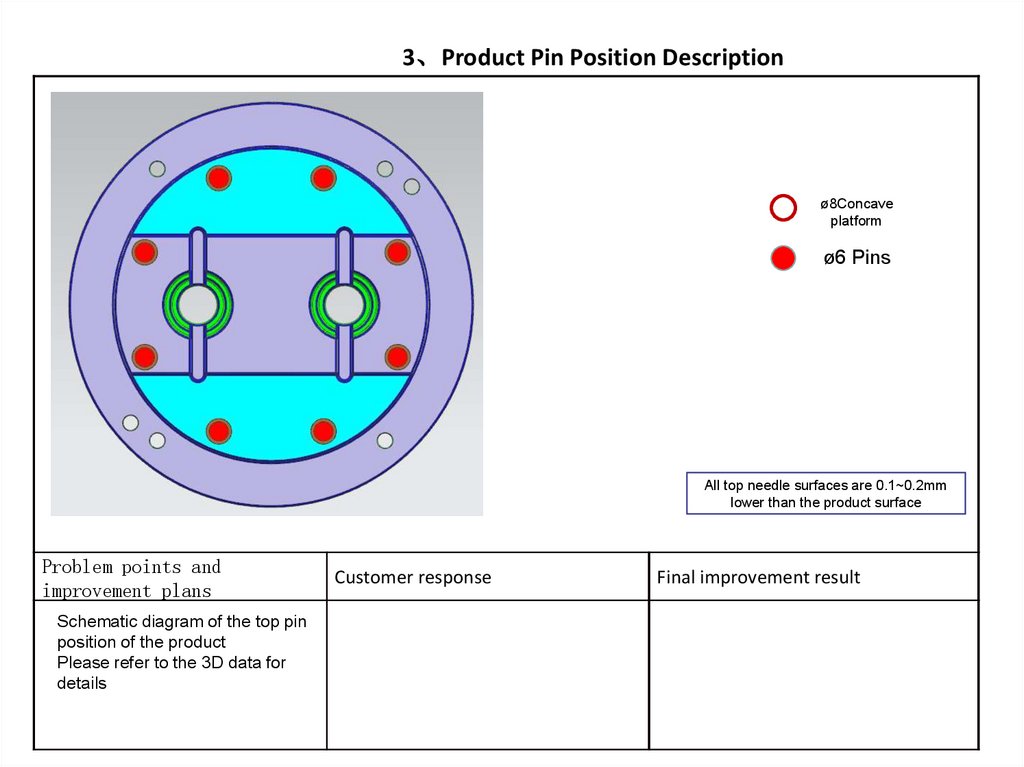
3、Product Pin Position Descriptionø8Concave
platform
ø6 Pins
All top needle surfaces are 0.1~0.2mm
lower than the product surface
Problem points and
improvement plans
Schematic diagram of the top pin
position of the product
Please refer to the 3D data for
details
Customer response
Final improvement result

 industry


