


 art
artSimilar presentations:


Outdoor Training
1.
Outdoor TrainingDay 1
2.
● Introduction● Different types of sketching
● Work features with roombox
● Step-by-step guide to working with orders
3.
Introduction4.
Main types of orders● Only walls
There can be a single wall or
multiple walls
● Only roof
● Walls and roof
5.
Additional order types● Fences
● Swimming pools
6.
Difficulties that may happen in the jobThe target house has been destroyed or not built
In this case we draw the object as it was supposedly before it was destroyed
No address
This is possible at this stage of the project, but address will be mandatory
in the future
The house doesn’t show up on maps
Sattelite images may have been taken in different seasons or may not be
updated
7.
Ways of sketching8.
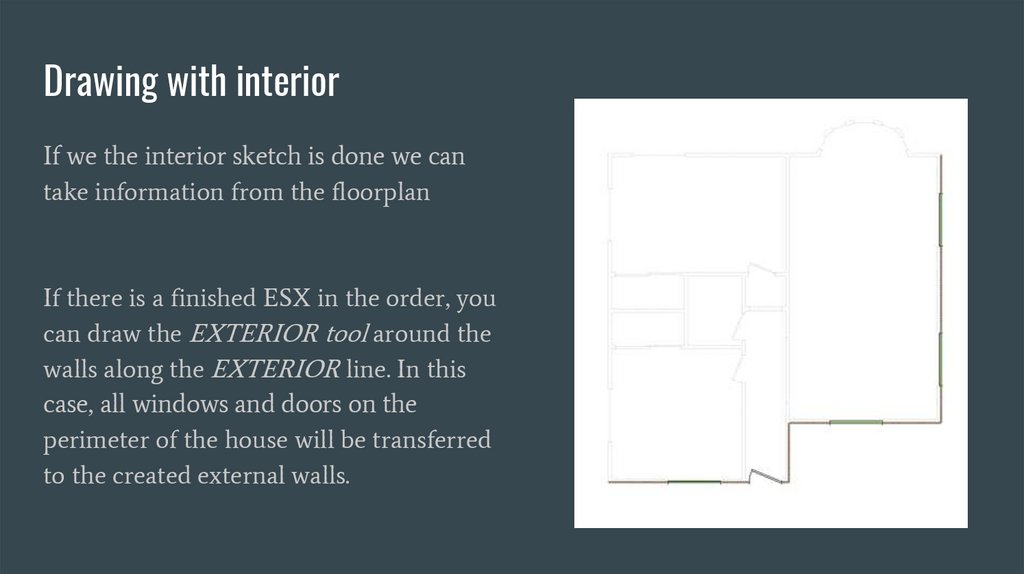
Drawing with interiorIf we the interior sketch is done we can
take information from the floorplan
If there is a finished ESX in the order, you
can draw the EXTERIOR tool around the
walls along the EXTERIOR line. In this
case, all windows and doors on the
perimeter of the house will be transferred
to the created external walls.
9.
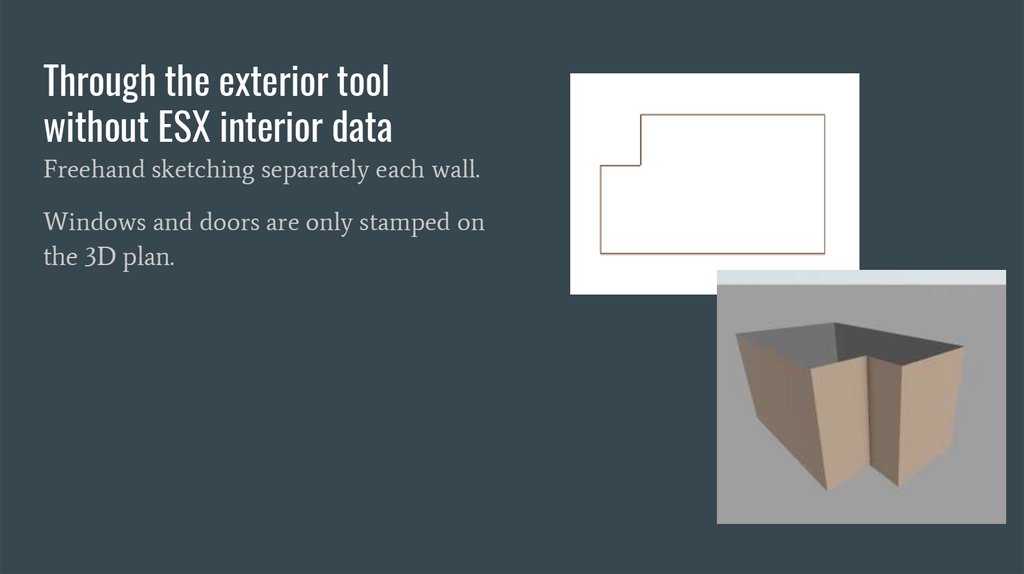
Through the exterior toolwithout ESX interior data
Freehand sketching separately each wall.
Windows and doors are only stamped on
the 3D plan.
10.
Through the converting of the roofThe first step is to draw the roof either in
the EXTERIOR or MAIN floor tab and
then convert it to a 3D exterior roof
where the EXTERIOR walls are
automatically added.
Complex compound roofs can be
converted in several steps piece by piece.
Double walls need to be monitored and
removed.
11.
Features of working with roomboxes12.
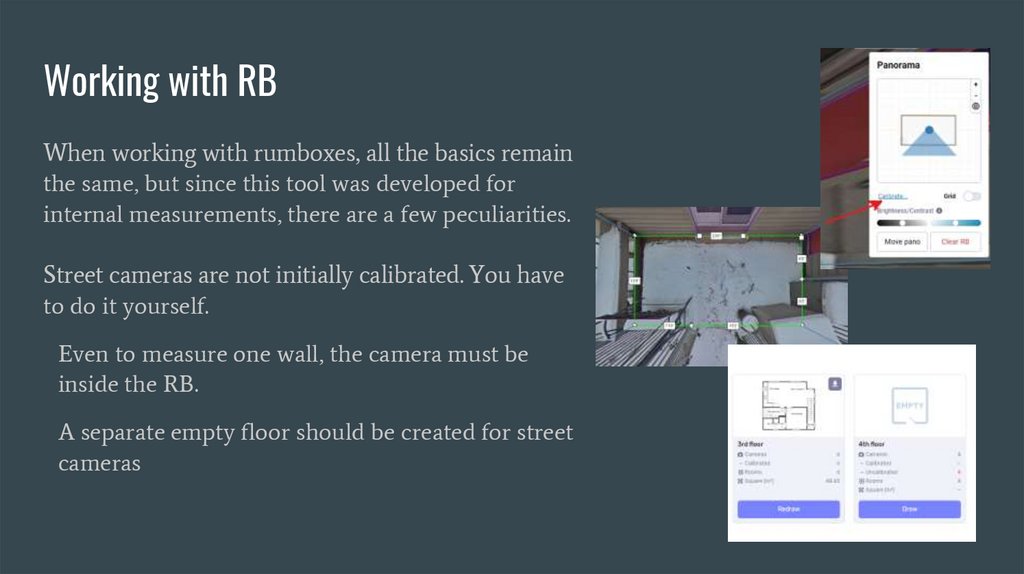
Working with RBWhen working with rumboxes, all the basics remain
the same, but since this tool was developed for
internal measurements, there are a few peculiarities.
Street cameras are not initially calibrated. You have
to do it yourself.
Even to measure one wall, the camera must be
inside the RB.
A separate empty floor should be created for street
cameras
13.
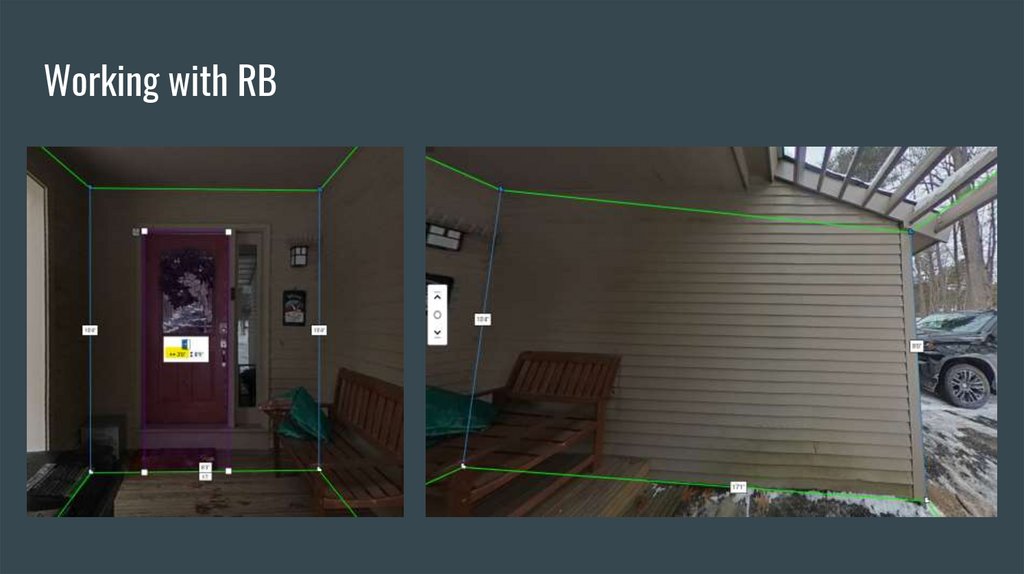
Working with RB.
Since it is very likely that the camera will be located
above/below the level of the walls connecting the ground, you
should not trust such measurements.
We start by looking for a reference element. The ideal
situation is when we can accurately measure the dimensions
of the building on the maps (the walls and elements are
clearly visible from the maps, which can also be seen from
the tour cameras).
If it is not possible to take the exact dimensions on the maps,
then we need to rely on other elements (door, window,
fence), whose dimensions we know and understand. We put a
RB around this element, and only after that we can use its
(RB) measurements
14.
Working with RB15.
Step-by-step guide to working withorders
16.
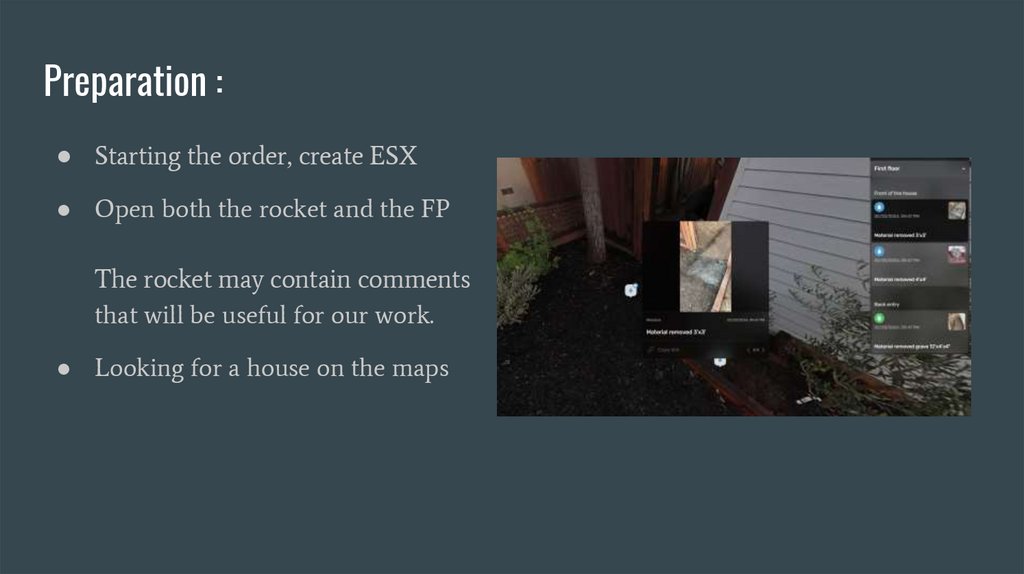
Preparation :● Starting the order, create ESX
● Open both the rocket and the FP
The rocket may contain comments
that will be useful for our work.
● Looking for a house on the maps
17.
Process● Make the necessary measurements via maps and/or RB
● Transfer by any type to Xactimate
● Add windows, doors, stairs, decks and other elements
18.
Finishing● Filling the table with test/live orders
● Logging the time without finishing the order
● Report to the esx-outdoors-test channel