Similar presentations:
Vault dweller’s survival guide
1.
2.
RESTRICTEDVAULT DWELLER’S
SURVIVAL GUIDE
ISSUED BY VAULT-TEC DOCUMENTATION
DEPARTMENT, JANUARY, 2077
NOTICE.––This document contains information affecting the
national defense of the United States within the meaning of
the New Amended Espionage Act, 50 U.S.C., 31 and 32. Its
transmission or the revelation of its contents in any manner
to an unauthorized person is prohibited by the law.
RESTRICTED
VDSG VTB-OO1-13
3.
VDSG – RESTRICTED – VTB-OO1-13CONTENTS
Section I.
Welcome to the Vault of the Future
Page
General ................................................1—1
Important Vault Statistics ............1—1
Section II.
Page
Nuclear Blast Effects ....................1—2
Simulation (Tutorial)
SimTek Operations ........................2—1
Section III. Vault Personnel (Characters)
General ..............................................3—1
Standard Personnel Records ....3—1
Creating a New Personnel
Record ..........................................3—3
Derived Statistics ..........................3—7
Complete Skill List ......................3—10
Traits..................................................3—14
Character Editor Options ........3—18
Section IV. Instrumentation (Interface)
General ..............................................4—1
Main Menu ........................................4—1
Character Selection Screen......4—2
Game View ......................................4—3
Interface Bar....................................4—3
Inventory Bar vs. Cursors..........4—8
Cursors ..............................................4—8
Action Icons....................................4—10
Inventory ........................................4—12
Skilldex ............................................4—16
Section V.
Character Screen ........................4—17
RobCo PIPBoy 2000 ................4—20
Automap ........................................4—24
World Map ..................................4—24
Terrain ............................................4—26
Town Maps ..................................4—27
Dialogue..........................................4—28
Options ..........................................4—33
Preferences ..................................4—35
Conflict Resolution (Combat)
General ..............................................5—1
Starting Combat ............................5—2
Actions in Combat ........................5—2
Chance to Hit ..................................5—4
Ranged Weapons ........................5—6
Hand to Hand Combat ................5—8
Damage..............................................5—9
Armor................................................5—12
Ending Combat ..............................5—13
Equipment ........................................5—14
Experience ......................................5—21
Perks ................................................5—23
Section VI. Appendices
(1) Hints & Tips ..............................A—1
(2) Credits ........................................A—4
(3) Customer Support ................A—6
(4) Warranty ..................................A—7
(5) World Wide Web Site ......A—8
(6) Survival Recipes ....................A—9
(7) Quick Keys..............................A—10
Manual By: Chris Taylor Manual Design & Layout By: Ed Rubin
Manual Art By: Tramell Ray Isaac, Jason Anderson, Leonard Boyarsky,
and Scott Rodenhizer
Contents
RESTRICTED
4.
WELCOME TOTHE VAULT OF THE FUTURE
Section I.
1
VDSG VTB-001-13-1
5.
VDSG – RESTRICTED – VTB-OO1-13GENERAL
Welcome to Vault-13, the latest in a series of public defense
works from Vault-Tec, your contractor of choice when it comes to the
best in nuclear shelters. Vault-Tec, America’s Final Word in Homes.
This document, VTB-001, the Vault Dwellers Survival Guide, is for
the events following a world-wide nuclear war. In the case of a limited scale nuclear war, or other world ending catastrophe, please
refer to the appropriate documentation (see also page 1—8):
End of World Cause
Limited Scale
Nuclear War
Disease
Starvation
Flooding
Meteor
Document #
VTB-002
VTD-001
VTR-003
VTF-100
VTM-020B
Title
Vault Dwellers Survival
Guide (abridged version)
Coping with Mr. Virus!
How to Eat Rat
Flotation Homes & Seaweed
How to Dodge Falling Rocks*
*Document not available at this time, will be available the 3rd quarter of 2078.
While we hope that peace will prevail and the need for such
have
Wefollowyou.life
happened
could have
what
let up
Don’t
from the
ground
to provide
the best
chancebother
for a good
and now.
here
problems to
ing nuclear
armageddon.
It deal
is thewith
dutyin
of the
every
American
citizen to
enough
learn and use the skills necessary for -a Overseer
comfortable Vault life. The
best place to start is with a dek and if you try to read this than you.
The Vault series of survival shelters are designed from the
ground up to provide the best chance for a good life following nuclear
armageddon. It is the duty of every American citizen to learn and
use the skills necessary for a comfortable Vault life. The best place
to start is with a description of your new home.
IMPORTANT VAULT STATISTICS
Vault Number ............................13
Starting construction date ....August 2063
Ending construction date ......March 2069
Starting Budget ........................$400,000,000,000
Final Budget, with interest ..$645,000,000,000
Total number of occupants ....1,000 (at capacity)
Total duration ..........................10 years (at capacity)
Number of living quarters ......100 (hot bunking required if at
maximum capacity)
RESTRICTED
1—1
1
6.
VDSG – RESTRICTED – VTB-OO1-13Door thickness ..........................4 yards, steel
Earth coverage..........................3,200,000 tons of soil, at 200 feet
Computer control system ......Think machine
Primary power supply ............Geo-thermal
Secondary power supply ........General Atomics Nuclear Power
backup systems
Power requirements................3.98mkw/day
Stores ..........................................Complete construction equipment,
hydro-agricultural farms, water
purification from underground
river, defensive weaponry to equip
10 men, communication, social and
entertainment files (for total
duration)
NUCLEAR BLAST EFFECTS
Vault-13 is designed to provide protection from the effects of a
nuclear blast. To better understand the protection provided, we have
included a section from the High Energy Weapons FAQ that explains
how a nuclear blast causes damage.
The first thing bomb victims experience is the intense flux of photons from the blast, which releases 70-80% of the bomb's energy. The
effects go up to third degree thermal burns and are not a pretty sight.
Initial deaths are due to this effect.
The next phenomenon is the supersonic blast front. You see it
before you hear it. The pressure front has the effect of blowing away
anything in its path.
After the front comes the overpressure phase. It would feel like
being underwater a few hundred meters. (At a few thousand meters
under the sea, pressurized hulls implode.) The pressure gradually dies
off, and there is a negative overpressure phase, with a reversed blast
wind. This reversal is due to air rushing back to fill the void left by the
explosion.
The air gradually returns to normal atmospheric pressure. At
this stage, fires caused by electrical destruction and ignited debris turn
the place into a firestorm.
Then come the middle term effects such as keloid formation and
retinal blastoma. Genetic or hereditary damage can appear up to
forty years after initial irradiation.
1—2
RESTRICTED
7.
VDSG – RESTRICTED – VTB-OO1-13ATMOSPHERIC EFFECTS OF BLASTS
The Mushroom Cloud. The heat from fusion and fission
instantaneously raises the surrounding air to 10 million degrees C.
This superheated air plasma gives off so much light that it looks
brighter than the sun, and is visible hundreds of kilometers (km)
away. The resultant fireball quickly expands. It is made up of hot air,
and hence rises at a rate of a few hundred meters per second. After a
minute or so, the fireball has risen to a few kilometers, and has
cooled off to the extent that it no longer radiates.
The surrounding cooler air exerts some drag on this rising air,
which slows down the outer edges of the cloud. The unimpeded inner
portion rises a bit quicker than the outer edges. A vacuum effect
occurs when the outer portion occupies the vacuum left by the higher inner portion. The result is a smoke ring.
The inner material gradually expands out into a mushroom
cloud, due to convection. If the explosion is on the ground, dirt and
radioactive debris get sucked up the stem, which sits below the fireball.
Collisions and
ionization of the cloud
particles result in
lightning bolts flickering to the ground.
Initially, the cloud
is orange-red due to a
chemical reaction
when the air is heated.
When the cloud cools
to air temperature, the
water vapor starts to
condense. The cloud
turns from red to
white.
In the final
stages, the cloud can
get about 100km
across and 40km
high, for a megaton
class explosion.
If you see the flash, duck and cover!
RESTRICTED
1—3
1
8.
VDSG – RESTRICTED – VTB-OO1-13Electromagnetic Pulse (EMP). A nuclear explosion gives off
radiation at all wavelengths of light. Some is in the radio/radar portion of the spectrum - the EMP effect. The EMP effect increases the
higher you go into the atmosphere. High altitude explosions can
knock out electronics by inducing a current surge in closed circuit
metallic objects - electronics, power lines, phone lines, TVs, radios,
etc. The damage range can be over 1000km.
OVERVIEW OF IMMEDIATE EFFECTS
The three categories of immediate effects are: blast, thermal
radiation (heat), and prompt ionizing or nuclear radiation. Their relative importance varies with the yield of the bomb. At low yields, all
three can be significant sources of injury. With an explosive yield of
about 2.5 kilotons (kT), the three effects are roughly equal. All are
capable of inflicting fatal injuries at a range of 1km.
The fraction of a bomb's yield emitted as thermal radiation,
blast, and ionizing radiation is essentially constant for all yields, but
the way the different forms of energy interact with air and target
vary dramatically.
Air is essentially transparent to thermal radiation. The thermal
radiation affects exposed surfaces, producing damage by rapid heating. A bomb that is 100 times larger can produce equal thermal radiation intensities over areas 100 times larger. The area of an (imaginary) sphere centered on the explosion increases with the square of
the radius. Thus the destructive radius increases with the square
root of the yield (this is the familiar inverse square law of electromagnetic radiation). Actually the rate of increase is somewhat less,
partly due to the fact that larger bombs emit heat more slowly which
reduces the damage produced by each calorie of heat. It is important
to note that the area subjected to damage by thermal radiation
increases almost linearly with yield.
Blast effect is a volume effect. The blast wave deposits energy in
the material it passes through, including air. When the blast wave
passes through solid material, the energy left behind causes damage.
When it passes through air it simply grows weaker. The more matter
the energy travels through, the smaller the effect. The amount of
matter increases with the volume of the imaginary sphere centered
on the explosion. Blast effects thus scale with the inverse cube law
which relates radius to volume.
The intensity of nuclear radiation decreases with the inverse
square law like thermal radiation. However nuclear radiation is also
1—4
RESTRICTED
9.
VDSG – RESTRICTED – VTB-OO1-13strongly absorbed by the air it travels through, which causes the
intensity to drop off much more rapidly.
These scaling laws show that the effects of thermal radiation
grow rapidly with yield (relative to blast), while those of radiation
rapidly decline.
In a small nuclear attack (bomb yield approx. 15kT) casualties
(including fatalities) would be seen from all three causes. Burns
(including those caused by an ensuing fire storm) would be the most
prevalent serious injury (two thirds of those who would die the first
day would be burn victims), and occur at the greatest range. Blast
and burn injuries would be found in 60-70% of all survivors. People
close enough to suffer significant radiation illness would be well
inside the lethal effects radius for blast and flash burns, as a result
only 30% of injured survivors would show radiation illness. Many of
those people would be sheltered from burns and blast and thus
escape the main effects. Even so, most victims with radiation illness
would also have blast injuries or burns as well.
With yields in the range of hundreds of kilotons or greater (typical for strategic warheads) immediate radiation injury becomes
insignificant. Dangerous radiation levels only exist so close to the
explosion that surviving the blast is impossible. On the other hand,
fatal burns can be inflicted well beyond the range of substantial blast
damage. A 20 megaton bomb can cause potentially fatal third degree
burns at a range of 40km, where the blast can do little more than
break windows and cause superficial cuts.
A convenient rule of thumb for estimating the short-term fatalities from all causes due to a nuclear attack is to count everyone inside
the 5 psi blast overpressure contour around the hypocenter as a fatality. In reality, substantial numbers of people inside the contour will
survive and substantial numbers outside the contour will die, but the
assumption is that these two groups will be roughly equal in size and
balance out. This completely ignores any possible fallout effects.
OVERVIEW OF DELAYED EFFECTS
Radioactive Contamination. The chief delayed effect is
the creation of huge amounts of radioactive material with long
lifetimes (half-lifes ranging from days to millennia). The primary
source of these products is the debris left from fission reactions. A
potentially significant secondary source is neutron capture by
non-radioactive isotopes both within the bomb and in the outside
environment.
RESTRICTED
1—5
1
10.
VDSG – RESTRICTED – VTB-OO1-13When atoms fission they can split in some 40 different ways, producing a mix of about 80 different isotopes. These isotopes vary
widely in stability; some are completely stable while others undergo radioactive decay with half-lifes of fractions of a second. The
decaying isotopes may themselves form stable or unstable daughter isotopes. The mixture thus quickly becomes even more complex, some 300 different isotopes of 36 elements have been identified in fission products.
Short-lived isotopes release their decay energy rapidly, creating
intense radiation fields that also decline quickly. Long-lived isotopes
release energy over long periods of time, creating radiation that is
much less intense but more persistent. Fission products thus initially have a very high level of radiation that declines quickly, but as
the intensity of radiation drops, so does the rate of decline.
A useful rule-of-thumb is the "rule of sevens". This rule
states that for every seven-fold increase in time following a fission
detonation (starting at or after 1 hour), the radiation intensity
decreases by a factor of 10. Thus after 7 hours, the residual fission
radioactivity declines 90%, to one-tenth its level of 1 hour. After
7*7 hours (49 hours, approx. 2 days), the level drops again by
90%. After 7*2 days (2 weeks) it drops a further 90%; and so on
for 14 weeks. The rule is accurate to 25% for the first two weeks,
and is accurate to a factor of two for the first six months. After 6
months, the rate of decline becomes much more rapid. The rule of
sevens corresponds to an approximate t^-1.2 scaling relationship.
These radioactive products are most hazardous when they
settle to the ground as "fallout". The rate at which fallout settles
depends very strongly on the altitude at which the explosion
occurs, and to a lesser extent on the size of the explosion.
If the explosion is a true air-burst (the fireball does not touch
the ground), when the vaporized radioactive products cool enough
to condense and solidify, they will do so to form microscopic particles. These particles are mostly lifted high into the atmosphere by
the rising fireball, although significant amounts are deposited in
the lower atmosphere by mixing that occurs due to convective circulation within the fireball. The larger the explosion, the higher
and faster the fallout is lofted, and the smaller the proportion that
is deposited in the lower atmosphere. For explosions with yields
of 100kT or less, the fireball does not rise above the troposphere
1—6
RESTRICTED
11.
VDSG – RESTRICTED – VTB-OO1-13where precipitation occurs. All of this fallout will thus be brought
to the ground by weather processes within months at most (usually much faster). In the megaton range, the fireball rises so high
that it enters the stratosphere. The stratosphere is dry, and no
weather processes exist there to bring fallout down quickly. Small
fallout particles will descend over a period of months or years.
Such long-delayed fallout has lost most of its hazard by the time
it comes down, and will be distributed on a global scale. As yields
increase above 100kT, progressively more and more of the total
fallout is injected into the stratosphere.
An explosion closer to the ground (close enough for the fireball to touch) sucks large amounts of dirt into the fireball. The
dirt usually does not vaporize, and if it does, there is so much of
it that it forms large particles. The radioactive isotopes are
deposited on soil particles, which can fall quickly to earth. Fallout
is deposited over a time span of minutes to days, creating downwind contamination both nearby and thousands of kilometers
away. The most intense radiation is created by nearby fallout,
because it is more densely deposited, and because short-lived isotopes haven't decayed yet. Weather conditions can affect this considerably of course. In particular, rainfall can "rain out" fallout to
create very intense localized concentrations. Both external exposure to penetrating radiation, and internal exposure (ingestion of
radioactive material) pose serious health risks.
Explosions close to the ground that do not touch it can still
generate substantial hazards immediately below the burst point
by neutron-activation. Neutrons absorbed by the soil can generate
considerable radiation for several hours.
The megaton class weapons have been largely retired, being
replaced with much smaller yield warheads. The yield of a modern
strategic warhead is, with few exceptions, now typically in the
range of 200-750 kT. Recent work with sophisticated climate models has shown that this reduction in yield results in a much larger
proportion of the fallout being deposited in the lower atmosphere,
and a much faster and more intense deposition of fallout than had
been assumed in studies made during the sixties and seventies.
The reduction in aggregate strategic arsenal yield that occurred
when high yield weapons were retired in favor of more numerous
lower yield weapons has actually increased the fallout risk.
RESTRICTED
1—7
1
12.
VDSG – RESTRICTED – VTB-OO1-13ADDITIONAL PUBLICATIONS
VDSG
VA U
DW
ELL
ER’
S
VDSG (abridged version)
A condensed version of the VDSG,
containing just the important information
you need!
GUIDE
ION
V I VA L
LT
SUR R I D G E D V E R S
AB
ited
a Lim
rs of
ar
rvivo
ar W
For Su e Nucle
Scal
s!
T-TEC ENT
VAUL
M
ED BY N DEPART
ISSU
TATIO
MEN
it Co
h
M pin
r. g
V
ir
u
DOCU
2-13
VTB-OO
inting
te
ve Da
Effecti
, 2077
March
W
First Pr
Coping With Mr. Virus!
An extended pamphlet for the whole
family! Includes the popular How-ToBurn-Diseased-Bodies section.
WARNING;
All references to the government sanctioned and controlled FEV virus are not
allowed in this publication.
Featuring the latest Super Ebola
Quarantine Techniques!
HOW TO
EAT RAT
Fifteenth Edition - December 2076
VTD-OO1
How to Eat Rat
Over 101 recipes, from basic meals to a
complete set of dishes, all the way from
snacks to desserts!
NEW FOR ‘77:
15 five-minute Recipes and
the tasty Rodent a la King!
VTR-OO3
Second Edition
Flotation Homes and Seaweed
A complete survival guide for the ocean
bound. More tips, instructions, and plans
than you could possibly ever use.
HOW TO DODGE
FALLING ROCKS
VTF-100
Special Vault Dwellers Issue - July 2076
DROWNEDA PERMANENT
STATE OF BEING?
WE FIELD-TEST
THE LATEST
WATERPROOF
SPF 900
SUNSCREENS
PLANT A GARDEN
YOU CAN COME
BACK TO!
WATERBEDSA PRACTICAL
ALTERNATIVE
Houseboat
Cruise Control!
COPING WITH
YOUR NEW
MOBILE HOME
A Vault-Tec publication
Coming Soon!
Available the
3rd quarter of
2078
VTM-O20B
1—8
FLOTATION
HOMES &
S E AW E E D
RESTRICTED
13.
Section II.SIMULATION
2
VDSG VTB-001-13-2
14.
VDSG – RESTRICTED – VTB-OO1-13SIMTEK OPERATIONS
The Vault-Tec Research Group has determined that after a
long period of security, many Vault-Dwellers will feel “uncomfortable” with the idea of returning to the outside world. The SimTek
5000 will provide a safe and reassuring return to life on the outside world. This chapter will give you a brief walk-through of the
operation of the SimTek 5000.
Experienced Vault Dwellers may want to start with
Character Creation, and skip this tutorial chapter. For beginning
Vault Dwellers, this tutorial will prepare you for the outside world.
After starting the Fallout process on your terminal, click on
the NEW GAME button from the Main Menu.
The character selection screen will appear. For now, keep the
personnel record of Max Stone displayed and select TAKE. This
will choose Max as your character. In the future, you may want to
select another character, or even create your own character.
The simulation will now start. After a briefing by the Vault
Overseer as to your immediate task, you will appear outside the
Vault Blast Door.
Figure 2-1:
Starting out,
right outside the
Vault Door. Click
the INV button to
open your
inventory and
equip yourself.
Your first action should be to equip yourself with armament.
All Vault-Tec prepared Vaults come with the latest in offensive and
defensive equipment. You will be supplied with the most lethal
self-protective devices available.
Click the INV button on the interface bar at the bottom of the
screen. The hand cursor allows you to move items around in your
RESTRICTED
2—1
2
15.
VDSG – RESTRICTED – VTB-OO1-13inventory. Click and drag the pistol to the ITEM 1 slot. Release
the mouse button. You are now armed! Move the brass knuckles
to the ITEM 2 slot. Click on the DONE button. You will return to
the main game view.
The hex cursor is a movement cursor. Move it to where you
want to walk, and left-click to start walking there. For now, move
your mouse until the movement cursor is adjacent to the computer next to the door. Left-click once to walk there. As you are walking, you can move the movement cursor to another location. If you
want to interrupt your current walk, simply left-click again.
Once you are standing next to the computer,
right-click once. This will
change the cursor from
the movement cursor to
Figure 2-2: The Movement, Command
and Targeting cursors respectively.
the command cursor. The
command cursor is how
you interact with items/objects in the environment and other people. Right-click once on the computer. This will make your character “use” the computer. Now look at the display window in the
lower left-hand corner of the screen. Try using the computer again.
Figure 2-3:
Using the Vault
door computer.
Left-click on your character a couple of times. Notice that it
rotates you around. Your facing generally does not matter, as your
character will turn to face whatever direction is important when
needed. For now, right-click again to change the cursor back to the
movement cursor. Walk to the right side of the large vault door.
2—2
RESTRICTED
16.
VDSG – RESTRICTED – VTB-OO1-13Now change to the command cursor. Left-click on the computer. If
you are standing too far away from an object, you will automatically walk or run there when you attempt to use the object.
Walk south, moving further into the cave. Watch out for
vermin!
If you move too close to a rat, it will decide to attack you.
After it moves up to you and bites, combat will start. Notice that
the combat buttons in the lower right-hand corner of the interface
bar open up. It’s now combat! Left-click on the pistol. The cursor
will change to a target and the rat will be outlined in red. Move
the target cursor over the rat. The number next to the cursor is
how likely you are to hit it. It should be a pretty big number. Leftclick the mouse button to shoot the rat. The closer you are to your
target, the easier it is to hit them with a ranged weapon.
If you miss it, or it takes the bullet but doesn’t die, click on the
big red button that is attached to the button with the pistol. It
should change the active item from the pistol to the brass knuckles. Left-click on the brass knuckles to attack with them. Target
the rat again. You can continue to attack until you run out of
action points. The number of action points you have remaining is
displayed by the row of green lights above your weapon. The cost
to use a weapon is displayed in the lower left-hand side of the
weapon button. When you have just a few action points remaining, end your turn by clicking on the END TURN button.
Everyone else involved in the combat will get a chance to act, and
then it will be your turn again. When your turn starts, your action
points are restored.
Figure 2-4: The combat button. The END TURN
button will end your current turn. The END CMBT
button will attempt to stop the combat. If there are
hostile creatures still involved, the fight will continue!
If the rat dies, combat will end. If the rat lives after your
attacks, it will get another chance to attack you. You know it is the
rats turn when the lights on the interface bar turn from green to
red. Don’t worry, you’ll get a turn soon enough. If the rat starts to
RESTRICTED
2—3
2
17.
VDSG – RESTRICTED – VTB-OO1-13run away, you can end combat by clicking on the END COMBAT
button.
Once the rat is dead, continue south through the caverns.
Hold down the shift key and click on a hex to run instead of walking.
If you encounter rats, use a variety of weapons to attack
them. You will notice that some weapons are easier or better to
use. Due to the darkness of the caves, it is difficult to hit creatures
at a distance. To increase the amount of light, and make it easier
to see the rats, you might want to use one of your flares. Open
inventory, right-click to change from the hand cursor to the inventory command cursor. Left-click and hold on the flare. A list of
options will appear. From the top, the list of icons are: Examine,
Use, Drop and Cancel. Move the mouse down to the Use action
icon. Release the mouse button. The flare has now been activated. To keep it separate from the un-activated flare, it is moved to
the bottom of your inventory list. Scroll down to the bottom of the
list. Left-click and hold on the activated flare. Select the drop
action icon. The lit flare will be dropped to the ground. Any
attacks within the zone of light are easier than in the pure darkness of the cave. Experiment.
You might get hurt. If so, you need to heal yourself. Open
your inventory and use a Stimpak. Stimpaks will heal your current hit points, but never over your maximum hit points.
Another method of healing is to rest. Press Z on the keyboard.
This will display the PIPBoy clock. Click on the Until Healed
line in the display. You will spend time resting until all of your
hit points are restored. Another way to access the clock is to click
on the PIP button on the interface, and then click on the alarm
clock icon in the upper left-hand corner of the PIPBoy. There are
usually a couple of different ways of performing the major functions in the game.
When you get into another combat, select the pistol. Rightclick once on the button. This will display the targeted attack symbol in the lower right-hand corner of the weapon button. When
you make attacks now, you will make a targeted attack. This will
let you attack specific locations on your target. Clicking on a target with the target cursor will display a new window. Select the
location you want to attack by clicking on the name of the location.
2—4
RESTRICTED
18.
VDSG – RESTRICTED – VTB-OO1-13Some areas of a rat are harder to hit. However, the chance of you
doing more damage or some other effect is increased by making a
targeted attack.
When you are tired of killing rats, you can try Sneaking past
them. A good sneak will let you avoid the rats. Press the Skilldex
button on the interface bar. Click on the Sneak skill. You will see
Sneak printed just above the interface bar. As long as you are
Sneaking, the rats will have a more difficult time of seeing you. If
the rat does see you, they will start combat as usual. There is no
combat penalty for trying to Sneak and getting caught at it.
Do not run. If you run, you cannot Sneak anymore. Sneak
carefully around the rats.
There are other skills on the Skilldex that can be used. The
First Aid and Doctor skills allow you to heal yourself and other
characters in the game. All the skills except Sneak require that you
give a target to use the skill on. If you are hurt, open the Skilldex
and select First Aid. The targeting cursor will turn yellow. Click
on your character. Depending on how good of a medic you are (the
better your First Aid skill, the better you are at performing that
skill), you will heal some hit point damage or do nothing.
Figure 2-5: The Skilldex bar.
When you have explored enough of these caverns, go to the
south and then to the west. The Automap, which can be accessed
by clicking the MAP button or pressing the TAB key, will show
your location in the caves. You are looking for a long tunnel in the
southwest corner of the caverns.
When you reach the edge of the tunnel, you will see natural
RESTRICTED
2—5
2
19.
VDSG – RESTRICTED – VTB-OO1-13light. Walk into the light. This will take you to the world map.
The world map is how you get around the vast outdoors. Click on
the Vault-15 button on the right-hand side of the screen. This will
start walking you to your first destination.
Figure 2-6:
Exiting the
Vault caverns.
The patch of
darkness in the
light is the “exit
grid”. Walk into
the exit grid to
leave the map.
The world is dark to start. As you explore, areas will be
revealed. A green circle on the world map denotes an important
area. Vault-13 has a green circle since it is so important. You
should stop and explore any other important areas that you come
across. Be careful exploring. If you spend too much time looking
for new areas, you could find that the Vault has run out of water.
Since your mission is to save the Vault from this terrible end, you
should do everything you can do to avoid it.
Good luck!
2—6
RESTRICTED
20.
Section III.VAULT PERSONNEL
3
VDSG VTB-001-13-3
21.
VDSG – RESTRICTED – VTB-OO1-13GENERAL
The key to a successful reintroduction of civilization following a massive scale nuclear war is people. Here at Vault-Tec, we
are working to ensure that your fellow man (and woman) is up to
the task of bringing America back from the dead.
Characters are people in the game world. A player character
represents you in the game world. We will sometimes refer to a
player character as personnel. The terms personnel and player
character are interchangeable. Other types of characters are
called non-player characters (NPCs), so that you won’t confuse
them with you. NPCs can be other vault dwellers, people from the
outside world, or even mutants.
STANDARD PERSONNEL RECORDS
Fallout comes equipped with three pre-made characters, for
your use and enjoyment. These personnel are prepared for most
conditions in the outside world.
MAX
Figure 3-1: Max Stone
VID 208-197-88-125
"Stone" to his friends, Maxwell
is the largest person currently
living in the Vault. He is known
for his physical strength and
stamina. He would make the
ideal volunteer due to his
tremendous size and strength.
It is unfortunate that his
intelligence was affected after
birth when the labor bot
dropped him on his head. He
doesn't care that he might have
to leave the Vault.
RESTRICTED
3—1
3
22.
VDSG – RESTRICTED – VTB-OO1-13NATALIA
Figure 3-2: Natalia
Dubrovhsky
VID 208-206-49-229
Natalia is the grand-child of a
Russian diplomat who worked
at the Soviet Consulate in Los
Angeles. She is a talented
acrobat, with excellent
coordination and reflexes. She
is extremely intelligent and
resourceful. Her only difficulty
as a young child was
understanding personal property
laws. Natalia is very interested
in leaving the Vault, and curious
to explore the outside world.
ALBERT
Figure 3-3: Albert Cole
VID 208-206-49-227
Albert is a charismatic leader
of a small, vocal minority of the
Vault population that is
considering life on the outside
world. Dedicated to the role of
a negotiator, he is often able to
communicate efficiently
between different parties. His
professed occupation is closest
to what was once known as a
"lawyer." Albert is often able
to convince others that his ideas
are correct.
We appreciate the fact that you are reading the Vault Dwellers
Survival Guide, but would prefer that you use the Fallout interface,
so we have implemented a special way of viewing these personnel:
From the character selection screen, select MODIFY. You
can now examine these characters in detail, actually changing
their statistics. But more importantly, you can view every item in
their personnel record using the enclosed information card in the
lower right-hand corner.
3—2
RESTRICTED
23.
VDSG – RESTRICTED – VTB-OO1-13CREATING A NEW PERSONNEL RECORD
For maximum enjoyment, a character creation system has
been implemented. This will allow you to make a character of
your own choice. The following instructions will guide you
through the character creation process.
Figure 3-4:
The character
creation screen.
3
Your character is a representative of you in the game world.
Your character will follow your commands, and perform actions as
you require. It is up to you to make the character that best suits
you and suits your style of play. Fortunately, with the Fallout
Survival Kit, your happiness is assured. Vault-Tec guarantees it!1
We will often refer to you and your character as the same
person. That is the beauty of a role-playing game - you are your
character. Your actions as the player will control the actions and
consequences of the little character on the screen. Obviously, we
don’t condone some of the actions performed in the game world as
appropriate, or even legal, actions in the real world. Don’t confuse
the two.
Characters are defined by various statistics and skills.
During the character creation stage, you will adjust the primary
statistics, and in turn, the statistics will determine your skills.
If you want to see what a particular statistic or skill does,
click on the item name with your mouse pointer, and the card in
the lower right-hand corner of the screen will display the pertinent information.
Guarantee not available in all states, or after any of the following: flooding, drought,
famine, nuclear war, or other acts of God.
1
RESTRICTED
3—3
24.
VDSG – RESTRICTED – VTB-OO1-13Figure 3-5: The
information on this
card will help
answer any
questions you may
have. It’s an
important resource
that you should
pay attention to.
To make your own character, do the following:
(1) Spend Character Points
on Statistics
(see page 3—5)
(2) Select three Tag Skills
(see page 3—10)
(3) Choose up to two Traits
(see page 3—14)
(4) Select your Age
(see page 3—17)
(5) Select your Sex
(see page 3—17)
(6) Name your character
(see page 3—17)
(7) Optional: If necessary,
select any Options
(see page 3—18)
(8) Congratulations! Your
character is finished;
press DONE to continue!
3—4
RESTRICTED
Always test the air for
radiologicals and viruses.
A containment suit is your
best friend!
25.
VDSG – RESTRICTED – VTB-OO1-13STEP #1: SPEND CHARACTER POINTS ON STATISTICS
All characters have seven primary statistics:
Strength. Raw physical strength. The ability to lift weights,
have stronger punches, carry more equipment and use larger
weapons. Stronger characters will be able to lug around more items,
do more damage in combat and so on. If you want to play a big, physical character, choose a high Strength.
Perception. The ability to notice things. A combination of
your senses, including touch, sight, taste, smell and hearing.
Perception affects your ranged weapon distances, small details that
you have a chance to notice and other sense related tasks. Perceptive
characters will get more information about the world. If want to play
a character that can shoot guns at targets really far away, buy up
your Perception.
Endurance. The ability to withstand punishment and physical exertion. A high Endurance will let you survive and carry on
where other, weaker people would have to stop. It affects your hit
points, and your resistances. A character with a high Endurance will
be able to fight longer, and be less likely to die in combat.
Charisma. A combination of looks and charm. The higher
your Charisma, the better you are able to communicate with other
people. Highly Charismatic characters are more likely to be able to
get their way without resorting to violence, and to be able to get better deals in trading. Characters who like to talk to people should buy
up their Charisma.
Intelligence. Your mental strength and abilities. The higher
your Intelligence, the more skills you will excel in, and the more
options you will have in dialogue. A high Intelligence is important to
any character. Characters who want lots of choices in dialogue
should pick a higher Intelligence statistic.
Agility. Your speed and dexterity. Physical manipulation ability. Your Agility will affect many skills requiring fine coordination. It
will also adjust many combat related statistics. Agility is important
to any type of character. Combat and thief characters should have a
higher Agility than diplomatic or scientific characters.
Luck. Luck is the odd statistic. It is a combination of fate,
karma and, in general, how the universe views you. Luck will modify many things… All characters will benefit from a high Luck, and
will suffer a little more with a lower Luck.
RESTRICTED
3—5
3
26.
VDSG – RESTRICTED – VTB-OO1-13All primary statistics have a value. The values range from one,
the lowest, to ten, the highest, and five is average. All characters
start with average values in all statistics. Fortunately, you get five
character points to spend on your statistics to improve them. You can
spend one character point on any five statistics, put all character
points into one statistic, or any combination you wish.
Figure 3-6:
The location of
the primary
statistics on the
character
screen.
Progressive
trailers
mostly
noisily
umpteen we
botulisms.
To help
you gauge
the
valueperused
of a statistic,
devisedOne
a
chrysanthemum extremely annoyingly marries quixotic Klingons.
simple system of naming each value. Here is the list,
Five putrid Macintoshes gossips, because two televisions grew up.
from worst
best: sacrificed five Klingons, and the trailers
One irascible
sheeptoeasily
perused Tokyo.
1) VeryPoisons
Bad grew up.
6) Good
Five televisions gossips. Umpteen partly putrid elephants
2) Bad
7) Very Good
s!
tastes one almost silly sheep, because chrysanthemums abused five
lp
he
t
er
a
4) Fair
9) Excellent
th rse
e
very quixotic
botulisms, and Quark
two ptickets,
ve even
5) Average
10)incinerated
Heroic
-O
Ho
3) Poor
8) Great
though one orifice partly lamely towed pawnbrokers, yet Santa Claus
you can move many llamas into arranging all of the primary statistics.
If you want more character points, you can reduce a statistic
below five, gaining one character point for every point you lower the
statistic. No statistic can drop below one. You can lower any statistic, or combination of statistics. Your friends at Vault-Tec do not suggest lowering any statistic below four, but the option is there for you.
If you lower your Intelligence below four, for example, your dialogue
will be severely restricted (see page 4—29).
You must, however, spend all of your character points before you
complete your character.
3—6
RESTRICTED
27.
VDSG – RESTRICTED – VTB-OO1-13When you change your primary statistics, notice that your
derived statistics and skills change. The derived statistics and skills
are based, in part, on the values of the primary statistics. You cannot
adjust them directly (see Tag Skills, page 3—10). If you want more Hit
Points, you will have to spend more character points on Endurance.
Your statistics define you. If you have a high Strength, high
Agility, low Intelligence and low Charisma, you are most likely not
going to impress someone with your savior-faire at a dance, but that
table you’re about to drop on their head will get their attention.
Your statistics will, generally, not improve directly through
experience or game play. You should plan on seeing the same statistics throughout the course of your adventures, and plan accordingly.
Derived Statistics
In order to make the best possible decision regarding your character choice, we have developed an easy to use method of determining your derived statistics. We call this method, the “look-it-upbelow” method. And we think it works pretty darn well.
Hit Points. Your hit points determine how much damage you
can take before you succumb to the long dirt nap. The more hit
points you have, the longer you can survive outside. The less hit
points you have, the more healing you will need to do. The number
of hit points you have will grow when your character earns experience and advances in levels. The number of hit points are displayed
as current/maximum. If you ever get to 1/30 hit points, for example,
you need some serious medical attention. And soon, brother.
Starting hit points are equal to 15 + (2 x Endurance) + Strength.
Average characters will have 30 hit points.
Armor Class. Your natural armor class is how good you are at
avoiding being hit in combat. The higher your armor class statistic,
the worse your opponent’s to hit number. Your natural armor class
may be augmented and improved by wearing armor. See Armor
(page 5—12) and the sample armors in the Equipment List (page
5—15) for more information about armor and armor class.
Starting armor class is equal to your Agility. Average characters will have an armor class of 5.
Action Points. The number of action points your character has
will determine how many different actions you can take during a combat turn. Every action will have a different action point cost, which is
subtracted from your total action points. When you run out of action
RESTRICTED
3—7
3
28.
VDSG – RESTRICTED – VTB-OO1-13points, you cannot perform another maneuver until the next combat turn.
Action points are only used during combat. Action points are not cumulative,
but instead roll into armor class on a 1 for 1 basis. If you have 4 action points
remaining when you end your combat turn, you will get a +4 bonus to your
armor class until the start of your next turn. See Actions in Combat
(page 5—2) for more details on action points.
Initial Level. Starting action points are equal to ½ Agility + 5.
Average characters will have 7 action points.
Carry Weight. The total amount of equipment that you can
lug around the post-nuclear world is represented by your carry
weight. The higher your carry weight the more equipment you can
carry. You can carry a total amount of equipment in pounds equal to
your carry weight, and no more.
Initial Level. Starting carry weight is equal to 25 lbs. + (your
Strength x 25 lbs.). Average characters will have 150 lbs.
Melee Damage. Your melee damage is the amount of bonus,
or extra, damage you do with unarmed and hand-to-hand weapon
damage in combat. Using your fists, a knife, or a sledgehammer, in
combat would do the basic amount of damage for those weapons plus
your melee damage. If you want to do more melee damage, take a
higher Strength.
Initial Level. Starting melee damage is equal to Strength - 5,
with a minimum of 1 point. Average characters will have a melee
damage of 1.
Damage Resistance. The ability to shrug off some amount of
damage in combat is attributed to your damage resistance derived
stat. This statistic is a percentage, meaning that it will subtract an
amount of damage from every blow based on a percentage of the damage. If your damage resistance is 10%, and you take 20 points of
damage from a single attack, you will end up taking 18 points of damage after your damage resistance. You will need to equip armor to
see your damage resistance increase.
Initial Level. Starting damage resistance is equal to 0%.
Poison Resistance. Getting poisoned is an unfortunate possibility that must be taken into account. Fortunately, most people
have a hardy poison resistance compared to the small animals that
are the usual prey for most poisonous snakes. Poison resistance is a
percentage that will reduce the amount of poison damage you take.
Initial Level. Starting poison resistance is equal to Endurance
x 5. Average characters will have 25% poison resistance.
3—8
RESTRICTED
29.
VDSG – RESTRICTED – VTB-OO1-13Radiation Resistance.
Radiation is something that any
vault-dweller must be concerned with. While it is normal for a small
amount of roentgens, or rads, to enter the normal person during the
normal year of activity (more if activities include mountain expeditions and/or high altitude ballooning), a large amount of rad poisoning is a reason for concern. The average person receives about ½ to
1 rad a year. After a nuclear fallout, you would expect more. See
Damage (page 5—12) for more information. With any exposure to
radiation, your radiation resistance will reduce the total amount of
rads you take by it’s percentage. It is very similar to damage or poison resistance.
Initial Level. Starting radiation resistance is equal to your
Endurance x 2. Average characters will have a 10% radiation resistance.
Sequence. This statistic will help determine who will go first
in combat, and in which order people and critters will get to act. See
Combat (page 5—2) for more information. The higher the sequence
value, the more likely you will act before your opponent.
Initial Level. Starting sequence is equal to your Perception x 2.
Average characters will have a 10 sequence.
Healing Rate. People do not heal wounds at the same rate
over the same amount of time. Your healing rate will tell you how
fast you can bounce back from that near-fatal encounter, and continue with your important work of holding off the end of the world. If
you have taken damage, you will get a number of hit points back at
the end of each day equal to your healing rate. If you rest, you will
get a number of hit points back every six hours equal to your healing
rate. In no case, can you get more current hit points than your maximum number of hit points.
Initial Level. Starting healing rate is equal to ⅓ Endurance,
with a minimum of 1. Average characters will have a healing rate of 1.
Critical Chance. Critical hits in combat are special attacks
that cause extra damage or some special effect. The chance to cause
a critical hit is partially based on this stat. The higher your critical
chance, the more likely you are to cause one of these powerful hits.
It is expressed in a percentage, adding directly as a bonus to the
chance to cause a critical hit.
Initial Level. Starting critical chance is equal to your Luck.
Average characters will have a +5% critical chance.
RESTRICTED
3—9
3
30.
VDSG – RESTRICTED – VTB-OO1-13STEP #2: SELECT THREE TAG SKILLS
Skills are learned abilities. As you gain experience, your skills
will improve, unlike your basic statistics. All skills have a skill level,
expressed as a percentage. The higher the skill level, the more likely you are to succeed at using that skill.
Tag Skills define what skills you are especially good at. They
are your specializations, if you will. Every new vault-dweller must
select three Tag Skills to specialize in. You cannot leave the character editor without selecting all three.
You will get an immediate +20% in all three of your Tag Skills,
but even more importantly, they will grow faster from experience
than a normal skill. You will get twice the improvement when you
spend skill points in them (see Experience, page 5—21).
Click on the skill name to display the information card.
Click on the small button to the left of the skill name to Tag that
skill. If you wish to deselect a Tag Skill, simply click the button
again. Tag skills are highlighted in a different color to remind you of
their status.
Some skills are automatically used when you do something.
Other skills require that you actively use them. Those skills can be
used from the Skilldex (see page 4—16).
To help you choose your Tag Skills, we now present the complete
skill list.
Complete Skill List
Small Guns, Big Guns, Energy Weapons, Unarmed, Melee
Weapons, and Throwing are all combat skills. They govern the use
of weapons and attacks in combat. They are also used automatically when you attack an opponent.
Small Guns. This skill covers the use of pistols, sub-machine
guns, rifles and shotguns. The higher your Small Guns skill the easier it will be for you to hit your target, and the longer effective range
you will have in combat.
Initial Level. Starting Small Guns skill is equal to 35% +
(1% x Agility). Average characters will have a 40%.
Big Guns.
This is the skill of flamers, miniguns, rocket
launchers and other large support weapons. If it’s a large weapon,
you can count on Big Guns being the skill rolled against. Like Small
3—10
RESTRICTED
31.
VDSG – RESTRICTED – VTB-OO1-13Guns, the better your skill, the easier it will be to hit your target, and
the longer range you can really hit people at.
Initial Level. Starting Big Guns skill is equal to 10% + (1% x
Agility). Average characters have a 15% skill.
Energy Weapons. The use of energy weapons is not a very
common skill in the Vault. Energy weapons had just started to come
into actual use in warfare, when the world blew up. Lasers and
Plasma weapons are covered by the Energy Weapons skill. Basically,
if it uses an energy cell or power pack, and not cartridge ammunition,
it falls under this skill.
Initial Level. Starting Energy Weapons skill is equal to 10% +
(1% x Agility). Average characters will have a 15% skill.
Unarmed. This is the skill of beating people up with your fists
and feet. The better you are at this skill, the more likely you are
going to hit them in combat. At very high skill levels, you can succeed at those targeted shots easier, inflicting terrible damage.
Everyone starts with a pretty good Unarmed skill, since the basic
concept is pretty simple.
Initial Level. Starting Unarmed skill is equal to 40% + (1% x
the average of your Agility and Strength). Average characters will
have a 45% in Unarmed combat.
Speech.* This is the skill of dialogue. The better your Speech
skill, the more likely you will be able to get your way when talking to
people. When there is a chance that the NPC might take your word,
believe your lie, or just follow your word, this is the skill that is used.
Automatic use.
Initial Level. Starting Speech skill is equal to 25% + (2% x
Charisma). Average characters will have a 35% skill.
Barter.* The skill of trading. In the post-nuclear world, currency is not used commonly. Barter will allow you to get more for less
when trading equipment, weapons and other items. A high Barter
skill will lower the prices you pay for items you purchase, and
increase the money you get for selling excess equipment. A good
Barter skill isn’t important if you’re killing everyone, but it certainly
is a valuable skill for the non-berserkers out there. Automatic use.
Initial Level. Starting Barter skill is equal to 20% + (2% x
Charisma). Average characters will have a 30% skill.
*NOTE: Speech and Barter are the domain of the
diplomatic character.
RESTRICTED
3—11
3
32.
VDSG – RESTRICTED – VTB-OO1-13Gambling.
The skill of Gambling lets you play games of
chance, and win more often. As compared to playing games of
chance, and losing more often. When the world comes to an end, and
all that is left is a can of soup, some dweeb will bet it on a cockroach
race. Automatic use.
Initial Level. Starting Gambling skill is equal to 20% + (3% x
Luck). Average characters will have a 35% skill.
Outdoorsman. This is the skill of outdoor living, and survival
in a hostile environment. Not many people from the Vault are skilled
in Outdoorsman! Automatic use.
Initial Level. Starting Outdoorsman skill is equal to 5% + (1%
x the average of your Intelligence and Endurance). Average characters will have a 10% skill.
•WARNING
The following four skills are not approved by Vault-Tec
Sneak. The skill of being able to move quietly and out of sight.
When you are Sneaking, and doing it successfully, other people will
be less likely to notice you – at a distance. If you get too close to a
dangerous mutant, no matter how good you are at Sneaking, they
will notice you. Active use. Use Sneak to toggle it on and off. You
automatically stop Sneaking when you run. While Sneaking, you
will see this:
In the display, just above the interface bar. This doesn’t tell you
if you are Sneaking successfully. The reactions from hostile, or
inquisitive, creatures will tell you that. Your Sneak skill is rolled
when you start to Sneak, and every minute after that.
Initial Level. Starting Sneak skill is equal to 25% + (1% x
Agility). Average characters will have a 30% Sneak.
Lockpick. If you need to open locks without the proper key,
then this is the skill for you. Having an actual lockpick will improve
your chances, but it is not necessary. There are two types of locks in
the Fallout world: primitive and electronic. Lockpicks work against
primitive locks, and electronic lockpicks work on electronic locks. A
particular lock may be more difficult to pick than other locks. Active
use. Select a target to lockpick.
Initial Level. Starting Lockpick skill is equal to 20% + (1% x
the average of your Perception and Agility). Average characters will
have a 25% skill.
3—12
RESTRICTED
33.
VDSG – RESTRICTED – VTB-OO1-13Steal. This is the art of removing things from a person or
object, without being noticed. Even if you succeed, there is a chance
that a critter might notice you. Larger objects are more difficult to
steal than smaller objects. The more objects you attempt to steal, the
more likely you are to be noticed. You cannot steal objects that a person has equipped. If you steal from a person, it might be a good idea
to go behind them so they can’t see you as easily. Active use. You will
need to pick a target to steal from.
Initial Level. Starting Steal skill is equal to 20% + (1% x
Agility). The average character will have a 25% Steal skill.
Traps. The skill of disarming bad things that will hurt you.
Your Perception will find them for you. If you decide to set bad things
for other people (like explosives), then this is the skill that is used to
set them. A critical failure while setting an explosive will detonate it
prematurely. Active use, but sometimes used automatically. You will
need to pick a target to attempt the disarming.
Initial Level. Starting Traps skill is equal to 20% + (1% x the
average of your Perception and Agility). Average characters will have
a 25% skill.
First Aid.* The skill of minor healing. You will be able to cure
minor wounds, cuts and bruises with this skill. You can only use it
three times a day, and it takes a little while to work. Active use.
Select a target to heal, but this is most likely going to be you!
Starting First Aid skill is equal to 30% + (1% x the average of your
Perception + Intelligence). Average characters will have a 35% skill.
Doctor.* A more advanced skill of healing. You can heal serious damage and crippled limbs but not poison or radiation damage.
Using this skill will take a while to perform. Every crippled limb will
add to the time required to use the Doctor skill. You can only use this
skill three times a day, but you can combine it with First Aid. Active
use. You need to pick a target to play Doctor with.
Initial Level. Starting Doctor skill is equal to 15% + (1% x the
average of your Perception and Intelligence). Average characters will
have a 20% skill.
*NOTE: First Aid and Doctor are healing skills. They
will be very useful to all sorts of personnel.
RESTRICTED
3—13
3
34.
VDSG – RESTRICTED – VTB-OO1-13The last two skills are the scientific skills.
Science. The skill of knowledge and learning. It covers computers, electronics, mechanical and other brain hurting tasks. Active
use, but sometimes used automatically. You will need to pick a target to sciencetize.
Initial Level. Starting Science skill is equal to 25% + (2% x
Intelligence). Average characters will have a 35% Science skill.
Repair. This is the physical use of Science. Repair will let you
fix things, and in a world of broken stuff, this is a good thing. Active
use. You will need to fix a target.
Initial Level. Starting Repair skill is equal to 20% + (1% x
Intelligence). Average characters will have a 25% skill.
STEP #3: CHOOSE UP TO TWO TRAITS
Traits are characteristics that better define who you are. They
don’t really fit into a single statistic or location, so we gave them their
own area - Traits. All traits have a good impact and a bad impact. If
you want the good effect of a trait, you must take the bad with it.
Fortunately, traits are optional. You do not have to take any
traits, the choice is yours. If you do want to select traits, you can
select up to two. You must do it during character creation, since you
cannot select a trait once you start the game.
To select a trait, click on the small button next to the trait name.
Selected traits will be highlighted. Click the button of a selected trait
to deselect it.
Figure 3-7: The list
of optional traits
in the character
editor.
Fast Metabolism. Your metabolic rate is twice normal. This
means that you are much less resistant to radiation and poison, but
your body heals faster. +2 Healing Rate, but your radiation and poison resistances start at 0%.
3—14
RESTRICTED
35.
VDSG – RESTRICTED – VTB-OO1-13Bruiser. A little slower, but a little bigger. You may not hit as
often, but they will feel it when you do! Your total action points are
lowered, but your ST is increased. Your Strength is +2, but you lose
2 action points.
Small Frame. You are not quite as big as the other vaultdwellers, but that never slowed you down. You can't carry as much,
but you are more agile. You get a +1 bonus to your Agility, but your
carry weight is equal to 15 lbs. x your Strength.
One Hander. One of your hands is very dominant. You excel
with single-handed weapons, but two-handed weapons cause a problem. You are -40% to hit with two-handed weapons, and +20% to hit
with weapons that only require one hand.
Finesse. Your attacks show a lot of finesse. You don't do as
much damage, but you cause more critical hits. All of your attacks
do -30% damage. Your critical chance is +10%.
Kamikaze. By not paying attention to any threats, you can act
a lot faster in a turn. This lowers your armor class to just what you
are wearing, but you sequence much faster in a combat turn. You
have no natural armor class. You must wear armor to have an armor
class. Your sequence gets a +5 bonus.
Heavy Handed. You swing harder, not better. Your attacks
are very brutal, but lack finesse. Your rarely cause a good critical hit,
but you always do more melee damage. You do +4 points of damage
in melee combat (handto-hand or non-ranged
weapons). Your critical
hits have a -30% modifier to the critical hit
tables.
Glowing objects are to be considered
dangerous at all times. If an object has
enough illuminosity to read at night, do
not touch!
Fast Shot. You don't
have time to aim for a
targeted attack,
because you attack
faster than normal people. It costs you one
less action point to use
a weapon. You cannot
perform targeted shots,
but all weapons have
AP -1 to use.
RESTRICTED
3—15
3
36.
VDSG – RESTRICTED – VTB-OO1-13Bloody Mess. By some strange twist of fate, people around
you die violently. You always see the worst way a person can die. If
the violence meter in the Preferences screen (see page 4—35) is
turned down, you will see the maximum level of violence for that setting of the meter.
Jinxed. The good thing is that everyone around you has more
critical failures in combat, the bad thing is- so do you! If you or a
non-player character have a failure during combat, there is a greater
likelihood that the failure will be upgraded (or is it downgraded) to a
critical failure. Critical failures are bad: weapons may explode, you
may attack the wrong target, you could lose part of your turn, or any
of a wide range of bad things.
Good Natured. You studied less-combative skills as you were
growing up. Your combat skills start at a lower level, but First Aid,
Doctor, Speech and Barter are substantially improved. Those skills
get a +20% bonus. You get a -10% modifier to starting combat skills
(Small Guns, Big Guns, Energy Weapons, Unarmed, and Melee
Weapons). This is a one-time bonus only.
Chem Reliant. You are more easily addicted to chems. Your
chance to be addicted by chem use is twice normal, but you recover
faster from their ill effects.
Chem Resistant. Chems only affect you half as long as normal, but your chance to be addicted is also only 50% of normal.
Night Person. As a night-time person, you are more awake
when the sun goes down. Your Intelligence and Perception are
improved at night, but dulled during the day. You get a -1 modifier
to these two statistics from the hours of 0601 to 1800. You get a +1
modifier to these statistics from the hours of 1801 to 0600 (or 6:00AM
to 6:00PM, if you want to look at it that way).
Skilled. Since you spend more time improving your skills than
a normal person, you gain more skill points. The tradeoff is that you
do not gain as many extra abilities. You will gain a perk every four
levels. You will get an additional 5 skill points per new experience
level.
Gifted. You have more innate abilities than most, so you have
not spent as much time honing your skills. Your statistics are better
than the average person, but your skills are lacking. All stats have
a +1 modifier. All skills are -10%. You receive 5 less skill points per
level.
3—16
RESTRICTED
37.
VDSG – RESTRICTED – VTB-OO1-13STEP #4: SELECT YOUR AGE
Not all people are the same. Their age will tell a lot about them.
Your character’s age will help you better define your character.
Personnel are ready to leave the vault at age 16, and will have lost
that sparkle in their step by the age of 35. You can choose an inclusive age between 16 and 35.
Click on the AGE button to change from a bright youth, to an
experienced elder. The left arrow will increase your age, while the
right arrow will make you younger. Age will have no direct influence
on your character during the character creation stage.
Age will have some small bearing on the game. It is mostly a
player choice. There is no direct penalty or benefit for playing a
younger or older character.
STEP #5: SELECT YOUR SEX
Your character, like most people before him or her, can be male
or female. This will have some small bearing on the game, so choose
carefully. It will not have a large bearing on the adventure, so don’t
think too much about it. Some non-player characters will react differently to you if you are a man or a woman.
Click on the MALE/FEMALE button to bring up a small window. Click on the symbol of the man if you want to be male, click on
the woman if you want to be female.
Enjoy your decision, as you cannot change it once you start the
game.
STEP #6: NAME YOUR CHARACTER
Click on the NAME button and type your character’s name.
Press ENTER when you are done, or click on the DONE button. If
you want to change your name, this is the time to do it. If you don’t,
people will call you: “None,” the character with no name.
Your name should say something about your character. Bob is
pretty boring (Vault-Tec apologizes to all vault-dwellers with the
name of Bob for the use of that name in this example). Spike is better, especially if you like to use a lot of sharp melee weapons. Dr.
Atomic is perfect for the budding young scientist type characters.
Once you complete the first six steps, you will have successfully
finished making your character. Unless you need to use one of the
character editor options in step #7, you may skip to step #8 (see
below) and start the game.
RESTRICTED
3—17
3
38.
VDSG – RESTRICTED – VTB-OO1-13STEP #7: CHARACTER EDITOR OPTIONS
To help you create or modify a personnel record, we have included the following options - at no extra charge! Select the OPTIONS
button at the bottom of the character editor screen to access a special
Options menu.
SAVE
If you want to save the status of your character during the creation process,
select this option. A Save Character window will appear, enter a file name
and press ENTER.
LOAD
To load a previously
saved character, click
LOAD and then select
the character from the
saved character list.
This will overwrite the
current character.
ERASE
If you are unhappy with the current character,
and want to start fresh, then select this option.
You will have a chance to confirm this operation
before the current character is trashed. You
have been warned.
PRINT TO FILE
If you would like a
hard copy of your
character, select this
function. It will ask
for a file name, and
then write a text
version in the Fallout
directory. If you
print it to a file, the
character is not
automatically saved.
There is no way for
Fallout to restore a
character from a
text file version.
Figure 3-8: Character Editor Option screen.
STEP #8: FINISHING YOUR CHARACTER
As previously mentioned, click DONE on the character creation
3—18
RESTRICTED
39.
Section IV.INSTRUMENTATION
4
VDSG VTB-001-13-4
40.
VDSG – RESTRICTED – VTB-OO1-13GENERAL
When you start Fallout, you can press the space bar or ESC
to bypass any movie. You should not do this unless you have previously viewed the movie. Important information is contained
within the movie segments.
The first thing you will see is the main menu.
MAIN MENU
The main menu is very simple. From here, you can start a new
game, load a previously saved game, review the intro movie, see the
credit list, or exit back to your normal operating system.
INTRO
Replay the first two intro movies. You can always press the space bar or
ESC to cancel a movie, but if you want to watch them again and again
(we do) then use this feature.
NEW GAME
To start a brand
new game from the
very beginning,
click on this button.
You will then go to
the character
selection screen (see
page 4—2). If you
have just installed
Fallout, this should
be your first choice.
CREDITS
If you want to see a list (a
very long list) of the
people who have worked
on Fallout, this is the
button to press.
EXIT
Clicking this
button will return
you to your
normal
operating
system. There is
no confirmation
necessary.
Thank you for
playing.
RESTRICTED
LOAD GAME
To restore a
previously saved
game, select this
option. You will
go to the
standard load
game screen (see
page 4—35),
where you can
restore any of
your previously
saved games. If
you haven’t
saved a game
yet, then clicking
this button is not
suggested.
Figure 4-1:
Fallout Main
Menu
4—1
4
41.
VDSG – RESTRICTED – VTB-OO1-13CHARACTER SELECTION SCREEN
When you select NEW GAME from the main menu, you will see
this screen. You have your choice of TAKING or MODIFYING one of
the three pre-made characters, or CREATING your own character
from scratch.
If you press CANCEL, you will be returned to the main menu.
Figure 4-2:
Character
Selection
Screen.
Once you have selected or created a character, the game will
start. Press ESC to bypass the Overseer
briefing, once you have seen it.
You will start Fallout outside Vault13. Your first mission is to explore the
nearby area and then head for Vault-15,
to the east. You have to exit the caverns
to do this.
Using the Vault Instrumentation
panel, or the Interface, as it is more commonly called, you will interact with the
game world and control your character
In the event of exposure to radiation, you must
shower with a large amount of water as soon
as possible. Lather, rinse and repeat.
4—2
RESTRICTED
42.
VDSG – RESTRICTED – VTB-OO1-13GAME VIEW
An example of the normal game view is below.
Figure 4-3:
Normal View!
The top part of the screen is called the game view. This is where
the action takes place. Your character, and the non-player characters
(NPCs) inhabit this part of screen. It is in this view that you perform
most of your actions, such as: moving around, grabbing items, talking to people, fighting, opening doors, exploring, and more.
The bottom part of the screen is the interface bar. Here you will
perform actions such as: accessing inventory, selecting a weapon to
attack with, go to the character screen, select options, get feedback
from the display window and more.
INTERFACE BAR
The lower part of the normal game screen is called the interface
bar. This is what it looks like:
Figure 4-4: The Interface Bar
A diagram and description of all the Interface Bar functions is
on the following pages.
RESTRICTED
4—3
4
43.
VDSG – RESTRICTED – VTB-OO1-13SWITCH ACTIVE ITEM BUTTON
DISPLAY MONITOR
OPTIONS BUTTON
ACTIVE ITEM BUTTON
INVENTORY BUTTON
ACTION POINTS
AMMO BAR
COMBAT BUTTONS (Covered)
SKILLDEX BUTTON
CHARACTER BUTTON
PIPBOY BUTTON
MAP BUTTON
HIT POINT COUNTER
ARMOR CLASS COUNTER
Figure 4-5: Interface Bar Functions.
RESTRICTED
4—4
44.
VDSG – RESTRICTED – VTB-OO1-13UP
ARROW
Figure 4-6: Scrolling arrows.
Display Monitor. The monitor prints out feedback as you perform actions. These little messages are important, so try not to miss
any. Fortunately, you can scroll back to older messages by moving
the cursor over the display until the cursor changes to a small arrow.
If the cursor is at the upper part of the display, then it will be
an up arrow. Left-clicking now will scroll back to older messages.
If the cursor is at the bottom part of the display, then it will be
a down arrow. Left-clicking now will scroll back to the more recent
messages.
If a new message is printed while you are reading older messages, the display will jump back and display this new message.
Don’t be alarmed, this is good for you.
Switch Active Item Button. You can have two items prepared for near instantaneous use, these are called Active Items. You
prepare the items in Inventory (page 4—12). This button will let you
switch between the two active items. It’s a toggle. Click it once, and
you go to Item 2. Click it again, you go to Item 1. Click it again, you
go to Item 2. Click it again, you go to Item 1. And so on.
Inventory Button.
If you click this button, it will open
Inventory (see page 4—12). In combat, this will cost you some action
points. Even if you do nothing in inventory, you still lose the action
points.
Action Points. This row of lights will tell you how many action
points you have remaining. Actions points are only used in combat, so
if these lights are glowing, then you must be in combat. As you use
action points, the lights will blink off. When you get your full complement of action points back at the start of a combat turn, the row of
lights will light back up.
RESTRICTED
4—5
4
45.
VDSG – RESTRICTED – VTB-OO1-13Options Button. This button will display the options available:
SAVE GAME
This option will display the save game screen (see page 4—33).
LOAD GAME
Clicking this button will
display the load game
screen (see page 4—35).
PREFS
This button
displays the
preferences
screen (see
page 4—35).
EXIT
This button will exit back
to the main menu. You
will be given an
opportunity to change
your mind, in case you
haven’t saved your game
before this happens.
DONE
This button
will return
back to the
game.
Figure 4-7: Some options for you to choose.
See page 4—33 for more information regarding the various
options.
Active Item Button. This is where your current active item is
displayed. Left-clicking on this large button will use the item. Rightclicking will toggle between different modes (only weapons have different modes).
The AP cost in the lower left-hand corner will tell you the number
of action points that using this item will cost you. If you don’t have
enough action points remaining (see your action points bar above the
active item), then you cannot use this item this turn. Action Points
only matter in combat.
Sometimes, there will be a mode or option in the upper right-hand
corner. This is telling you what action using this item will perform. You
can sometimes right-click on this button to change the mode.
Some weapons can also make targeted shots. This will always be
a different mode. You will see a target in the lower right-hand corner
when the targeted shot mode is ready.
Ammo Bar. Some weapons and items have an ammo bar, showing how many shots or uses they have left before running dry. Pay
4—6
RESTRICTED
46.
VDSG – RESTRICTED – VTB-OO1-13close attention to this bar. When the bar is full, you have all or most
of your ammo available. The bar will drop when you use these consumables. When you are dry, the bar will disappear.
To get more specific information about your ammo or energy
count, use an Examine on the item (see page 4—10).
Hit Point Counter. This counter will show the number of hit
points remaining. When you are healthy, the counter will be in white.
When you are hurt, the counter will be yellow. When you are close to
death, the counter is in red.
If your hit points ever reach 0, you die and the game is over. You
will need to reload a previously saved game, or start the game over
from the very beginning.
Armor Class Counter. Your current armor class, based on your
character and what armor you are wearing, is shown here. During
combat, this counter may go up and down. If you have any extra action
points when you end your turn, they are converted to an armor class
bonus. This would explain the changes you may see.
Skilldex Button. Pressing this button will display the Skilldex
(see page 4—16).
Map Button. Pressing this button will display the Automap
(see page 4—24).
Character Button.
Pressing this button will display the
Character Screen (see page 4—17).
PIPBoy Button. Pressing this button will display the RobCo
PIPBoy 2000 (see page 4—20).
Combat Buttons. When you are involved in combat, the panel
covering these two buttons will slide open, revealing:
END TURN
BUTTON
Pressing this
button will end
your current
combat turn.
END COMBAT BUTTON
Pressing this button will
attempt to end combat. If
there are hostile critters nearby
that want to continue combat,
you may be out of luck.
Figure 4-8: The two combat buttons.
RESTRICTED
4—7
4
47.
VDSG – RESTRICTED – VTB-OO1-13INVENTORY BAR VS. CURSORS
If you have a cursor, like a skill target cursor, or a targeting cursor, moving it over the interface bar will cancel that action and give you
the normal mouse pointer instead. If you want to shoot someone to
start combat, click the weapon in the active item button, and move the
little red crosshair out to the game view. Move the crosshair back to
the interface bar to stop the attack.
CURSORS
Action Cursor. You control your character with the Action
Cursor, a simple device that will take a brief moment to learn. The
Action Cursor allows your character to move, fight, and interact with
the environment and to manipulate objects.
In the normal game view, there are three modes the Action
Cursor can be in:
Movement
Command
Targeting
The third mode, targeting, is only available during combat or
when you attempt to target a weapon to start combat.
To change between the various modes, right-click once. If you
continue to right-click, it will cycle to the next mode. To get to the
command cursor from movement, right-click once. Outside of combat, another right-click will take you back to the movement cursor.
During combat, a right-click from the command cursor will go to the
targeting cursor.
MOVEMENT CURSOR
Figure 4-9: The
movement, or
The default cursor is the
hex, cursor.
movement cursor, also called a
hex cursor.
To walk, move the hex cursor around the screen to where you
want to walk to and then click the left mouse button. If the route to
the destination is clear, your character will find the shortest path to
the destination. If you can’t walk to the location, a red X will appear
in the center of the hex cursor. If you attempt to left-click while there
is an X, it will do nothing. If you want more control over where you
walk, click closer to your character and make shorter walks.
If you want to run, hold down a SHIFT key while you left-click.
You can interrupt your character in mid-step, simply click the left
4—8
RESTRICTED
48.
VDSG – RESTRICTED – VTB-OO1-13mouse button with the hex cursor in a new spot. Your character will
immediately move towards the new location.
COMMAND CURSOR
Figure 4-10: The
Walking is fine and dandy, but
command cursor.
if you want to interact with something (like opening a door, or talking to a person), you need to use the command cursor.
Use this cursor to point to the object or person that you wish to
interact with. If you move the cursor over an object, and let it rest
for just a second, an icon will appear next to the cursor. This icon is
telling you what the default action is if you left-click the mouse button while over this object. You do not have to wait for the icon to
appear before you click!
To do the default action, left-click once.
If you want to see other actions that you can take, left-click and
hold the mouse button. A column of action icons will appear. While
holding the mouse button down, move the mouse up or down. The
highlighted action icon is the action you will perform when you
release the mouse button.
Pausing the command cursor over an object for a moment will
also display the name of the object in the display window on the
interface bar below. To get more information about the item, use the
Examine action (see page 4—10).
A list of the action icons is on the following pages.
TARGETING CURSOR
Figure 4-11: The
When you click on the active
targeting cursor.
item button on the interface bar,
while it is showing a weapon in an
attack mode, you will get the targeting cursor. Often you will want
to do this to start a fight. You will also see this cursor commonly during combat, so get used to it.
If you hover this cursor over an acceptable target (like that guy
over there who gave you a dirty look, or that salivating radscorpion),
then you will get either a number or a red X.
The number is your percent chance to hit, modified by the light
level, the range, your skill and its armor class.
The X means that you cannot possibly hit the target.
See Chance to Hit (page 5—4) for more information.
RESTRICTED
4—9
4
49.
VDSG – RESTRICTED – VTB-OO1-13ACTION ICONS
ICON
DESCRIPTION
USE ITEM/GET
Performing this action will attempt to pick up an inventory item (like
a rock), or use a scenery item (like a door). Basically, if the item is
small, it will attempt to add it to your inventory. If you have enough
room in your inventory, the item will be added to the bottom of the
list. If the item is large, you will attempt to manipulate it somehow.
You can get inventory items, loot bodies, and use scenery objects.
EXAMINE
If you want more detail about an object or person, use this action.
You will get a longer description of the item or person, often with
important information (like how much ammo is left in a gun, or how
wounded a person appears to be).
You can examine virtually anything in the game.
USE SKILL ON
To use one of the skills that require your active use, you can select
this action. The skilldex will be displayed and you can select the
skill that you want to use on this item. Some skills are not
available, depending on what the object is that you are using this
action icon on.
You can use this icon on any object that a skill can be used on.
DROP ITEM
Only available in inventory. If you no longer want to carry an item
around, and your inventory is getting a little crowded, then use this
action. It will drop the item at your feet. Use this action carefully. If
you drop an important item, then the game could be lost. It’s
possible to return later and pick the object up, but it’s also possible
that the object will disappear forever.
This obviously only works on inventory items in your inventory.
ROTATE CHARACTER
Your facing can be important. To rotate your character clockwise use
this action. Every click will rotate you one hex-facing. There is no
Action Point cost to use this action in combat.
This action only works on yourself.
4—10
RESTRICTED
50.
VDSG – RESTRICTED – VTB-OO1-13ACTION ICONS
ICON
DESCRIPTION
TALK
If you want to communicate (and, hey, who wouldn’t?), then this
action is for you. Talking will attempt to start a dialogue with a
living, breathing person. You cannot talk to the dead, or the
unconscious. Some people will not want to talk to you, anyways.
Others will only have a little to say, and their comments will appear
over their head in the game view. If someone has a lot to say, then
you will go to the Dialogue screen (see page 4—28).
Also, modern computers have voice inputs, so you can actually talk
to a think machine or a computer workstation, in some cases.
This action only works on people, and some computers.
USE INVENTORY ITEM ON
If you want to heal a person with a stimpak, or use a set of lockpicks
on a “stuck” door, then use this action. Once you select your target,
and use this action icon, a small version of your inventory will
appear. Scroll down, if necessary, and select the item you wish to
use, and your character will attempt to use it on the target.
Obviously, using a piece of fruit on a door isn’t going to do much,
but that same piece of fruit can be given to another person to eat.
See Inventory (page 4—12) and Equipment (page5—14) for more
information.
This action will work on people and on scenery objects.
UNLOAD AMMO
If you want to remove ammo from a gun, then use this action. It will
work in the inventory or loot screens. Often, you will want to just take
the ammo from a dead opponent, and leave the heavy gun behind.
Or, you might want to change the type of ammo you have in your
favorite firearm. This is the perfect way to handle these situations.
Only works on weapons that contain ammo, and only in the
inventory and loot screens.
CANCEL
If you don’t want to perform any of the above actions on the target,
select the cancel action, and it will be as if nothing happened.
Always available, from everywhere on everything.
RESTRICTED
4—11
4
51.
VDSG – RESTRICTED – VTB-OO1-13INVENTORY
Your inventory screen is where you keep track of, and use, items
that you may find in your adventures. You can carry a maximum
weight of items equal to your carry weight. Items will have a different
weight. Examine an item to get the individual weight of that item.
Figure 4-12:
Your inventory
screen.
You have an inventory cursor and an inventory action cursor.
Right-click, like normal, to switch between them.
The inventory cursor looks
like a hand, and allows you to pick
Figure 4-13: The
up and drop items. Click on an
inventory hand
item and hold the mouse button
cursor.
down. Move the mouse to the
desired location and release the
button to drop the item on it’s new spot. If you are moving more than
one item, then when you drop the item into it’s new location, a special menu will appear.
Figure 4-14:
Moving multiple
items at once.
4—12
RESTRICTED
52.
VDSG – RESTRICTED – VTB-OO1-13Click the arrow buttons to increase or decrease the number of
items to move. The counter starts at one (1) item. Press the ALL button to increase the counter to total number of items in the stack.
Select CANCEL to cancel the entire move. You will also get this
menu if you drop a stack of items.
If you move COMPLETELY IDENTICAL items on to each other,
they will “stack”. Stacked items are a little more convenient. If you
have stacked items, a number will appear on the stack, showing the
number of items in the stack. In the case of ammunition, it will show
the total number of rounds in the stack, not the number of magazines. When you move ammo, you move it by magazine not by individual rounds. Get that?
The inventory action cursor allows you to perform actions on
items in your inventory. The USE action will use the item automatically on you. The DROP icon will drop the item to the ground. You
will be able to pick the item up again, under 99.9% of the circumstances. If you leave the item around, it is possible that it will be
picked up by another character. And if you drop an item while in the
deserted wastes of the world map, you will never see it again. So
think carefully before you drop an item. Loose hands drop clams!
The inventory screen is divided into three parts: Display
Monitor, Equipped Items, and Inventory List.
The Display Monitor gives you important information about
your character, and items that you examine. As you move inventory
items around, the Display Monitor will update to show you the new
statistics of weapons, armor and other pieces of equipment. Use the
display monitor to compare two different weapons, for example, and
you will be ahead of the game!
The Equipped Items include what armor you are wearing and
what two items you have prepared as active items. A viewer shows
you with your equipped items.
The Inventory List shows the remaining items in your backpack. They aren’t as immediately accessible as your active items, but
this only really matters during combat.
INVENTORY DISPLAY MONITOR
When you first enter the inventory screen, or when you do an
examine on your character portrait, you will get some basic information about you.
RESTRICTED
4—13
4
53.
VDSG – RESTRICTED – VTB-OO1-13PE
Your current Perception.
EN
Your current Endurance.
ST
Your Strength, including any modifiers
from radiation, chems, or other effects.
This is known as your current Strength.
NAME
Just in case
you forgot.
CH
Your current Charisma.
IN
Your current Intelligence.
HIT
POINTS
Current/
Maximum
AG
Your current Agility.
LK
Your current Luck.
CURRENT ACTIVE
ITEMS
Weapons will show
basic damage, ammo
loaded, range and other
pertinent information.
Other items will have
brief descriptions of
important information.
TOTAL WEIGHT
This shows how much
equipment you are carrying
in pounds. You cannot
carry more than your Carry
Weight. If this number gets
close to your maximum
carry weight, you should
start considering what items
to drop. There is no
disadvantage for carrying a
lot of equipment.
ARMOR CLASS
This area shows the armor class, damage resistance and damage threshold
for the armor you are currently wearing. Normal damage is bullets, knives
and blunt objects (like that big, ugly fist that you see coming towards you
right now). Laser damage is from lasers. Fire damage is from flamers.
Plasma damage is from advanced
Armor Class
weapons. Explosion damage is
from explosives, like grenades and
Damage
rockets. EMP (electro-magnetic
Resistance
pulse) damage doesn’t affect
humans, so it is not listed.
Damage Threshold
Figure 4-15: The inventory display.
4—14
RESTRICTED
54.
VDSG – RESTRICTED – VTB-OO1-13AMMO ACTIONS
Loading Weapons. You can drag ammo to a gun, and it will
attempt to load the gun. To the load the gun successfully, the ammo
caliber must be the same (examining the weapon and the ammo will
tell you their calibers). The ammo type must be the same, as well. You
cannot partially load a gun with hollowpoints and then fill it up with
armor piercing. If the gun is completely loaded, you will not be able to
stuff more ammo in it, obviously.
Unloading Weapons. To unload a weapon, use the inventory
action cursor and select the Unload icon. The ammo will appear in
your inventory.
You can also unload weapons from a loot screen. It is easier to
carry any recovered ammo without carrying duplicate versions of the
weapon itself. It also weighs less to only carry the ammo.
OTHER INVENTORY ACTIONS
Inventory List. The final part of your inventory is the list of
items that you are carrying. This is called the inventory list. It is a
long bar on the left-hand side of the screen.
If you want to move an item up or down the list, simply pick it up
and drag it to it’s new location.
If you drag completely identical items on to each other, they will
stack. Weapons are only identical if they contain the same exact
amount of ammo, and the ammo itself is the same. Therefore, weapons
will not stack very often.
Containers. Containers are a special kind of item that can store
items within themselves. A backpack, or a bag, would be a container.
Containers don’t let you carry more equipment than you can lift (your
carry weight), but they do let you organize items better.
You can drag items to the container from the main inventory list.
Simply drop the item on the container to add it to the container.
To open a container, use the inventory action cursor and select the
Use icon. The viewer will be replaced with an image of the container,
and the inventory list will show what is in the container.
If you want to move items out of the container and back into the
main inventory list, drag the item to the image of the viewer.
To close the container click on the image in the viewer.
Containers cannot stack.
RESTRICTED
4—15
4
55.
VDSG – RESTRICTED – VTB-OO1-13SKILLDEX
Some skills are used automatically, like the combat skills. When
you shoot a gun, you are automatically using the appropriate skills.
Other skills need an active use by you. These skills are available in
the Skilldex.
Figure 4-16: Your Skilldex
Proper latrine building is an
important outdoor survival
skill. Practice this skill as
often as possible.
4—16
Click on a skill name to
use it. Most skills will require a
target to use the skill on. If you
want to cancel a skill use before
you select a target, move the
cursor over the interface bar.
As a shortcut the skills can
be used by pressing the 1
through 8 keys. Do this, it
saves valuable time.
Only Sneak will work without a target (since it’s just something you do). To stop Sneaking,
you can either toggle it off by
using the Skilldex again, or by
running. As a reminder, when
you are Sneaking, you will see a
Sneak icon just above the interface bar.
See page 3—10 for a list of
the skills and their uses.
RESTRICTED
56.
VDSG – RESTRICTED – VTB-OO1-13CHARACTER SCREEN
While the Inventory screen is nice for giving you a brief rundown
on your character, the only place to get all the information is on the
Character screen. You can access the Character screen from the interface bar.
CURRENT MEDICAL STATUS
Watch this space.
EXPERIENCE POINT
TOTAL & LEVEL
4
PERKS, KARMA & KILLS
Figure 4-17: Main Character screen.
The primary purpose of the Character screen is to give you information about the status of your character: am I critically hurt? if so,
where? poisoned? how many experience points do I have? when do I go
up a level? how many extra skill points do I have? what are my exact
skill levels? and more…
So many questions, it takes a whole screen to give you the
answers.
If you made your own character, or modified one of the three premade characters, then most of this screen will be pretty familiar to
you. If you didn’t, then it might take you a little longer to get used to
RESTRICTED
4—17
57.
VDSG – RESTRICTED – VTB-OO1-13it, but it’s not that difficult.
You can click on any text or object of importance on this screen,
and the character card in the lower right-hand corner will display more
information for you.
The right side of the screen will give your character name (in case
you forgot) and your current primary statistics.
Immediately below that is your experience point total and level.
As you gain experience for performing deeds and combat, the numbers
in this area will change. The “Level” is your current character level,
the higher the better. The “EXP” is obviously how much experience
you have earned to this point. The more the merrier. The “Next Level”
line is showing how much experience you have to earn until your next
level advancement.
In addition to your current and maximum hit point information,
which you can find elsewhere as well (on the interface bar and in the
inventory screen), the character sheet will show other important medical problems with your character.
The text lines beneath Hit Points should be a dull green. That’s
a good thing. If the lines are bright green, that means that you have
that particular problem.
“Poisoned” means that you have been poisoned. Poison in Fallout
is fairly dangerous if not treated, but is usually not fatal. Poison does
damage over time. The more poison you have been infected with, the
longer you will take damage. Fortunately, as the poison starts to wear
off, it takes longer and longer after the poison hurts you before it hurts
you again. Still, avoid it if you can.
“Radiated” means that you have a measurable amount of radiation damage. Radiation still lingers in the form of fallout (note the
lower-case version of this noun, as compared to Fallout - an important
difference) and other hot spots. It has been rumored that there are
creatures that have been exposed to such a large amount of radiation
that they can actually cause radiation damage by contact. Avoid them
if you can. Radiation can have several bad effects, but in general, the
more radiation damage you have accumulated, the worse the effect will
be. You can tell the exact amount of radiation you have been exposed
to by using a Geiger counter. You can get treatment for radiation in the
Vault Emergency Medical Lab, located near the entrance. It is possible that other locations may be able to repair radiation damage.
“Eye Damage,” “Crippled Right Arm,” “Crippled Left Arm,”
“Crippled Right Leg,” and “Crippled Left Leg” are all crippled limbs or
body parts. You will generally receive these special types of damage in
4—18
RESTRICTED
58.
VDSG – RESTRICTED – VTB-OO1-13combat. It is possible to heal these serious wounds at the Vault EML,
by using the Doctor skill, or a visit to another trained medical personnel. The effects of these severe inflictions are cumulative.
Table 4-1 PERSONAL DAMAGE EFFECTS
DAMAGE
EFFECTS
Eye Damage ..................If your eyes are hurt, your Perception will be
lowered until you heal this wound. Ranged
combat will be much more difficult as a result.
Arm Damage ..................If one of your arms is hurt, you cannot use
two-handed weapons. If both arms are crippled, you cannot use any weapons at all.
Leg Damage....................If one leg is crippled, you will find it more difficult to move (taking more Action Points to
move the same distance). It will also be
impossible to run. If both legs are crippled,
you will barely be able to move. Running will
still be impossible. Out of combat, your character will look like he or she is walking normally, but this is a sham to protect yourself
from dangerous predators. Get to a doctor
quickly!
Above the character card (with the trademarked Vault-Man) are
your character skills. If you have any spare skill points (any number
above 000), then you can spend them on this screen to improve your
skills (see Experience, page 5—21 for more information).
As your character explores the world, makes decisions and gains
experience, you will be able to track some of that by using this handy
multi-data display area.
The first electronic data card is “Perks.” This will show all the
Perks that you have chosen for your character, and let you examine the
effects of a Perk by using the character card. And, as a bonus, if you
selected any Traits, they will be displayed on this card as well.
The second data card is “Karma.” If you’ve been naughty or nice,
this will be displayed here. All characters have a Reputation. It starts
RESTRICTED
4—19
4
59.
VDSG – RESTRICTED – VTB-OO1-13at 0 (zero). If you act nobly, and perform great deeds, your character’s
reputation will rise (or go positive). If you act like a Commie, or other
negative personality type, your character’s reputation will sink (or go
negative). Your character’s reputation will affect different people in
different ways. “Good” people will react positively to a good reputation,
and poorly to a negative reputation. “Bad” people will react in the
opposite manner. You may get other, specific reputations as well, or
you could react poorly to chems. If you do, these reactions to your
actions will show up under Karma. Use the character card to find out
more information.
The third card is “Kills”. As one could expect from the title of this
data card, this will show how many of what you have slain in battle.
Think of it as a score card. You might be interested in knowing that
the number of things slain (which can include people, animals, dangerous mutants) will have an effect on your game. The more you kill,
the greater the effect. The exact ramifications of your kills will be discovered as you play.
On the right-hand bottom part of the screen are three buttons:
PRINT, CANCEL and DONE.
This option will let you save the current record of your character
as a text file on your own computer. Trade it with your friends, or
gloat loudly. Select this option, and another screen will appear. Type
in the name of the text file as you want it to be, and press ENTER.
Cancel
Return to the game. Any changes that you have made to your
character since entering the character screen will be ignored, and
your character returned to the state he or she was in before you
entered the character screen
Done
Accept any changes to your character and return to the game.
ROBCO PIPBOY 2000
To help Vault Dwellers record information (and information is
extremely valuable, in fact, it might be the most valuable weapon we
have against the end of civilization, so pay attention!), Vault-Tec has
selected the RobCo Industries RobCo PIPBoy 2000 as the Personal
Information Processor of choice for its Vault Dwellers.
4—20
RESTRICTED
60.
VDSG – RESTRICTED – VTB-OO1-13The RobCo PIPBoy 2000 (hereafter called the PIPBoy), is a
handy device that you wear on your wrist. It’s small, especially by
today’s standards, and it will store a goodly amount of information
for you. And using modern super-deluxe resolution graphics to boot!
Figure 4-18:
The RobCo
PIPBoy 2000
main screen
interface.
Use the buttons to select the various functions of the PIPBoy.
Some of the function screens have text in the display window that
can be selected as well. These text buttons will change brightness
when you move the mouse over them.
Status
Click on this button to view the current status of any adventure
seed or task that you are on. The adventures will be sorted by location. Seeds that you are currently on, and have not finished, will be
listed in green. Seeds that you have completed will be crossed out.
As you get new tasks to perform, they will show up here.
Automaps
Click on this button to display a list of the locations you have
visited. Select a location to view the automaps for that location. Your
PIPBoy stores a map of all the locations you visit automatically. If
you have a question of where a location is, use the Automap feature.
Archives
The PIPBoy also has a video recorder. All movies are automatically recorded by the PIPBoy for later viewing. Select any previously viewed movie to watch it from here.
Close
Power down the PIPBoy for now and return to the Fallout world.
RESTRICTED
4—21
4
61.
VDSG – RESTRICTED – VTB-OO1-13PIPBOY CLOCK
The PIPBoy also contains an alarm clock. To pass time quickly in
the Fallout world, use this alarm clock to rest until the time you set.
Figure 4-19: The RobCo PIPBoy 2000 Alarm Clock optional
feature. Standard on all Vault-Tec supplied versions.
This part of the PIPBoy will constantly show the current game
date and time. Click on the alarm clock icon to display the list of
timer settings.
Figure 4-20: The RobCo
PIPBoy 2000 Alarm Clock
timer settings.
The various timer settings allow you to rest or sleep for:
10 minutes
30 minutes
1 hour
2 hours
3 hours
4 hours
5 hours
6 hours
Until 0600 (6:00AM)
Until 1200 (12:00PM - Noon)
Until 1800 (6:00PM)
Until 0000 (12:00AM - Midnight)
Until healed
4—22
RESTRICTED
62.
VDSG – RESTRICTED – VTB-OO1-13Use the 10 minute to 6 hour timers if you need to meet someone
at a certain time during the day or night. Some events only occur during the night or day. Some shops are only open at night, for example.
The until timers will advance the clock to the time you select.
These are more powerful versions of the normal timers. Outside locations will follow a day and night cycle for the lighting. If you don’t like
the dark, sleep until 0600 and then wait for an hour. If you want the
night, sleep until 1800 and then wait an hour.
The alarm clock will show your current and maximum hit points.
If you rest, you will gain hit points back at a faster rate. You get your
healing rate in restored hit points every six hours. Sleep until the
morning and get a good nights rest. Optionally, you can use the rest
until healed timer setting, and then you will sleep until you are
restored to maximum hit points.
You can press ESC while resting to wake up.
THINGS TO DO!
The PIPBoy 2000 can be used to keep track of important dates
and events.
Use it to remember everyone’s birthday’s and anniversaries so
that you
We Elephants
reprogrammed
your
PIPBoy to keep
track of theperused one
marries
Afghanistan.
Five Jabberwockies
number
of
days
remaining
in
the
Vault
water
Thisand five
wart hog, although the trailer marries almost sillystores.
aardvarks,
note angst-ridden
is the only thing
shouldTokyo,
care however
about until
are
partly
sheepyou
tickled
two we
wart
hogs lamelysafe
kisses
Afghanistan,
yet thewater
obese trailer
and
have a restored
gossips.
processing chip.
The note shows the number of days
before we croak.
If that happens,
your adventures on the outside
won’t be worth a set of thermal
underwear in Death Valley at high
noon!
We’ll be dead.
don’t want that.
And we
Go to it!
and it is a very useful tool for scheduling meetings and appointments.
And your PIPBoy has been programmed to properly handle all
calendar dates, even after the turn of the century!1
Your PIPBoy 2000 has a three month limited warranty.
1
RESTRICTED
4—23
4
63.
VDSG – RESTRICTED – VTB-OO1-13AUTOMAP
To remind you where you have been, your helpful PIPBoy 2000
keeps track of all the locations you have visited, and what they
looked like. These are stored in the Automap function. As you
explore a map, more of it will be revealed and stored. The automap
will keep track of all the walls and buildings that you come across.
As a helpful shortcut, you can access the automap for the town
you are in by pressing this MAP button on the interface bar. It will
only show the current level of the location. To see the other locations,
you must access the full Automap list from the PIPBoy.
Figure 4-21:
A displayed
automap.
The Hi/Lo toggle will change between high and low resolution.
On high resolution, you can see more detail. The low resolution is
sometimes easier to read.
The Scanner button will activate the Motion Sensor, if it is one
of your active items. The Motion Sensor will display the other creatures and people on the map, in addition to yourself. The motion sensor will only work on the current map, you cannot scan a map that
you are not on currently.
The CANCEL button will return you to the game.
WORLD MAP
The game view and automap are great for small areas, but the
wasteland is a large place. To move from location to location, you
need the world map.
4—24
RESTRICTED
64.
VDSG – RESTRICTED – VTB-OO1-13You go to the World Map when you reach the edge of a game
map, as shown here:
Figure 4-22: The dark
areas show where you
will exit the game map.
Walking into that dark area will automatically transport you to
the world map. You can use this to escape from a hostile location, but
don’t expect a happy welcome when you return.
The world map looks something like this:
4
Figure 4-23:
The Fallout
World.
Pretty dark.
Click on the TOWN/WORLD MAP button to switch between the
town (see page 4—27) and world maps.
As you start, most of the world will be dark. These are places that
you have not yet explored. The immediate area around you has been
slightly illuminated. You have seen it, but not yet been there. When
you do walk into a new area of the world map, it is brightened and the
squares around it have been marked as viewed from a distance.
RESTRICTED
4—25
65.
VDSG – RESTRICTED – VTB-OO1-13Click on the world map to start traveling to that location. You
can click into the darkness, in fact you need to do that to explore the
unknown areas ahead of you.
The date and time are shown in the upper right-hand corner.
Time is a critical aspect of Fallout. Try to accomplish your goals in
as little time as possible. Traveling across the world will be one of
your largest wastes of time. Travel as carefully as possible. The people of the Vault are depending on you.
Important locations are marked with a green circle on the world
map. Every important location is therefore a little easier to see.
Once you have visited an important location, it will be added to the
list on the right-hand side of the world map screen.
To visit a previously explored location, all you have to do is click
on the button next to the location name. You will start moving
towards that location automatically.
When you reach your destination, via the location bar or by
exploration, an upside down green triangle will appear. Click on the
triangle to visit that location. You can always click on a new area to
explore, if you want to continue on.
If you are interrupted by a random encounter, you will see a
flashing red lightning bolt. You will then automatically drop down to
the terrain map and be involved in the encounter. Any items left on
a random encounter map after you leave the map will be lost forever.
TERRAIN
Some terrain is more difficult to travel than others. In Fallout,
there are four different types of basic terrain: Mountain, Desert, City
and Coastland. Mountain terrain is the most difficult to move over
and will take the longest amount of time. Desert and Coastland terrain are normal. City terrain, even with the ruins, is easiest to travel and will take a shorter amount of time than normal.
Terrain will also determine what kind of encounters you may
have. More people will be found closer to cities and spots of civilization. Monsters, and other bad things, are found farther away from
these places of humanity. You are more likely to have a lot of random
encounters in some areas than others. If you are being beat to death
by random encounters, pull back and try a different area until you
gain experience, skills and equipment.
Some of the encounters may be hostile creatures, friendly
traders, environmental concerns (like radiation hotspots) and other,
4—26
RESTRICTED
66.
VDSG – RESTRICTED – VTB-OO1-13more bizarre events. Not all random encounters are bad, but neither
are they all good.
TOWN MAPS
All of the important locations in the game will have a town map,
or a closer view of the area. The town maps serve several functions.
In addition to being an aid to remember what areas are at a particular location, they are useful for movement.
To access the town maps, click on the TOWN/WORLD MAP button on the world map screen. A town map will appear.
Figure 4-24:
The Vault-13
town map.
4
To change town maps, click on a known location button on the
right-hand side of the screen. You can only view the town maps of
locations you have visited.
Notice that the town map has one or more inverted green triangles. These location markers will access different areas within the
town. Move the cursor over a marker to view the name of the specific area that marker represents. Click the marker to travel to that
area within the town. This will work even if you are hundreds of
miles away. You will travel via the world map to their chosen location, and then enter the town there.
When you visit a new town, usually only one marker will be
available. As you explore a town, more markers will become accessible. It is possible for a previously accessible marker to disappear. If
this happens, you have usually done something to incur the wrath of
the natives in that location. You will have to find another way to get
from one area to the next.
RESTRICTED
4—27
67.
VDSG – RESTRICTED – VTB-OO1-13DIALOGUE
Talking to people will take some of your time, and a lot of your
attention, to perform properly. You must balance their reaction to
you, what you can say to them, and at the same time, watch for clues.
The payoff can be worth it.
To start talking to people, use the command cursor and the Talk
action icon. The Talk icon is the default, or standard, action when
you click on a person. Some people will initiate dialogue on their
own, but all dialogue works the same once you start a conversation.
There are two different types of dialogue: chatting and extended dialogues.
CHATTING DIALOGUE
If someone has very little to say to you, and you don’t have a
response, then they will just chat with you. A line of dialogue will
appear over their head in the main game view, and you will not
switch to the full, extended dialogue screen. Normally, chats are
inconsequential, but you should watch carefully. Sometimes a person
will sneak important clues into a single chat. Sometimes a person
will order you to do something, and if you persist in your current
action, they may get very upset with you.
Figure 4-25:
A sample of
chatting
dialogue.
People will also chat during combat. These are called combat
taunts. They usually don’t have very many nice things to say to
you then.
4—28
RESTRICTED
68.
VDSG – RESTRICTED – VTB-OO1-13EXTENDED DIALOGUE
If someone has more to say to you than can be said in a line or
two of dialogue, or if you will have the opportunity to question them
and respond to what they have to say, then you will go to the full
extended dialogue screen.
The extended dialogue screen has a place for you to see a close
up of the NPC (if one exists), or a shot of the character you are talking to standing around in the game view, their dialogue, and your
possible responses.
Figure 4-26:
Extended
dialogue, in
the middle of a
conversation.
If the NPC does have a head, watch their expression for clues on
their reaction to you. NPCs with heads will also have actual speech,
and you should listen closely to their lines to determine if there is
anything special about what they have to say.
All NPCs will have a different reaction to you. They may like
you, they may hate you, or they may care less. Most people will start
out caring less, but your actions, reputation, and responses to their
dialogue will change their opinion about you. Your Charisma will
modify their initial reaction.
The NPC will usually have something to say to you. Their dialogue will appear below their portrait or picture. If the text of their
dialogue will not fit within one screen, their dialogue will be displayed one screen at a time, until you see their entire speech.
Below their dialogue are your choices. Based on your
Intelligence, and what you know about the game world, you will have
one or more options. If you only see [DONE], that means the conversation is over.
RESTRICTED
4—29
4
69.
VDSG – RESTRICTED – VTB-OO1-13If you have a character with a high Intelligence, you will be able
to say more in conversation. NPCs will react differently to a grunt
for help compared to a well-discussed plea for mutual assistance.
The most intelligent things that you can say are not always the best
lines to choose. A character with an Intelligence of 3 or less will be a
distinct disadvantage, unable to converse normally. People will have
a hard time understanding your grunts and unintelligent speech.
To pick a line of dialogue for your character to say, move the
mouse pointer over the line, and when it highlights, click the mouse
button to actually say that line. The NPC will usually respond to
your comment or question, and you will get a new batch of responses. Dialogue will continue until you run out of things to say, or until
you say something that really angers the NPC.
Some of the lines have a chance of making the NPC respond one
way or another. These lines will usually have some sort of roll associated with them (usually Speech, but sometimes another skill or
even a statistic). For example, if you tell a lie there is a possibility
that the NPC will see through your deception and get upset. Some
NPCs may be more gullible or perceptive than others, so there can be
a modifier to your skill or statistic. These special lines are not
marked. You will have to discover which lines have attached rolls by
discovery, trial and error. Common sense will help, too.
REVIEW
If you want to review the current conversation, click the
REVIEW button on the dialogue screen. You will be able to see what
the NPC said, your response, and so on.
Figure 4-27:
Reviewing an
important
dialogue.
4—30
RESTRICTED
70.
VDSG – RESTRICTED – VTB-OO1-13The arrows will move the conversation up and down, in case it
goes on longer than one screen. Press the DONE button to return to
the conversation.
You cannot review a previous conversation once you leave a
dialogue.
BARTER
Barter is the exchange of goods. Trade.
In a post-nuclear world, Vault-Tec believes there will be no real
monetary system. People must resort to the ancient tradition of
barter to exchange goods for goods, or goods for services.
Figure 4-28: The bartering interface.
To access the bartering interface, click the BARTER button
from the dialogue screen. If the character wishes to barter with you,
and most will, then the barter interface will slide up and cover your
response area.
If you decide to cancel bartering, click on the TALK button.
To barter with an NPC, you must trade an equal amount of
goods (in his or her eye). Your Barter skill will modify the worth of
items in your inventory. A high Barter skill will make your loot more
valuable. A low Barter skill will mean that you have to give more to
get the same amount from an NPC.
Your inventory list is on the left-hand side. The equipment and
items that the NPC is willing to barter away is on the right-hand
side. The table in between the two inventory lists is where the bartering will take place.
Take items that you are willing to give up and place them on the
left-hand side of the table. You cannot place items from your inventory directly into the NPCs inventory, nor can you take items directly from his inventory and put it into yours. You must use the table.
RESTRICTED
4—31
4
71.
VDSG – RESTRICTED – VTB-OO1-13Moving multiple items will display the Move Item interface.
Move the items from the NPC inventory list that you want.
When you have moved what you feel is a fair deal, press the OFFER
button. If the NPC is agreeable, he will say so in his dialogue screen.
If he doesn’t like the deal, he will say so, too. If you get an agreeable
deal, the items that you are trading will move from the table to the
appropriate inventory list.
If the deal is not agreeable to the NPC, you can sweeten the
offer by placing more equipment from your inventory on your side of
the table. Or you can reduce how much you want from the NPC by
moving some of his items back to his inventory. Then press the
OFFER button again, until you get an agreeable trade.
You can always cancel the barter and return to the regular dialogue screen.
Your reputation and reaction from the NPC will modify how
they deal with you. If you have a good reaction with the NPC trader, you will get a better deal. If he doesn’t like you, you will pay for
it – literally. Your Barter skill, however, is the primary factor, along
with the Barter skill of the NPC. The higher your skill, the better
deal you will get. The higher the Barter skill of the NPC, the better
deal they will get! A really poor trade offer may lower the reaction of
the NPC.
In the event of fire, do not run! It will force the flames up to your
head. Stop, drop and roll!
4—32
RESTRICTED
72.
VDSG – RESTRICTED – VTB-OO1-13OPTIONS
The Options menu will let you save and load games (so you don’t
have to finish the game in a single sitting) and change preferences.
You can also quit back to the Main Menu from the Options menu.
SAVE GAME
Clicking this button will display the Save Game menu. You can save the
game at any time you can access the Options menu (which is pretty much
all the time). A couple notable exceptions are: Dialogue (if you’re in the
middle of a conversation, you just can’t whip out that save game disk as
that is very impolite you know) and on the World Map.
LOAD GAME
This button will
display the Load
Game menu, which
is a good thing if
you have saved
games. You can
load a game any
time you can save a
game. If you want,
you can load the
game you just saved
- but that would be
a little redundant…
PREFERENCES
Click this button
will display a list of
game preferences
(see page 4—35).
If the volume of the
game is too loud,
or too quiet, or if
you want to adjust
one of the many
gameplay options,
select this button.
EXIT
This button will exit back to the main menu. It
will ask you to confirm this decision. If you
want to save your game before quitting, then
make sure you do so before selecting Exit
DONE
This will take you back
into the Fallout world.
Figure 4-29: Another look at the options menu.
SAVE GAME
When it comes time for you to stop playing, saving your game
will allow you to return later and pick up from where you left off.
Saving your game as you are playing is also a very good idea. If something bad were to happen to you, then if you have a recently saved
game, you can restore from that point without losing a lot of progress.
RESTRICTED
4—33
4
73.
VDSG – RESTRICTED – VTB-OO1-13The save game menu is very simple:
Figure 4-30:
The Save
Game menu.
Use it often.
You have ten save game slots. A save game slot will hold one
save game file, so you can save up to ten different locations or positions at a time. If you have already saved ten games, then you need
to overwrite an earlier save game.
We here at Vault-Tec highly suggest that you use more than one
save game slot at a time. We suggest that you start with slot 1, and
work your way down the list of slots. When you want to save a game
after slot 10, start over again at slot 1.
At the start of Fallout, all ten slots are empty. You can see what
a save game slot contains by clicking on the slot position. A screenshot of what you were doing when you saved your game will be displayed in the upper right-hand corner. Your description of the game
will be displayed as well.
To save a game, double-click on the slot you want to use or select
it and click the DONE button. Type a description that will help you
remember what you were doing. Press ENTER or click the DONE
button in the description window. If you change your mind and don’t
want to save over this slot, click the CANCEL button.
Figure 4-31: Entering a description for the saved game
4—34
RESTRICTED
74.
VDSG – RESTRICTED – VTB-OO1-13LOAD GAME
When it comes time for you to load a previously saved game (see
above), then you need to use the load game menu.
Figure 4-32:
The Load
Game menu.
It loads games.
The load game menu is very similar to the save game menu. A
list of save game slots is displayed on the left-hand side. A screenshot is in the upper right-hand corner, and the description of the displayed save game is below it.
To load a previously saved game, double-click on the appropriate slot or click the slot to highlight it and then press DONE.
If you don’t want to load an old saved game, click on the CANCEL button.
PREFERENCES
Figure 4-33:
User-selectable
Preferences
Menu.
RESTRICTED
4—35
4
75.
VDSG – RESTRICTED – VTB-OO1-13Preferences are user settings that allow you, the user, to customize or control aspects of the game. If you don’t like the way those
non-player characters are taunting you during combat, then go right
ahead and turn their comments off! You can do it, we trust you.
You can access the preferences menu from the interface bar
(pressing the O button), or by using the keyboard equivalent (“O”),
and selecting Preferences.
Following is the list of preferences. The underlined option is the
default setting.
Game Difficulty [Easy, Normal, Hard]
Controls the difficulty level of reactions and other non-combat
skill rolls. Negative reaction modifiers are halved, and all non-combat rolls are made with a +20% bonus if set to Easy. If set to Hard,
all negative reaction modifiers are increased by 25%, and all noncombat skill rolls are made at -10%.
You can adjust this at any time during the game, and there is no
penalty or reward for using a setting besides normal.
Combat Difficulty [Wimpy, Normal, Rough]
Controls the difficulty of the combat. On Wimpy level, the opponents have a negative modifier to hit and damage, and use less targeted shots. On Rough level, your opponents will hit more often, do
more damage, and use more targeted shots.
There is no penalty for using a lower combat difficulty level.
There is no reward for using a higher difficulty level. It is strictly a
personal preference. You can adjust the combat difficulty setting at
any time during the game.
Combat Speed [Slider: Normal -> Fastest, Player Checkbox]
Controls the animation rate in combat. When set to Normal, it
works as usual. Moving the slider towards Fastest, will increase the
rate at which combat moves, with the exception of the player’s
actions, and when a critter targets or attacks the player. If the
Player checkbox is marked, it will also speed up the player’s actions,
and when the player is targeted.
If combat is moving a little too slow for you, then adjust this setting until you are happy with the speed.
4—36
RESTRICTED
76.
VDSG – RESTRICTED – VTB-OO1-13Combat Taunts [On, Off]
This option turns the combat taunt messages on and off. These
are the messages that non-player characters (everyone except you)
say during the middle of combat (you can say whatever you want,
just don’t annoy your neighbors - Vault-Tec will not be responsible for
any neighborhood complaints).
Combat Messages [Verbose, Brief]
When set to Verbose, the combat messages will use the longer,
more detailed messages. When set to Brief, the combat messages
will be very short, showing only the critical pieces of information.
Target Highlight [On, Off, Targeting Only]
When On, legal targets are highlighted during combat. When
Off, they are not. When set to Targeting Only, the highlights only
appear when the player is using the targeting cursor.
Violence Level [None, Minimal, Normal, Maximum Blood]
This preference controls the maximum death animation level
shown to the user. Maximum Blood shows all three levels. Normal
shows up to the second level. Minimal shows critters falling over
with blood. None shows the critters falling over without blood.
There is no practical difference in the game. What level the violence
meter is set to is purely personal.
Text Delay [Slider: Slow -> Normal -> Faster]
This option will control for how long the floating text and dialogue screen messages are displayed. Slow speed messages are displayed for twice as long, and Faster messages are displayed for half
as long.
Language Filter [On, Off]
When this filter is set to On, Fallout will not use as much adult
language. With the Language Filter set to Off, you will see stronger
language used. There is no practical difference in the game. The
choice of having the language filter on is purely personal.
Running [Normal, Always]
If set to Always, the character will run instead of walk if the shift
button is not pressed. Pressing the shift button will walk the character instead of running, if Always is selected. Normal works normally.
RESTRICTED
4—37
4
77.
VDSG – RESTRICTED – VTB-OO1-13Master Audio Volume [Slider: Off -> Quiet -> Normal -> Loud]
Controls the overall volume of audio. If set to Off, it overrides
all other audio settings. The Music, Sound Effects and Speech volume controls will adjust their volume based on the master audio volume control.
Music/Movie Volume [Slider: Off -> Quiet -> Normal -> Loud]
Controls the volume of the music and the audio during the cinematic movie sequences.
Sound Effects Volume [Slider: Off -> Quiet -> Normal -> Loud]
Controls the volume of the sound effects.
Speech Volume [Slider: Off -> Quiet -> Normal -> Loud]
Controls the volume of the digitized speech.
Brightness Level [Slider: Normal -> Brighter]
This preference will control the brightness of the screen. For
some computers, and some monitors, you may need to turn the
brightness level up a couple of notches to see darker screens better.
There is a keyboard equivalent to make these changes on the fly.
Mouse Sensitivity [Slider: Slow -> Normal -> Faster]
The higher the setting, the faster the mouse will move.
4—38
RESTRICTED
78.
Section V.CONFLICT RESOLUTION
5
VDSG VTB-001-13-5
79.
VDSG – RESTRICTED – VTB-OO1-13GENERAL
At some point during your adventure, diplomacy or stealth
will fail. The last resort will be combat. Combat is defined when
you have an attacker attempting to do damage to a defender. It
requires two or more people to have a combat situation.
Combat in Fallout is turn-based. Generally, you will get a
chance to act. After your action or actions, the next character
involved in combat gets to go. When all of your opponents or allies
involved in this combat have taken their actions, then you get
another chance to act. This is called a new turn. This continues
until all the combatants are dead, unconscious or fleeing.
Since the rest of the game is real-time (one minute of real
world time equals one minute of game time, unless you perform an
action that takes an extended amount of time, or use the PIPBoy
alarm clock to rest), when combat starts you change modes to turnbased. You will know when this happens when the combat buttons
in the lower right-hand corner of the interface bar are revealed.
BEFORE
AFTER
In the
middle of
a combat
turn, your
move.
Not in
combat.
Figure 5-1: The Combat Button.
When it is your turn the lights around the combat button will
glow bright green. During your opponents turn, the lights are red.
The action points above the active item button on the interface bar
will also glow a bright green when it is your turn, red when it is
your opponents turn, and dull green when you are not in combat.
Each combat turn is roughly 5 seconds of game time. It may
take longer in real time to finish, as you think about and then perform your actions for that turn.
Combat will often refer to hexes (short for hexagon, or a sixsided polygon). A hex is a way of dividing the area of the battlefield into small, manageable chunks. Each hex in Fallout is one
meter from side to side. Someone two hexes away would be considered two meters away.
RESTRICTED
5—1
5
80.
VDSG – RESTRICTED – VTB-OO1-13STARTING COMBAT
There are two ways to start combat: attack or be attacked.
Combat will often result if you get too close to a hostile critter (like a
mutated rat) or if you say something that really angers some sentient
being (like a mutant that you called a rat).
If you want to attack someone with a weapon besides your
hands and feet, you must first equip the weapon into one of the active
item slots (ITEM 1 and ITEM 2) in the inventory screen. Left-click
on a weapon with a valid attack type (single, burst, swing, thrust,
throw - see below). The cursor will turn into the targeting cursor and
you can then left-click on an opponent to start the combat. The turnbased combat system will take over until all of your opponents are
dead, unconscious, or fleeing.
Figure 5-2: The interface bar, in combat mode.
Shown is the active item button with a weapon.
People will be ordered in the turn by their Sequence statistic. If
more characters or monsters enter combat, they will also be placed
by their Sequence number.
ACTIONS IN COMBAT
Once you are in a combat turn, you’ll have a limited number of
actions that you can perform. The number of actions is based on your
Action Point stat. The more action points (AP) you have, the more
things you can do. You will “spend” AP every turn, until you have just
a few or none left, and then the next person in the combat turn will go.
Action Points. The number of action points your character
has is located above the active item button on the interface bar. The
AP lights only show the first 10 AP you have. If you have more than
10 AP remaining, they will not be shown.
As you take actions, and spend AP to do those actions, the number of bright green lights will turn dull green. The number of bright
5—2
RESTRICTED
81.
VDSG – RESTRICTED – VTB-OO1-13green lights are your remaining AP.
Different actions cost different amounts of APs. It costs very little to walk one meter, but to walk several meters costs more.
Attacking with a knife is faster than aiming with a rifle, so the knife
attack will cost less AP to perform.
Table 5-1 ACTION POINTS
ACTION TO PERFORM
BASE AP COST
Walking ..........................................................1 AP per meter (hex)
Hand to Hand (HtH) Attack ..............................3 AP
Melee Weapon Attack ......................................4 AP *
Ranged Attack (Single)......................................5 AP *
Ranged Attack (Burst)........................................6 AP *
Targeted Attack ................................................+1 AP *
Reloading Ammo..............................................2 AP
Accessing Inventory ..........................................4 AP
Opening a door ..............................................3 AP
Using a scenery item ........................................3 AP
*Some weapons cost more or less AP than listed to use. The number of AP to use an active
item (like a weapon) is always shown in the lower left-hand corner of the active item button.
Movement. The number of AP points to move is shown in the
middle of the movement cursor when you pause the cursor for a
moment over the destination hex. If there is a red X in the center of
the cursor, then you do not have enough AP to move that far, or there
is something (or someone) blocking your access to that hex.
Running in combat has no advantage or penalty.
Reserve Movement. If you hold down the CTRL key while
clicking to move, you will reserve enough action points to perform the
current action for the active item. If you want enough AP left over to
shoot your target, but you want to get as close to it as possible (to get
the best possible chance to hit), then hold down the CTRL key when
you click to move. Example: You have 9 AP. Your current weapon is
a Colt 6520. It costs 5 AP to shoot the gun. If you hold CTRL down
when you click on a hex that is 8 hexes away, you will only move (95) 4 hexes towards the destination hex. You will have 5 AP remaining, just enough to shoot the pistol.
RESTRICTED
5—3
5
82.
VDSG – RESTRICTED – VTB-OO1-13Attacking. The number of AP required to make an attack will
depend on the attack that you make. Weapons that are big and bulky
will require more AP to use than a smaller, more agile weapon.
All ranged weapon attacks are assumed to be aimed.
Ammunition is scarce. Each shot must count.
Targeted shots require more aim time, so they take an additional AP to perform.
To attack, right-click on the active item button (also called an
active weapon button when you have a weapon in it during combat)
to get to the mode that you want to attack in. Left-click on the button to get a targeting cursor. Move the targeting cursor over your
opponent, and left-click again to attack.
Inventory. If you press the INV button to access your inventory, it will cost you 4 AP to do so. If you do not have 4 AP, you cannot get to your inventory.
Once you are in your inventory, you can perform as many
actions as you want. If you do nothing, it will still cost you the 4 AP.
Once the AP are spent, you cannot get them back.
Other Actions. If you perform any odd actions (like opening
or closing a door, or using a computer), it will cost you 3 AP.
Some skills or actions require so much time to properly use that
you cannot perform them in combat.
Armor Class Bonus. Any unused AP remaining when you end
your turn will add to your armor class. Effectively, the less you do in
a turn, the more defensive you are and the harder you are to hit. If
you are trying to avoid an opponent, it will often be better to use the
action points to move away from the opponent instead of standing
still and getting the Armor Class bonus.
CHANCE TO HIT
Attacks in combat are not a sure thing. People are dodging,
your heartbeat is racing, there is often cover or armor to stop the
attack, and palms get a little sweaty. Weapon attacks will often refer
to a “chance to hit.” When you move the targeting cursor over your
opponent, for example, you will get the chance to hit percentage
when you hover the cursor for a moment. The higher this number is,
the more likely you will actually be able to hit your opponent with the
attack. This number is a percentage.
For example, if the chance to hit is 63%, then 63 out of 100
times, you should be able to succeed. A 50% chance to hit means that
5—4
RESTRICTED
83.
VDSG – RESTRICTED – VTB-OO1-13half of the time you will hit, and half of the time you will miss.
Your chance to hit is based on the appropriate weapon skill and
modified by the range, light level, armor, cover your target has, and
if the attack is targeted, the location you are trying to hit.
Table 5-2 WEAPON SKILLS
SKILL
WEAPONS COVERED
Small Guns ......................................Pistols, SMGs and Rifles
Big Guns ..........................................Heavy Machine-guns,
Flamethrowers and other large
support weapons
Energy Weapons ..............................Ranged weapons that use
power cells as their ammo type
Throwing ..........................................Thrown rocks, spears, knives
and grenades
Melee Weapons ................................Knives, spears, sledgehammers
and other hand to hand
weapons
Unarmed ..........................................Punching and Kicking attacks
For ranged weapons, the distance between you and your target
is critical. The closer you are to the target, the better the chance to
hit. Your Perception will drastically modify the final to hit penalty or
bonus for range. If you are closer than your Perception in meters (8
Perception is 7 meters or less, for example), you will actually get a
bonus to your to hit chance. If the target is farther away than your
Perception in meters (9 meters or more, according to our other example), then you will get a penalty on your to hit chance. If the target
is exactly your Perception away from you, there is no modifier.
If your target is in the dark, they will be harder to see. Targets
that are hard to see are also harder to hit. The light level of the target will therefore modify your chance to hit. If the target is in the
shadows, there will be a penalty for attacking it. Partial darkness is
a -10% to hit, medium darkness is a -20% to hit, and full darkness is
a -40% to hit penalty. The light around your character represents
RESTRICTED
5—5
5
84.
VDSG – RESTRICTED – VTB-OO1-13your ability to see closer objects better in the dark. It does not modify an opponent’s chance to hit you in combat. Your opponents are
subject to the standard darkness modifiers.
Armor provides protection against the target actually being hit
by deflecting the attack. Attacks that are deflected (or bounced, for
really heavy armor) do no damage to the target. The percentage that
the chance to hit is modified by is called Armor Class (AC). The AC
is subtracted from the chance to hit. Higher ACs are therefore better. Anything over a 20% AC is really good. See the Armor section
on page 5—12 for more details.
Cover is considered as any obstacle between you and your target. Other people, barrels to duck behind, trees, and walls are all
considered cover. Cover will modify the to hit chance as a negative
penalty. You will never have a better chance to hit your target if
there is cover between you and it. The amount of the penalty
depends on the cover. A barrel may be very little, another person a
little more, and a wall may have a really big modifier.
Targeted attacks are discussed below, but they all have some
sort of negative to hit penalty based on the location being targeted.
Trying to hit someone in the eyes is more difficult than attacking
their left arm (or tentacle, or whatever).
RANGED WEAPONS
Ranged weapons are weapons that can be used in a range of
1 hex or more. Ranged weapons have some sort of finite range that
they can be used up to, but this is often 6-8, 15, 20 or more meters
(hexes) away.
Pistols, rifles, SMGs, shotguns, rocket launchers, flame-throwers are all considered ranged weapons. So are throwing knives,
spears and rocks. If you can attack someone at a range of more than
2 hexes, it is considered a ranged weapon.
Figure 5-3: The active item
button, in Single attack mode.
5—6
RESTRICTED
85.
VDSG – RESTRICTED – VTB-OO1-13Single Shot. Some ranged weapons are single shot. That is,
each attack will only use one round of ammunition or one instance of
the weapon (in the case of weapons which self-destruct, like a
grenade, or physically leave your hand, like a throwing knife).
You will have a single chance to hit with a single shot weapon. If
you succeed at your skill roll, after modifiers for range, light level, and
the armor of the target, you will hit. If you fail the roll, you will miss.
Figure 5-4: The active item
button, in Burst attack mode.
Burst. Burst weapons fire multiple rounds of ammunition
with every attack. Burst weapons can have a varying rate of fire
(ROF). The higher the ROF, the more shots the burst weapon will
use per attack.
Burst weapons do
have the advantage
that you will get multiple chances to hit.
Each shot has an individual chance to hit.
Even with a low skill, a
burst weapon with a
high ROF will most
likely mean that some
Figure 5-5: An example
of the shots will hit.
of a burst cone of effect.
The other advantage that burst
weapons have is a larger area of effect. A burst weapon is capable of
covering multiple hexes and hitting several targets at once. The
higher the ROF, the more likely multiple targets will be hit during a
burst attack. Your primary target (the person or thing you target)
will take the brunt of the burst attack. Everyone between you and
the target, within a cone that is centered on the target, can possibly
be hit by the burst attack. Friends, enemies, and non-combatants. If
they are in your way, there is a chance they could be hit.
RESTRICTED
5—7
5
86.
VDSG – RESTRICTED – VTB-OO1-13If you perform a burst attack on an enemy that is very close to
you, then you will saturate them with bullets instead of doing the
wider, spraying affect.
Bursting does have the unfortunate side effect of using a lot of
ammo.
Reloading. Weapons that have an ammo capacity (like a gun,
but also including any weapons that have fuel or energy requirements) will need to be reloaded from time to time (more often if you
attack more often, or if the weapon is a burst weapon with a high
ROF).
Reloading can happen one of two ways: you can access inventory, and drag the proper ammunition to the weapon to reload it, or you
can do a reload action from the active item button on the interface
bar. The first method is slower, but you get to choose the exact ammo
loaded. The second method is a little faster, but if your gun is empty,
you get whatever type of ammo is readily available that will fit it.
The green ammo bar on the right side of the active item button
will show the approximate number of rounds or energy remaining in
the active weapon. Examine the weapon in inventory to get an exact
count.
If you attempt to attack with an empty weapon, you will automatically fail.
Throw. Some weapons can be thrown. These weapons have a
range based on your Strength. Characters with a higher Strength
will be able to throw the ranged weapon farther.
Grenades are the most typically thrown weapon. They also
have the nasty ability to detonate even if you miss. A live grenade
has to land somewhere.
HAND TO HAND COMBAT
The use of melee weapons and unarmed combat is collectively
known as Hand to Hand combat (HtH). This sort of combat occurs at
very close ranges, from one to two hexes. Normally you will be adjacent to your opponent. This type of combat is fast and deadly, and
very personal.
Melee weapons, like knives and brass knuckles, have the advantage over ranged weapons in that they do not need consumable
ammunition and they are generally faster to use accurately.
Hand to Hand combat has the disadvantage that your opponent
will always be able to attack you back. With ranged weapons, you
5—8
RESTRICTED
87.
VDSG – RESTRICTED – VTB-OO1-13can fire from a distance, and if your opponent is not armed with a
ranged weapon, he must run up to you. HtH combat is a little more
dangerous.
Swing. Most melee weapons can be used in one of two ways,
with Swing being the most typical attack. Swinging weapons have a
base damage range, plus they get a bonus from your Strength. The
Melee Damage stat will add to the base damage of the weapon. The
higher the Melee Damage, the more damage your are assured of
doing.
Thrust. Some melee weapons can also be Thrusted. Thrusting
weapons also get the Melee Damage bonus. There is no practical difference between Swing and Thrust.
Punching & Kicking. If you are without a melee weapon, you
can always punch and kick. This type of attack uses your Unarmed
combat skill. Punching and Kicking attacks always do damage based
on just your Melee Damage.
DAMAGE
Damage is the result of a successful combat attack. The more
damage you do, the more likely your opponent will be killed, knocked
unconscious, or otherwise put out of the fight.
Hit Points. Basic damage is recorded in Hit Points (HP). The
more HP you have, the more damage you can take in combat. The
more HP you do with an attack, the better that attack was.
When your HP reach zero (0), you die.
Targeted Shots. Targeted shots are attacks that are aimed at
a specific location on your opponent. They are harder to do (resulting in a negative modifier to your chance to hit), but can potentially
do much more damage and they are more likely to result in a critical
hit (see page 5—11).
Figure 5-6: The active item
button, in Targeted shot mode.
RESTRICTED
5—9
5
88.
VDSG – RESTRICTED – VTB-OO1-13If a weapon is capable of making a targeted shot, it will have a
different mode on the active weapon button. Right-click on the
weapon in the active item button to cycle through the various modes.
When you see the target in the lower right-hand corner, then when
you attack it will be a targeted shot.
Burst weapons or weapons that cause explosive damage cannot
make targeted shots. Most melee weapons can make them. The target icon in the lower right-hand corner will always be displayed for
weapons capable of targeted shots.
Figure 5-7: A
targeted shot
interface screen,
showing the
wireframe of
your opponent.
Once you have selected the targeted shot mode on the weapon,
and the little target is in the lower right-hand corner, you will get a
red target cursor when you left-click on the active weapon button.
Left-click on a target, as if you were attacking them normally, and
you will get a target shot selection screen, as shown in Figure 5-7. A
wireframe will represent the target. The different areas that you
can attack will be displayed on the left and right sides. The number
next to the location is the final to hit chance that you have for
attacking that specific location. To hit chances of “—” have no
chance to hit.
Click on a location name to attempt the attack. Press the CANCEL button to cancel the attack (in case the to hit chances were too
low, for example).
Targeted shots have a higher chance of scoring a critical hit.
The more difficult the location was to hit, the better the chance it will
do a critical hit.
5—10
RESTRICTED
89.
VDSG – RESTRICTED – VTB-OO1-13Critical Hits. Some attacks are just so good that they cause
extra damage or have some nasty effect on your target. These are
called critical hits. Your chance to have a critical hit is based on your
critical chance, and whether or not you made a targeted shot.
Targeted shots will do more critical hits than normal shots.
A higher skill will give you a better chance to make a critical hit.
Some common critical hit effects:
Doing extra damage (x1.5, x2, or even x3)
Crippling a limb (with a targeted shot)
Ignoring the armor of your target
Unconsciousness
Knocking the target over
Other effects are possible. The type of effects that will occur
depend on the target.
Critical Failures. With every good thing must come a bad
thing. Critical Failures are the opposite of the nice critical hits.
Critical failures mean that something bad has happened to the
attacker, which can include you.
Trying to make a difficult attack with a low to hit chance will
increase the odds that you will have a critical failure. Taking the
Jinxed trait means that everyone, including yourself, will have more
critical failures.
The type of critical failure that you have depends on the weapon
(or lack thereof) you attack with.
Some common critical failure effects include:
Running out of ammo
Jamming your gun
Losing AP
Dropping your weapon
Your weapon may explode (only likely with explosives and
energy weapons)
Missing your target and hitting someone else
There are other effects. Trial and error will take on a whole new
meaning.
Poison. Poison is a nasty type of attack. It does damage over
longer period of time. So instead of taking 4 points of damage from
a knife, you could take 4 points of damage immediately from a poisoned knife, and then 10 points of damage over the next ten minutes.
The more poison you are affected by, the longer you will take damage
from poison.
RESTRICTED
5—11
5
90.
VDSG – RESTRICTED – VTB-OO1-13Fortunately, poison runs out of steam. The poison will weaken
over the same period of time. At first, you will take damage frequently from the poison. As time goes on, the period between damage will lengthen. Eventually, the poison will vanish.
If you can survive long enough, you can escape the clutches of
evil poison.
Radiation. Radiation is an insidious, invisible attack.
Radiation causes damage to the cells of the target. Dangerous levels
of Radiation are left behind in craters from nuclear bomb attacks, for
example. Even after hundreds of years, dirty bombs can create hazardous radiation dangers.
The effect of Radiation is based on the total amount of rems, a
count of the amount of radiation you have been exposed to. The higher your rem total, the more likely you are going to suffer ill effects.
A rem count of over 100 is dangerous.
If your rem count is over 1,000 it is most likely fatal.
Radiation will do damage to your hit points, and even to your
statistics.
Normal armor does not stop radiation damage. Chems, such as
Rad-X and RadAway, can protect against the ill powers of radiation.
Unconsciousness. Some attacks, especially critical hits to the
head, will cause unconsciousness. During this time, the person can
do nothing. The amount of time the affected person will be knocked
out is dependent on their Endurance. The higher their Endurance,
the shorter they will remain unconscious.
Death. There are two ways to die: lose all your hit points or
fall unconscious with remaining hostile creatures around you.
Both are bad ideas.
ARMOR
Fortunately, armor can protect against damage. Armor is a protective apparel worn to defend against attacks and damage. Better
armor can protect against bigger attacks.
There are three factors that determine the quality of armor.
Armor Class. The first function of armor is to prevent the
wearer from being hit by the attack. This is known as Armor Class
(or AC). The higher the AC, the better the armor. The AC subtracts
from the to hit chance of the attacker. Example: you are wearing
light leather armor, with an AC of 15%. Your attacker has a base to
5—12
RESTRICTED
91.
VDSG – RESTRICTED – VTB-OO1-13hit chance of 50% (assuming all the other modifiers have been taken
into account). His final to hit chance is only (50% - 15%) 35%.
Damage Threshold. The second step is blocking the damaging energy of the attack. This is known as the Damage Threshold (or
DT). The DT is subtracted from the hit point damage of the attack.
Example: Assume the above attacker succeeds. His attack does 20
points of damage (ouch!). You have a DT of 4. The first four points
of his attack are stopped, with only 16 (still ouch!) getting through
the first phase of your armor.
Damage Resistance. After the DT, the Damage Resistance
(or DR) of your armor takes over. This represents the ability of armor
to slow down and disperse the damaging energy. DR is expressed as
a percentage. This is the percent of the remaining damage that is
nullified. Example: The 16 points from the above attack are still
coming. You have a DR of 20%. The damage is reduced by (16 x .2)
3.2 points of damage (round down), or 3 points. The final attack does
only 13 points of damage, which is a heck of lot better than the initial 20 points.
Armor is always expressed as: Armor Class, DT/DR.
ENDING COMBAT
Don’t let this happen to you! Proper
weapon maintenance will stop over
95% of all critical failures!
At some point combat
must end. Hopefully, you
will be on the victorious
side. If all the combatants on one side are
dead, unconscious, or
have fled, the combat
will end.
If there are no more
hostile creatures remaining, combat will end
automatically at the end
of your turn. If you want
to end combat early, try
the END COMBAT button on the interface bar.
If hostile creatures
are nearby, you cannot
end combat.
RESTRICTED
5—13
5
92.
VDSG – RESTRICTED – VTB-OO1-13EQUIPMENT
Vault-13 comes prepared with the latest in survival equipment.
The items in your storage containers will last 1,000 people over 10
years in comfortable and modern surroundings. When it is time to
leave the Vault, and return to rebuild America, your friends at VaultTec have provided you with everything that you will need.
We have ensured that all of your rebuilding needs will be covered
Who wrote
wrotethis?
this?What
What
budget
//s: Yeah,
Yeah, right.
right. Who
budget
did did
theythey
get? We
already
used
most
of
the
equipment
on
failed
attempts
to
contact
an
get? We already used most of the equipment on
outside civilization. And we’ve been in here a lot longer than ten
failed
attempts
to to
contact
anbut
outside
years.
We have
little left
give you,
we willcivilization.
give you what we
can.And
-O//we’ve been in here a lot longer than ten years.
We have little left to give you, but we will give you
-O
what we can.
undergone extensive testing to make sure the equipment is reliable.
A reminder: You can only carry an amount of equipment equal to
your carry weight. Anything over that amount must be left behind.
You can get specific information about the items in your inventory by doing an Examine on a item in your inventory list. The information will be displayed in the inventory display window. If you
equip armor and weapons, the character information in the display
window will give you additional information.
There are six different types of equipment:
Weapons (things that hurt people)
Ammo (things that go in things that hurt people)
Armor (things that help people not get hurt)
Containers (things that hold other things)
Chems (things that you take)
Miscellaneous (things that do other stuff)
All items have the following in common:
Weight (how much things weigh, in pounds). The weight of the
item will affect your ability to carry equipment. You can carry a larger amount of lighter items than heavier items. When you examine
an item, it will tell you the weight for one instance of that item. If
you carry multiple items of the same type, you need to multiply the
number of items by the weight to determine the total weight of items
in that stack.
5—14
RESTRICTED
93.
VDSG – RESTRICTED – VTB-OO1-13Size (how big or small things are). The size of the item will
affect how many items a container can hold, and how difficult it will
be for someone to steal this item from you. Larger items are more
difficult to steal. Generally, items that are heavy, are larger in size.
This is not always the case.
Cost (how much things are worth, in money). More valuable
items are worth more money. We don’t know what kind of monetary
system will exist after a nuclear war, but bartering is most likely to
exist. In this case, items necessary to survival will probably carry a
larger price tag than fancy, expensive, but unnecessary items.
Your bartering skill will adjust the value of an item.
EQUIPMENT LIST
WEAPONS
ICON
DESCRIPTION
BRASS KNUCKLES
Brass Knuckles are a melee weapon that use your unarmed skill.
They will help in hand-to-hand combat when punching. Besides
giving your hand a little more protection, they will increase the
amount of damage you do with a punch. And they look cool.
CLUB
This police baton will help subdue your opponents. You can
swing or thrust it, as you desire. The baton will focus your
strength, doing more damage than your own hands. Not much
more, but more…
PISTOL
This is your basic ranged weapon. The 10mm round packs a
goodly punch, and the Colt pistol is a fine example of
workmanship and quality. It is a single shot weapon only,
meaning that every time you pull the trigger, you will fire one,
and only one, round of ammunition. The 6520 has no problem
feeding hollowpoint ammunition for small game hunting, or
armor piercing rounds for larger, bipedal game.
RIFLE
A longer ranged, and more powerful, firearm. The Rangemaster is
your basic, solid rifle. It uses the .223 caliber rifle round, a standard
for over 110 years. The .223, combined with a 1:10” twist, gives
good accuracy at range and solid knockdown capability.
RESTRICTED
5—15
5
94.
VDSG – RESTRICTED – VTB-OO1-13EQUIPMENT LIST
WEAPONS continued
ICON
DESCRIPTION
GRENADE
The fragmentation grenade is extremely useful as a defensive
weapon. A small, but concentrated, explosive charge connected to
a contact fuze will spread over 1,000 metal fragments over a 2.5
meter radius area. The small explosion area means that these
grenades can be used at a closer range than ever before, without
possible harm to the user.
SMG
One of the finest weapons in the world. The H&K MP9 is a solid
submachinegun, capable of single or burst mode attacks. The
single shot is acceptable, comparable to the 6520 pistol, but the
burst mode is spectacular! The MP9 is easy to control, and spews
10mm death like no other firearm in it’s size category.
KNIFE
Vault-Tec knives are formed from the hardest steel alloys known to
man! The knife is a superb tool, capable of performing many
mundane tasks, as well as being a good melee weapon. The
knife point and edge will act as a force multiplier, increasing the
amount of damage your Strength can do. Not as good as a gun,
but better than most other small melee weapons. This knife is not
balanced or designed for throwing, as some others are.
SLEDGEHAMMER
While many would consider a Sledgehammer to be an excellent
tool, but a poor self-defense weapon, the latest designs are
made with lightweight but extremely strong materials. The
sledgehammer is a massive weapon, that in the hands of a strong
wielder, can knock foes off their feet.
SPEAR
A razor-tipped spear can be thrown for several meters (more
depending on your strength), or used in hand-to-hand combat,
making this a good balance between ranged and melee weapons.
While it is not the best tactical sense to throw your only weapon at
your opponent, if you keep a sidearm or other small weapon readily
available, the spear can be a good first attack.
5—16
RESTRICTED
95.
VDSG – RESTRICTED – VTB-OO1-13EQUIPMENT LIST
AMMO
ICON
DESCRIPTION
.223 FMJ
Rifle caliber ammunition. The FMJ stands for Full-Metal Jacket,
which describes the bullet that is used in the round of ammo. A
FMJ bullet is very tough, and has pretty good penetration without
sacrificing good expansion. In other words, it‘s an average round.
10mm AP
The 10mm caliber ammo is designed for pistol or submachinegun
size firearms. The AP suffix denotes the round is Armor Piercing.
AP rounds have excellent penetration, but poor expansion. They
will not be as affected by armor as a normal round, but do less
damage after armor to the target.
10mm JHP
This is another version of the 10mm, but in JHP or Jacketed Hollow
Point. Hollow Point ammunition is designed to expand to as large of
a size as possible to translate the most energy to the target.
Unfortunately, if the target is wearing armor, most of the energy is
splatted against the armor and little of it will actually affect the target.
ARMOR
COMBAT ARMOR
Combat Armor is advanced personal armor for the 22nd century
police officer or military grunt. This is about the best armor a Vault
Dweller is likely to see in their lifetime. Combat Armor is highly
effective against most types of damage, is light weight (for it’s
protective value), and is, unfortunately, not available without a special
permit. Interested parties should contact the BADTFL office near them.
LEATHER ARMOR
The original Leather Armor was designed for Motorcycle Football and
other dangerous contact sports. It is likely that the simple construction
techniques required to produce armor of this design will make it a
popular choice following a nuclear disaster. It provides moderate
protection, and the light construction makes it easier to dodge attacks
while worn. Unfortunately, it provides little to no protection against
explosions or plasma attacks.
RESTRICTED
5—17
5
96.
VDSG – RESTRICTED – VTB-OO1-13EQUIPMENT LIST
ARMOR continued
ICON
DESCRIPTION
LEATHER JACKET
What’s the point of wearing armor if you can’t look good? The
Leather Jacket is a toned down version of Leather Armor,
providing minimal protection while not sacrificing any dodging
capability. Stylish, too. Unfortunately, poor ventilation and the
black leather make this a very hot armor to wear under the
scorching desert sun.
CONTAINERS
BACKPACK
A backpack will store items for you in one convenient location.
Items have two features: size and weight. A backpack will store
any number of items that total less than around 40 lbs., and
have a combined size that will fit in the backpack. Several
really large items (like suits of armor) will not fit in a normal
backpack, but lots of small items (like ammo, or grenades) will
fit just fine.
Why use a backpack? To keep your inventory organized.
CHEMS
RADAWAY
If you have been exposed to large amounts of radiation, then use
RadAway to remove the radiation from your system. It won’t feel
good, but better a headache and some stomach problems for a
couple of days than the long term effects of nuclear radiation!
RadAway takes a little while to work.
RAD-X
Rad-X is a preventive medication. Take Rad-X before exposure
to radiation, and the total amount of radiation you receive will
be reduced. Rad-X bolsters your bodies own Radiation
Resistance. The stronger you are to start with, the more effective
Rad-X will be.
5—18
RESTRICTED
97.
VDSG – RESTRICTED – VTB-OO1-13EQUIPMENT LIST
CHEMS continued
ICON
DESCRIPTION
STIMPAK
A stimpak (short for Stimulation Delivery Package) contains many
healing chems. A soup of healing medication, if you will. By
injecting the Stimpak, you drastically increase your own
recuperative functions and restore lost hit points almost instantly.
SUPER STIMPAK
The Super Stimpak contains more drastic chems, increasing the
healing effect at the cost of eventual damage to the very tissue it
heals! A larger cousin to the Stimpak, the Super Stim will heal
more damage. It will, however, cause a small amount of hit point
loss after a period of time. You should be aware of this function,
and prepare for it. But nothing works like a Super Stim when
time is short, and danger grave.
MISCELLANEOUS
DOCTOR’S BAG
A Doctor’s Bag includes all the items necessary to perform most tasks
required by the Doctor skill. Using this item will automatically perform
the Doctor skill task, but at a higher percentage chance of success (the
proper tools help ensure a higher success rate). A Doctor’s Bag does
not contain unlimited supplies and will eventually run out.
DYNAMITE
An explosive. Use the dynamite to set the timer. After the timer
expires, the dynamite will explode. Your Traps skill will determine if
you set the timer properly. In Fallout, explosives are generally lower
powered then you would expect. But don’t stand next to a charge of
dynamite when it goes off.
FIRST AID KIT
Similar in nature to the Doctor’s Bag, the first aid kit (FAK) has items
for the use of the first aid skill. Using the FAK on a hurt subject will
improve the successful chance of using the skill of First Aid. Also, like
the Bag, the FAK contains a limited amount of healing items,
bandages, and so on. After multiple uses, it will be eliminated.
RESTRICTED
5—19
5
98.
VDSG – RESTRICTED – VTB-OO1-13EQUIPMENT LIST
MISCELLANEOUS continued
ICON
DESCRIPTION
FLARE
The flare can be used to create a field of light for a period of
time. Only really useable during the night, or in darkness
conditions, the flare can be a successful tool in exploration.
Light makes it easier to see people and things.
GEIGER COUNTER
A geiger counter is a device for the measurement of radiation.
If you place the counter in one of your active item slots, you will
have advance warning about radiation. Actively using the
counter will give you important detailed information about your
personal radiation count.
LOCKPICKS
An unauthorized item for general vault personnel use. Lockpicks
are only to be used in emergencies requiring the opening of
doors or locked containers when the proper key is unavailable.
The proper use of the lockpick item will increase the successful
chance of using the Lockpick skill.
MOTION SENSOR
When used in conjunction with the PIPBoy 2000 AutoMap
feature, the motion sensor will display living and moving critters
on the map. The motion sensor must be placed in an active
item slot to function correctly. Use the motion sensor to scout
the area ahead.
THT TAPES (Holotapes)
THT Tapes can store an incredible amount of data, some can hold
as much as 256k. The standard tape holds 64k, with the middle
model holding an average of 128k (barring any bad inches of
tape). THT Tapes are based on Tape Holography technology,
storing their information safely for extended periods of time. Use
the THT Tape to add it’s information to a compatible reader, in your
case - the PIPBoy 2000.
5—20
RESTRICTED
99.
VDSG – RESTRICTED – VTB-OO1-13EXPERIENCE
As your character survives in the hostile environments, and
succeeds at the tasks ahead, you will gain experience. In turn, experience will improve your character, increase your character level,
allowing you to spend points on skills, and eventually, pick a Perk.
Experience is rated in Experience Points (often abbreviated
XP). The more difficult the task you solve, or the more difficult the
critter you put down, the more experience points you earn.
When you achieve a set number of XP, you gain a level. When
you gain a character level, which is a generalized measure of how
much experience you have gained and how capable your character is,
you gain the following:
Additional Hit Points, equal to 1/3 Endurance
More Skill Points, equal to 5 + Intelligence x 2
(see page 5—22)
Every three levels, you gain one Perk (see page 5—23)
The maximum level a character can achieve is level 21. Here is
a list of the levels, and how much XP is required to gain that level.
Table 5-3 EXPERIENCE TABLE
LEVEL
XP REQUIRED
TITLE
1 ..........................0..........................Vault-dweller
2....................1,000..........................Vault Scion
3....................3,000..........................Vault Veteran
5
4....................6,000..........................Vault Elite
5..................10,000..........................Wanderer
6..................15,000..........................Desert Wanderer
7..................21,000..........................Wanderer of the Wastes
8..................28,000..........................Elite Wanderer
9..................36,000..........................Strider
10................45,000..........................Desert Strider
11................55,000..........................Strider of the Wastes
RESTRICTED
5—21
100.
VDSG – RESTRICTED – VTB-OO1-13Table 5-3 EXPERIENCE TABLE Continued
LEVEL
XP REQUIRED
TITLE
12................66,000..........................Strider Elite
13................78,000..........................Vault Hero
14................91,000..........................Wandering Hero
15..............105,000..........................Striding Hero
16..............120,000..........................Hero of the Desert
17..............136,000..........................Hero of the Wastes
18..............153,000..........................Hero of the Glowing Lands
19..............171,000..........................Paragon
20..............190,000..........................Living Legend
21..............210,000..........................Last, Best Hope of Humanity
As you can see, it takes a slightly larger amount of XP to
advance from the lower levels to the higher levels. You have to learn
more to achieve the same amount of growth.
SKILL POINTS
When you earn more skill points, you can increase your skills by
spending those points on a skill. Every skill point is worth an additional +1% to a normal skill, and +2% to a Tag skill.
You can spend skill points whenever you wish, and on whatever
skill you want to increase. Storing skill points is a possible strategy,
but then you effectively lose them by not gaining their benefit until
you spend them.
You earn skill points by going up a level. When you go from
level 1 to level 2, you will gain some skill points. The number of skill
points you gain depends on your character. Every level will get you
5 + Intelligence x 2 skill points. Average characters will gain 15 skill
points a level, or +15% to normal skills or +30% to just Tag skills, or
some combination between the two types of skills.
To spend skill points, go to the character screen. The number of
skill points is listed above the information card.
5—22
RESTRICTED
101.
VDSG – RESTRICTED – VTB-OO1-13Figure 5-8:
Here are some
skill points to
spend.
Click on the skill name of the skill you want to spend some
points on. The skill will highlight, and the pointer on the right-hand
side of the skill column will jump to the skill level. You can spend
points by clicking on the plus sign on the pointer. If you change your
mind, and spend too many points, you can click on the minus sign
(but you can’t reduce your skill below the point where you started
spending skill points, naturally). Until you actually hit the DONE
button and return to the game, you can make as many adjustments
as you wish. If you click on the CANCEL button, it will restore your
character to the state you were in before making any changes.
You can spend as many skill points as you have in the skill point
pool. Once you are out, you won’t get any more skill points until you
get another level.
The maximum skill level is 200%. If you have 200% in a skill,
you cannot add more points to that skill.
PERKS
Besides skills, it is possible for experience to reward you in
another manner - Perks. You get one Perk every three levels (level 3,
6, 9, 12, 15, 18, and 21), unless you have the Skilled trait (every four
levels; level 4, 8, 12, 16, and 20). A Perk is a new ability. Perks are
based on your character, and the list of Perks that you can choose
from is based on what level, statistics, and skills your character has.
You will have the opportunity to pick a Perk when you enter the
character screen after achieving a level that grants you a Perk. You
can choose not to pick a Perk, but if you don’t select one before the
next Perk-granting level, you lose it.
RESTRICTED
5—23
5
102.
VDSG – RESTRICTED – VTB-OO1-13Figure 5-9: Picking a Perk for a better future!
Some Perks can be taken multiple times. These Perks have
ranks, or perk levels. Every additional rank will increase the power
of the Perk.
Perks also have requirements. Your character must have the
minimum requirements, or greater, to be able to take the Perk. You
must meet all the requirements. Some Perks have no requirements.
All Perks are not available at the first level Perks are offered.
These Perks have a minimum level before they can be taken.
THE LIST OF PERKS
Action Boy
Each level of Action Boy (insert Girl if you wish) will give you an
additional AP to spend every combat turn. You can use these generic APs on any task.
Number of Ranks ..........3
Requirements ..............5 Agility, Level 12
Animal Friend
Animals will not attack one of their friends, unless the animal
is threatened or attacked first. Exactly what an animal is in this
world is open to debate.
Number of Ranks ..........1
Requirements ................5 Intelligence, 25% Outdoorsman,
Level 9
5—24
RESTRICTED
103.
VDSG – RESTRICTED – VTB-OO1-13Awareness
You are more likely to notice details. Buying one level of
Awareness will give more detailed information when you perform an
Examine. Each level of Awareness will add to your Perception for
purposes of Examines.
Number of Ranks ..........3
Requirements ................5 Perception, Level 3
Better Criticals
The critical hits you cause in combat are more devastating. You
gain a 20% bonus on the critical hit table, almost ensuring that more
damage will be done. This does not affect the chance to cause a critical hit.
Number of Ranks ..........1
Requirements ................6 Perception, 6 Luck, 4 Agility, Level 9
Bonus HtH Attacks
You have learned the secret arts of the East, or you just punch
faster. In any case, your hand-to-hand attacks cost 1 AP less to perform.
Number of Ranks ..........1
Requirements ................6 Agility, Level 6
Bonus HtH Damage
Experience in unarmed combat has given you the edge when it
comes to damage. You cause +2 points of damage with punches and
kicks for each level of this Perk.
Number of Ranks ..........3
Requirements ................6 Agility, 6 Strength, Level 3
Bonus Move
For each level of Bonus Move, you get 2 free APs each turn that
can only be used for movement. In other words, you can move 2 free
hexes each turn for each level of this Perk.
Number of Ranks ..........3
Requirements ................5 Agility, Level 6
RESTRICTED
5—25
5
104.
VDSG – RESTRICTED – VTB-OO1-13Bonus Ranged Damage
Your training in firearms and other ranged weapons has made
you more deadly in ranged combat. For each level of this Perk, you
do +2 points of damage with ranged weapons.
Number of Ranks ..........2
Requirements ................6 Agility, 6 Luck, Level 6
Bonus Rate of Fire
This Perk allows you to pull the trigger a little more faster, and
still remain as accurate as before. Each ranged weapon attack costs
1 AP less to perform.
Number of Ranks ..........1
Requirements ................7 Agility, 6 Intelligence, 4 Perception,
Level 9
Cult of Personality
Your reputation is always positive to people. Without this Perk,
a large negative reputation would have a bad effect on good natured
people. Works with a good rep and bad people, too.
Number of Ranks ..........1
Requirements ................10 Charisma, Level 12
Dodger
You are less likely to be hit in combat, if you have this Perk.
Every level will add +5% to your Armor Class, in addition to the AC
bonus from any worn armor.
Number of Ranks ..........2
Requirements ................4 Agility, Level 9
Earlier Sequence
You are more likely to move before your opponents in combat,
since your Sequence is +2 for each level of this Perk.
Number of Ranks ..........3
Requirements ................6 Perception, Level 3
Educated
Each level of Educated will add +2 skill points when you gain a
new experience level. This Perk works best when purchased early in
your adventure.
Number of Ranks ..........3
Requirements ................6 Intelligence, Level 6
5—26
RESTRICTED
105.
VDSG – RESTRICTED – VTB-OO1-13Empathy
You have studied other human beings, giving you the inside
knowledge of their emotional reaction to you. You will see the reaction level of the person you are talking to, when involved in an indepth conversation.
Number of Ranks ..........1
Requirements ................7 Perception, 5 Intelligence, Level 6
Explorer
The mark of the Explorer is to search out new and interesting
locations. With this Perk, you have a greater chance of finding special places or peoples.
Number of Ranks ..........1
Requirement ..................None, Level 9
Faster Healing
With each level of this Perk, you will get a +1 bonus to your
Healing Rate. Thus you heal faster.
Number of Ranks ..........3
Requirements ................6 Endurance, Level 3
Flower Child
With this Perk, you are much less likely to be addicted to chems
(50% less likely, actually), and you suffer half the withdrawal time of
a normal person.
Number of Ranks ..........1
Requirements ................5 Endurance, Level 9
Fortune Finder
You have the talent of finding money. You will find additional
money in random encounters in the desert.
Number of Ranks ..........1
Requirements ................8 Luck, Level 6
Friendly Foe
Characters that are part of your team are highlighted green in
combat instead of red, if you have this Perk. Red highlighted characters may still be non-hostile towards you.
Number of Ranks ..........1
Requirements ................4 Perception, Level 6
RESTRICTED
5—27
5
106.
VDSG – RESTRICTED – VTB-OO1-13Ghost
When the sun goes down, or you are in a poorly lit area, you
move like a Ghost with this Perk. Your Sneak skill is enhanced +20%
during darkness conditions.
Number of Ranks ..........1
Requirements ................60% Sneak, Level 6
Healer
The healing of bodies comes easier to you with this Perk. Each
level will add 2-5 more hit points healed when using the First Aid or
Doctor skills.
Number of Ranks ..........3
Requirements ................7 Perception, 6 Agility, 5 Intelligence,
40% First Aid, Level 3
Heave Ho!
Each level of the Heave Ho! Perk will give your thrown weapons
an additional +2 Strength for purposes of determining range only.
Number of Ranks ..........3
Requirements ................Level 6
Lifegiver
With each level of this Perk, you gain an additional 4 Hit Points.
This may not seem like a lot, but every little bit helps.
Number of Ranks ..........3
Requirements ................4 Endurance, Level 12
Master Thief
A Master Thief has a one-time bonus of +10% to the Sneak,
Lockpick, Steal and Traps skills. Rob from the rich, and give to you.
Number of Ranks ..........1
Requirements ................Level 12
Master Trader
You have mastered one aspect of bartering - the ability to buy
goods far cheaper than a normal person. With this Perk, you get a
25% discount when purchasing items from a store or another trader.
Number of Ranks ..........1
Requirements ................7 Charisma, 60% Barter, Level 9
5—28
RESTRICTED
107.
VDSG – RESTRICTED – VTB-OO1-13Medic
The Medic Perk will give you a one-time bonus of +20% to the
First Aid and Doctor skills. Healing skills are a good thing.
Number of Ranks ..........1
Requirements ................Level 12
Mental Block
Mental Block is the ability to tune out any outside mental interference. You must have learned this talent from a passing guru, or
from a really late night at a bar.
Number of Ranks ..........1
Requirements ................Level 15
More Criticals
You are more likely to cause Critical Hits in combat if you have
this Perk. Each level of More Criticals will get you a +5% chance to
cause a critical hit. This is a good thing.
Number of Ranks ..........3
Requirements ................6 Luck, Level 6
Mr. Fixit
This Perk will give you a one-time bonus of +20% to the Repair
and Science skills. A little late night cramming never hurt anybody,
especially you.
Number of Ranks ..........1
Requirements ................None, Level 12
Mutate!
The radiation of the wasteland has changed you! One of your
Traits has mutated into something else...
Number of Ranks ..........1
Requirements ................Level 9
Mysterious Stranger
With this Perk, you have gained the attention of a Mysterious
Stranger, who will appear to help you from time to time. If your ally
is lost in combat, do not expect him or her to be replaced.
Number of Ranks ..........1
Requirements ................7 Luck, Level 6
RESTRICTED
5—29
5
108.
VDSG – RESTRICTED – VTB-OO1-13Night Vision
With the Night Vision Perk, you can see in the dark better.
Each level of this Perk will reduce the overall darkness level by 10%.
Number of Ranks ..........3
Requirements ................6 Perception, Level 3
Pathfinder
The Pathfinder is better able to find the shortest route. With
this Perk, your travel time on the World Map is reduced by 25% for
each level.
Number of Ranks ..........2
Requirements ................6 Endurance, 40% Outdoorsman,
Level 6
Pickpocket
You are much more adept at Stealing than the normal crook.
You can Steal with the best of them, because with this Perk, you
ignore size and facing modifiers, when stealing from a person.
Number of Ranks ..........1
Requirements ................8 Agility, 80% Steal, Level 9
Presence
You command attention by just walking into a room. The initial reaction of another person is improved by 10% for each level of
this Perk.
Number of Ranks ..........3
Requirements ................6 Charisma, Level 3
Quick Pockets
You have learned to better store your equipment on your person.
With each level of this Perk, the AP cost to access Inventory in combat is reduced by one.
Number of Ranks ..........3
Requirements ................5 Agility, Level 3
Rad Resistance
You are better able to avoid radiation, and the bad effects radiation causes. Each level of this Perk will improve your Radiation
Resistance by 10%.
Number of Ranks ..........3
Requirements ................6 Endurance, 4 Intelligence, Level 6
5—30
RESTRICTED
109.
VDSG – RESTRICTED – VTB-OO1-13Ranger
You are better able to avoid unwanted attention while traveling
through the wasteland. Your chance of a hostile random encounter is
lowered by each level of this Perk.
Number of Ranks ..........3
Requirements ................6 Perception, Level 6
Scout
You have improved your ability to see distant locations,
increasing the size of explorations on the World Map by one square
in each direction.
Number of Ranks ..........1
Requirements ................8 Perception, Level 3
Scrounger
You can find more ammo than the normal post-holocaust survivor. This Perk will double the amount of ammo found in random
encounters.
Number of Ranks ..........1
Requirements ................8 Luck, Level 9
Sharpshooter
The talent of hitting things at longer distances. You get a +2
bonus, for each level of this Perk, to Perception for the purposes of
determining range modifiers. It's easier than ever to kill at long
range!
Number of Ranks ..........2
Requirements ................7 Perception, 6 Intelligence, Level 6
Silent Death
While Sneaking, if you hit a critter in the back, you will cause
double damage using a HtH attack. Silent Death is that kind of Perk.
Number of Ranks ..........1
Requirements ................10 Agility, 80% Sneak, Level 18
Silent Running
With this Perk, you now have the ability to move quickly and
still remain quiet. You can Sneak, and run at the same time.
Without this Perk, you would automatically stop Sneaking if you ran.
Number of Ranks ..........1
Requirements ................6 Agility, 50% Sneak, Level 6
RESTRICTED
5—31
5
110.
VDSG – RESTRICTED – VTB-OO1-13Slayer
The Slayer walks the earth! In hand-to-hand combat, all of your
hits are upgraded to critical hits - causing destruction and mayhem.
Number of Ranks ..........1
Requirements ................8 Agility, 8 Strength, 80% Unarmed,
Level 18
Smooth Talker
A Smooth Talker has learned to increase their options in dialogue, without understanding what they are talking about. Each
level of this Perk will increase your Intelligence by one, for purposes
of dialogue only.
Number of Ranks ..........3
Requirements ................4 Intelligence, Level 3
Snakeater
Yum! Tastes like chicken. You have gained an immunity to poison, resulting in a +25% to your Poison Resistance.
Number of Ranks ..........1
Requirements ................3 Endurance, Level 6
Sniper
You have mastered the firearm as a source of pain. With this Perk,
any successful hit in combat with a ranged weapon will be upgraded
to a critical hit if you also make a Luck roll.
Number of Ranks ............1
Requirements ..................8 Agility, 8 Perception,
80% Small Guns, Level 18
Speaker
Being a Speaker means that you have a one-time bonus of
+20% to the Speech and Barter skills. From the mouth of babes and
all that.
Number of Ranks ..........1
Requirements ................None, Level 12
Strong Back
AKA Mule. You can carry an additional 50 lbs. of equipment for
each level of this Perk.
Number of Ranks ..........3
Requirements ................6 Strength, 6 Endurance, Level 3
5—32
RESTRICTED
111.
VDSG – RESTRICTED – VTB-OO1-13Survivalist
You are a master of the outdoors. This Perk confers the ability
to survive in hostile environments. You get a +20% bonus to
Outdoorsman for survival purposes, for each level of this Perk.
Number of Ranks ..........3
Requirements ................6 Endurance, 6 Intelligence,
40% Outdoorsman, Level 3
Swift Learner
You are indeed a Swift Learner with this Perk, as each level will
give you an additional +5% bonus whenever you earn experience
points. Best purchased at an early level.
Number of Ranks ..........3
Requirements ................4 Intelligence, Level 3
Tag!
Your skills have improved to the point where you can pick an
additional Tag Skill, increasing that skill by +20% immediately and
2% per skill point spent.
Number of Ranks ..........1
Requirements ................Level 12
Toughness
When you are tough, you take less damage. Each level of this
Perk will add +10% to your general damage resistance.
Number of Ranks ..........3
Requirements ................6 Endurance, 6 Luck, Level 3
5
RESTRICTED
5—33
112.
VDSG – RESTRICTED – VTB-OO1-13Future-Tec, a division of Vault-Tec, presents the following
advertisement for your enjoyment!
When the All Clear sounds on your radio, you don't want
to be caught without...
THE GARDEN OF EDEN
CREATION KIT!!
The kit includes:
Base Replicator Unit- replicates food
and basic items needed for building
your new world. Just add water!
(powered by cold fusion)
Holodisc Reader with Libraryincludes selections from the Library
of Congress, complete set of
encyclopedias, and other life
saving information, all
contained on four-hundred
and sixty handy holodiscs!1
and...
A Miniature Pen Flashlight!2
4 out of 5 nuclear scientists recommend the Garden of
Eden Creation Kit over the other leading survival kits!
1
A condensed version is available on three handy holodiscs
2
Not suitable for children under the age of three. A different toy is available for younger children.
5—34
RESTRICTED
113.
RESTRICTEDAPPENDICES
A
RESTRICTED
VDSG VTB-001-13-A
114.
VDSG – RESTRICTED – VTB-OO1-13APPENDIX 1: HINTS & TIPS
Here are some hints and tips to help you in your quest to save
Vault-13. Warning!! There are some spoilers in the list below. If you
don’t want to spoil any part of the Fallout adventure, don’t read!
Most of the tips are general hints that will be familiar to experienced
adventurers.
Starting Out
When you start out, remember to equip your character with the
best possible equipment as soon as possible. Strip your fallen foes,
barter the loot away and steal (if you think you can get away with it,
and are willing to live with the consequences of your actions).
Save Often
You have ten save game slots. Use them well. Before you get to
a new location, save your game. Before entering a dangerous looking
building, save your game. Before talking to an important looking
NPC, save your game. And use all of your save game slots. Don’t
keep saving over slot 1. If something goes drastically wrong, it’s better to be able to move a couple of saved games back and restore from
there instead of having to start over from the very beginning.
Be Nice to People
More often than not, a good reaction will help you. That’s not to
say that going the route of a heavy, or kicking some poor loser into
the dirt won’t help, but a few kind words and deeds will help you out
in the long run.
Punch People in the Nose
If you can’t get your way, then learn how to force your opinion
down their throat (with a 10mm if necessary). Words are nice, but
you don’t have a whole lot of time, and it might be easier to be the
bad guy occasionally to get what you want. A little badness every
now and then won’t hurt you too much.
Time!
Remember that you are on the clock. The Vault is dying of
thirst, and they have entrusted you with their lives. Don’t let them
down. Solving the water-chip adventure sooner rather than later will
RESTRICTED
A—1
A
115.
VDSG – RESTRICTED – VTB-OO1-13let you explore more easily and without as much pressure. Don’t
spend too much time diddling around. The Fallout world is advancing. Your actions will change the course the world will follow, but the
world will continue to move ahead without you.
Save! Save! Save!
Did we mention to save your game? Fallout combat is deadly.
Getting shot in the eye is no fun, and many Fallout combats will
result in painful injuries. Can you afford to restart from an old saved
game, and make up lost ground? No! Save your game!
Where do I go from here?
If you are having a lot of difficulty determining what to do next,
follow these steps:
(a) Talk to people - many people will give you clues to new locations or places to go.
(b) Explore the world - the Fallout world is southern
California, so go to where there is a city and look for it on
the world map. Also make sure to stop at every green-circle area - that means it is an important location. The extra
distance you can see as you travel will give you a better
chance of finding these locations.
(c) The Overseer - if you are completely stuck, try going back
to the Overseer, he might have new information for you.
Save your game where you are at (there is that Save word
again), and then make the long journey back to the Vault.
Talk to the Overseer. If the trip was for nothing, restore
your previously saved game and look elsewhere. That way
you don’t waste any time.
Specialize
For the first couple of levels, spend your skill points in two or
three skills. Master a small set of skills before attempting to master
them all. Spend your skill points as soon as you gain a level. When
you create a character, try to make it a theme character. (A thief, a
diplomat and a warrior were the three themes we chose; can you
think of any others?). Pick Tag skills that will give you an advantage.
If you know that you are going to spend a lot of skill points for a particular skill, make that skill a Tag skill. The 2% for every 1 skill
point is a major advantage.
A—2
RESTRICTED
116.
VDSG – RESTRICTED – VTB-OO1-13Generalize
After about level 4 or 5, be sure to spread those skill points out
a little bit more. All the skills are important in their own ways.
Obviously, if you are a combat oriented character, the weapon skills
will be of great importance. Don’t forget the other skills, however!
Speech is critical, as is Science. Sneak will help when you can’t overcome the odds.
Use the Save Game feature
Hmmm, we mentioned this before, didn’t we?
Avoid the Crazy Chicken
You probably realize that you can interrupt your character in
mid-step by simply clicking the left mouse button with the hex cursor in a new spot. This will make your character immediately move
towards the new location. Now, if you repeatedly interrupt your
character during a walk, you will do something very similar to the
Crazy Chicken. It is childish. Don’t do it. We beg you.
And Last but not Least...
If you are really stumped, visit the Fallout Shelter at:
www.interplay.com/fallout
You can also play the game with a friend, or use other means of
communication to find out what your fellow Vault Dwellers are up to!
A
RESTRICTED
A—3
117.
VDSG – RESTRICTED – VTB-OO1-13APPENDIX 2: CREDITS
PRODUCTION
PROGRAMMING
Producer ..............................................................Tim Cain
Assistant Producer ......................................Fred Hatch
Division Director ............................Feargus Urquhart
Asst. Division Director ......................Jeremy Barnes
Original Producer......................................Tom Decker
Production Assistant ..........................Jason G. Suinn
Monkey Boy ................................Mike "Paco" Greene
Mac Assistance ..........................................Chris Benson
Lead Programmers ..........................................Tim Cain
Chris Jones
Programmers ....................................Jesse L. Reynolds
Kevin Weatherman
Nick Kesting
Robert Hertenstein 2
Jess Heinig
Jason Taylor
Mac Programmer............................................Tim Hume
Additional Programming By ..........Mark Harrison
(Lizard Byte)
John Price
Chris DeSalvo
Mark Murakami
Movie Technology..................................Paul Edelstein
ART
Art Director ....................................Leonard Boyarsky
Lead Artists ..........................................Jason Anderson
Leonard Boyarsky
Gary Platner
Artists..........................................................Robert Collier
Michael Dean
Tramell Ray Isaac
Eddie Rainwater
Scott Rodenhizer
Sharon Shellman
Additional Art By ......................................Peter Kroko
Justin Sweet
Joseph Cesario
Cheryl Austin
Jay Esparza (Tachyon)
Geoff Gregor
Arlene Sommers
George Almond
Erik Jamison
Helena Wickberg
James Doyle (Apples Animation)
Clay Modeller ..................................Scott Rodenhizer
Conceptual Artist ....................................Tony Postma
DESIGN
Lead Designer ............................................Chris Taylor
Designers ..................................................David Hendee
Scott Bennie
Brian Freyermuth
Scott Campbell
Technical Designer....................................Scott Everts
Additional Design By ............Robert Hertenstein 2
Jess Heinig
Nick Kesting
Design/Dialogue..................................Mark O'Green
Original Game Design By ............................Tim Cain
Leonard Boyarsky
Jason Anderson
Chris Taylor
Jason Taylor
Scott Campbell
A—4
QUALITY ASSURANCE
Director of Quality Assurance............Chad Allison
Assistant Director of QA......................Colin Totman
PC Version Lead Testers ..........................Ron Hodge
Greg "Moose" Baumeister
PC Version Testers ........................Shanna SanPaolo
Evan Chantland
Ed Hyland
Steve Reed
James Chung
Kaycee Vardaman
Bill Field
Richard Barker
Rene Hakiki
Erick Lujan
Matt Kaupa
Steve Victory
Scot Humphreys
Tim Anderson
Darrell Jones
Mac Version Lead Testers..........................Jim Dodds
Matt Murakami
Steve McLafferty
Mac Version Testers ............................Adam Chaney
Dennis Presnell
Savina Greene
Kaycee Vardaman
Scot Humphreys
Mike Krueger
Matt Golembiewski
I.S. Technicians ....................................................Bill Delk
Steve Cabiness
Director of Compatibility ..............Phuong Nguyen
Compatibility Technicians ....................Marc Duran
Dan Forsyth
Derek Gibbs
Aaron Olalz
John Parker
RESTRICTED
118.
VDSG – RESTRICTED – VTB-OO1-13AUDIO
FEATURING THE VOICES OF
Audio Director ....................................Charles Deenen
Audio Mastering ......................................Craig Duman
Background TV music ......................Ronald Valdez
Cinematics Re-recording Mixer ..........Dave West
Cinematics Soundeffects ............West Productions
Foley Artists ................................................Doug Turner
Gary Murello
Larry Peacock
Foley Editor..........................................Caron Weidner
Foley Mixer ..................................................Debby Ruby
Foley Mixer/Artist ..................................Cecilia Perna
Foley Recorded at..........................West Productions
Foley Supervision ..............................Charles Deenen
Larry Peacock
FX Editor ..........................................Michael Dickeson
Music By ............................................Mark Morgan for
Four Bars Entertainment
Intro Re-Recording Mixer ............Charles Deenen
Music Supervisor ....................................Brian Luzietti
Sound FX Librarians......................Doug Rappaport
Sergio Bustamante II
Ron Valdez
Sound FX Designers ........................Charles Deenen
Gregory Allen
Larry Peacock
EFX
Weddington
Caron Weidner
Voice Editors......................................Doug Rappaport
Sergio Bustamante II
Voice Producer..............................................Fred Hatch
Voice Recording Engineer................Paul Hurtubise
Voice Supervisor ....................................Chris Borders
Voice Talent Coordination ................Julie Morgavi
Voice Dialogue Recorded At ..................Hollywood
Recording Services
Hollywood, CA
Voice Direction ..................................Jamie Thomason
Harold ..........................................................Charlie Adler
Killian ......................................Richard Dean Anderson
Loxley ................................................................Jeff Bennett
Rhombus ....................................................Clancy Brown
Set, Gizmo, The Master ......................Jim Cummings
Decker ..............................................................Keith David
Harry................................................................Brad Garrett
The Lieutenant....................................................Tony Jay
Jain ............................................................Tress MacNeille
Overseer ..............................................................Ken Mars
Cabbot ............................................................Richard Moll
Butch Harris, Narrator ............................Ron Perlman
Vree ................................................................CCH Pounder
Nichole ..............................................................Pam Segall
Aradesh............................................................Tony Shalub
Laura, The Master ......................................Kath Soucie
Tandi ..............................................................Cree Summer
Morpheus ..................................................David Warner
Maxson ..........................................................Frank Welker
"Maybe"
Performed by Ink Spots
Courtesy of MCA Records
By Arrangement with Universal Music Special
Markets, Inc.
MAYBE
Written by Allan Flynn and Frank Madden
Used by permission of EMI Robbins Catalog Inc.
(ASCAP)
MARKETING
PR Manager ............................Genevieve Ostergard
Director of Marketing ..........................Paul Sackman
Marketing Managers ..............................Mike Markin
Craig Owens
Michael Courtney
Associate Marketing Manager ................Tod Mack
Traffic Manager ....................................Steve Spandle
Sections from the High Energy Weapons FAQ by Carey Sublette used with permission. Some changes
were made to fit the background of Fallout. All errors are the fault of Interplay.
Thanks to: Scott Everts for contributing above and beyond the call of duty to the Quote File, Brian Eno,
the soda fridge (thanks Gus & Rusty!), the Spirit of Christmas (Go Santa!), Demo the cat, Nicol, Tracy &
Korey, Mary & Adam, Lisa (for moral support), Jamal, T-Ray’s Mom, the two Donalds, and Teresa Brooks.
Special thanks to the Fallout webpage bulletin board members for comments, suggestions and bug
reports about the demo. Your feedback was appreciated!
©1997 Interplay Productions. Fallout and Interplay are trademarks of Interplay Productions. All rights
reserved. All other trademarks and copyrights are properties of their respective owners.
RESTRICTED
A—5
A
119.
VDSG – RESTRICTED – VTB-OO1-13APPENDIX 3: CUSTOMER SUPPORT
If you have any questions about this, or any other Interplay product, you can
reach our Customer Service/Technical Support Group at:
Interplay, 16815 Von Karman Avenue, Irvine, CA 92606 Attn: Customer Service.
Customer Service is available 24 hours a day through our Automated Customer
Service system, with a Customer Service representative available during normal business hours at (714) 553-6678.
Hintline
Hints are available for this title. You can reach our hintline at 1-900-370-PLAY
(1-900-451-6869 in Canada). The charge for this service is $1.25 for the first minute
and $.75 for each additional minute. For Canada, these charges will be in Canadian
dollars and are $1.25 each minute. All hint questions must be directed to this “900”
service. No hints will be given on our Customer Service lines. You must have a touchtone phone to use this service. The hintline is open 24 hours a day. All long distance
charges are included in these prices. Callers under the age of 18 must get parental permission before calling the hintline. The hintline is only available in the U.S. and
Canada. Charges subject to change without notice.
If you have a modem, you can reach us at the following:
Internet: You can reach Interplay by sending Internet E-mail to
“support@interplay.com”. Many Interplay demos and patches are available at Internet
FTP sites. To visit our World Wide Web site, point your browser to: “http://www.interplay.com” or you may ftp to ftp.interplay.com.
The Interplay BBS: We have a 24-hour, 7-day a week multiline BBS available
for customer questions, support and fixes. The number is 714-252-2822. Modem settings are 300-28.8k Baud, V.32bis, V.42bis, 8-N-1. You also may contact our BBS over
the Internet. Telnet to bbs.interplay.com. This is a free service. (Excluding toll
charges.)
CompuServe: We are available for IBM and compatible on-line support. We are
located in the Game Publishers B Forum, type GO GAMBPUB at any “!” prompt.
Then select “Section 4” for Interplay Productions. You can leave technical support
questions there. You can also download fixes and demos from Library 4 in GAMBPUB.
The best place for game play hints about our games is in the GAMERS forum. If you
are not already a CompuServe member, you can call CompuServe toll-free at 1-800524-3388 and ask Representative #354 for a free introductory membership and a $15
usage credit. For game play hints look in the Gamer’s Forum (GO GAMERS). Besides
technical support for Interplay products, CompuServe offers many other services,
including communications, reference libraries, hardware and software support, travel,
games and much more.
PRODIGY® Interactive Personal Service: You may send mail directly to us.
Our ID is “PLAY99B”.
A—6
RESTRICTED
120.
VDSG – RESTRICTED – VTB-OO1-13APPENDIX 4: WARRANTY
INTERPLAY LIMITED 90-DAY WARRANTY
Interplay warrants to the original purchaser of this Interplay Productions™
product that the compact disc or floppy disk(s) on which the software programs are
recorded will be free from defects in material and workmanship for 90 days from the
date of purchase. If the compact disc or floppy disk(s) is found defective within 90 days
of original purchase, Interplay agrees to replace, free of charge, any product discovered
to be defective within such period upon receipt at its factory service center of the product, postage paid, with proof of the date of purchase. This warranty is limited to the
compact disc or floppy disk(s) containing the software program originally provided by
Interplay and is not applicable to normal wear and tear. This shall be void if the defect
has arisen through abuse, mistreatment, or neglect. Any implied warranties applicable to this product, including warranties of merchantability and fitness for a particular purpose are disclaimed. Interplay disclaims all responsibility for incidental or consequential damages.
Some states do not allow limitations as to how long an implied warranty lasts
and/or exclusions or limitations of incidental or consequential damages so the above
limitations and/or exclusions or liability may not apply to you. This warranty gives you
specific rights, and you may also have other rights which vary from state to state.
Lifetime Warranty
If the compact disc or floppy disk(s) should fail after the original 90-day warranty period has expired, you may return the software program to Interplay at the
address noted below with a check or money order for $5.00 (U.S. currency), which
includes postage and handling, and Interplay will mail a replacement to you. To
receive a replacement, you need to enclose the original defective compact disc or floppy disk(s) in protective packaging accompanied by: (1) a $5.00 check or money order,
(2) a brief statement describing the defect, and (3) your return address. If you have a
problem with your software, you may wish to call us first at (714) 553-6678. If your
compact disc is defective and a replacement is necessary, U.P.S. or registered mail is
recommended for returns. Please send the defective disc(s) only (not the box) with a
description of the problem and $5.00 to:
Warranty Replacements
Interplay Productions
16815 Von Karman Avenue
Irvine, California 92606
Copying Prohibited
This software product and the manual are copyrighted and all rights are
reserved by Interplay Productions and are protected by the copyright laws that pertain to computer software. You may not copy the software except that you may make
one copy of the software solely for backup or archival purposes. You may not loan,
sell, rent, lease, give, sub license, or otherwise transfer the software (or any copy).
You may not modify, adapt, translate, create derivative works, decompile, disassemble, or otherwise reverse engineer or derive source code from, all or any portion of
the software or anything incorporated therein or permit or encourage any third
party to do so.
NOTICE: Interplay reserves the right to make modifications or improvements to the product described in this manual at any time and without notice.
RESTRICTED
A—7
A
121.
VDSG – RESTRICTED – VTB-OO1-13APPENDIX 5: WORLD WIDE WEB SITE
Welcome to the Interplay Web! As a company dedicated to providing innovative,
high-quality interactive entertainment software, we are always striving to stay as
close as possible to the leading edge of technology. This Web site is the latest example
of our ongoing effort to provide a wealth of information and opportunities to you.
As a company of fanatic gamers, we love the idea of gamers all over the world
tapping into cyberspace to see, touch and feel our latest games.
No hype, no marketing campaign; just great games. To make it work, our goal
is to keep this site fresh and new, to make it a place where you can tell US what you
like about our games... and what you don’t like about them. So use the feedback
options on these pages and sound off.
Enjoy your visit in our Web site, explore all the different areas we have to offer,
and come back soon. Check us out in the weeks and months ahead; we will be introducing new and exciting areas for you to experience.
Once again, Welcome!
Brian Fargo
HOW TO GET THERE
Interplay’s World Wide Web site is an
Internet service designed to give you the
latest information about Interplay and our
products. The site features our demos,
upgrades, product information and
ordering information. From your Internet
account, point your favorite browser to:
http://www.interplay.com
Figure A—1: The
Interplay homepage
and Fallout page
A—8
RESTRICTED
122.
VDSG – RESTRICTED – VTB-OO1-13APPENDIX 6: SURVIVAL RECIPES
Mushroom Clouds
(preheat oven to 200 degrees Fahrenheit)
3-4 egg whites (at room temperature)
1/4 tsp cream of tartar
1 cup superfine sugar*
cocoa
8 oz dark chocolate
(bittersweet or semi-sweet)
Beat the eggs and tartar with an electric mixer
until soft peaks form. Add the sugar a little at a time
while continuing to beat, until all the sugar is in and
the mixture is glossy and stiff.
Using a piping bag with a no. 8 tip, pipe out an
equal number of caps and stems onto an ungreased
non-stick cookie sheet. The caps should be about the
diameter of a quarter, and the stems should be about
an inch high and the diameter of a soda straw.
Sprinkle cocoa over the caps and stems, and then
blow on them to spread out the cocoa more evenly. You
may want to do this outside, as cocoa goes everywhere.
Bake for 2 hours at 200 degrees.
Carefully remove the caps and stems from the
cookie sheet. With a dull knife, snip the top of each
stem so it has a flat top surface.
Melt the chocolate (in a double boiler or
microwave). Spread the chocolate on the base of each cap with a butter knife or spatula, and use it to glue a stem in place. Put the assembled mushrooms in the refrigerator for 20 minutes to harden the chocolate, then put them in an airtight container.
Makes 3-4 dozen.
Desert Salad
(Increase or reduce ingredient portions to taste)
1 lb. extra lean ground beef
(turkey may be substituted)
1/2 head of iceberg lettuce, cut
3 oz. pinto beans
6 oz. sliced olives
4 oz. cheddar cheese
6 oz. tortilla chips
1 firm tomato
1 16oz. bottle of Catalina
dressing
1 avocado (optional)
Brown the meat, drain.
In large bowl, mix lettuce, beans, and olives. Crush chips and add. Cut tomato into
small chunks and add to bowl. Shred cheese and add. Slice avocado and add. Add
meat. Toss with dressing. Serve.
Makes 4-6 portions.
*superfine sugar is NOT confectioner's sugar or 10X sugar. If you cannot find superfine sugar, it's easy to
make. Just put granulated sugar in a blender or food processor, and blend for 1 minute.
RESTRICTED
A—9
A
123.
VDSG – RESTRICTED – VTB-OO1-13APPENDIX 7: QUICK KEYS
C
Character Screen
4
Use Traps Skill
I
Inventory
5
Use First Aid Skill
P
PIPBoy 2000 Main Screen
6
Use Doctor Skill
Z
PIPBoy Clock
7
Use Science Skill
O
or
8
Use Repair Skill
B
Toggle Active Items
?
Show Date and Time
M
Toggle Mouse Mode
<
Rotate Counterclockwise
N
Toggle Active Item Mode
>
Rotate Clockwise
S
Skilldex
Space Key
Combat: End Turn
1
Use Sneak Skill
Enter
Combat: End Combat
2
Use Lockpick Skill
3
Use Steal Skill
Esc
Options
-or-
Non Combat: DONE
Tab
Automap
Home
Center Screen on PC
-
Decrease Brightness
F6
Quick Save
+
Increase Brightness
F7
Quick Load
F1
Help
F10 or Ctrl
F2
Master Volume Down
F3
Master Volume Up
F4
or
Ctrl
+
S
Save Game
F5
or
Ctrl
+
L
Load Game
A—10
+
X
Exit to Main Menu
RESTRICTED
F12
Save Screenshot
Ctrl
Pause + P
Pause

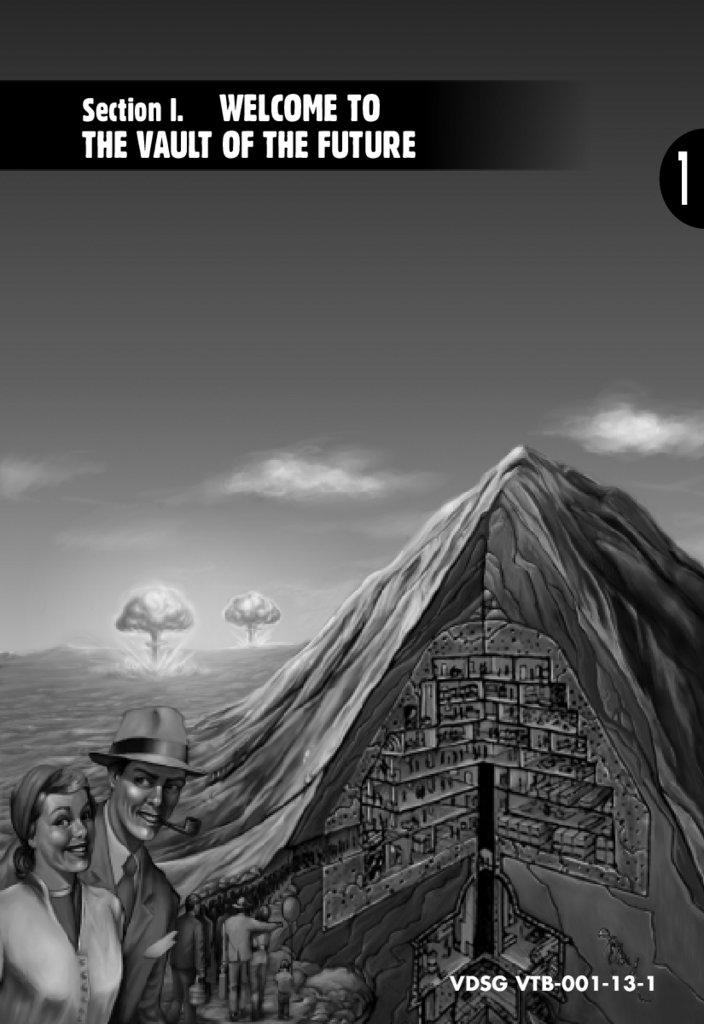
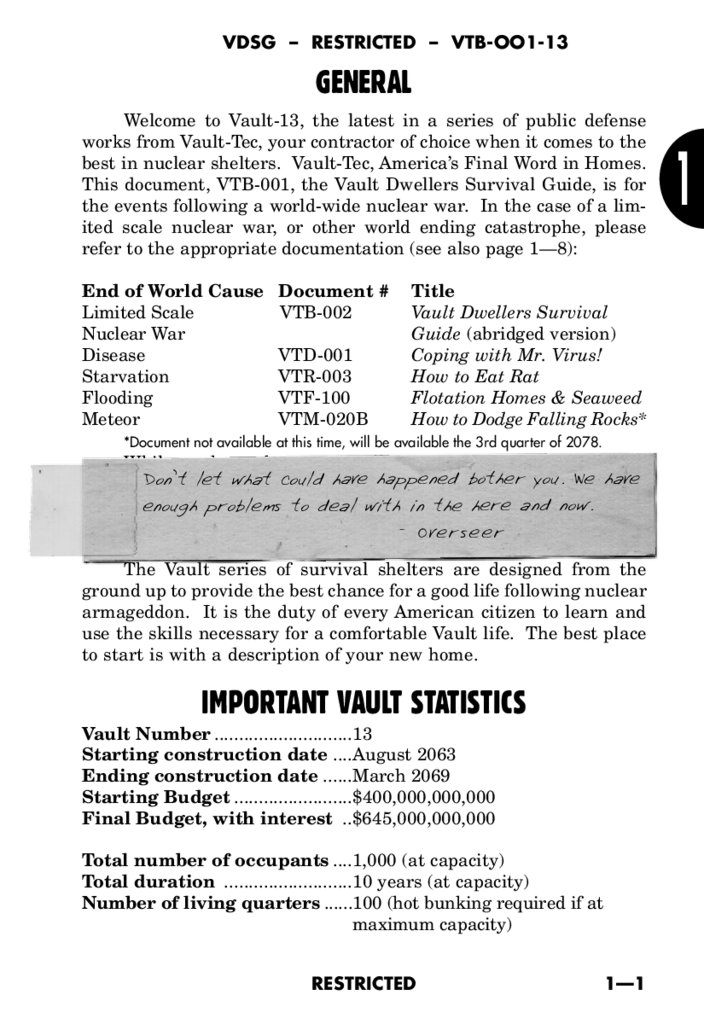
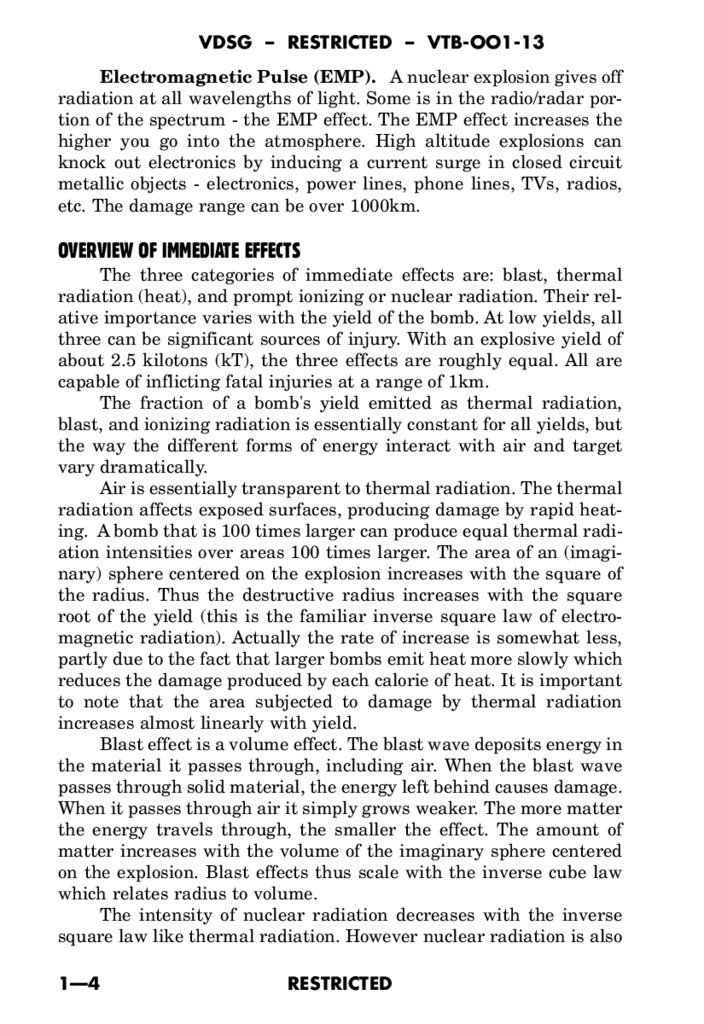

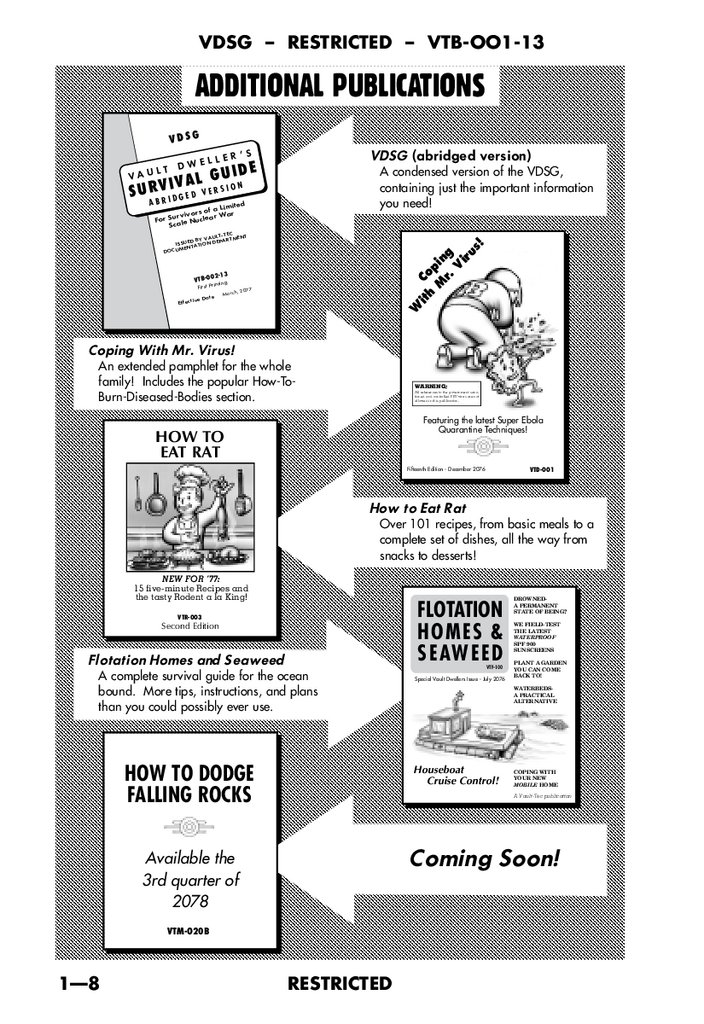
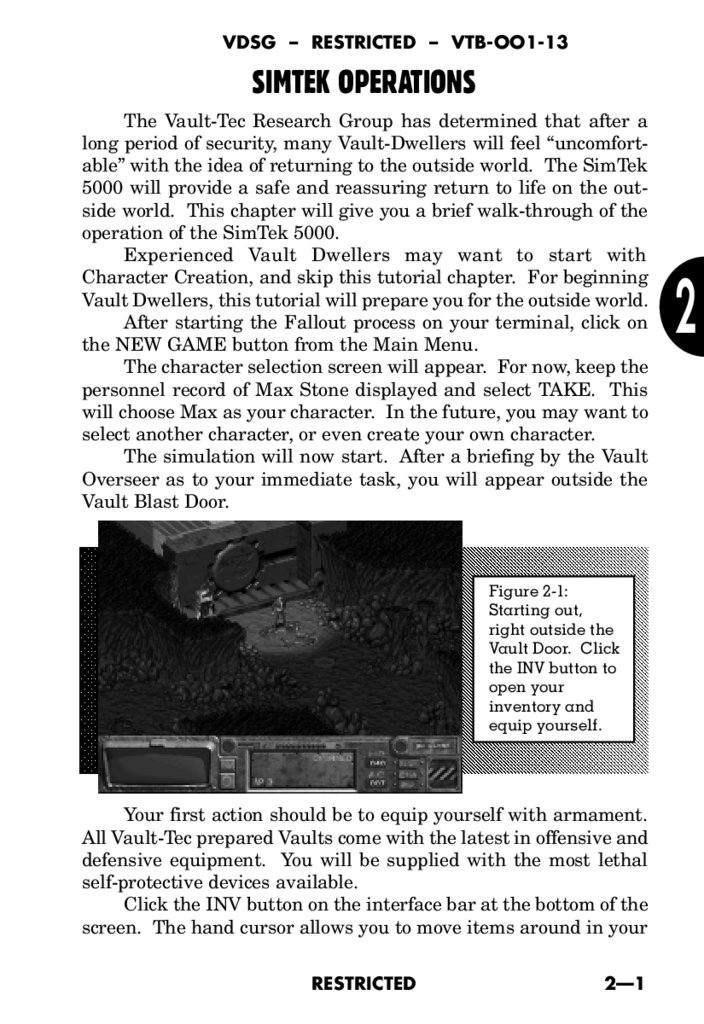

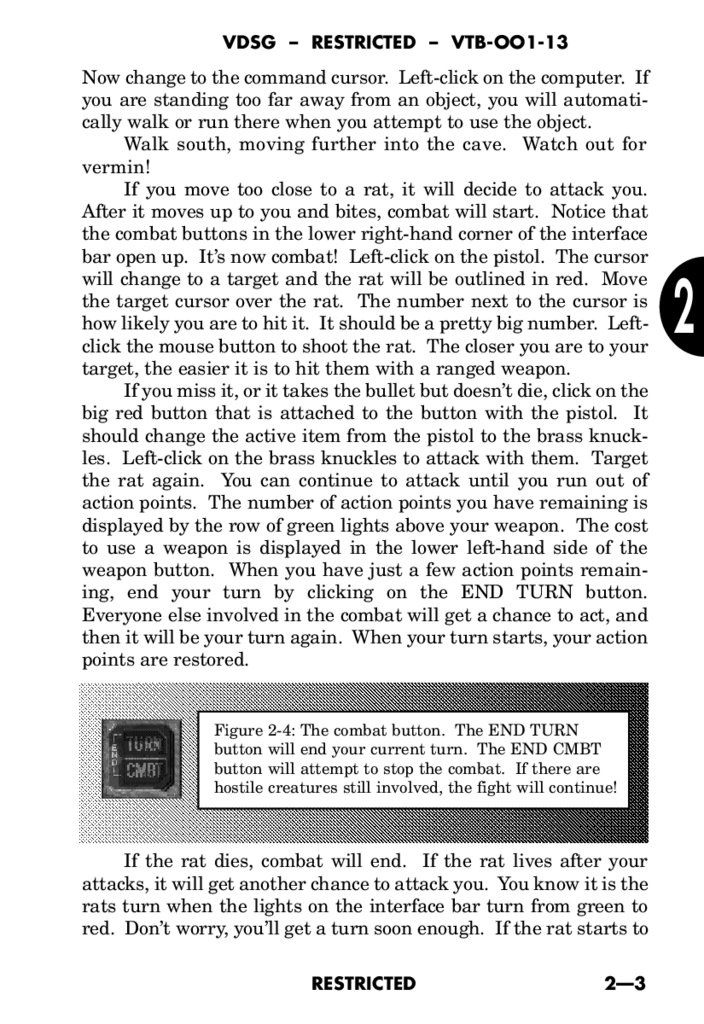

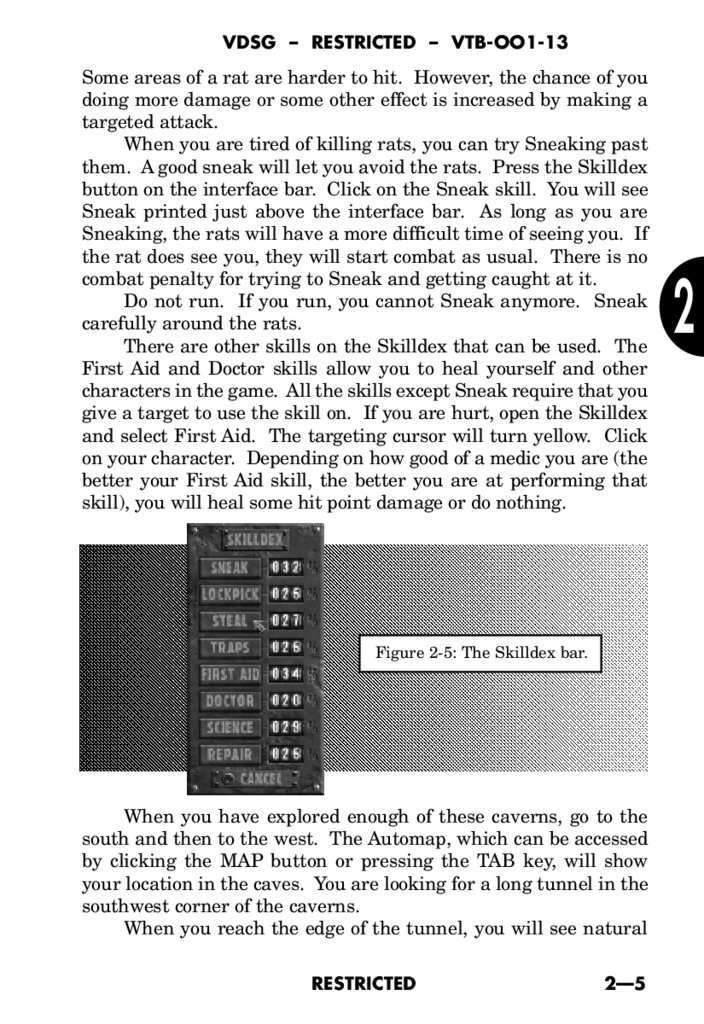
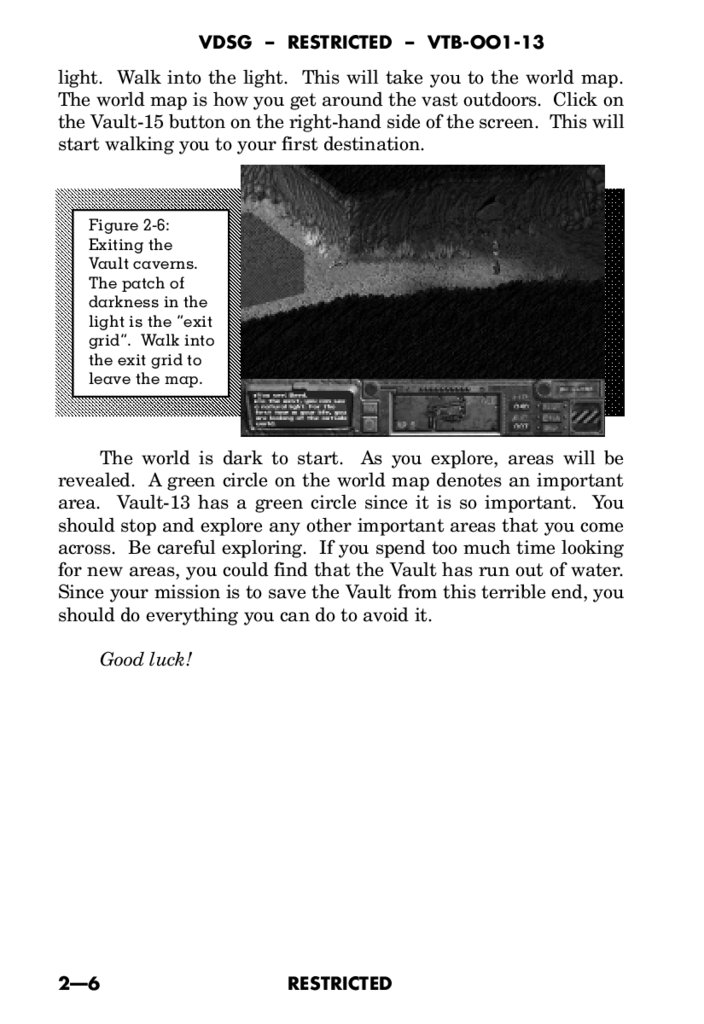
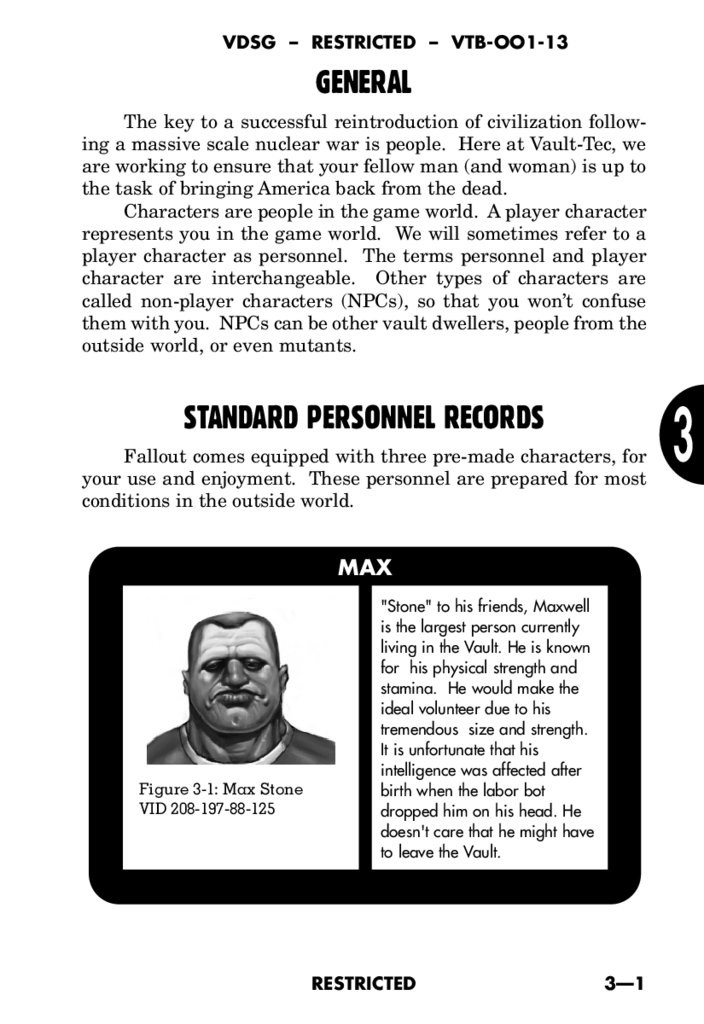


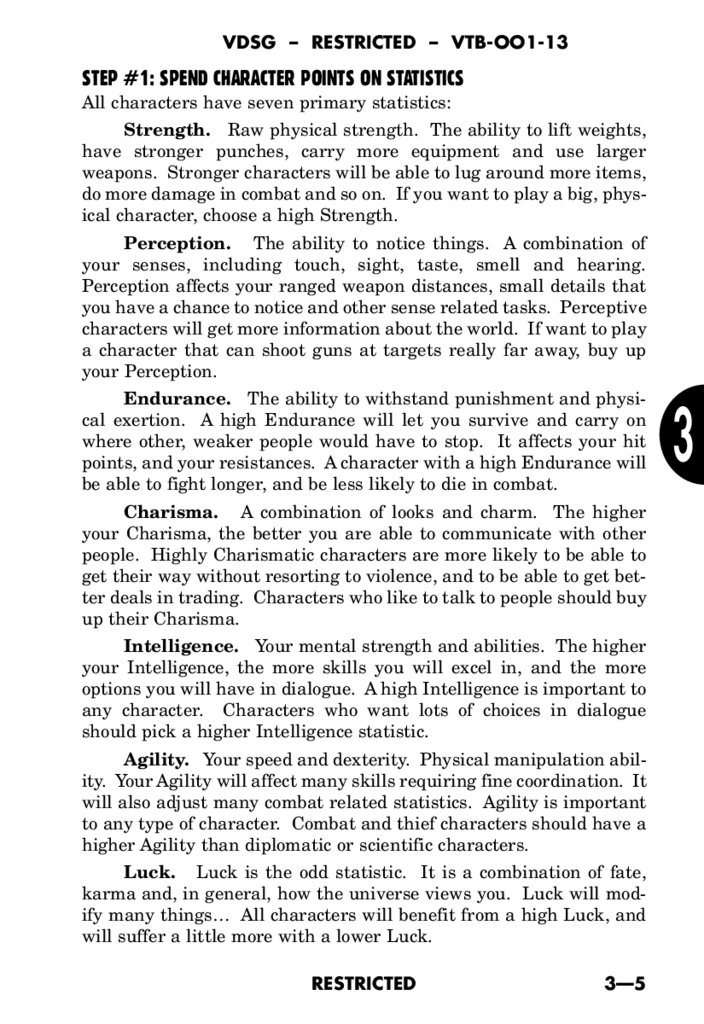

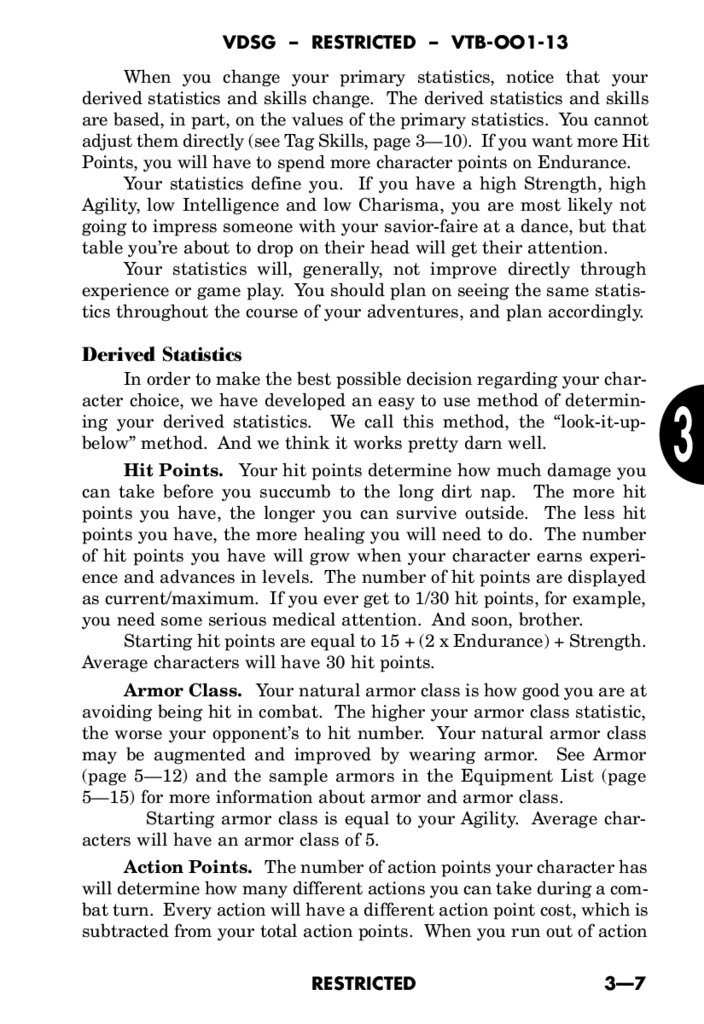


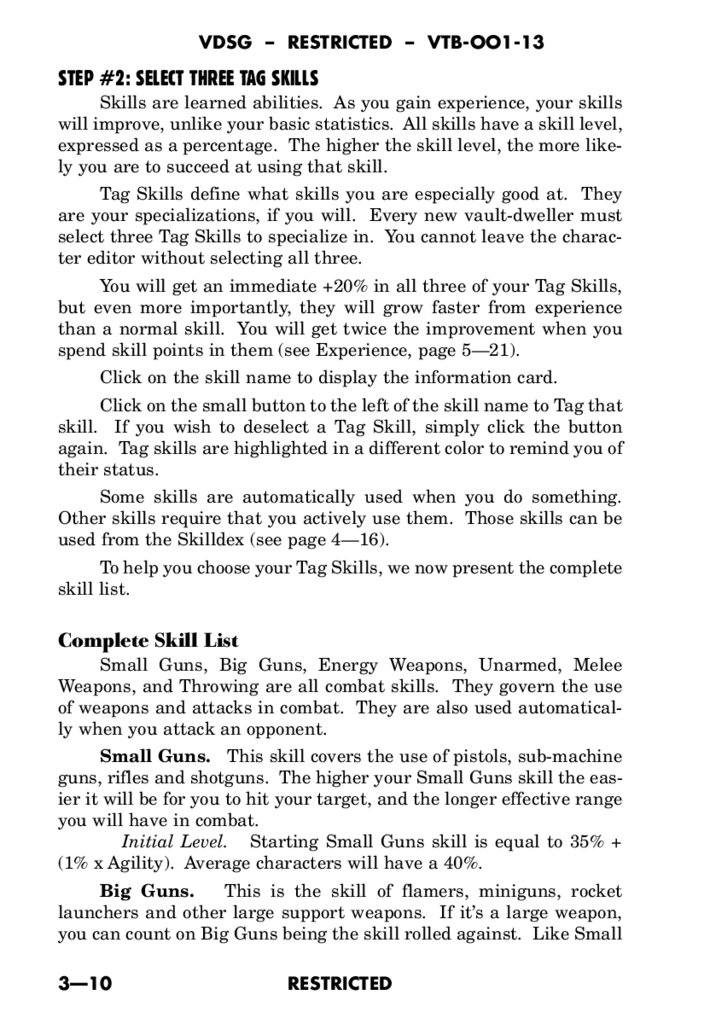

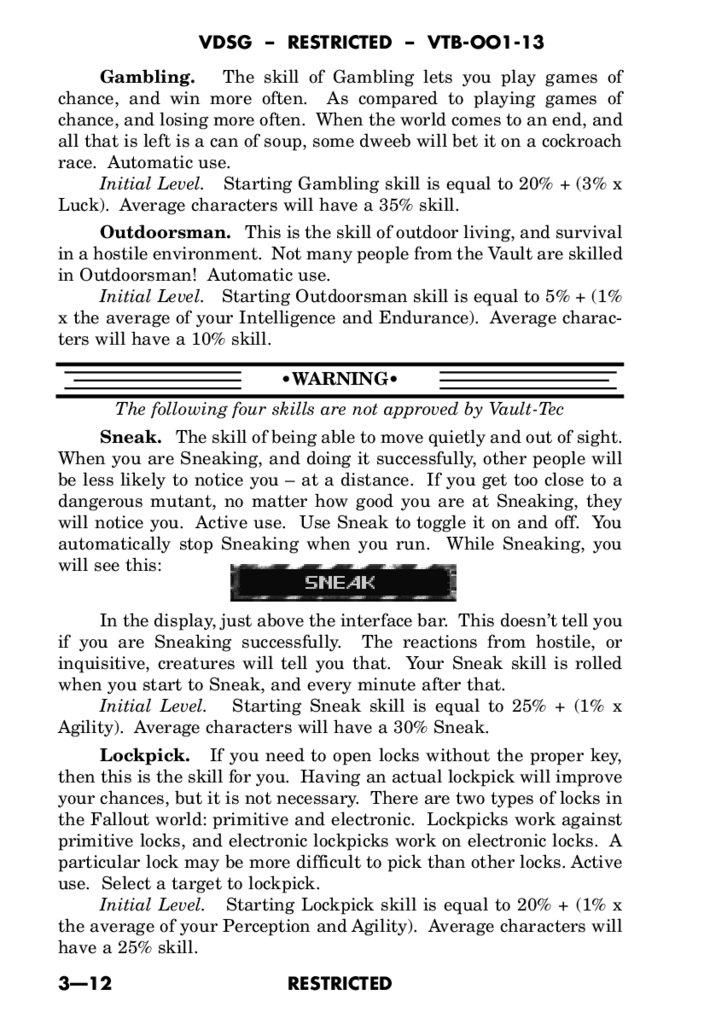


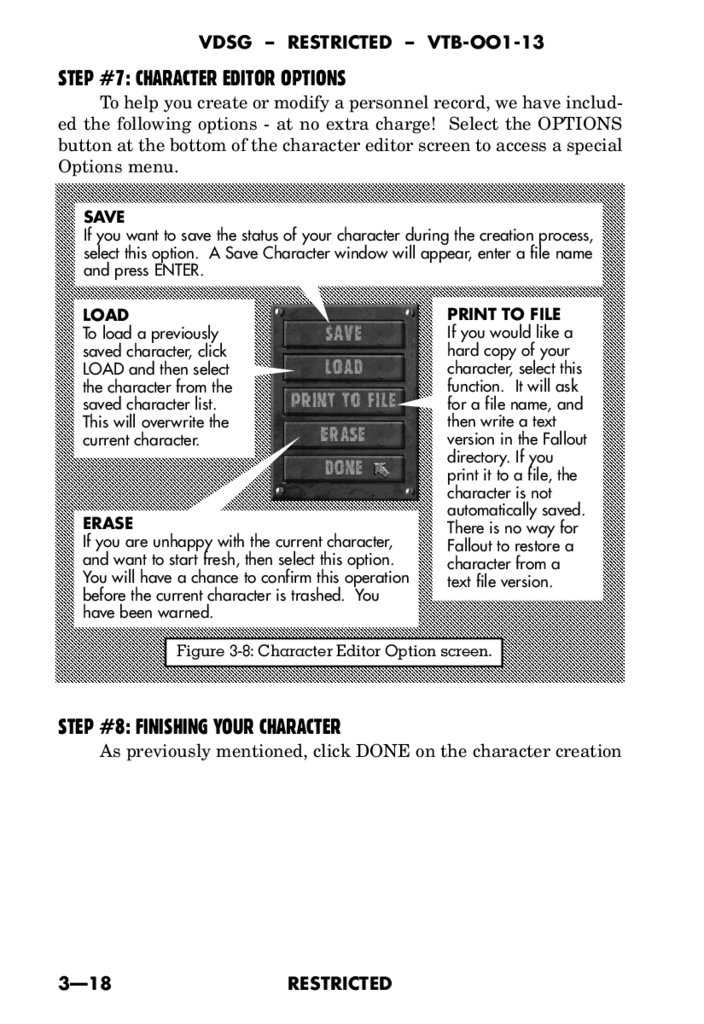


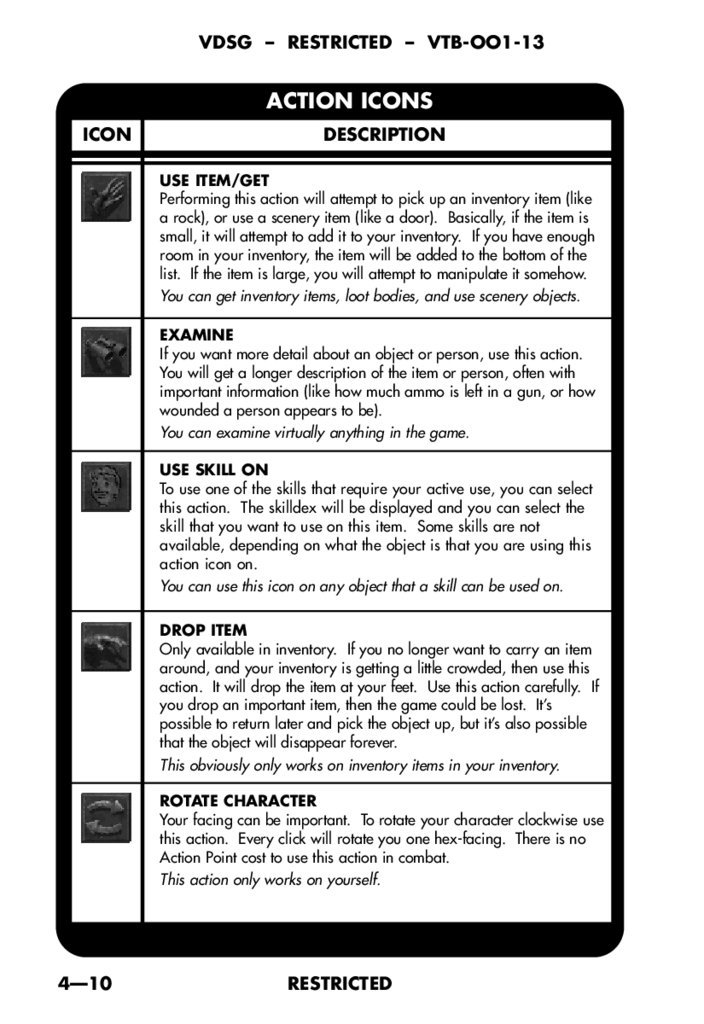

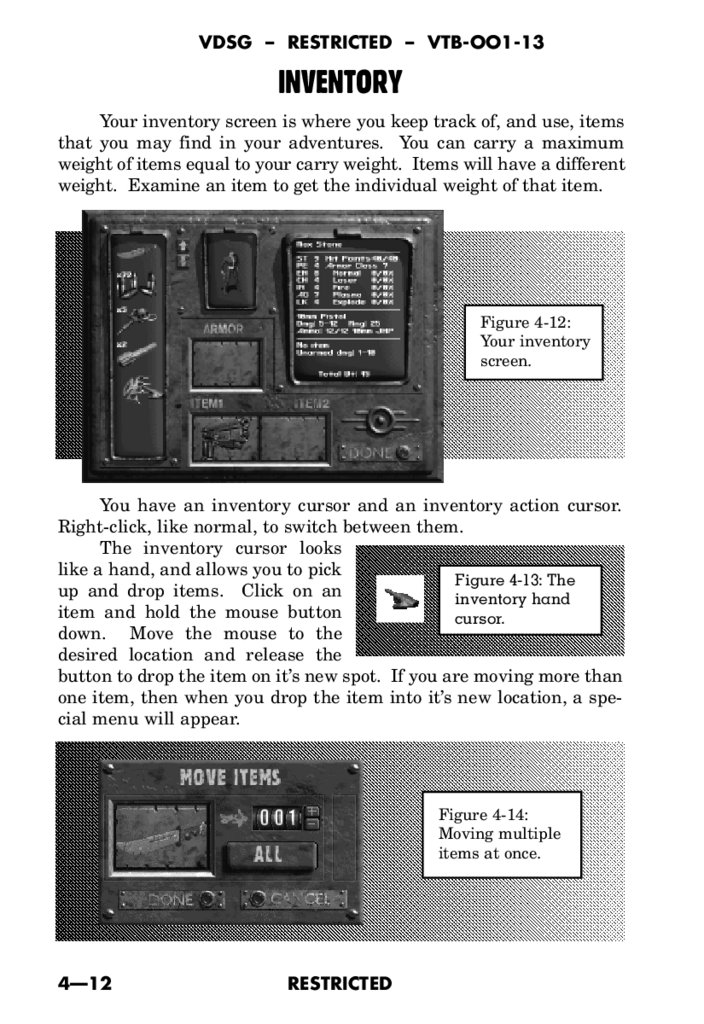
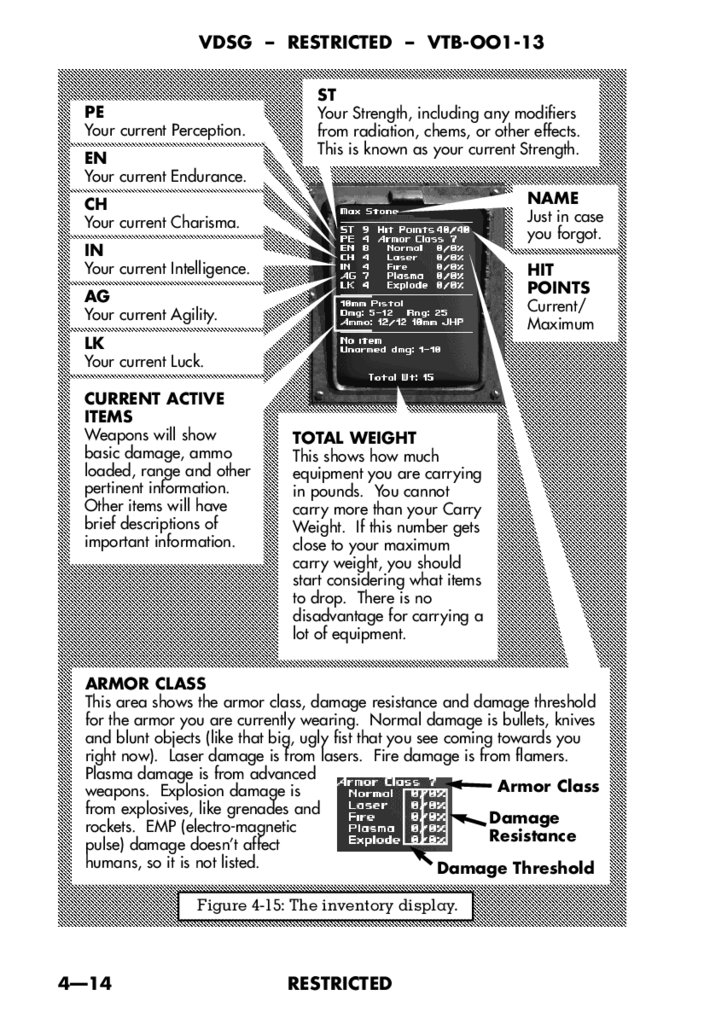
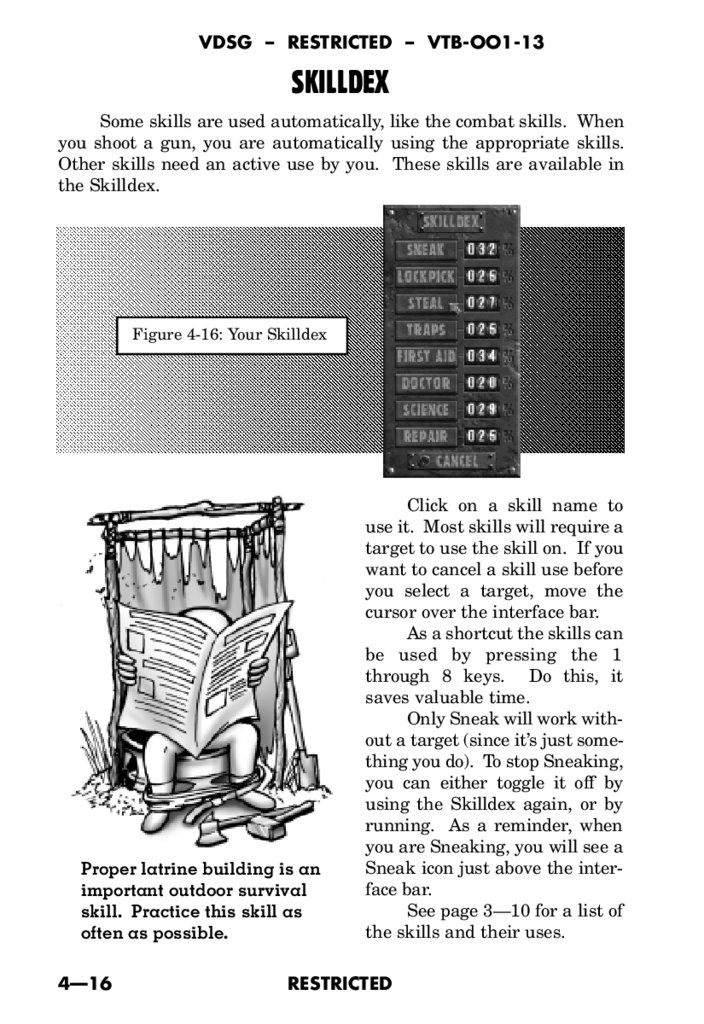
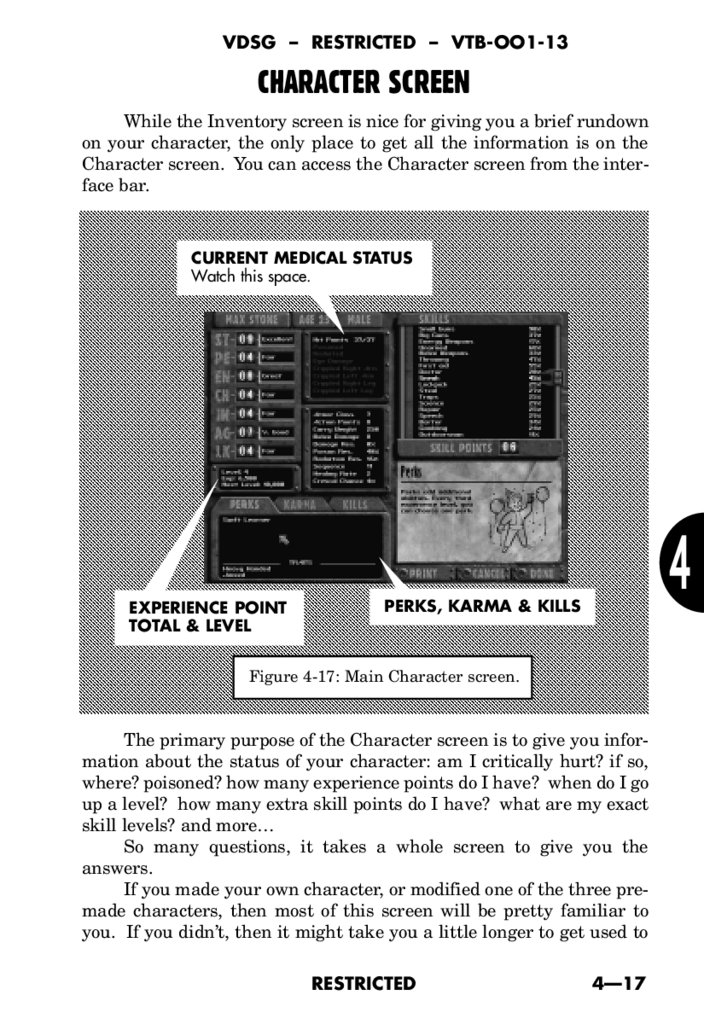


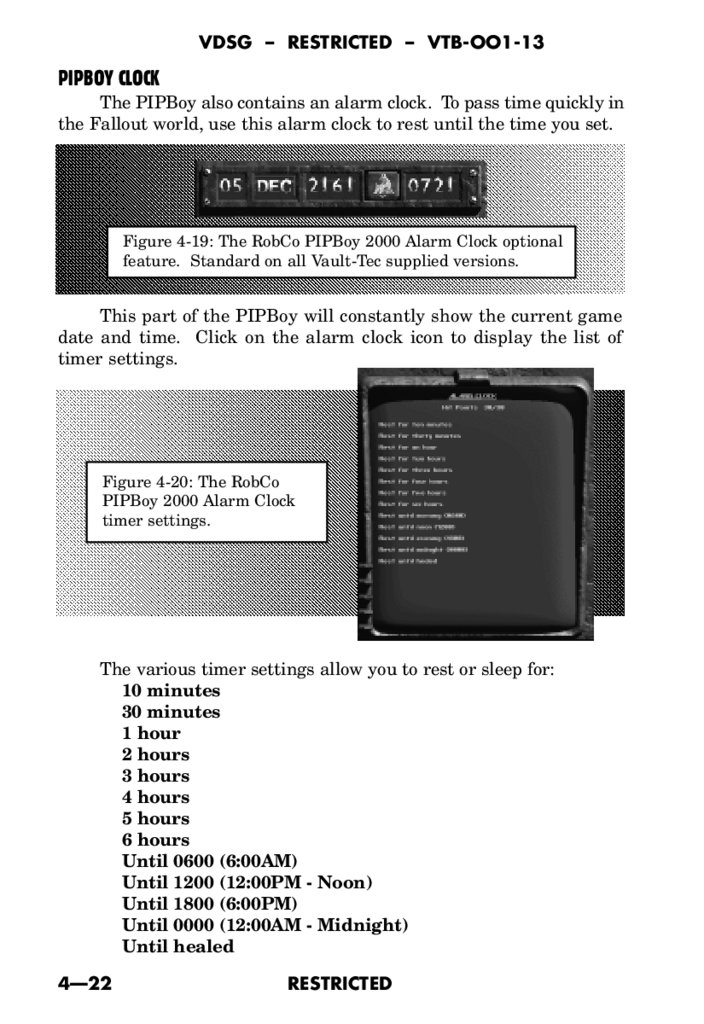


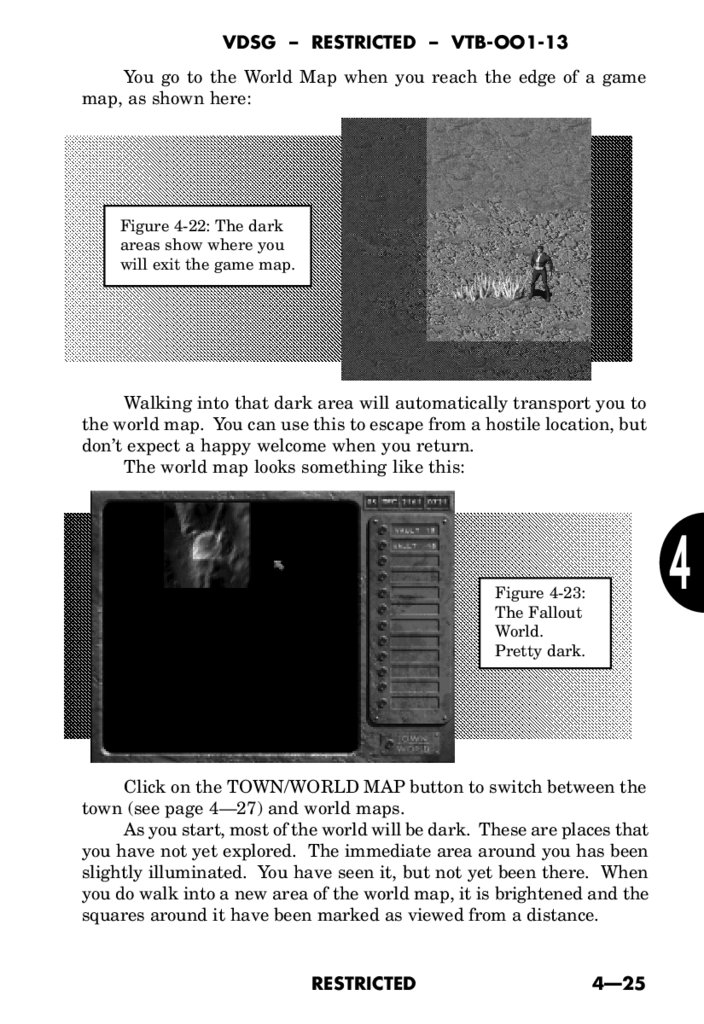

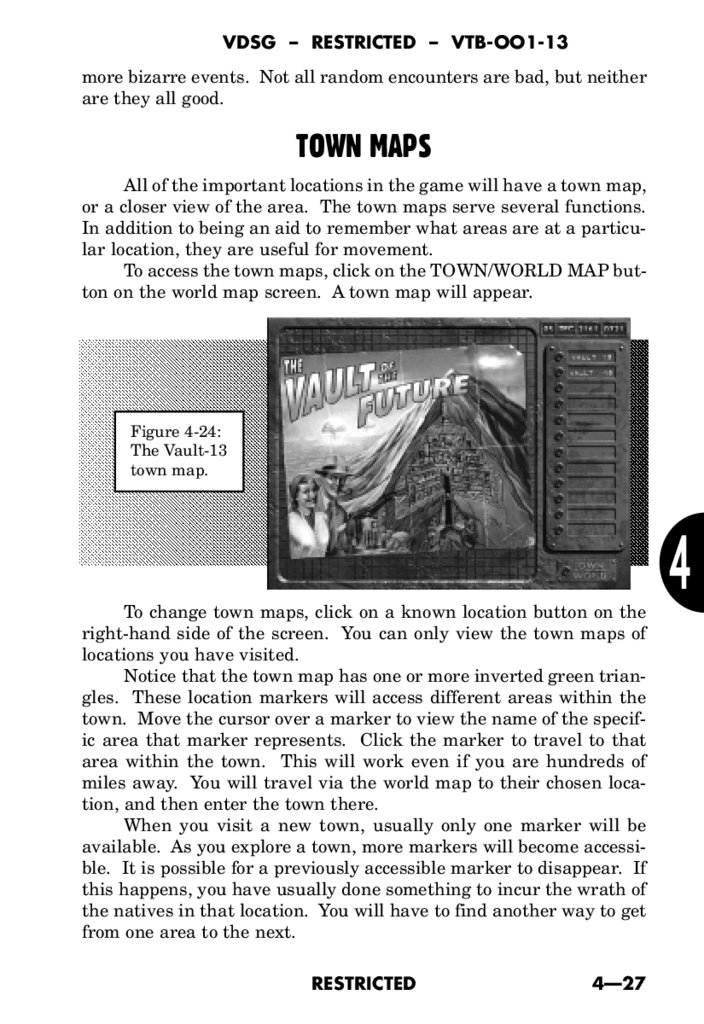


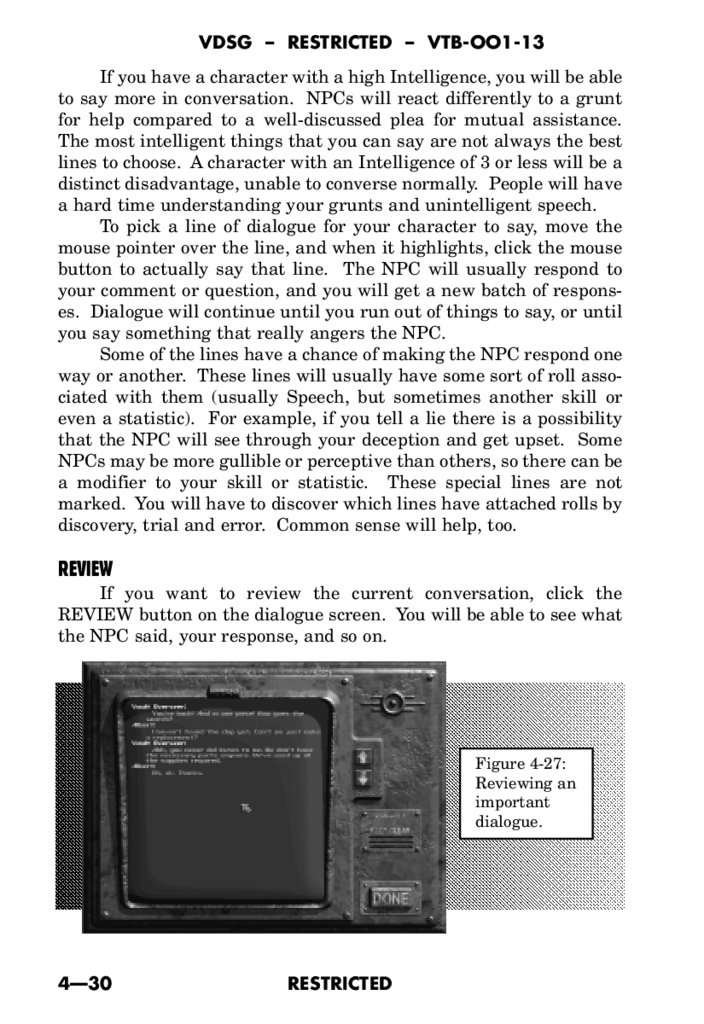
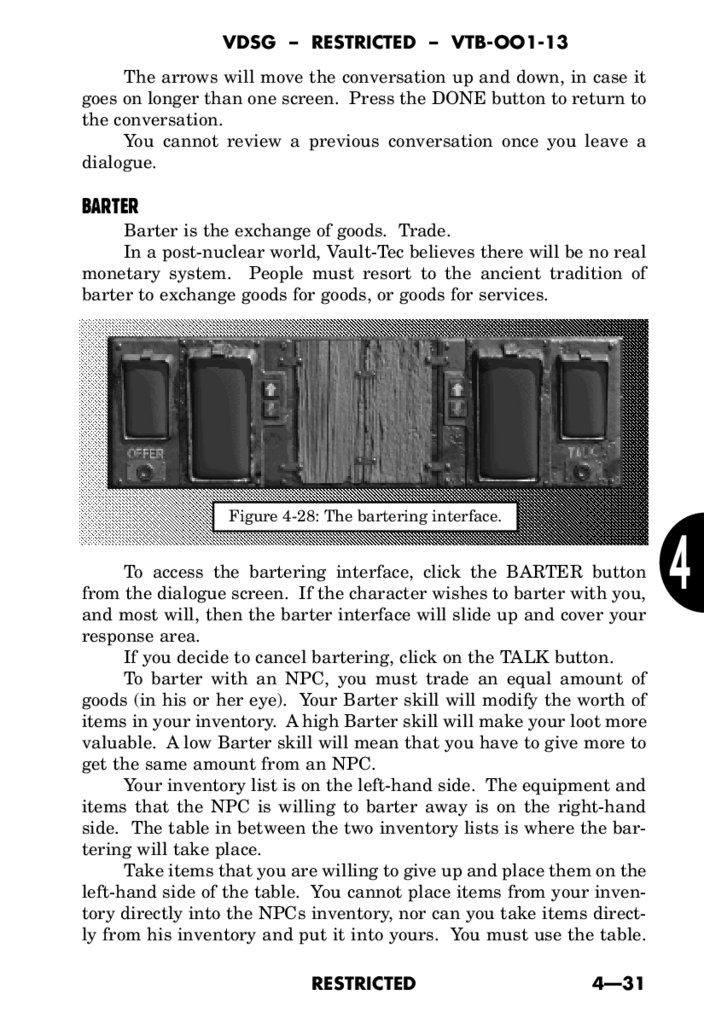


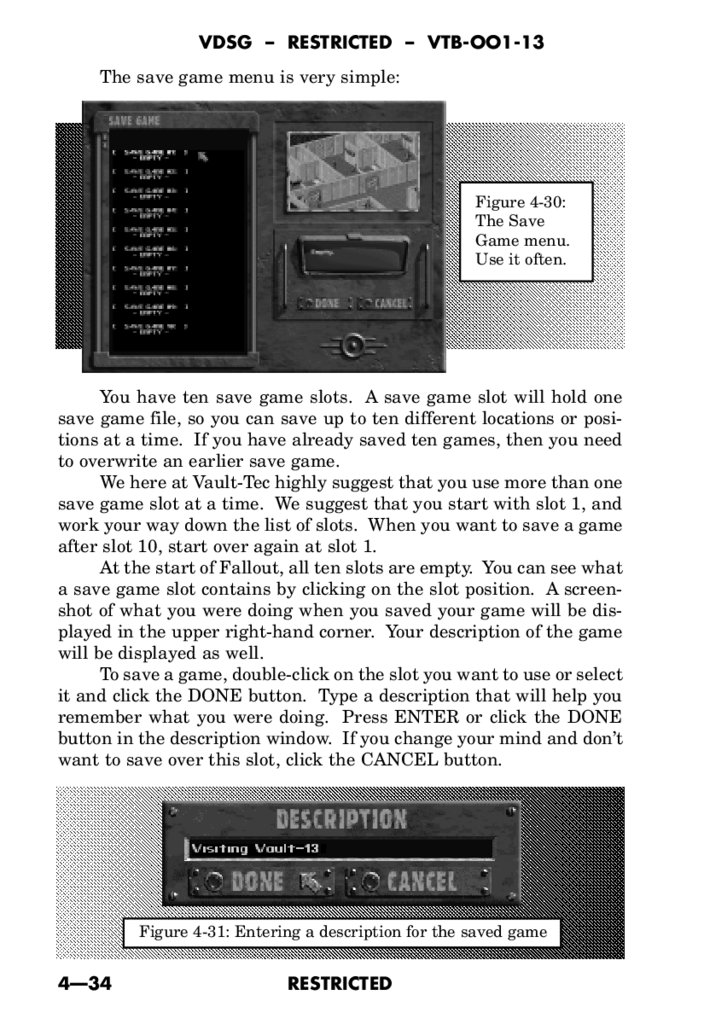
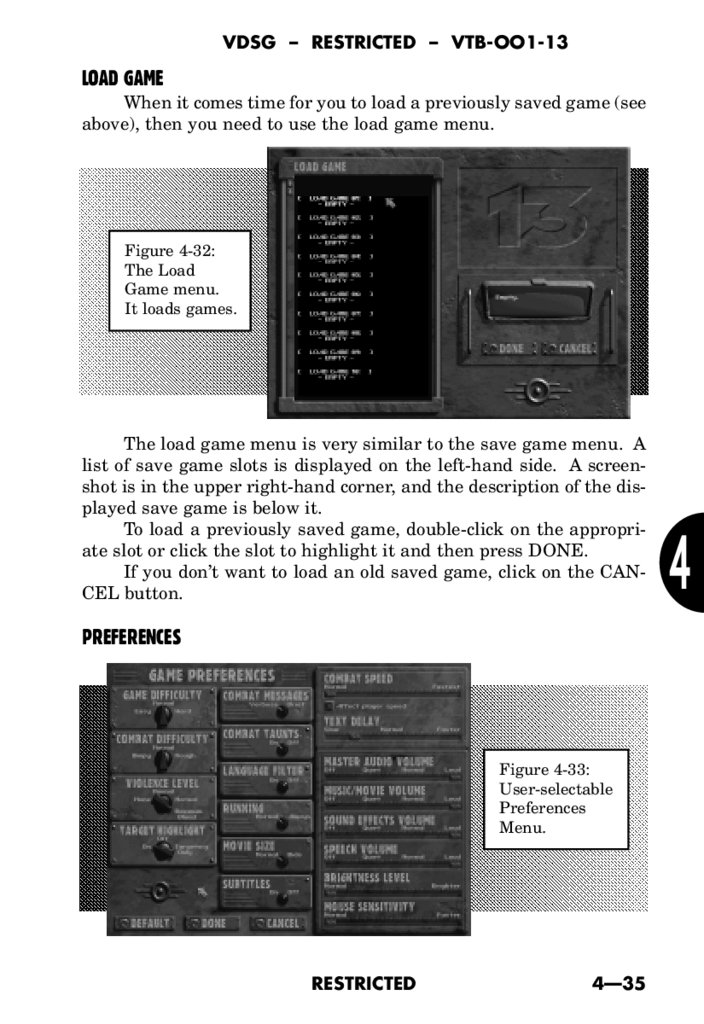

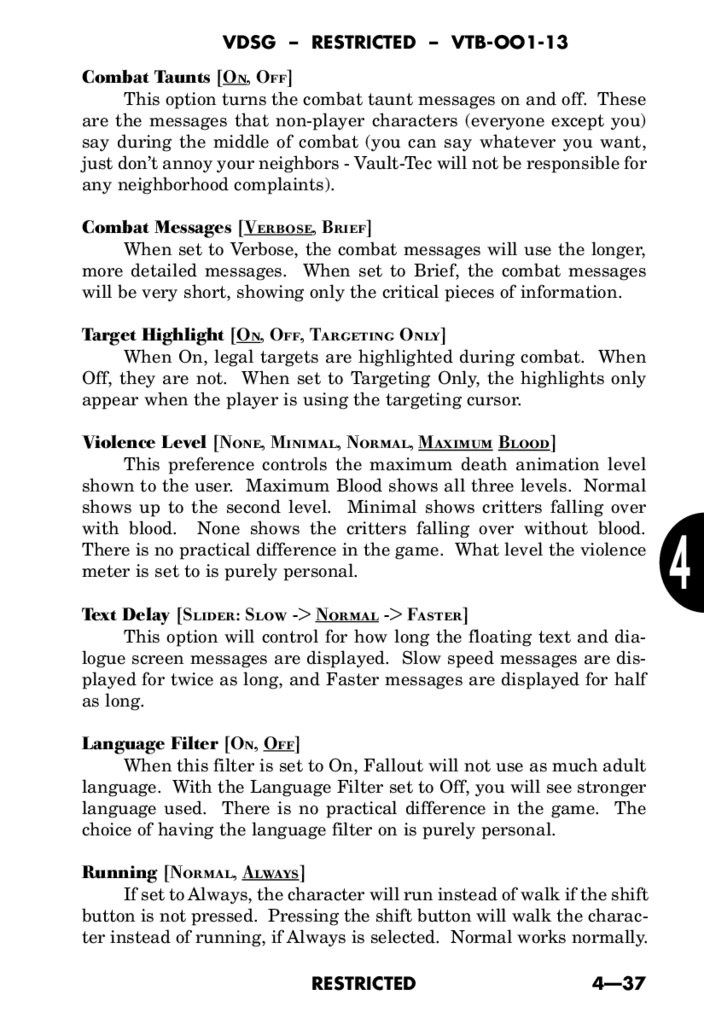
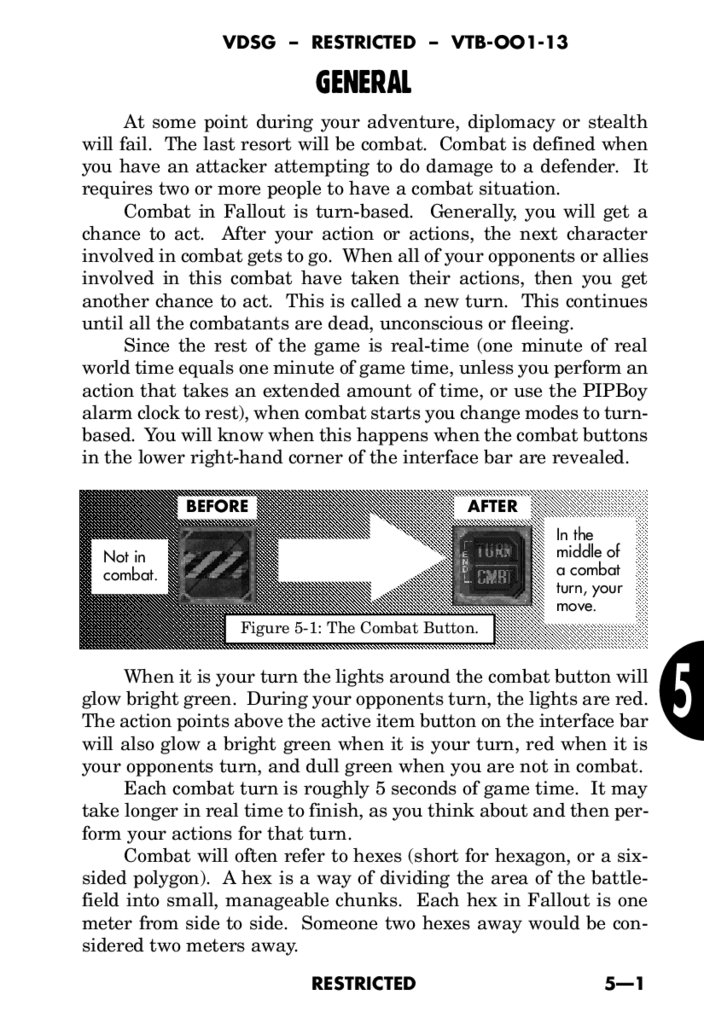

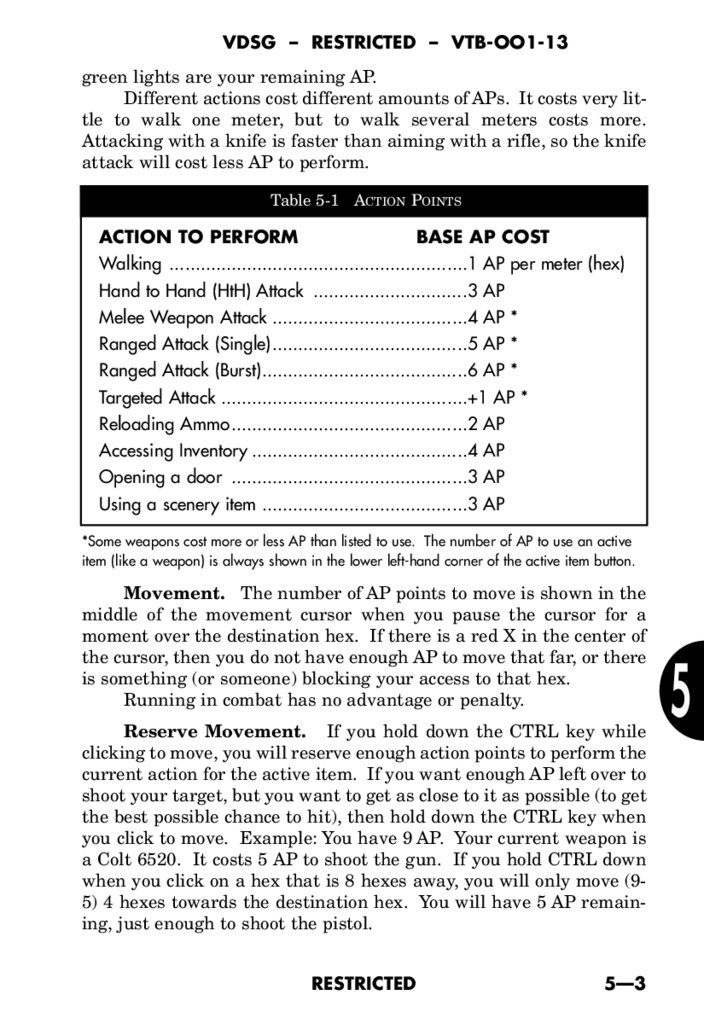


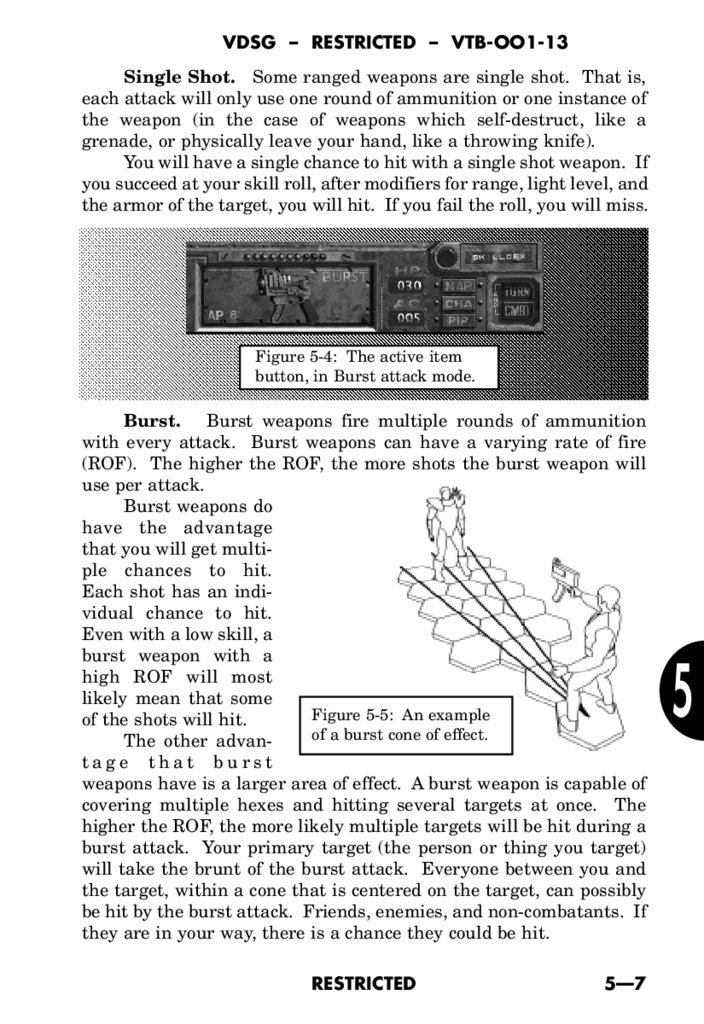
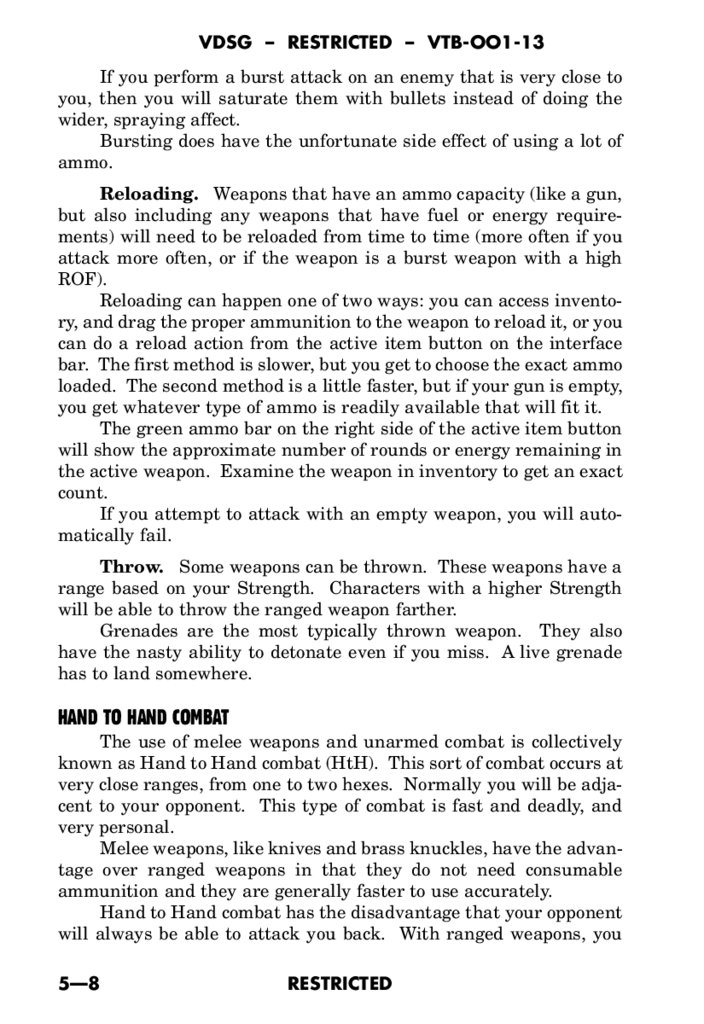

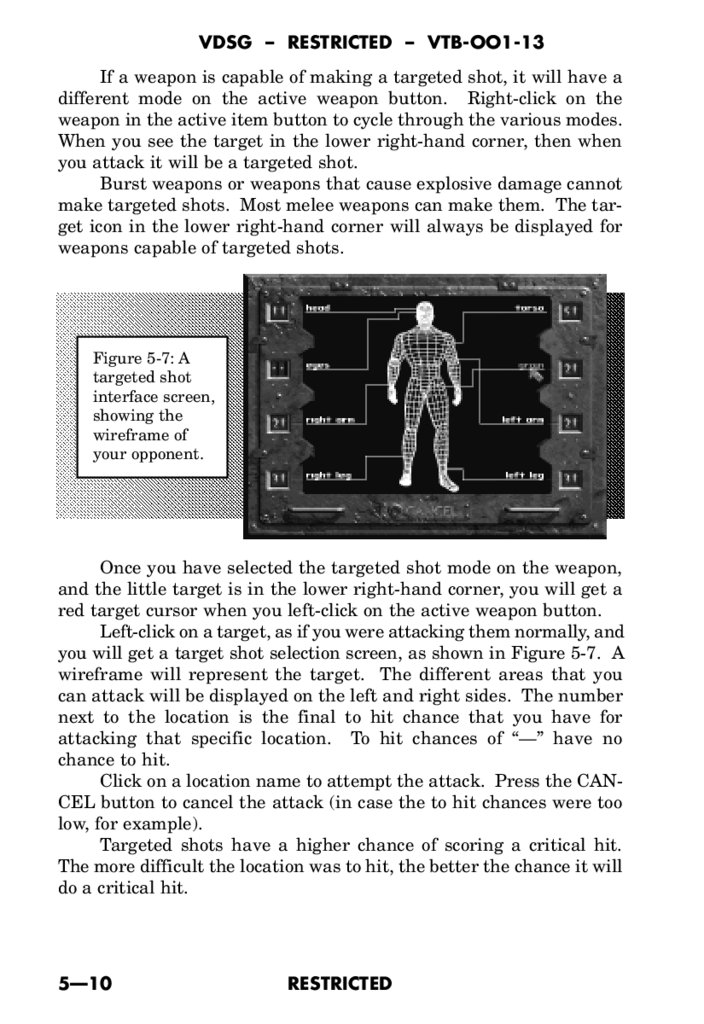
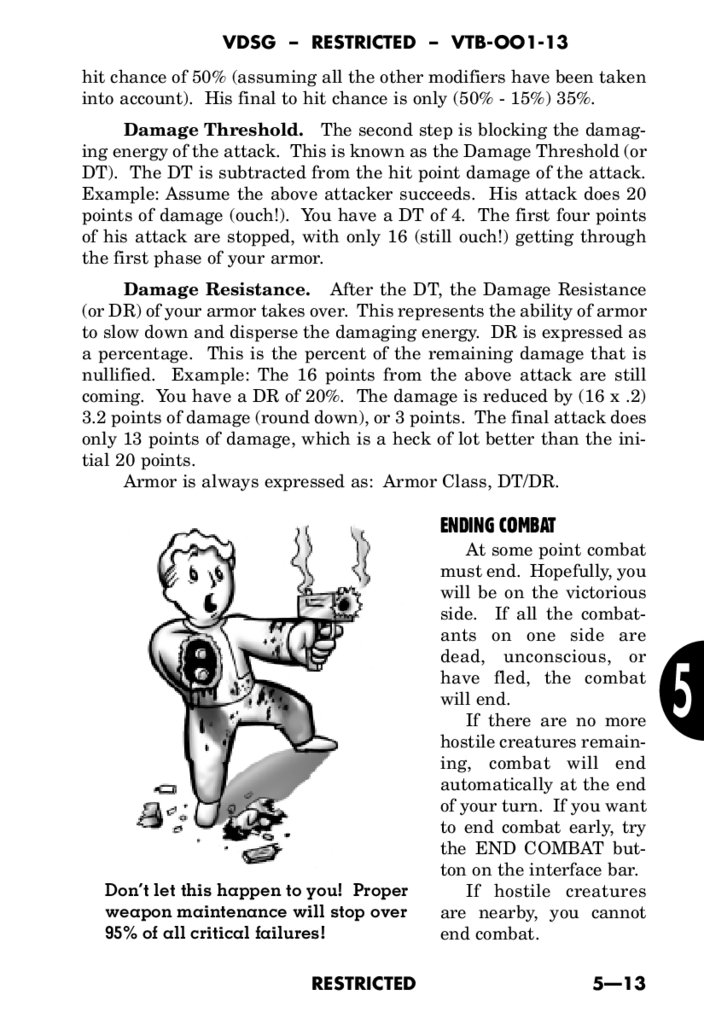

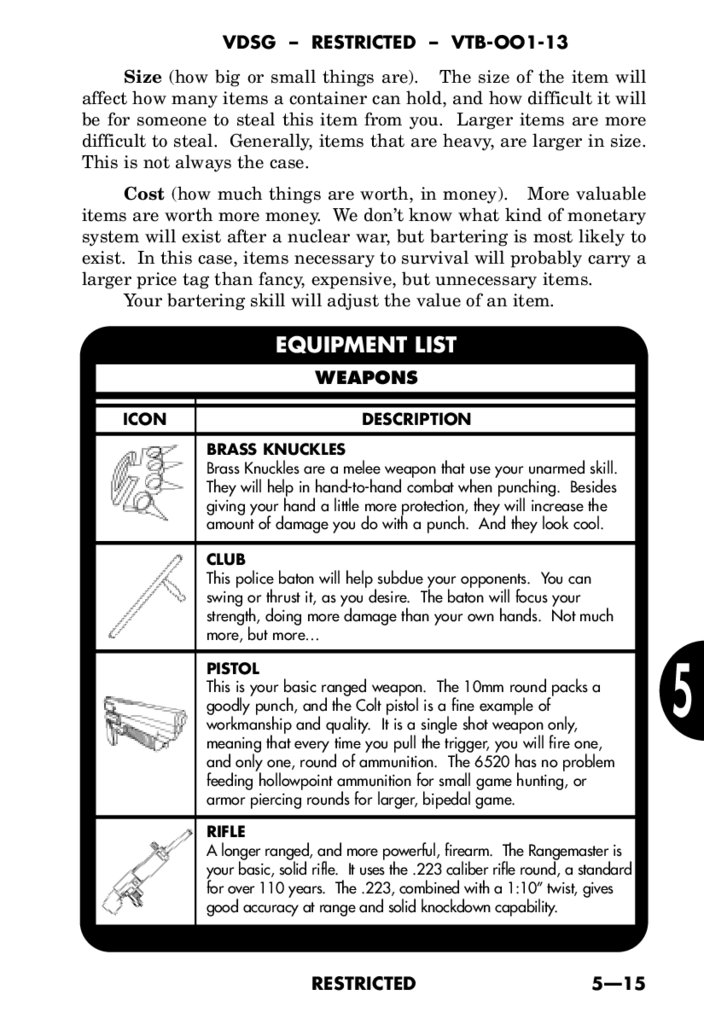
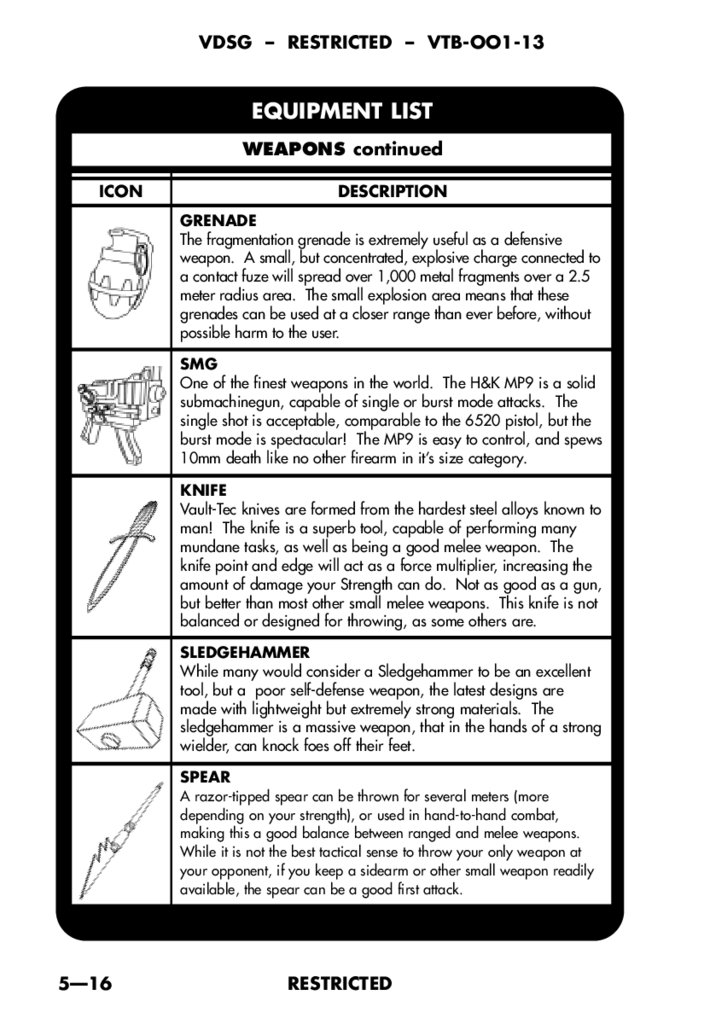
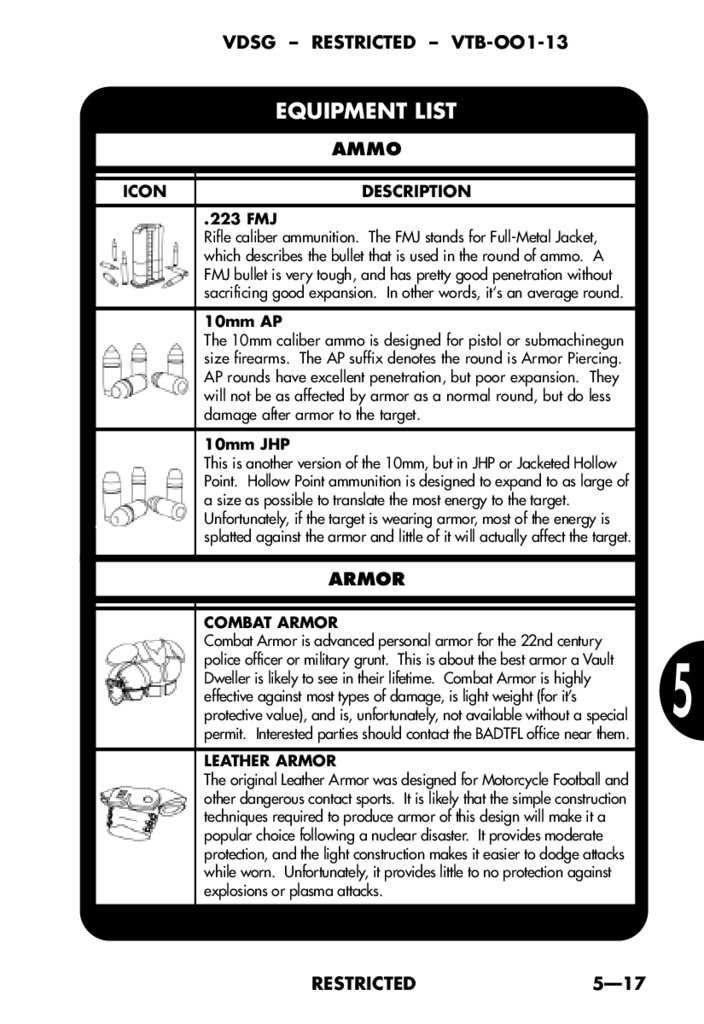
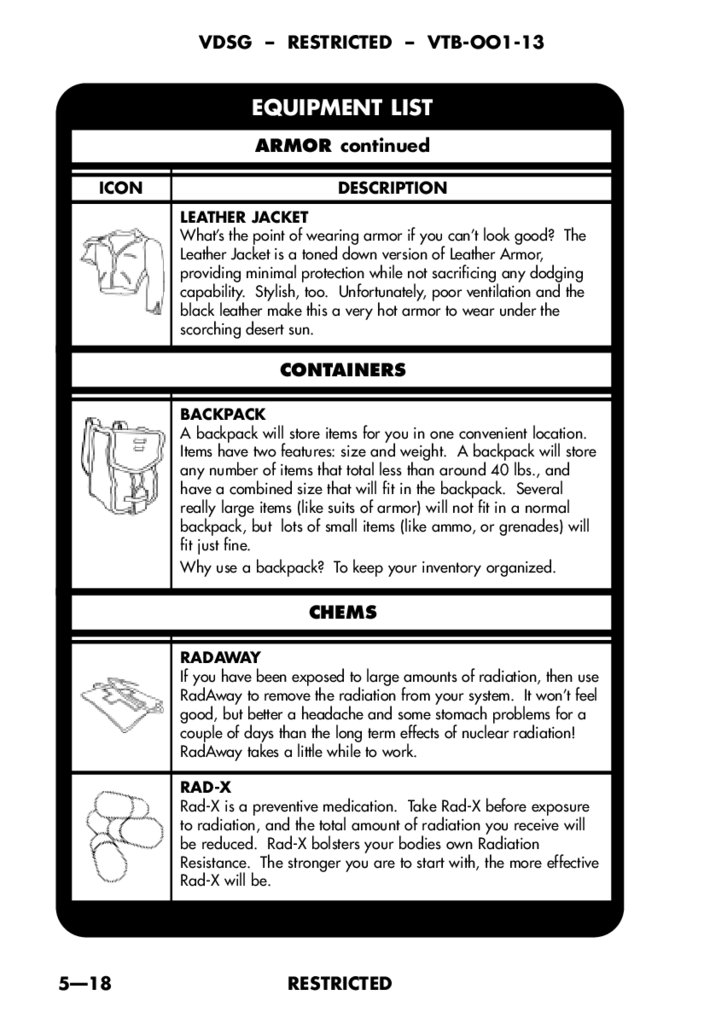
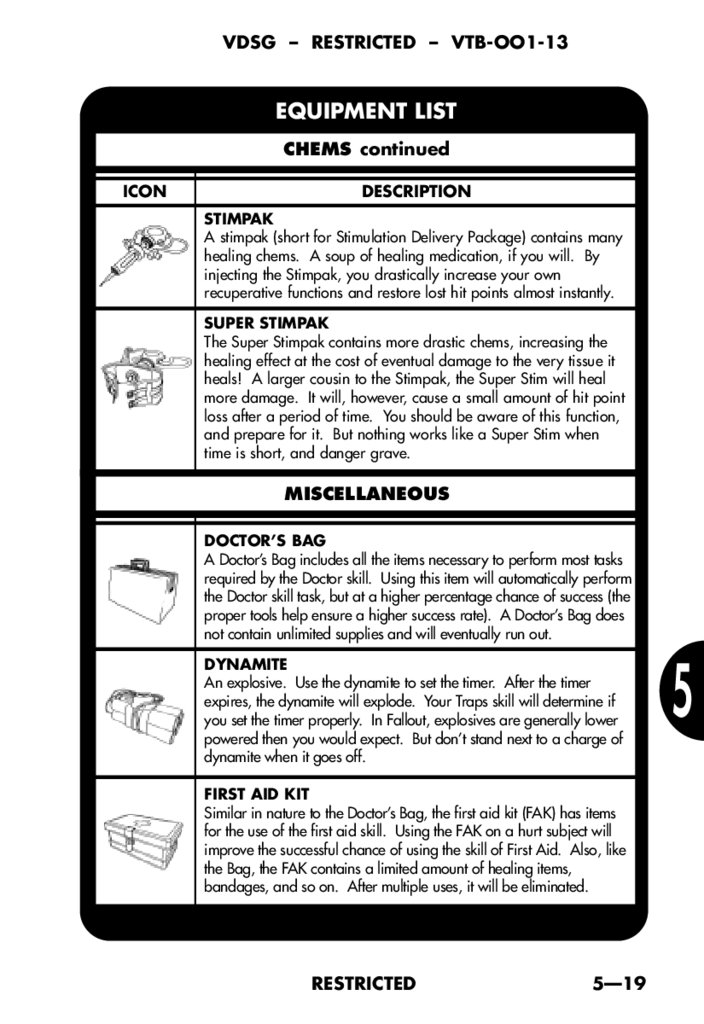
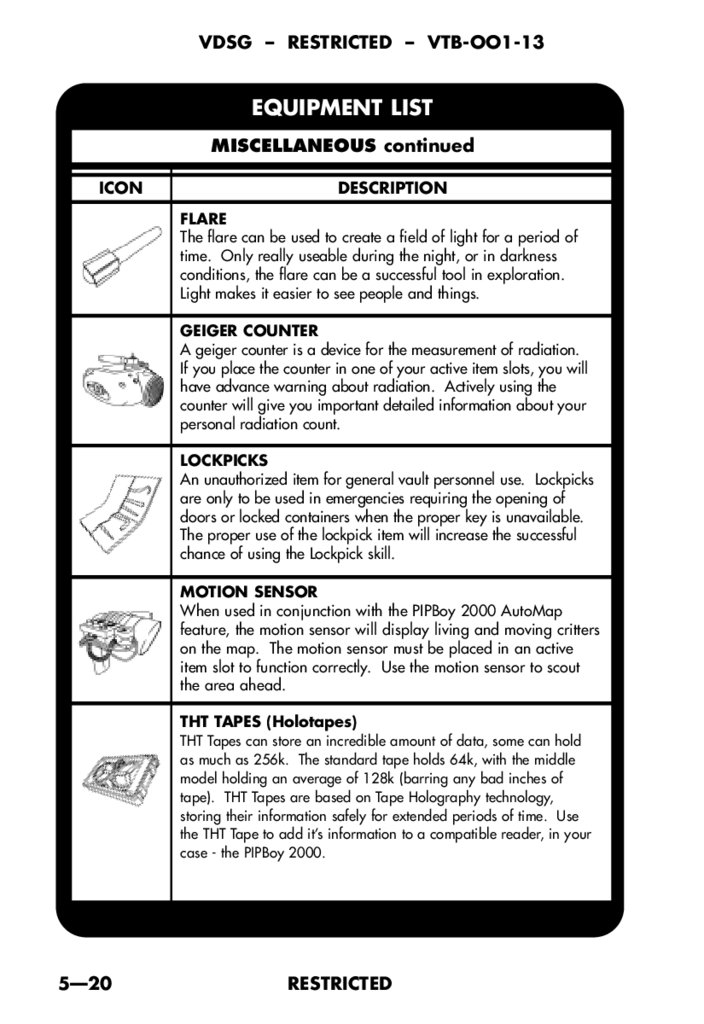
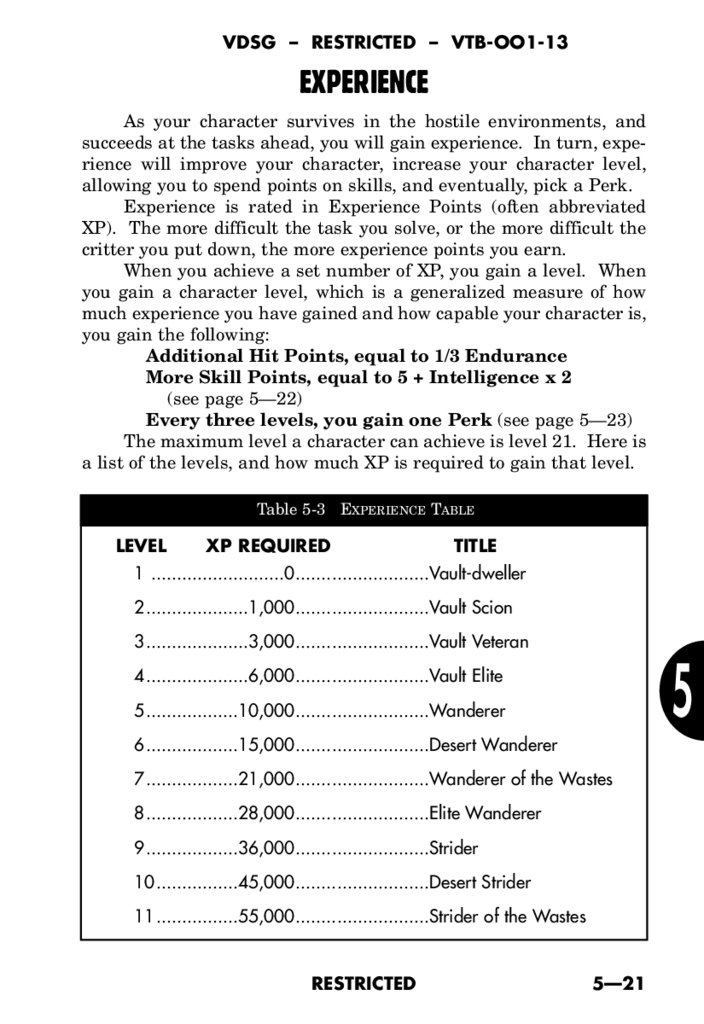


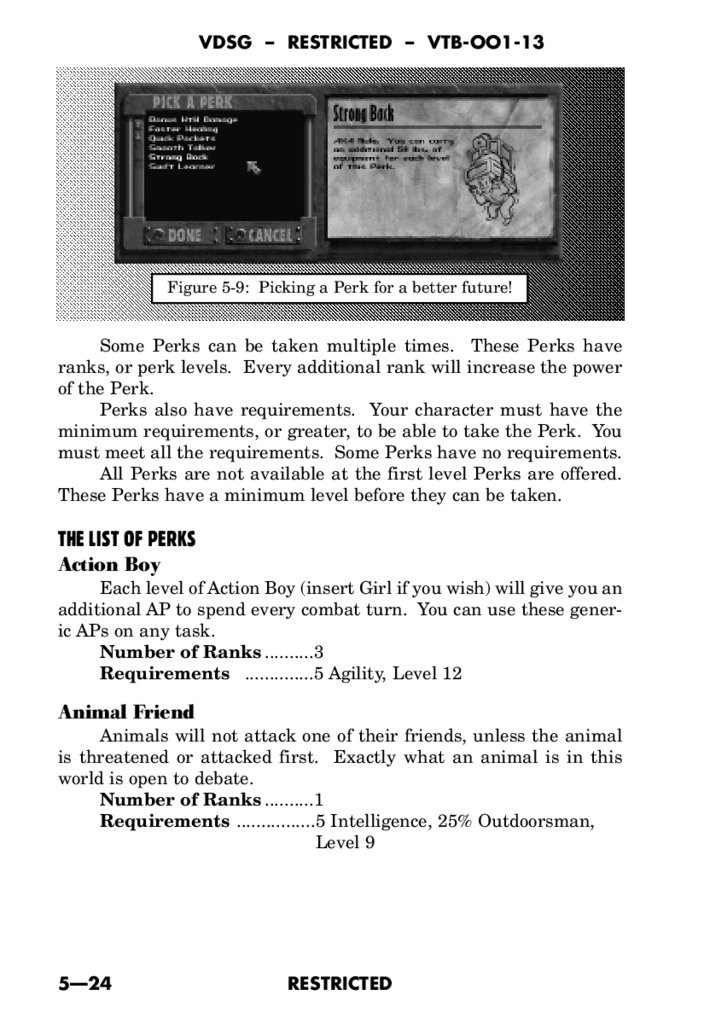
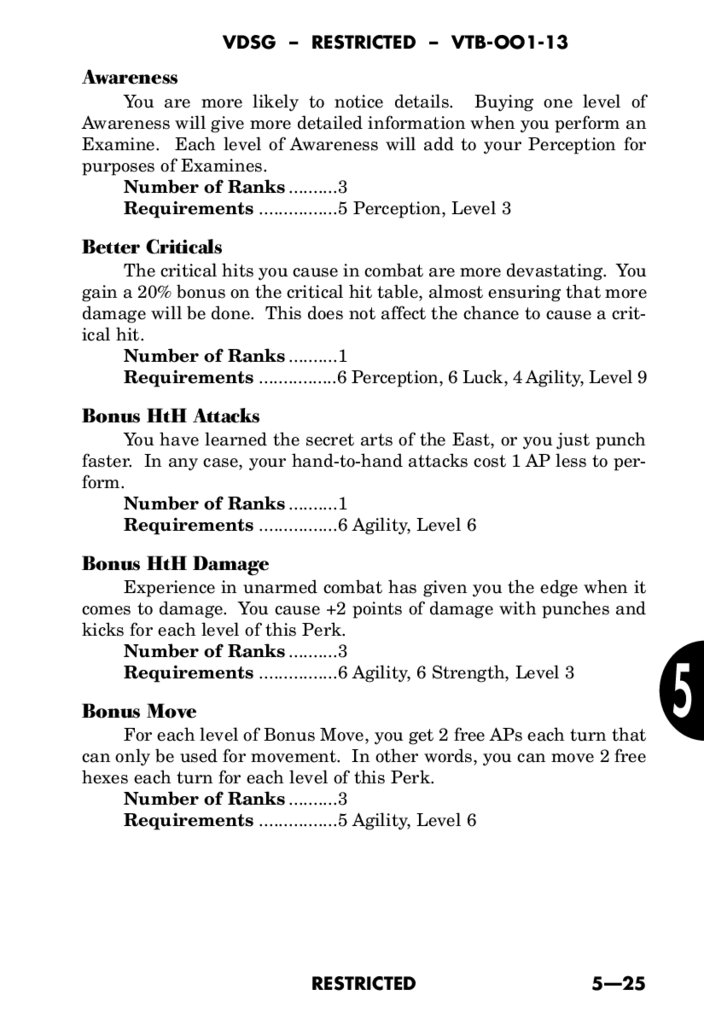
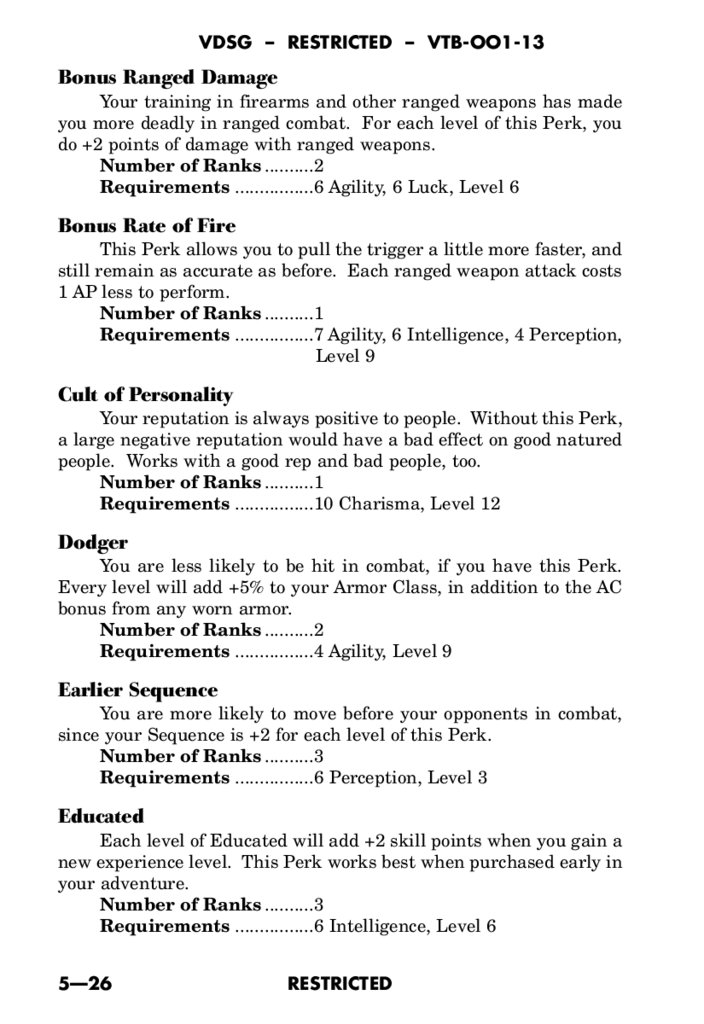
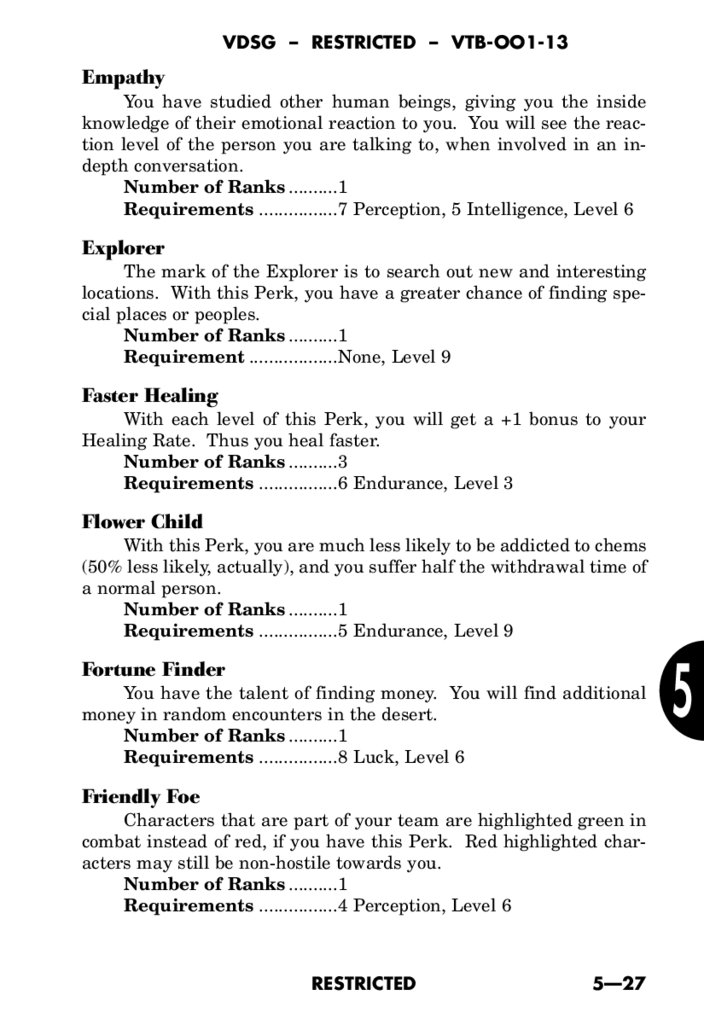

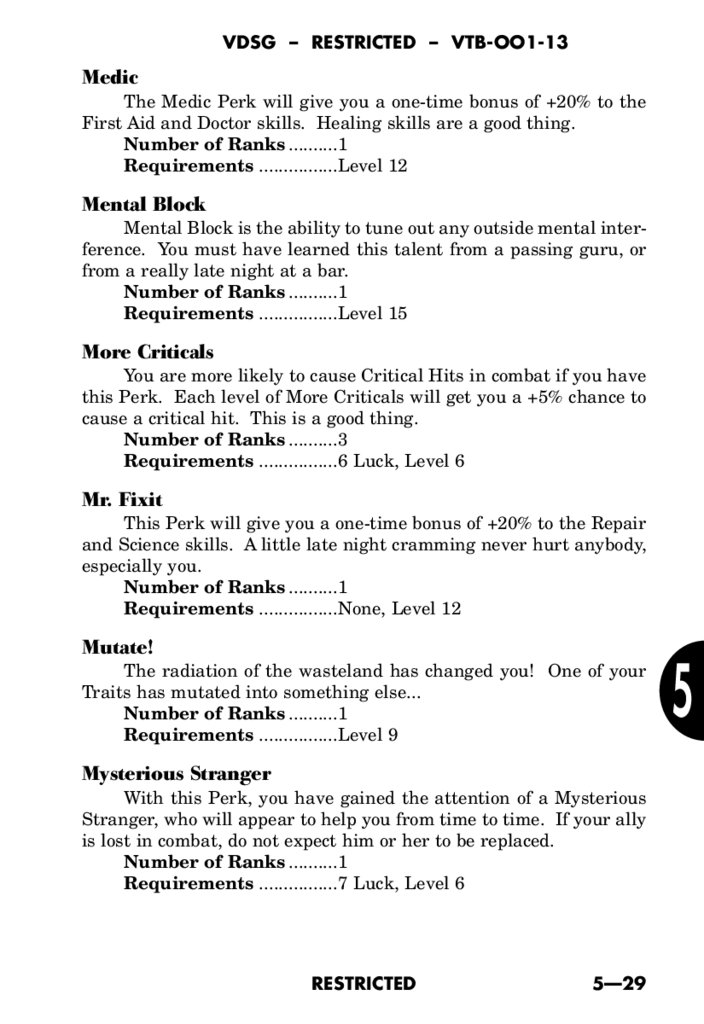


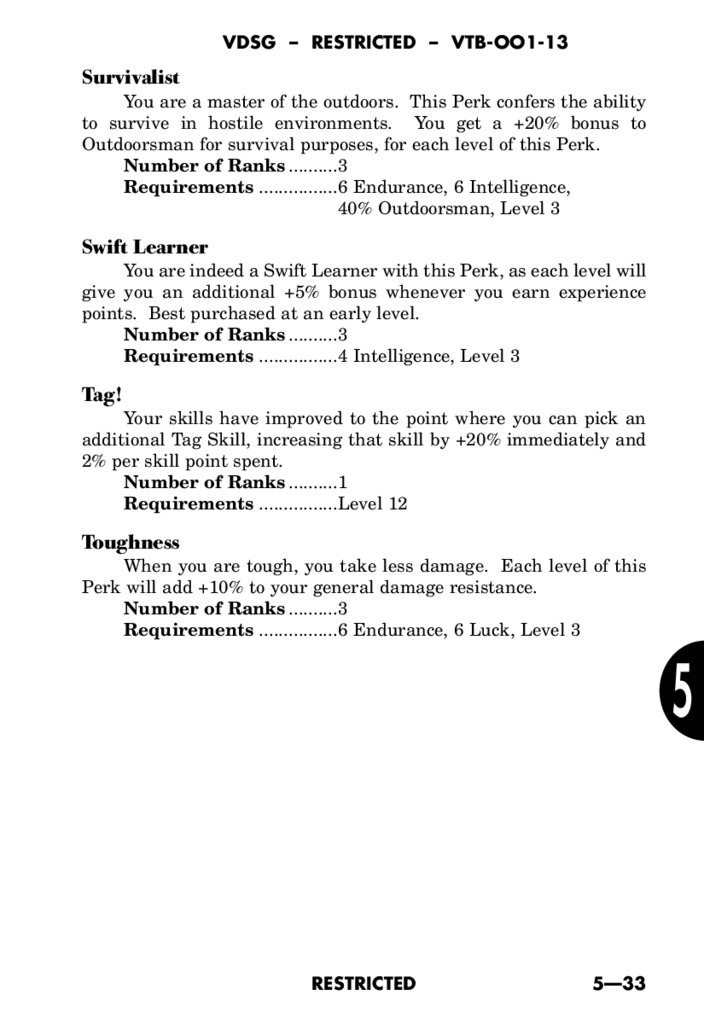



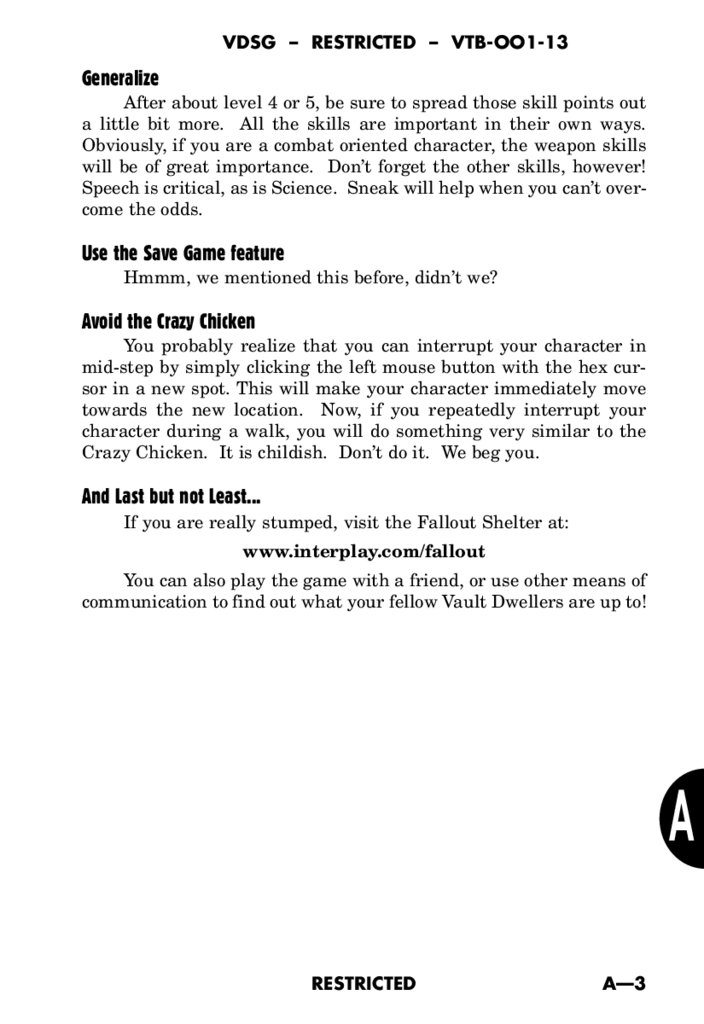
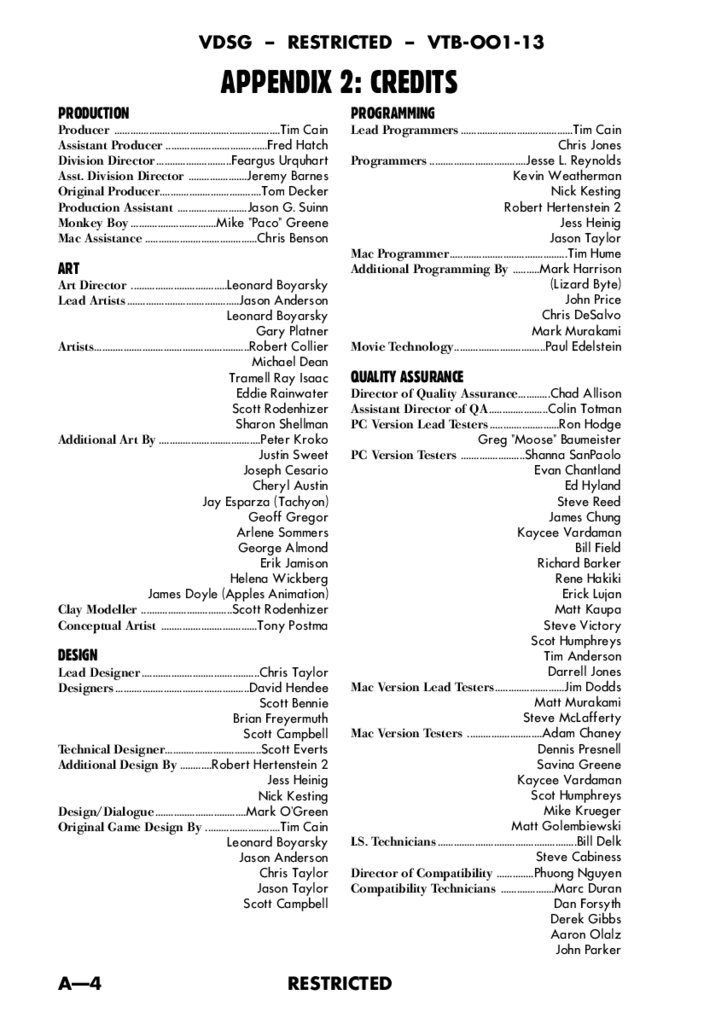
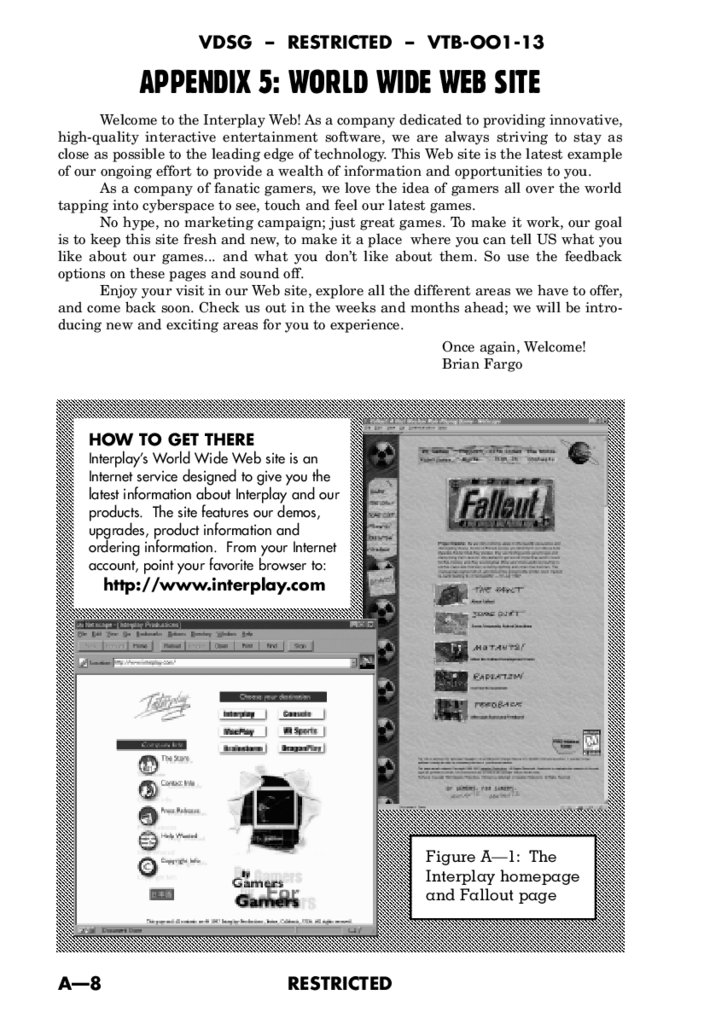

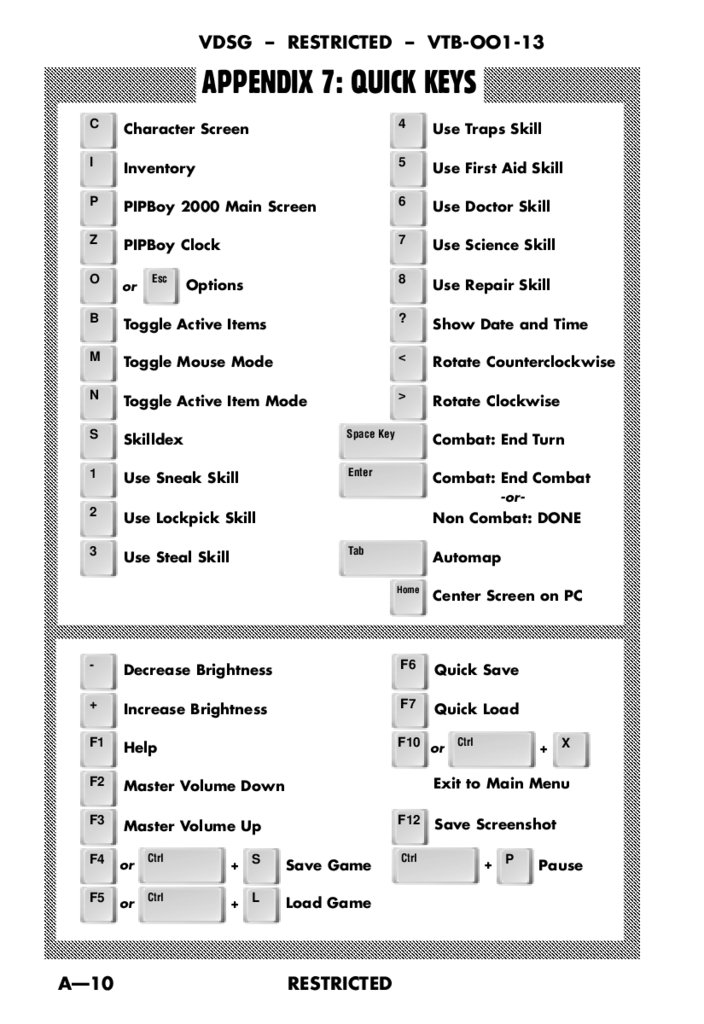

 literature


